User Roles Management Overview
This section outlines how to configure and manage User Roles in the Exsited platform, ensuring appropriate access levels are granted to staff across your organisation. Roles are critical to maintaining operational security, data privacy, and task-specific user control.
Purpose of User Roles
A User Role in Exsited defines the permissions and responsibilities assigned to a group of users. It determines what they can view, edit, create, delete, or manage across the system.
Roles help organisations:
- Enforce data confidentiality
- Prevent unauthorised access
- Streamline workflows based on job functions (e.g. Manager, Accountant, Warehouse Staff)
- Minimise manual errors by restricting unnecessary access
Navigation Path
To access the Roles settings:
Go to Settings > Under Access Control, click Roles.
You will be directed to the Roles Dashboard, where you can view, create, manage, or delete user roles.
Adding a New Role
When you click Add Role, a form appears with the following fields:
| Field | Description |
|---|---|
| Name | A system name without spaces (e.g., finance_lead). Used internally. |
| Display Name | A readable label for end-users (e.g., “Finance Lead”). |
| Description | (Optional) Tick to enter a short explanation of the role’s purpose. |
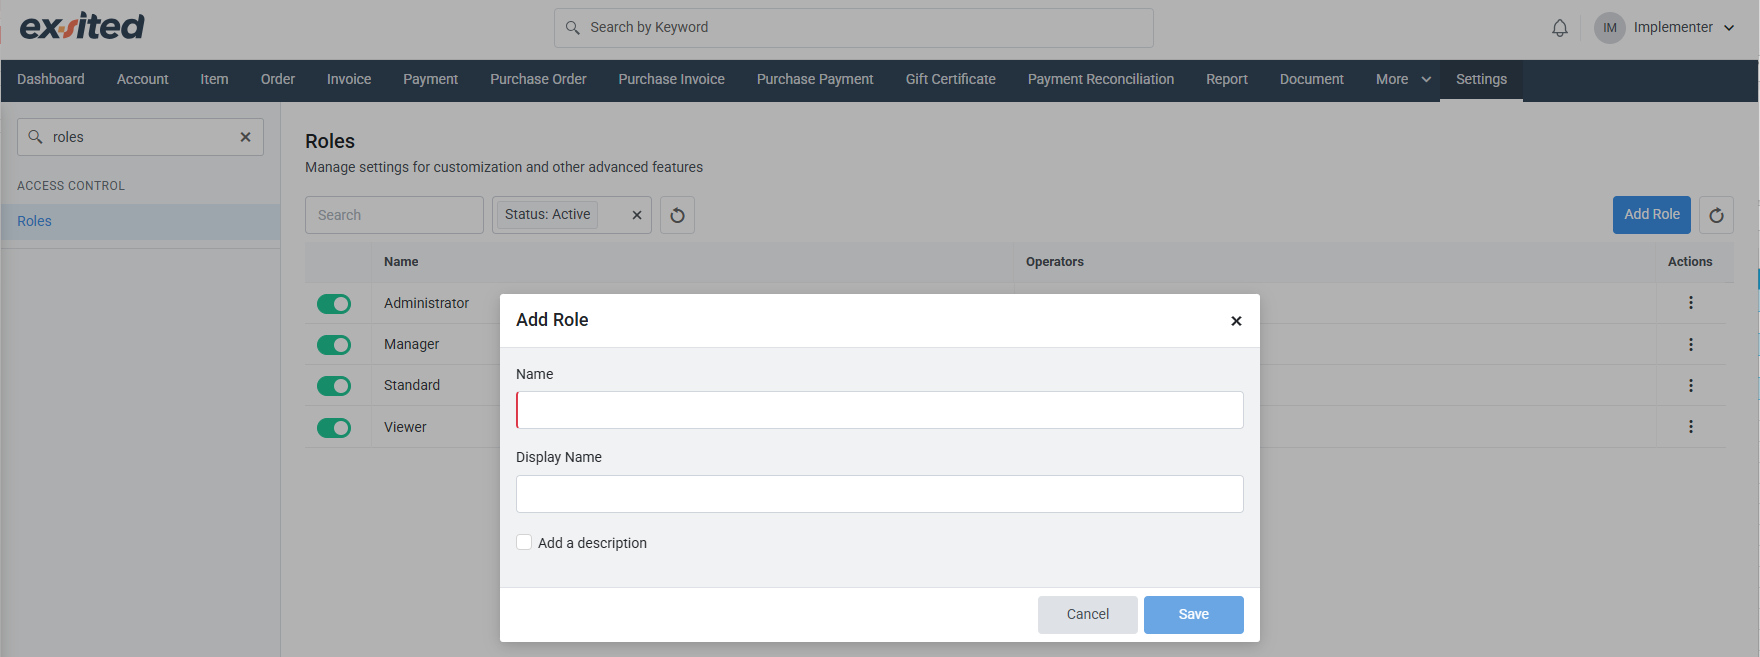
Once completed, click Save to register the new role in the system.
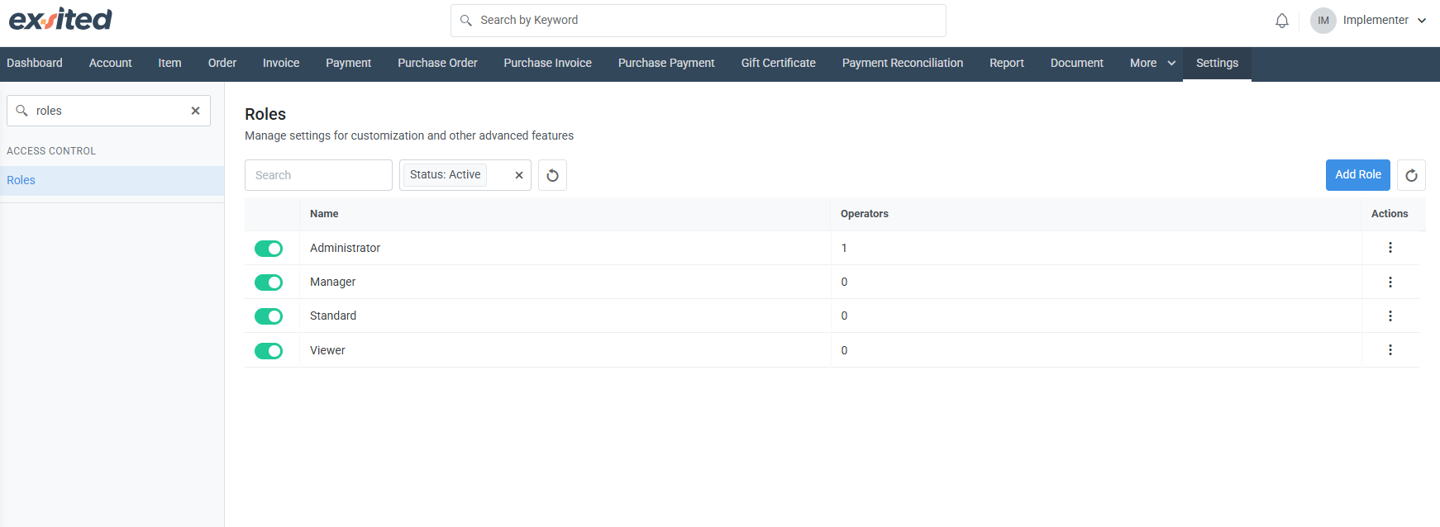
Viewing and Managing Existing Roles
On the main Roles screen, you will see a list of default and custom roles (e.g., Administrator, Manager, Standard, Viewer).
Each entry shows:
- Role name
- Number of assigned operators
- Toggle to activate/deactivate the role
- Actions menu (⋮) on the right
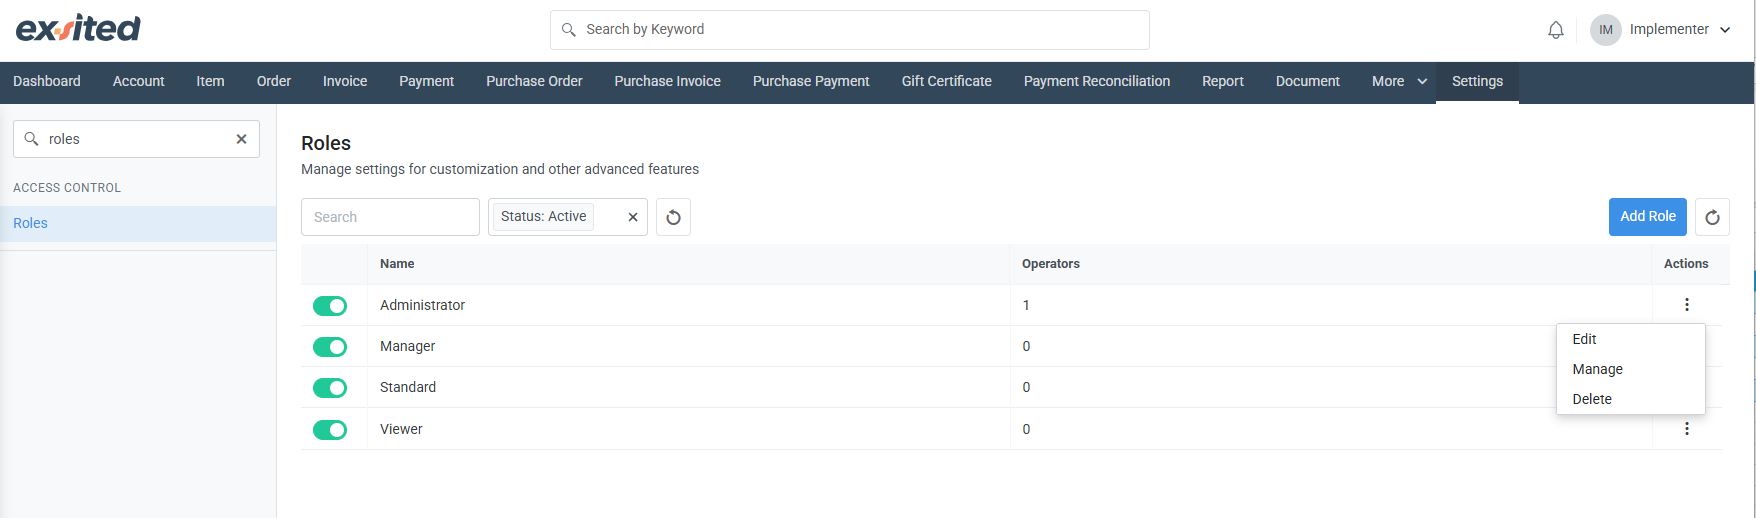
Actions Menu Options
| Option | Function |
|---|---|
| Edit | Update the name, display name or description of the role. |
| Manage | Configure detailed permissions (see below). |
| Delete | Remove the role entirely (only possible if no operators are linked). |
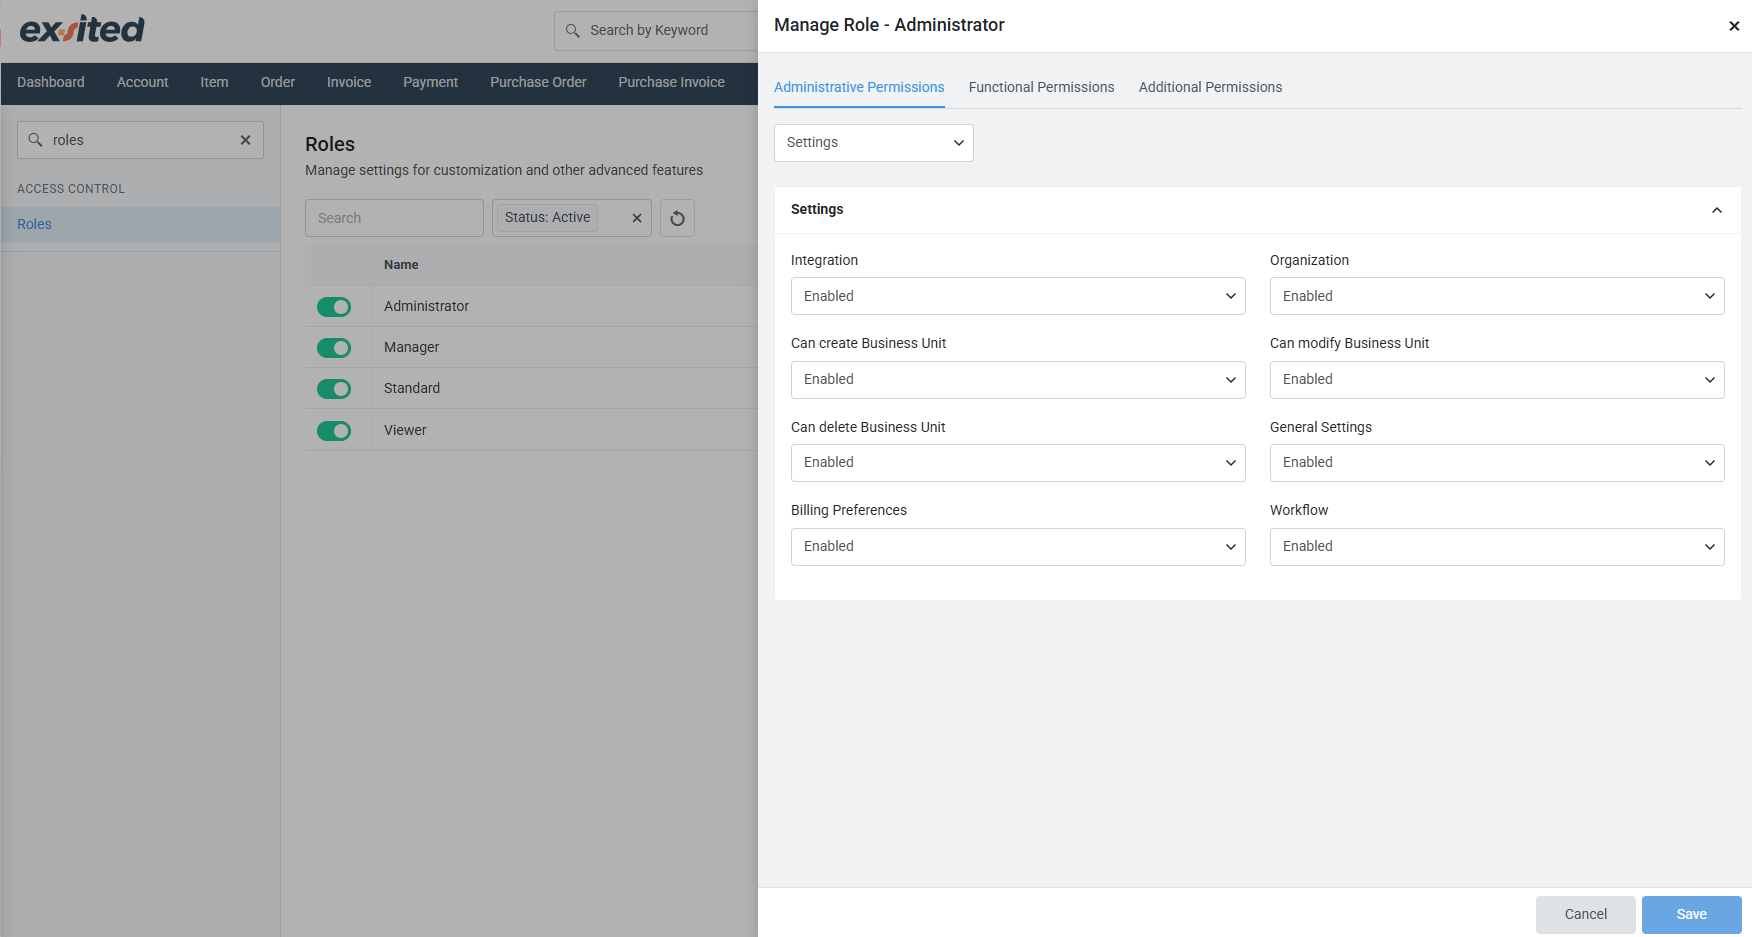
Configuring Permissions for a Role
Clicking Manage allows administrators to define the access level for each role via three permission tabs:
1. Administrative Permissions
These permissions allow or restrict access to system-wide settings and back-end configurations.
Categories (Dropdown List):
- Settings
- Approvals
- Configuration
- Communication
- Field Settings
- Period Terms
- Access Control

Permission Descriptions:
| Setting | Purpose |
|---|---|
| Organisation | Allows configuration of company-wide settings. |
| Can modify Business Unit | Grants permission to change departmental or branch configurations. |
| Can delete Business Unit | Enables permanent removal of business units. |
| General Settings | Access to global preferences (currency, time zone, templates). |
| Workflow | Allows user to manage process automations and task flows. |
| Billing Preferences | Grants access to set default billing rules and periods. |
Only users in supervisory, admin, or finance roles should receive these privileges.
2. Functional Permissions
These define what the role can do within each module (Accounts, Payments, Contacts, etc.).
Permission Levels:
- View Permission – Can see information only (read-only).
- Manage Permission – Can view and edit.
- Create Permission – Full access, including the ability to add new records.

Module Permissions Include:
| Module Feature | Description |
|---|---|
| Can view Account Information | View client or supplier account records. |
| Can view Contacts | Access saved contacts linked to accounts. |
| Can view Notes | Read internal communication or logs. |
| Can view Addresses | View billing and delivery addresses. |
| Can view Billing Preferences | See invoice due dates, billing cycles, etc. |
| Can view Payment Methods | Access stored credit card or bank details. |
| Can view Communication Messages | Read emails/messages sent through the platform. |
| Can view Account Statement | Allows access to generated account balance reports. |
Recommended for roles such as Operations, Customer Service, and Finance.
3. Additional Permissions
These provide extended functionality beyond basic module access.
Dropdown Feature Groups:
- Additional Features
- Power Features
- Export
- Import
- Trial Balance
- Budget
- Report & Dashboard
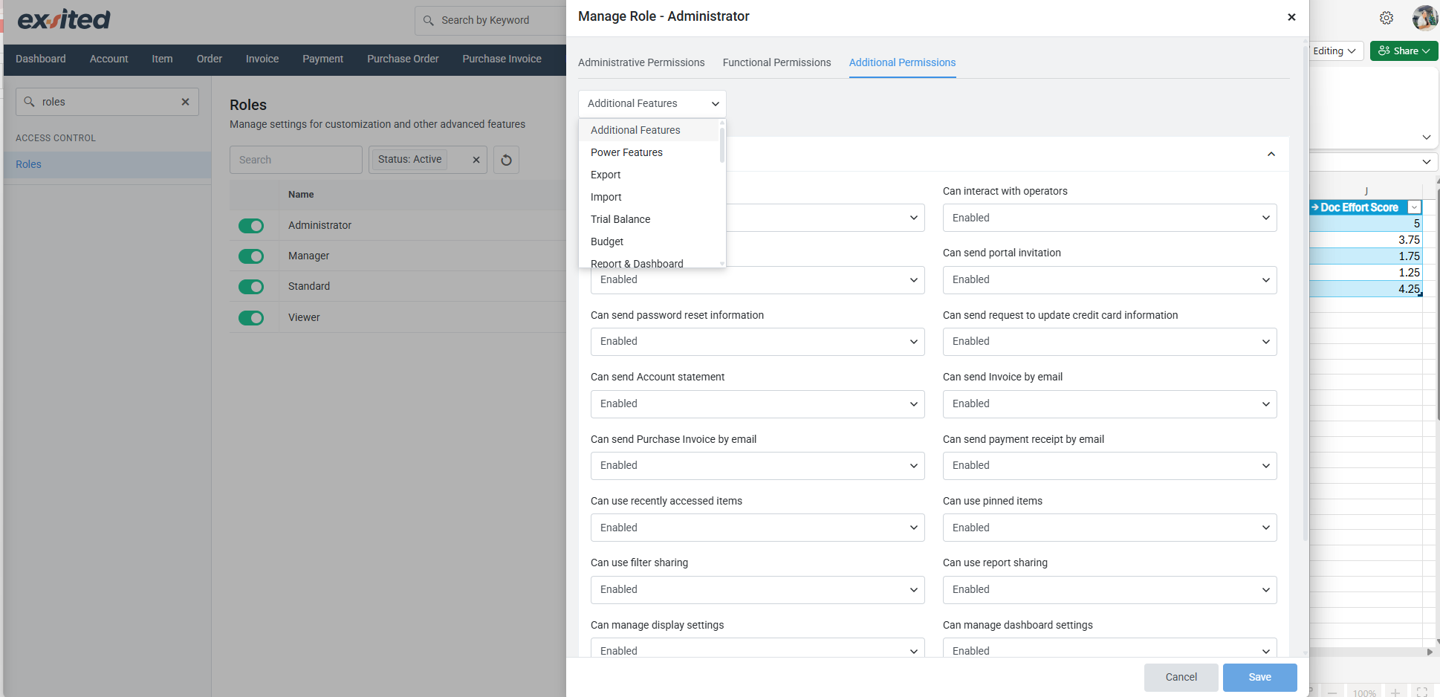
Advanced Action Permissions:
| Feature | Description |
|---|---|
| Can interact with operators | Chat or collaborate with other internal users. |
| Can send portal invitation | Send login invites to external stakeholders. |
| Can send password reset information | Issue reset instructions via email. |
| Can send request to update credit card info | Trigger payment detail update request. |
| Can send Account Statement | Email account statements to clients. |
| Can send Invoice by email | Deliver invoices directly through the platform. |
| Can send Payment Receipt by email | Email confirmation upon successful payment. |
Grant these permissions only to team leads, finance officers, or admin-level users.
Best Practice Tips for Managing Roles
- Use the principle of least privilege – Only assign necessary permissions.
- Test roles using a temporary user account before enabling for active users.
- Review permissions quarterly to ensure compliance and security.
- Disable roles that are no longer used to reduce clutter and risk.
- Document role configurations for audit and compliance records.
Summary
The Roles module in Exsited provides a powerful and flexible method of managing user access and authority. By properly configuring:
- Administrative Permissions (settings-level access),
- Functional Permissions (module-level access),
- Additional Permissions (advanced and communication features)
Your organisation can maintain secure, scalable, and efficient operations across all departments.
Recommendation: Maintain a spreadsheet or matrix of all role names and their assigned permissions as part of your IT governance policy.