Overview
This guide outlines the complete process for integrating HubSpot with Exsited. This integration enables seamless, bidirectional data flow between your sales pipeline and operational systems—covering contacts, companies, deals, custom fields, and integration with downstream platforms such as Xero, Square, and AroFlo.
By connecting HubSpot with Exsited, businesses can:
- Synchronise CRM data with operational systems
- Automate deal and contact flows across platforms
- Ensure data integrity across deals, companies, contacts, and invoices
- Simplify integration with finance systems like Xero
- Enable better visibility into pipeline-to-revenue operations
- Trigger downstream workflows (e.g., job creation in AroFlo or invoice drafts in Xero)
This document is designed for CRM administrators, operations managers, finance officers, ERP consultants, and integration engineers who are implementing or maintaining this integration. Whether setting up a new sync or troubleshooting an existing one, this guide provides all the essential steps for configuration.
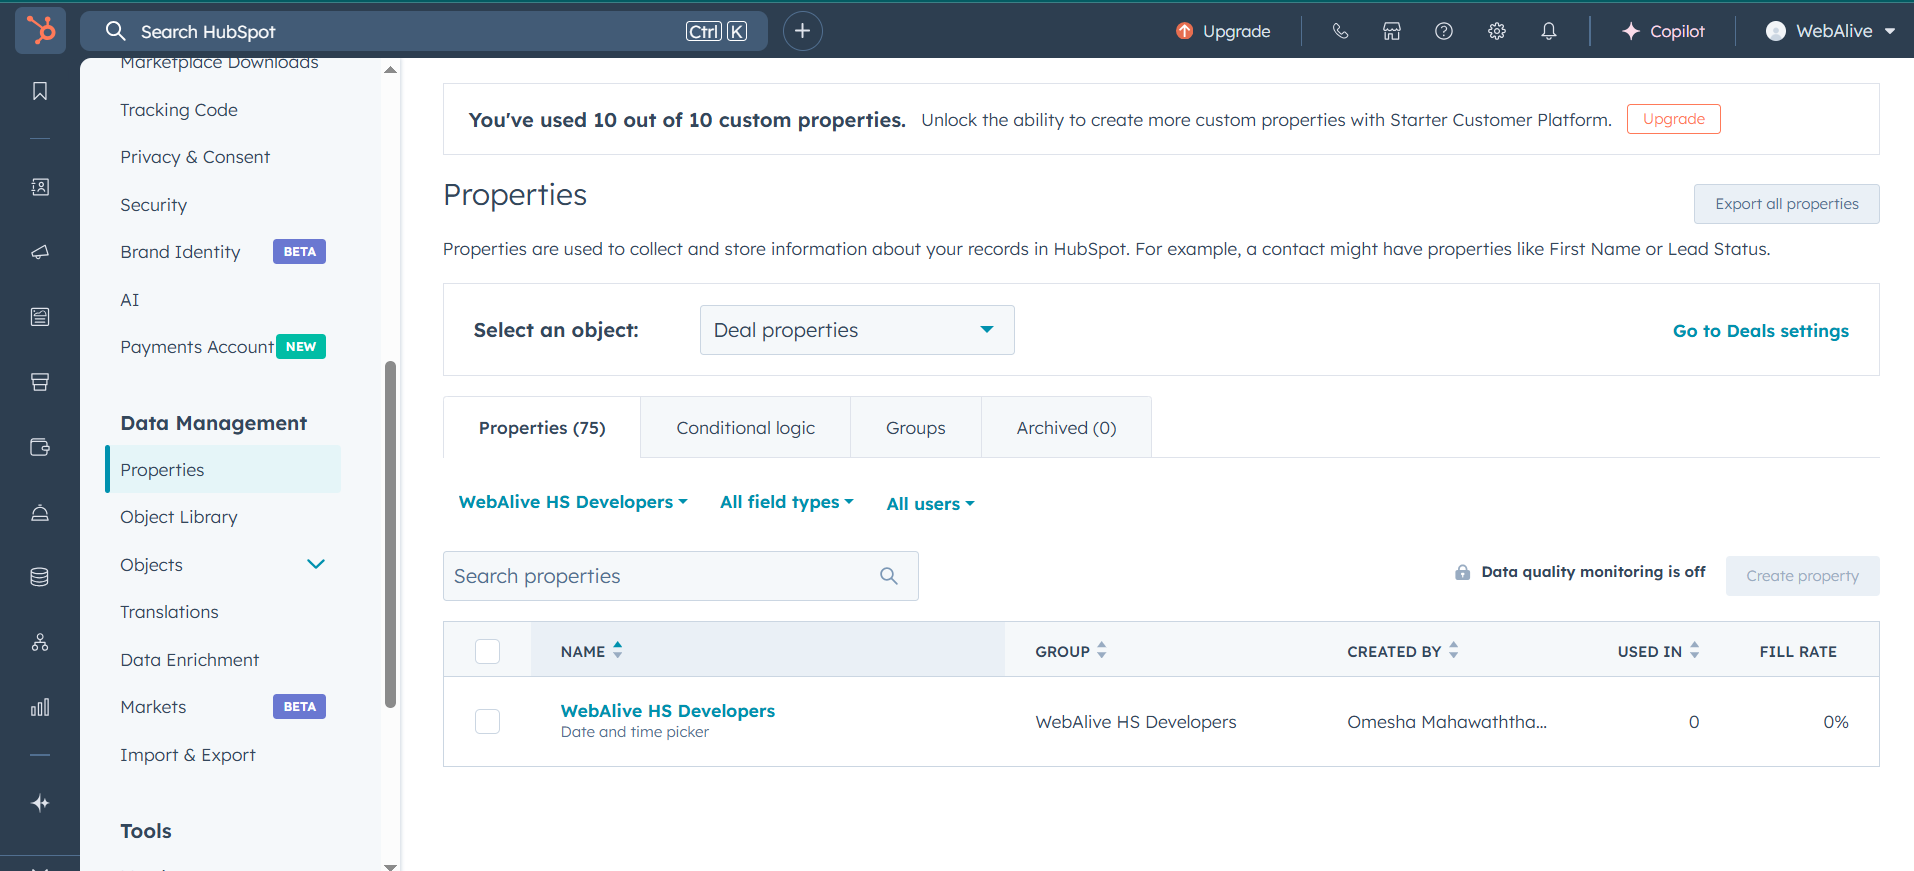
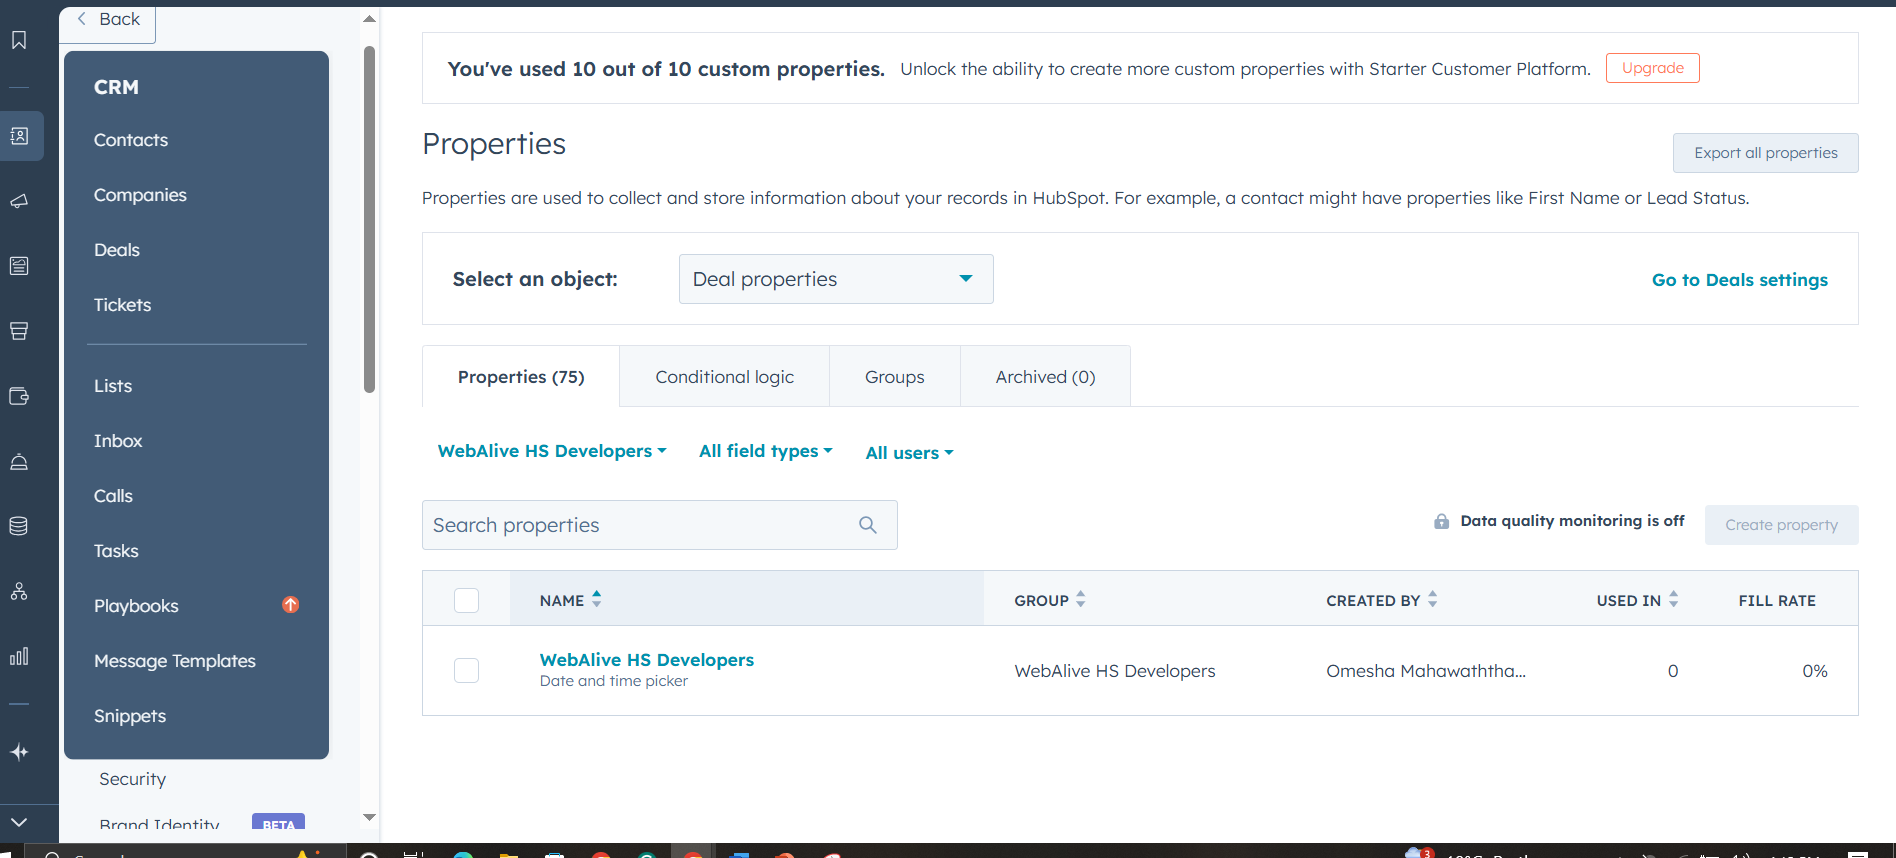
Pre-Configuration in HubSpot
- Log in to HubSpot.
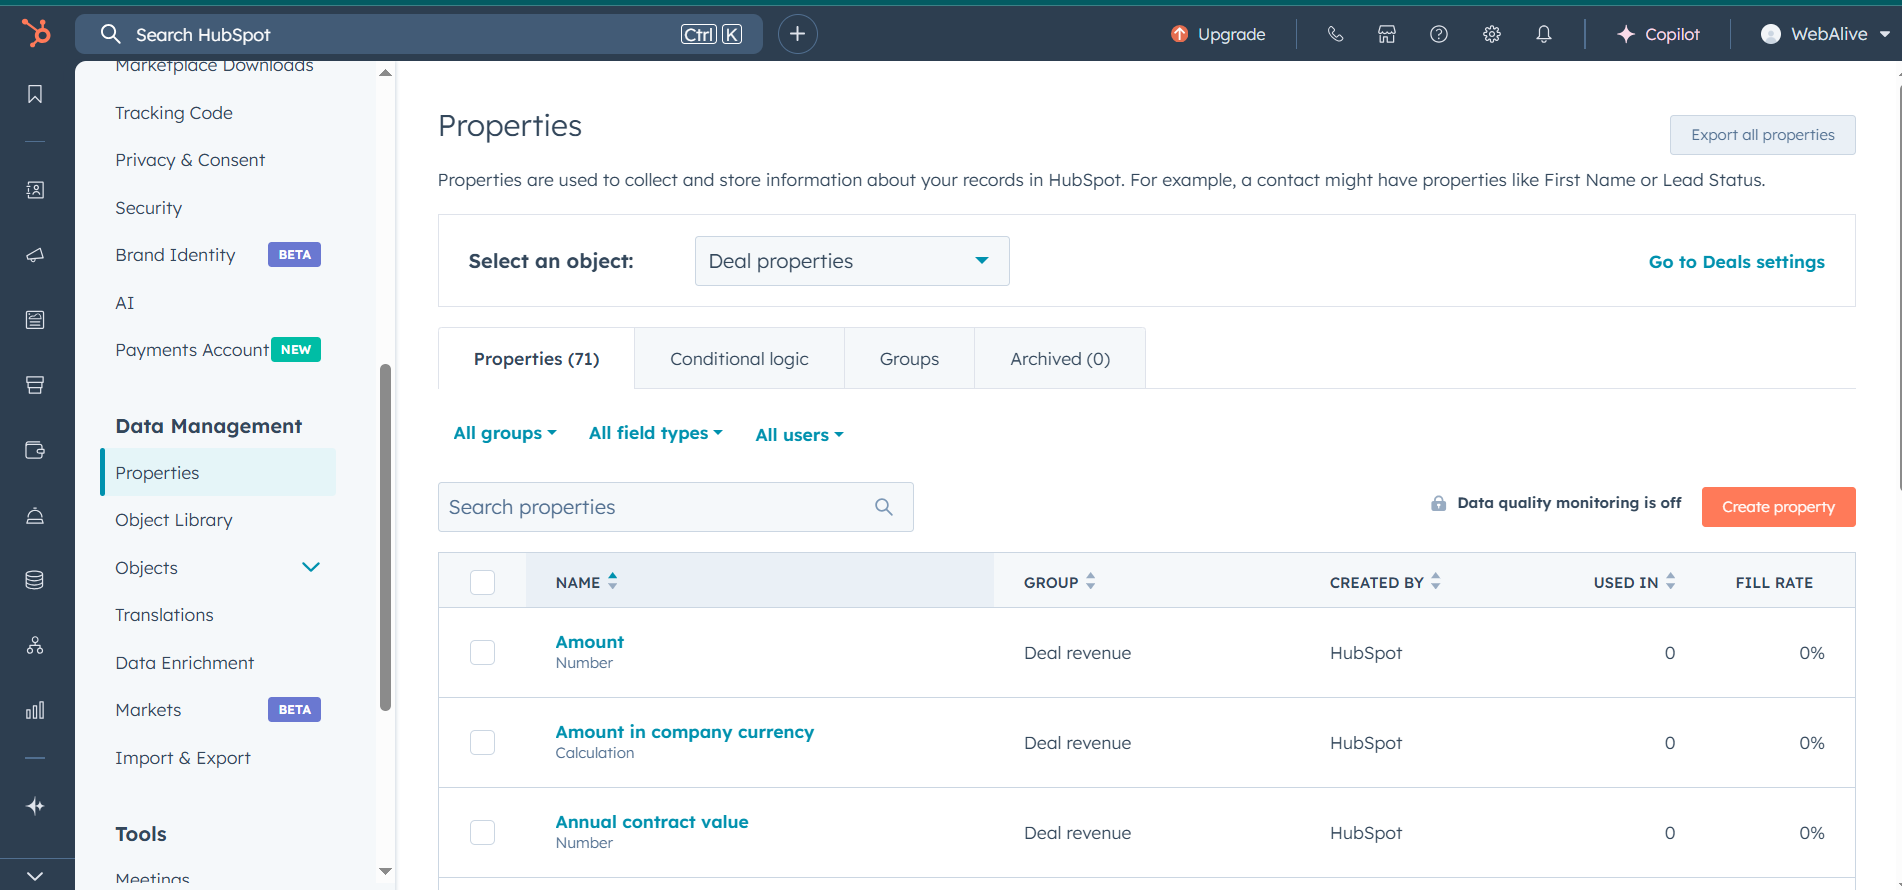
- Go to Settings > Properties.
- Under “Select an Object,” choose:
Companyfor company-level fieldsContactfor contactsDealfor deal pipeline-related fields
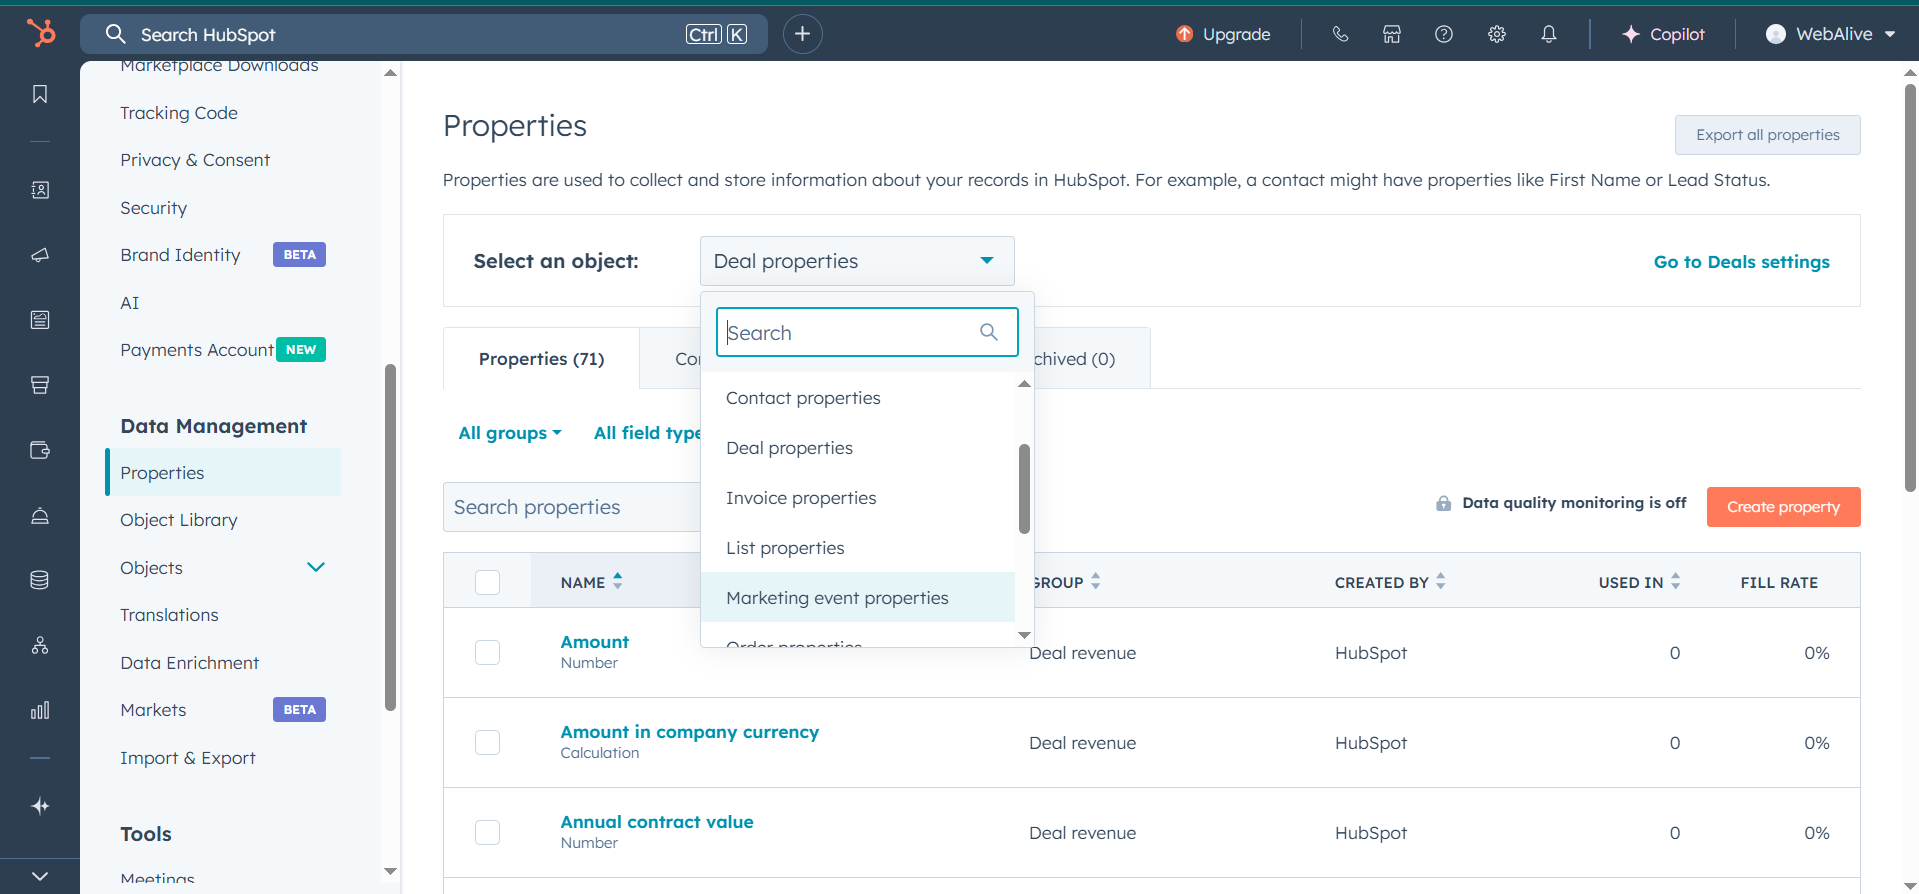
4. Create Custom Groups and Properties:
- Select the
Groupstab
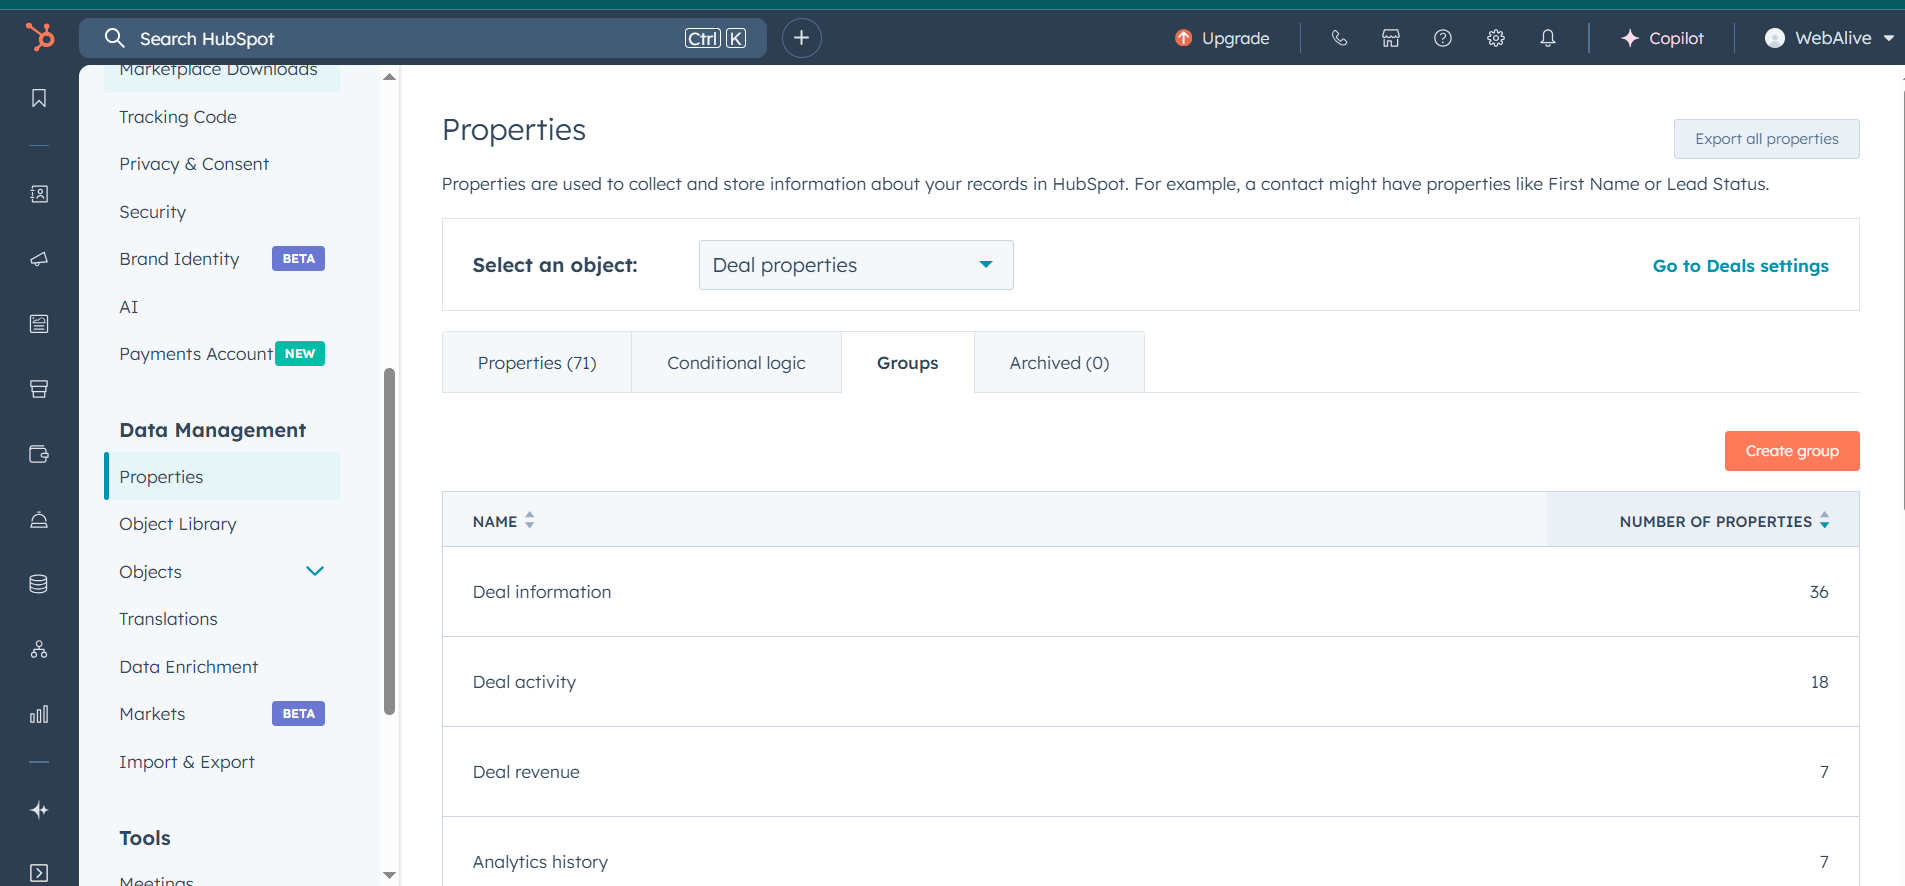
- Create a group > Select “Create group”
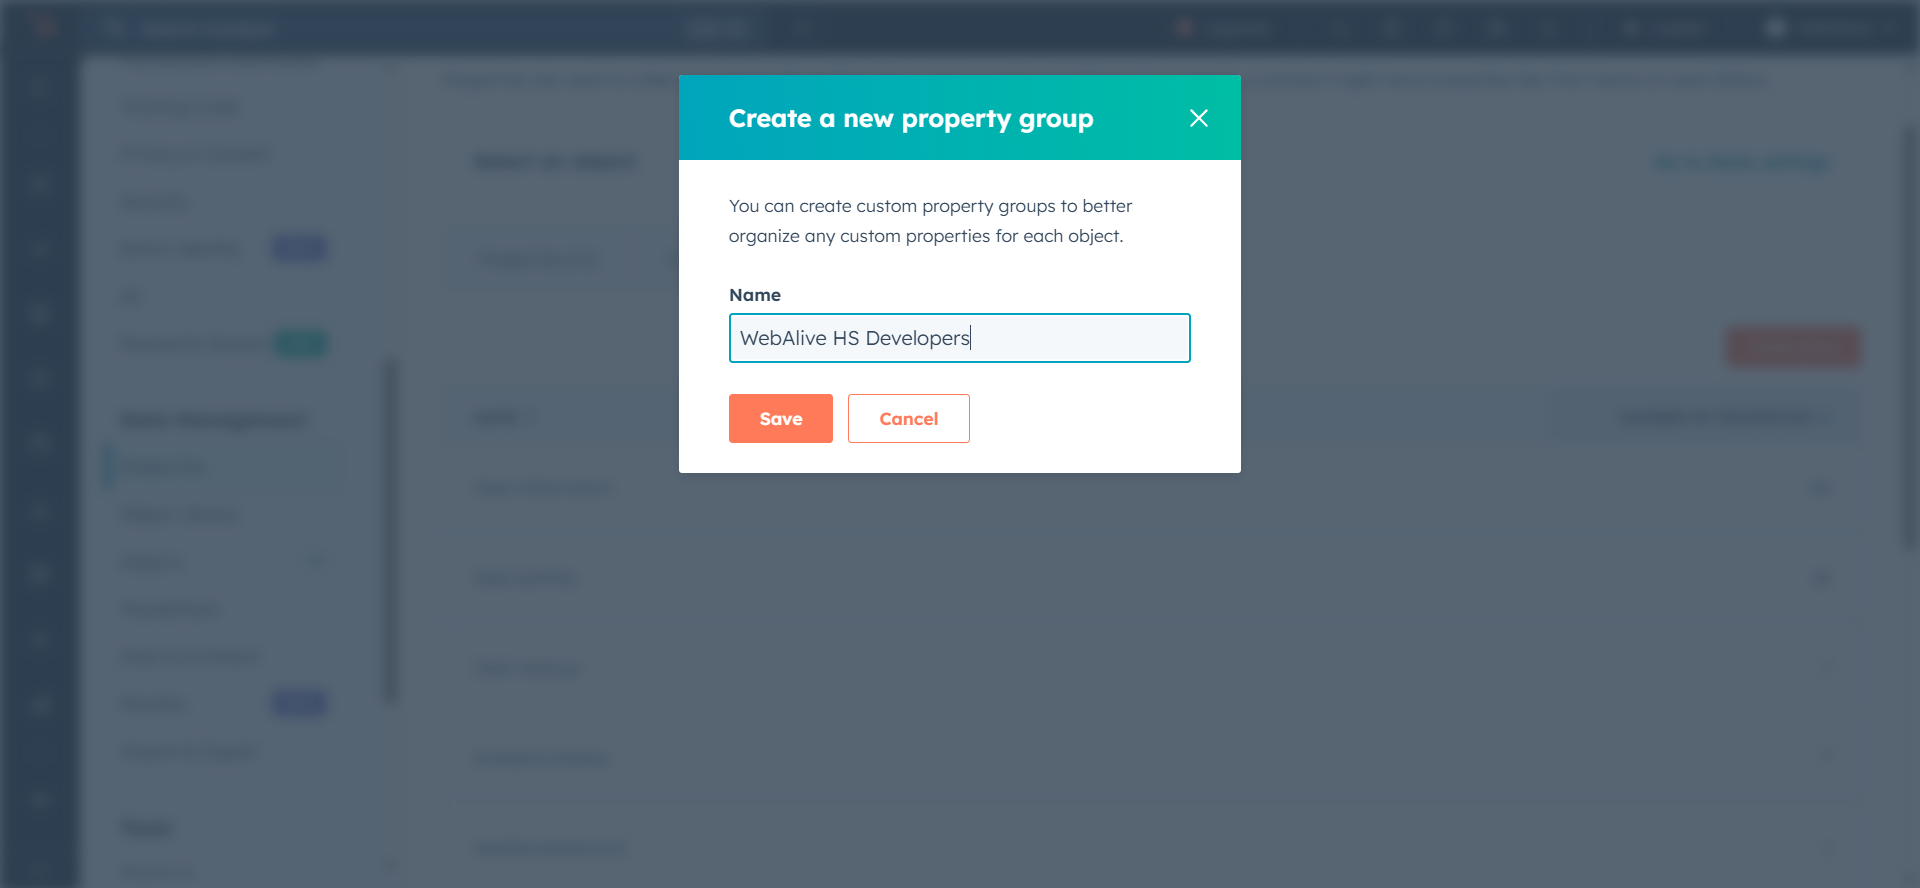
- Select the created group from the list of groups appeared in the list.
- Add custom properties under that group (e.g.,
Deal One,Installation Date,Deposit Amount Received).
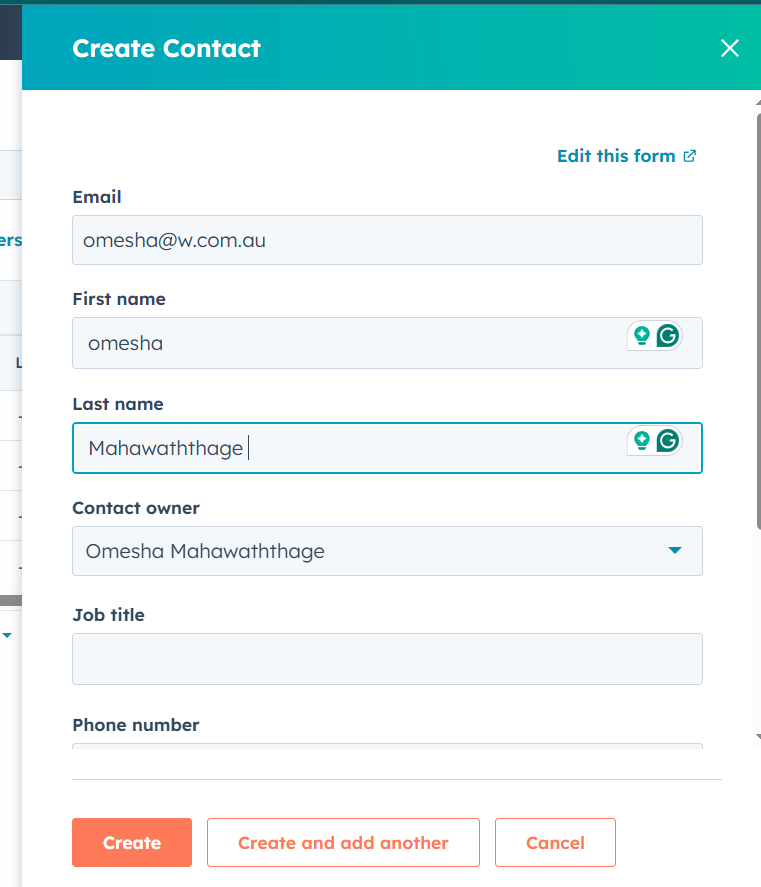
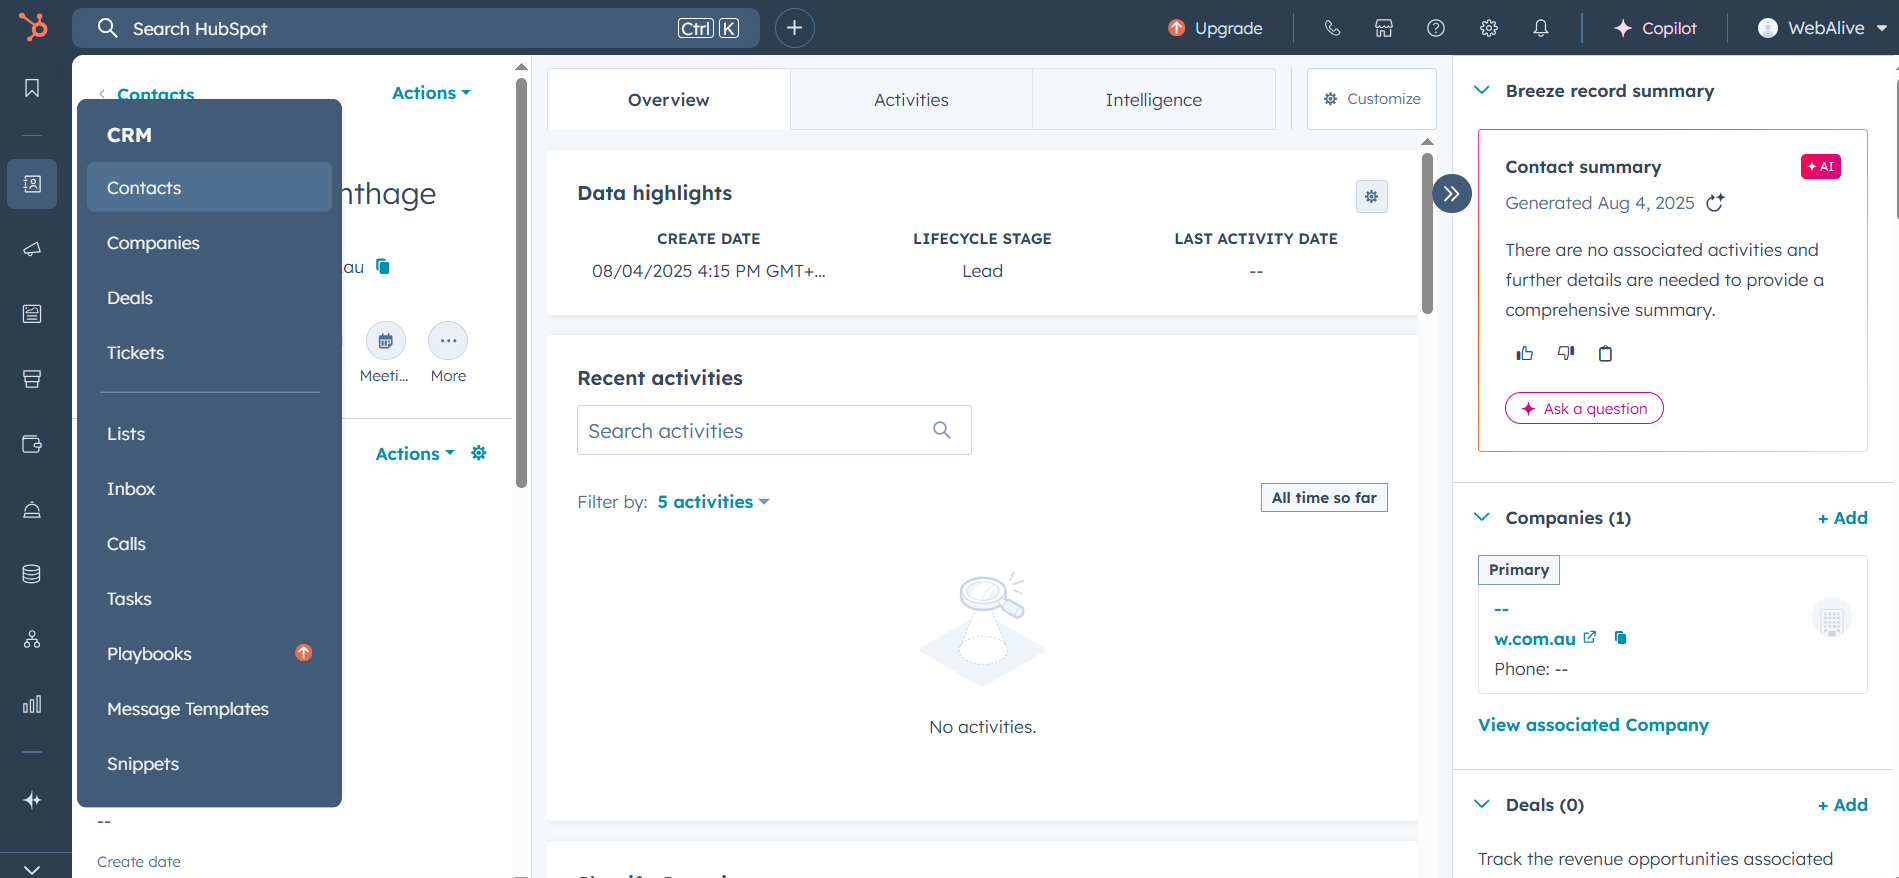
Create a Contact in HubSpot
- Go to HubSpot > Click + > Contact > Create Contact
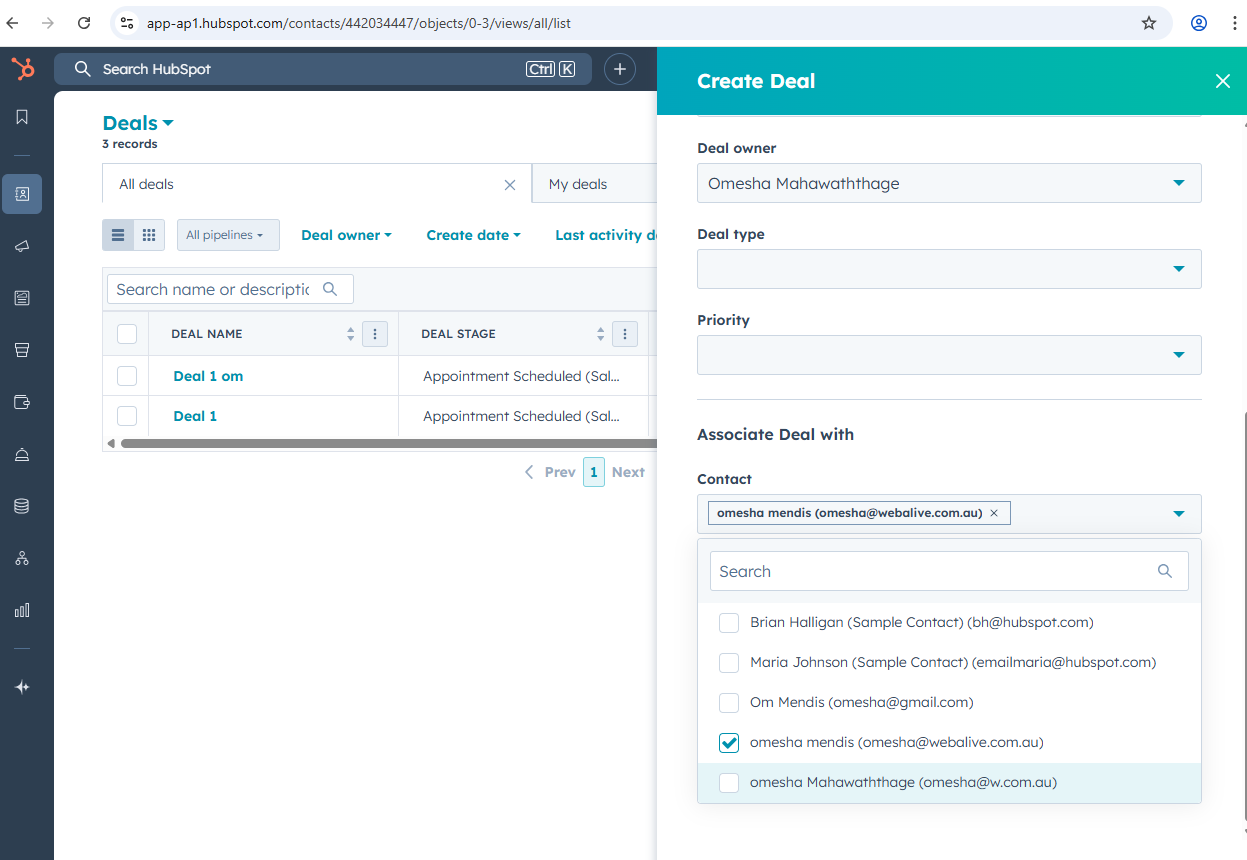
Create a Deal in HubSpot
- Go to Hubspot > click + > Deal > Create Deal
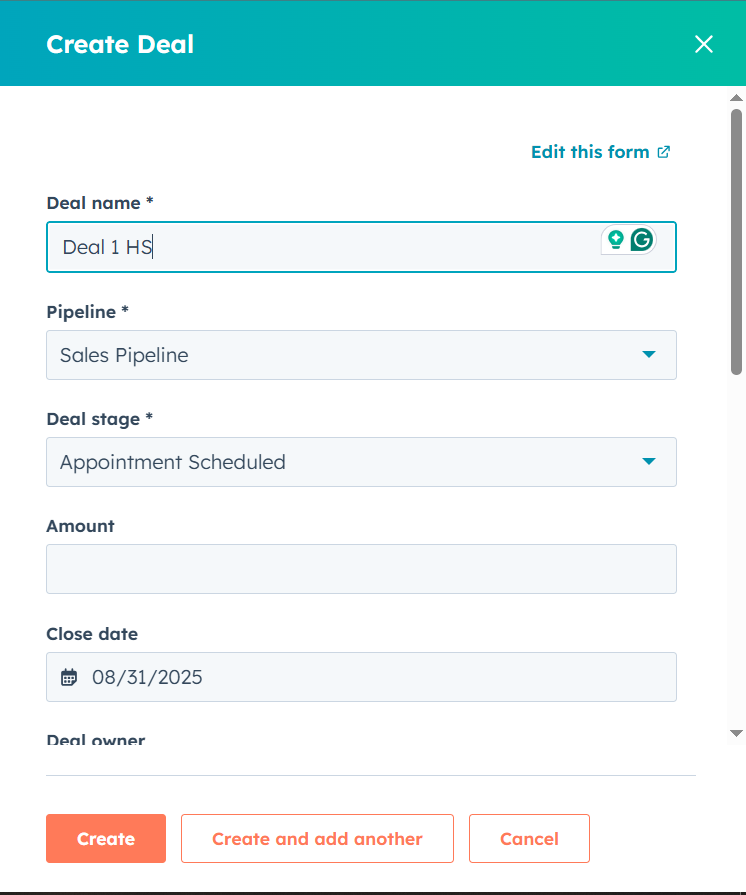
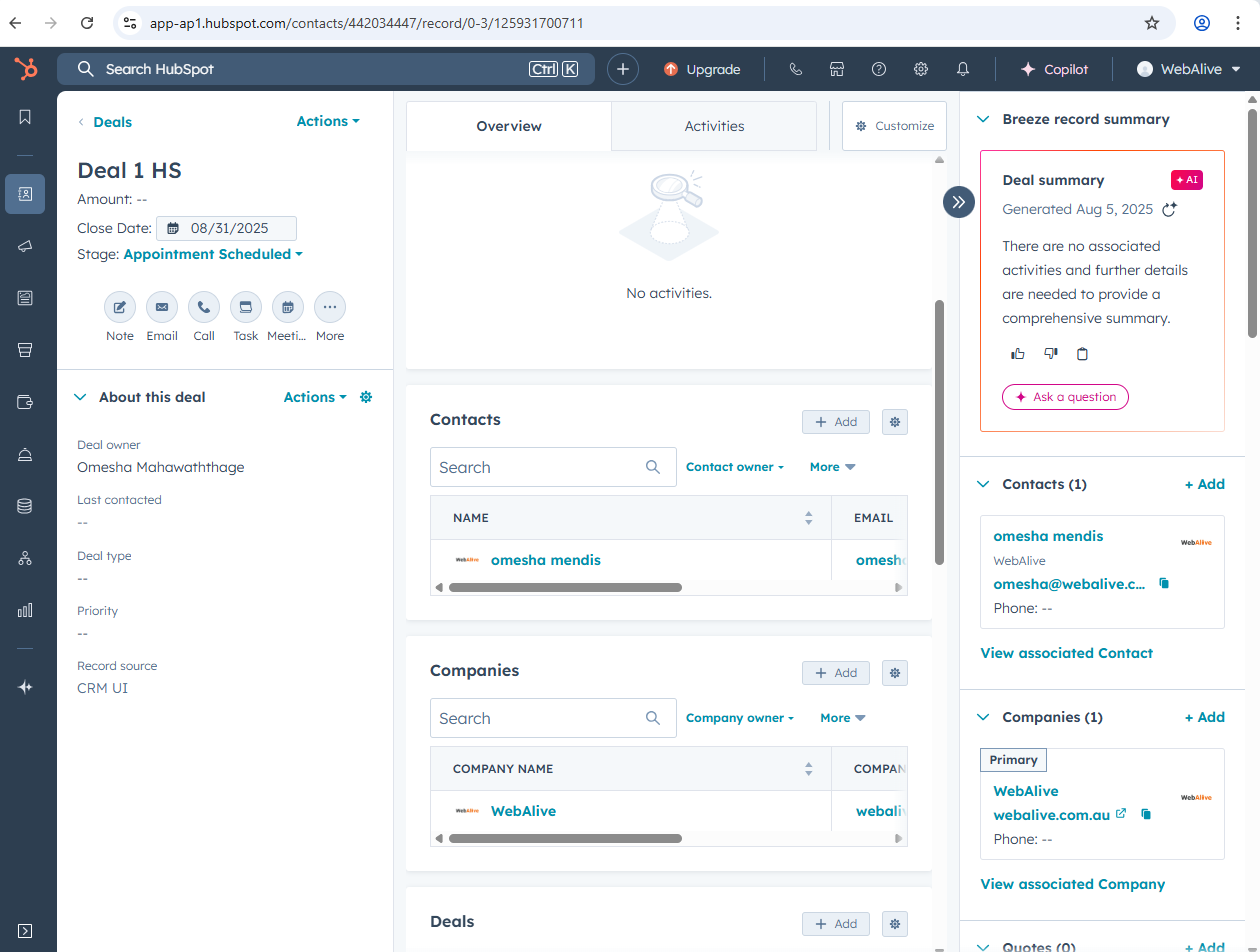
2. While creating a deal, you can select the relevant contact from the dropdown to establish a connection between the deal and the contact.
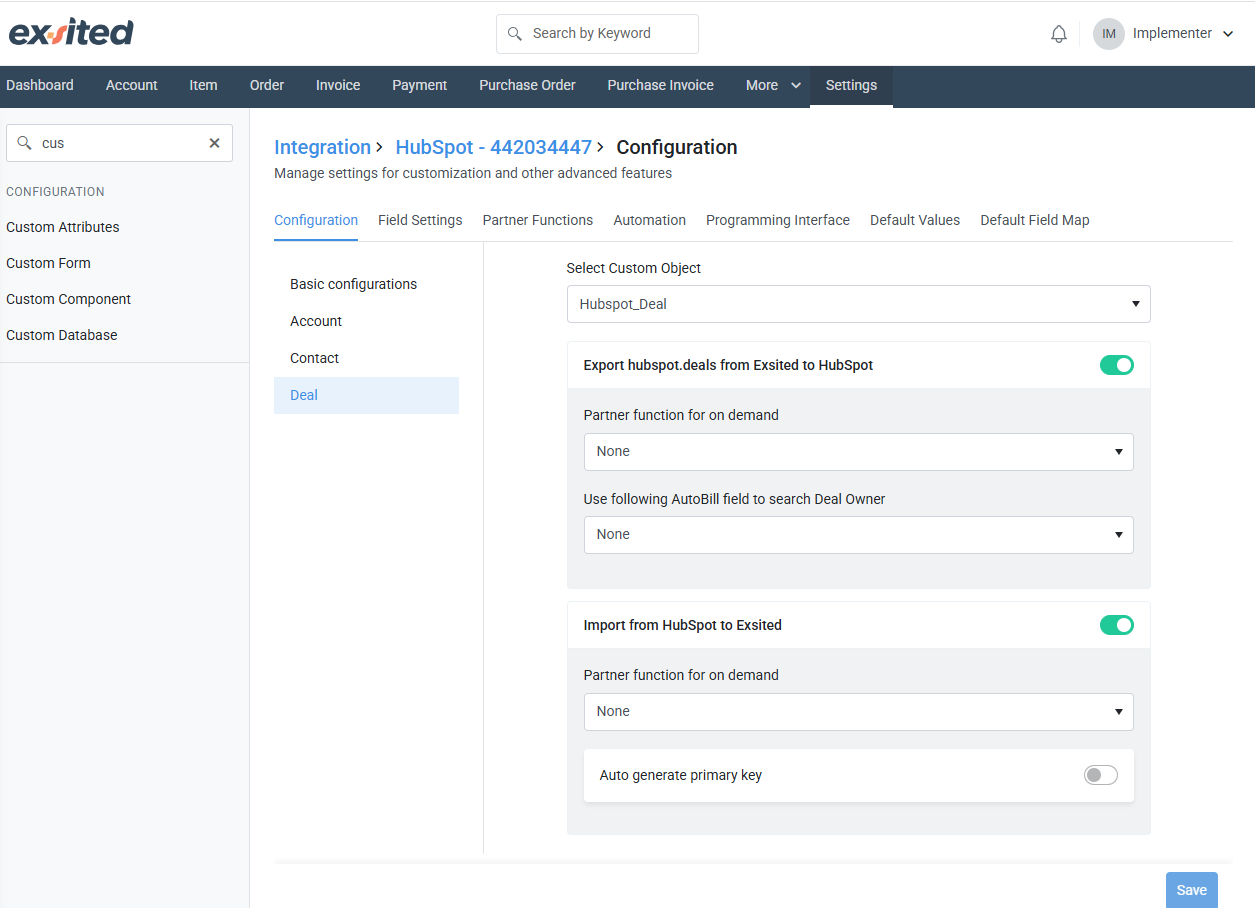
Note: After creating a deal and mapping it to the associated contact, you need to configure the integration by navigating to Exsited > Settings > HubSpot > Configure.
Set the configuration settings for Account and Contact, and ensure they are saved properly. Once saved, proceed to Field Settings.
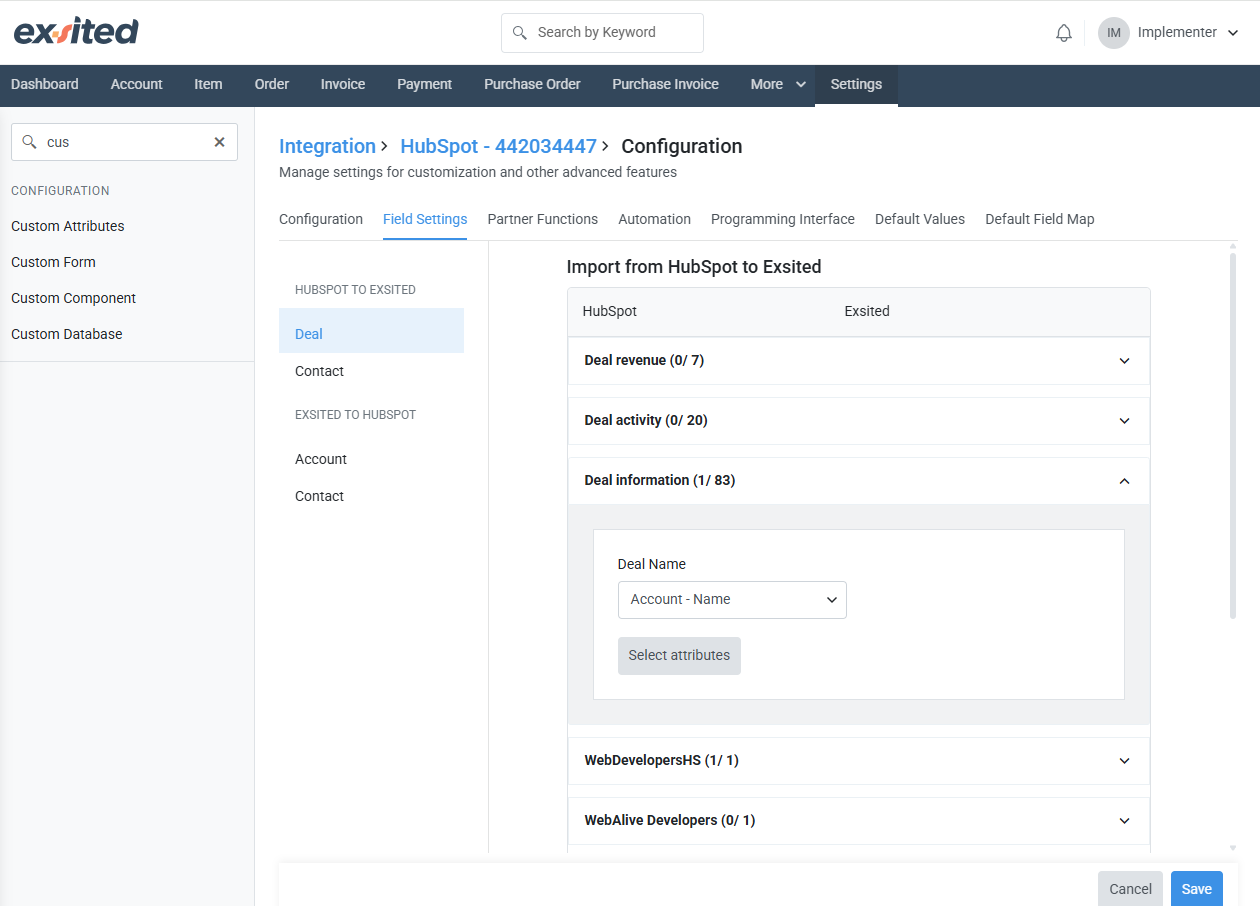
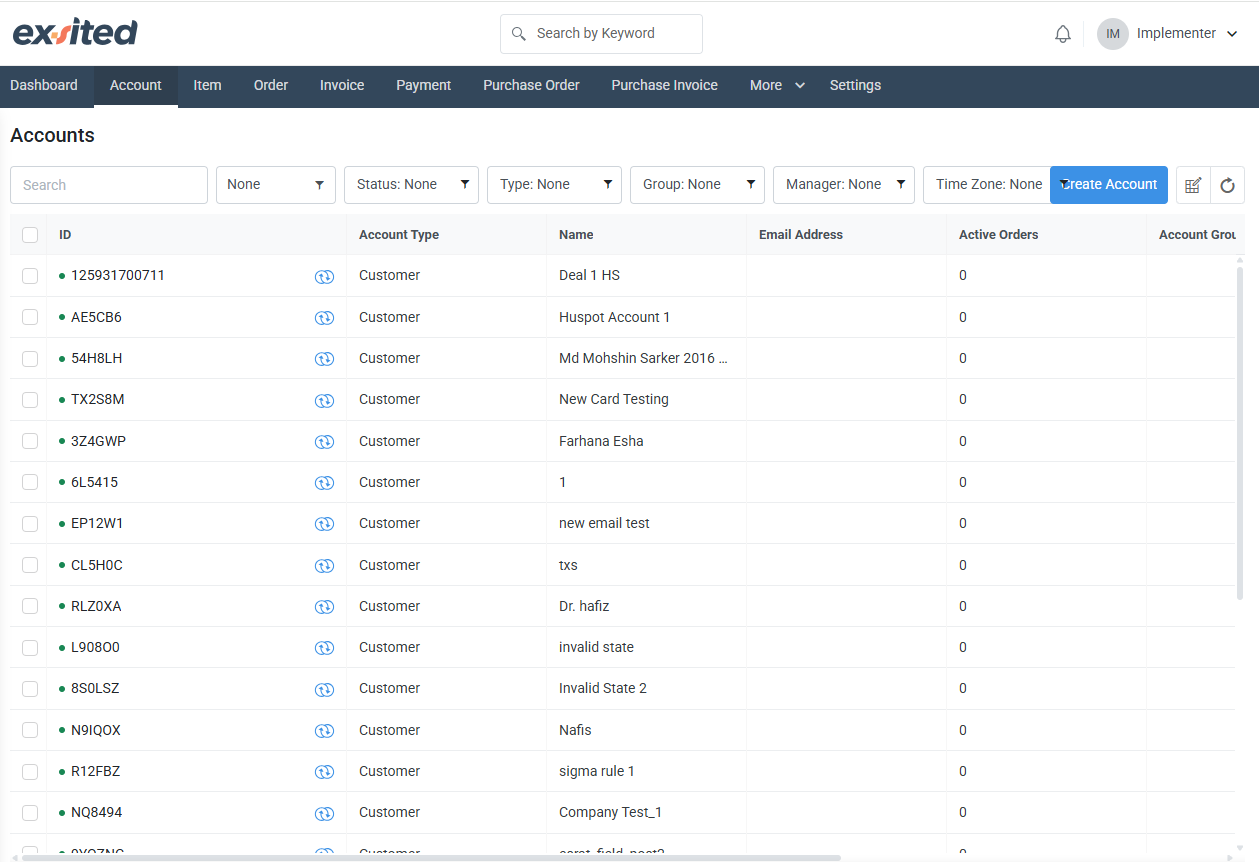
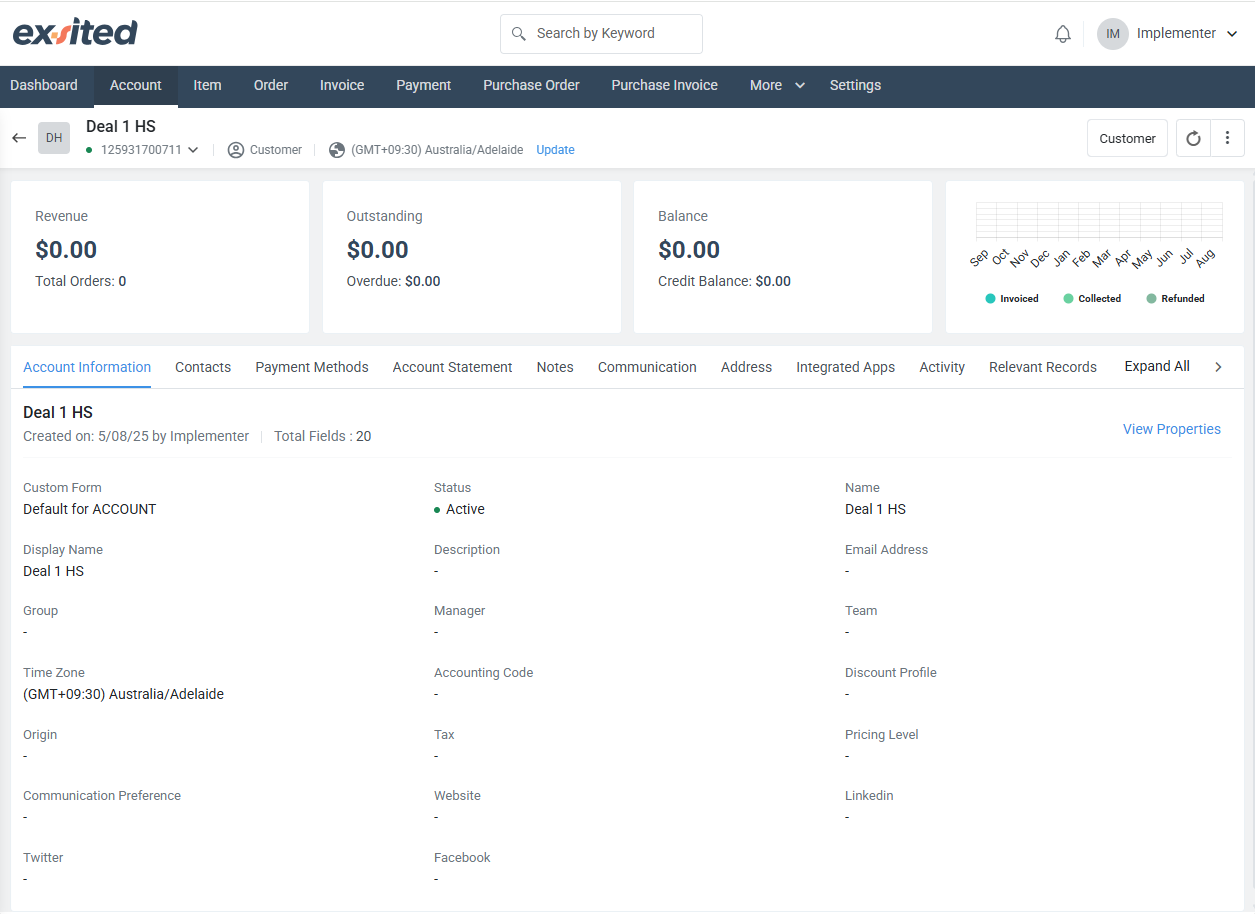
To import a deal into Exsited, ensure that the Deal Name is mapped to the Account Name.
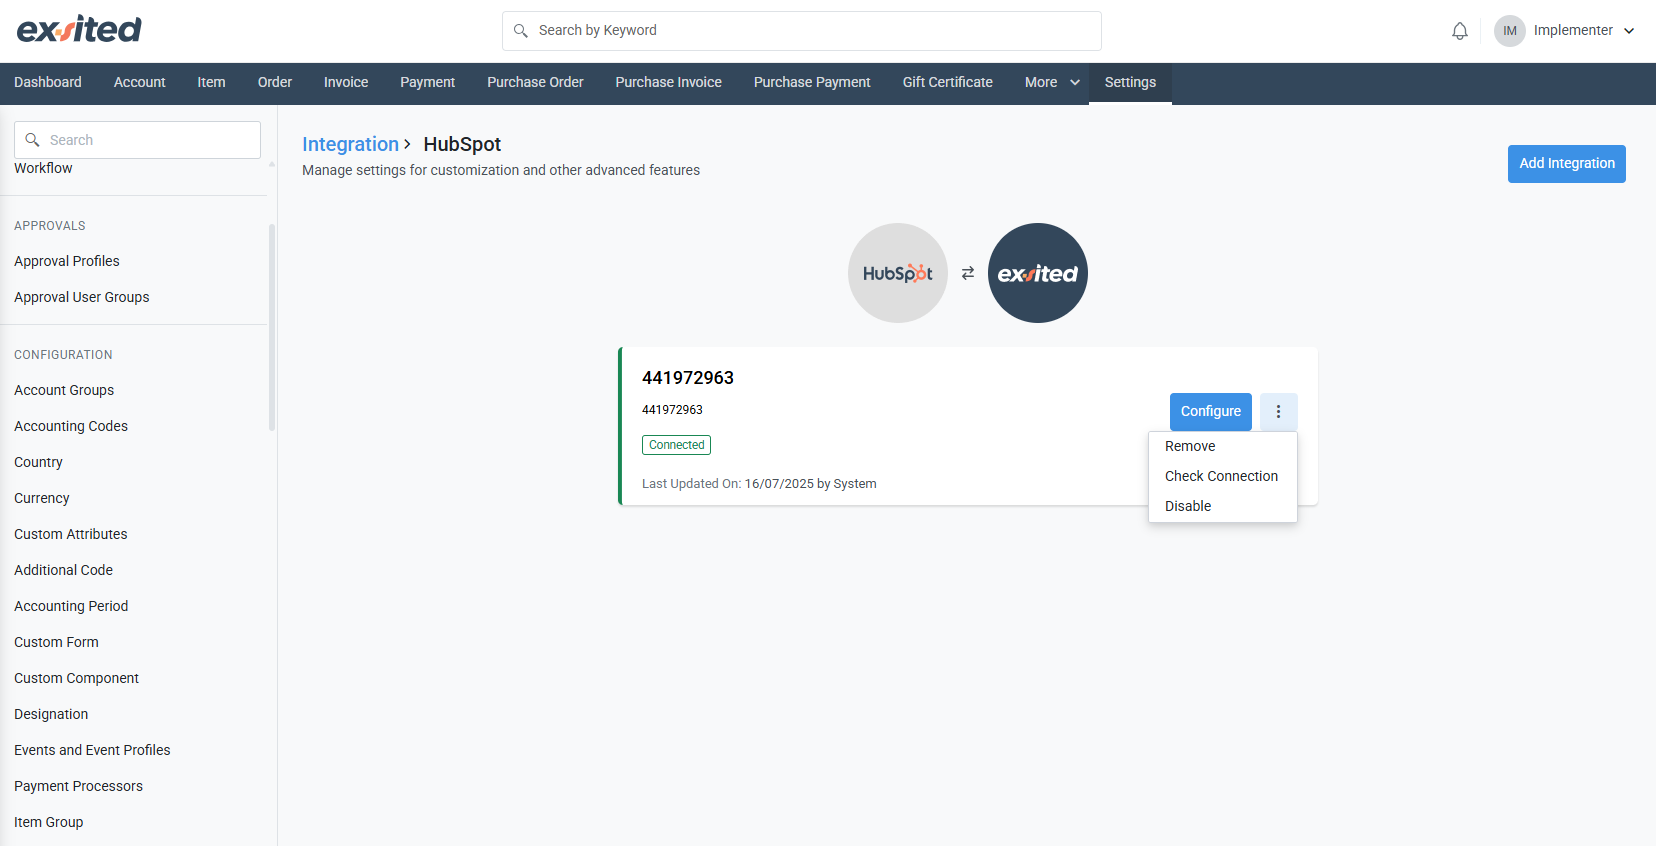
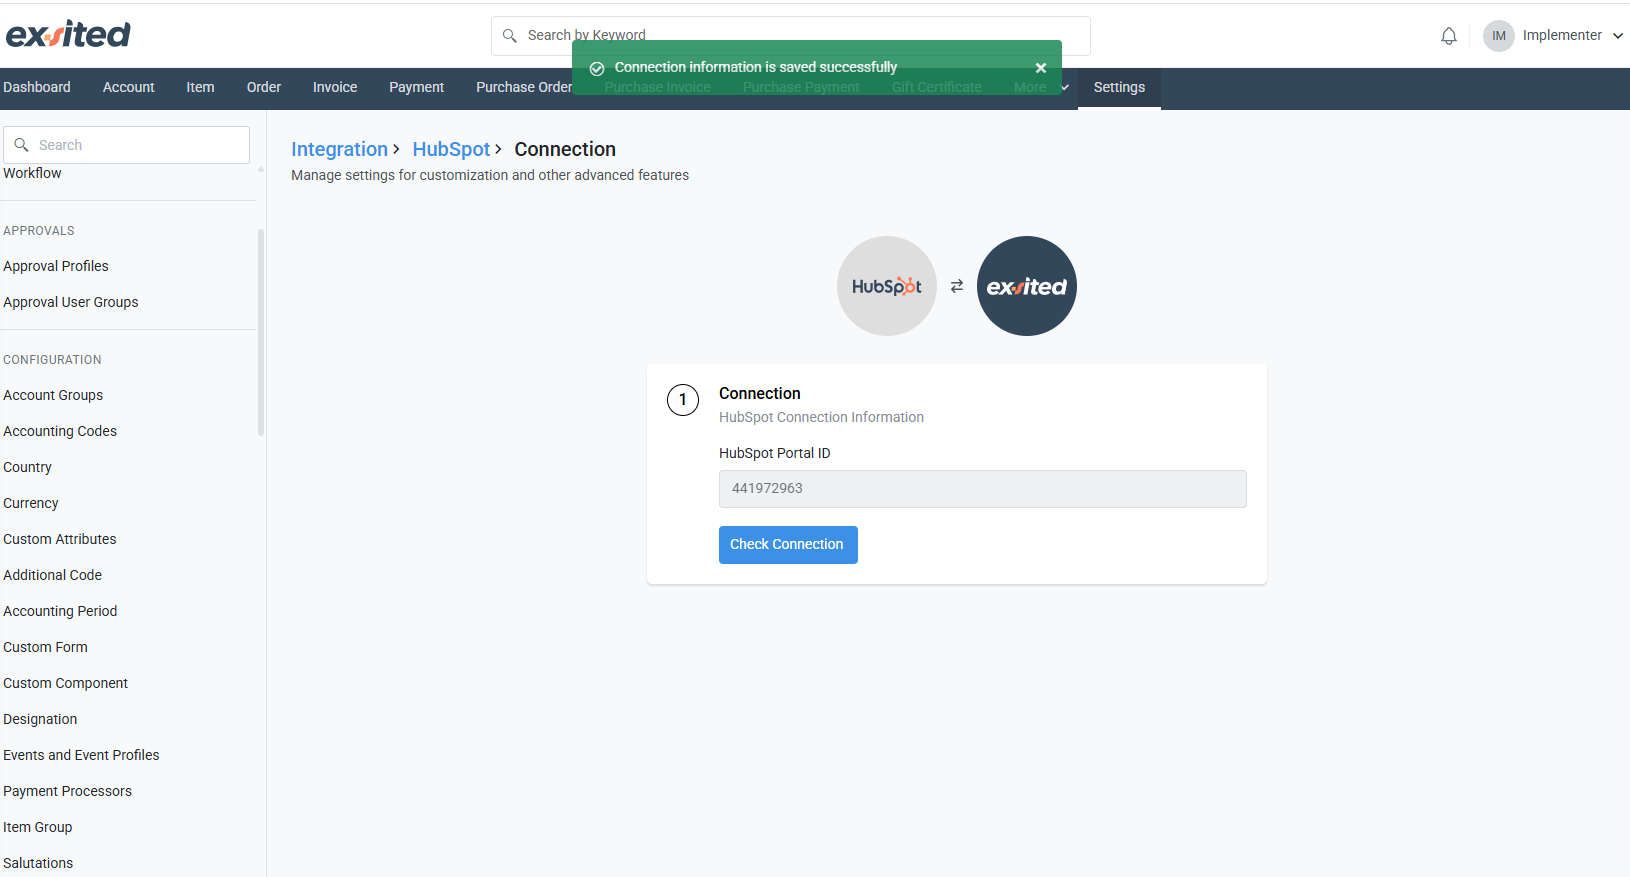
Connect HubSpot to Exsited
- In Exsited, go to Integration > HubSpot.
- If the user doesn't have an integration:
- Click Add Integration > Connect > Check Connection > Save
- If the user already has an integration:
- Click Check Connection
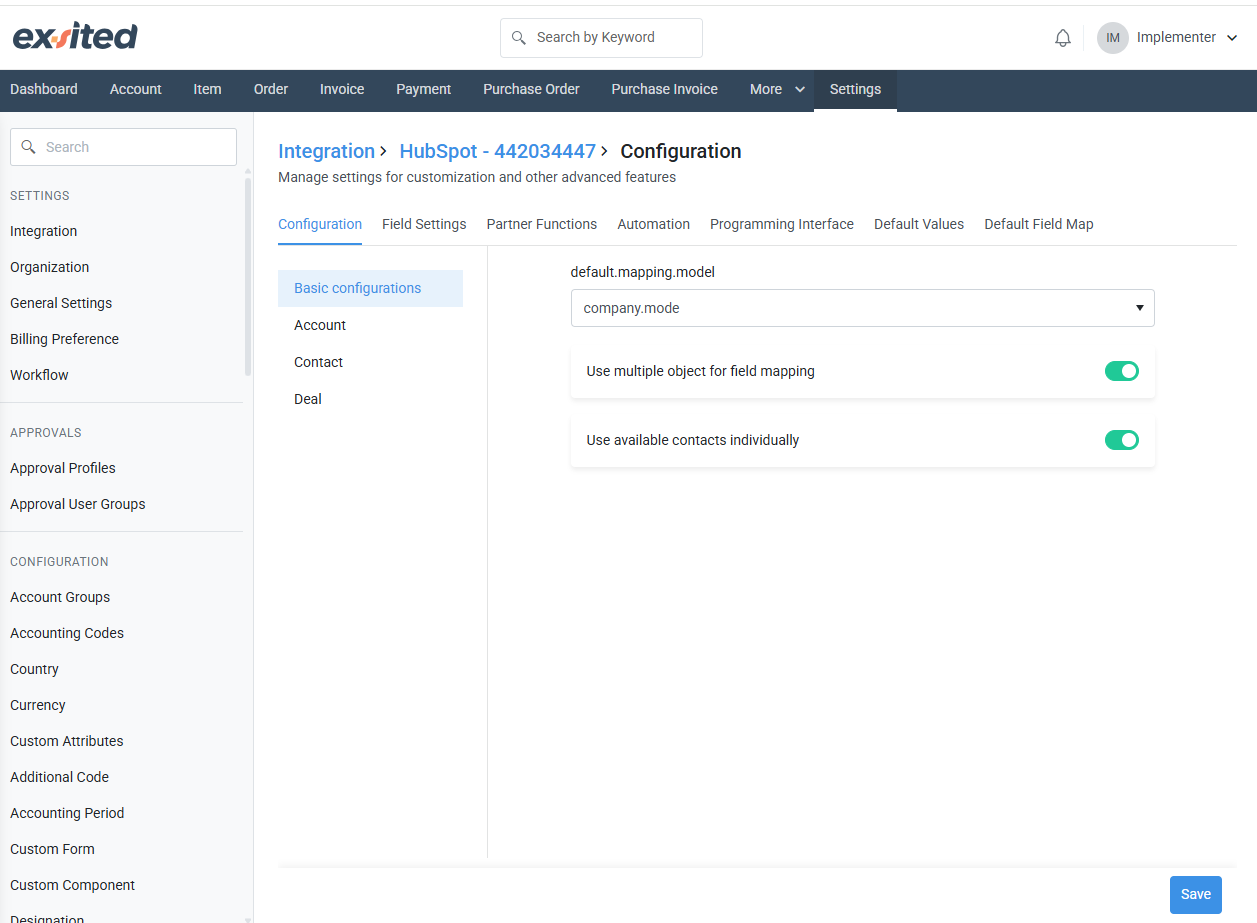
Configuration
Navigation: Exsited > Integrations > HubSpot > Configuration
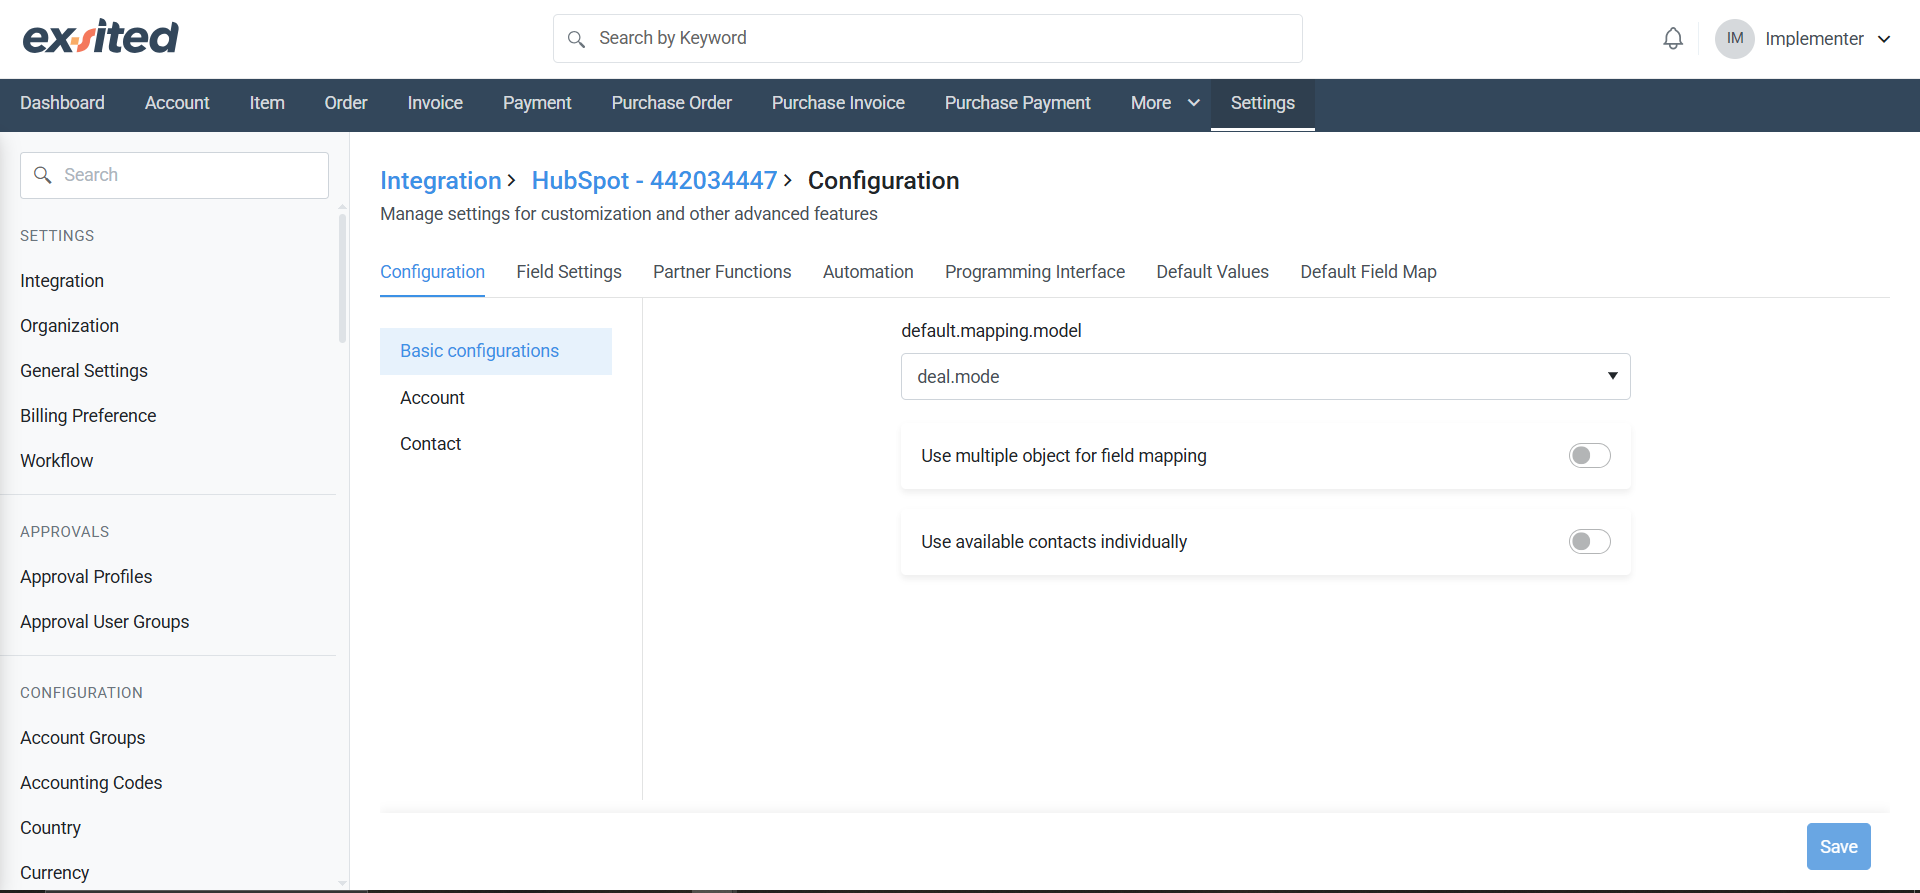
Two integration models are available under the “Basic configurations” Tab. You can select the appropriate model based on your requirements:
- Company Model – For syncing companies and many related deals
- Deal Model – For syncing single deals as accounts in Exsited
Company Model
Select the 'Company Model' if you need to manage multiple deals.
When you select the Company Model, enable both the “Use multiple objects for field mapping” and “Use available contacts individually” toggles and click “Save” at the bottom.
When the user selects the Company Model, the system activates a dedicated section for deals, allowing the user to select the necessary Customer Objects. A Customer Object is required to export or import deals into the account. To create a Customer Object, navigate to Settings > Custom Attributes > Custom Objects. Then click the ”Add Custom Object” button.
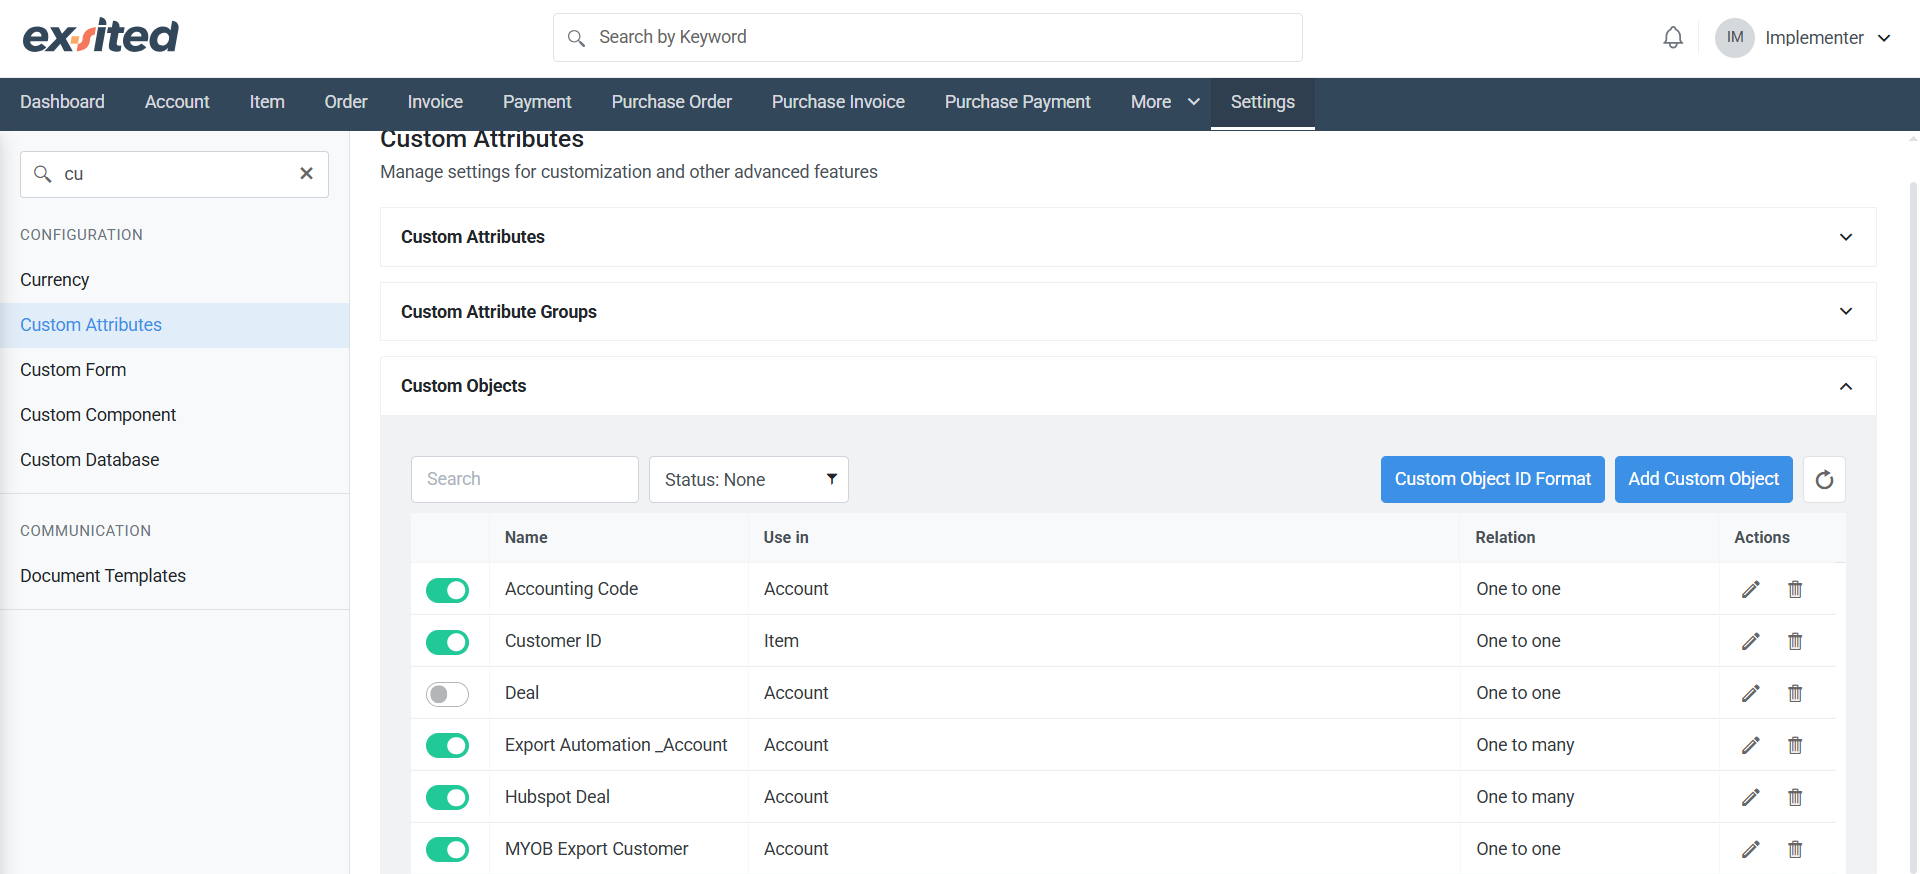
Enter the Name for Custom Object and select Use In drop-down to display the Relation field on the screen.
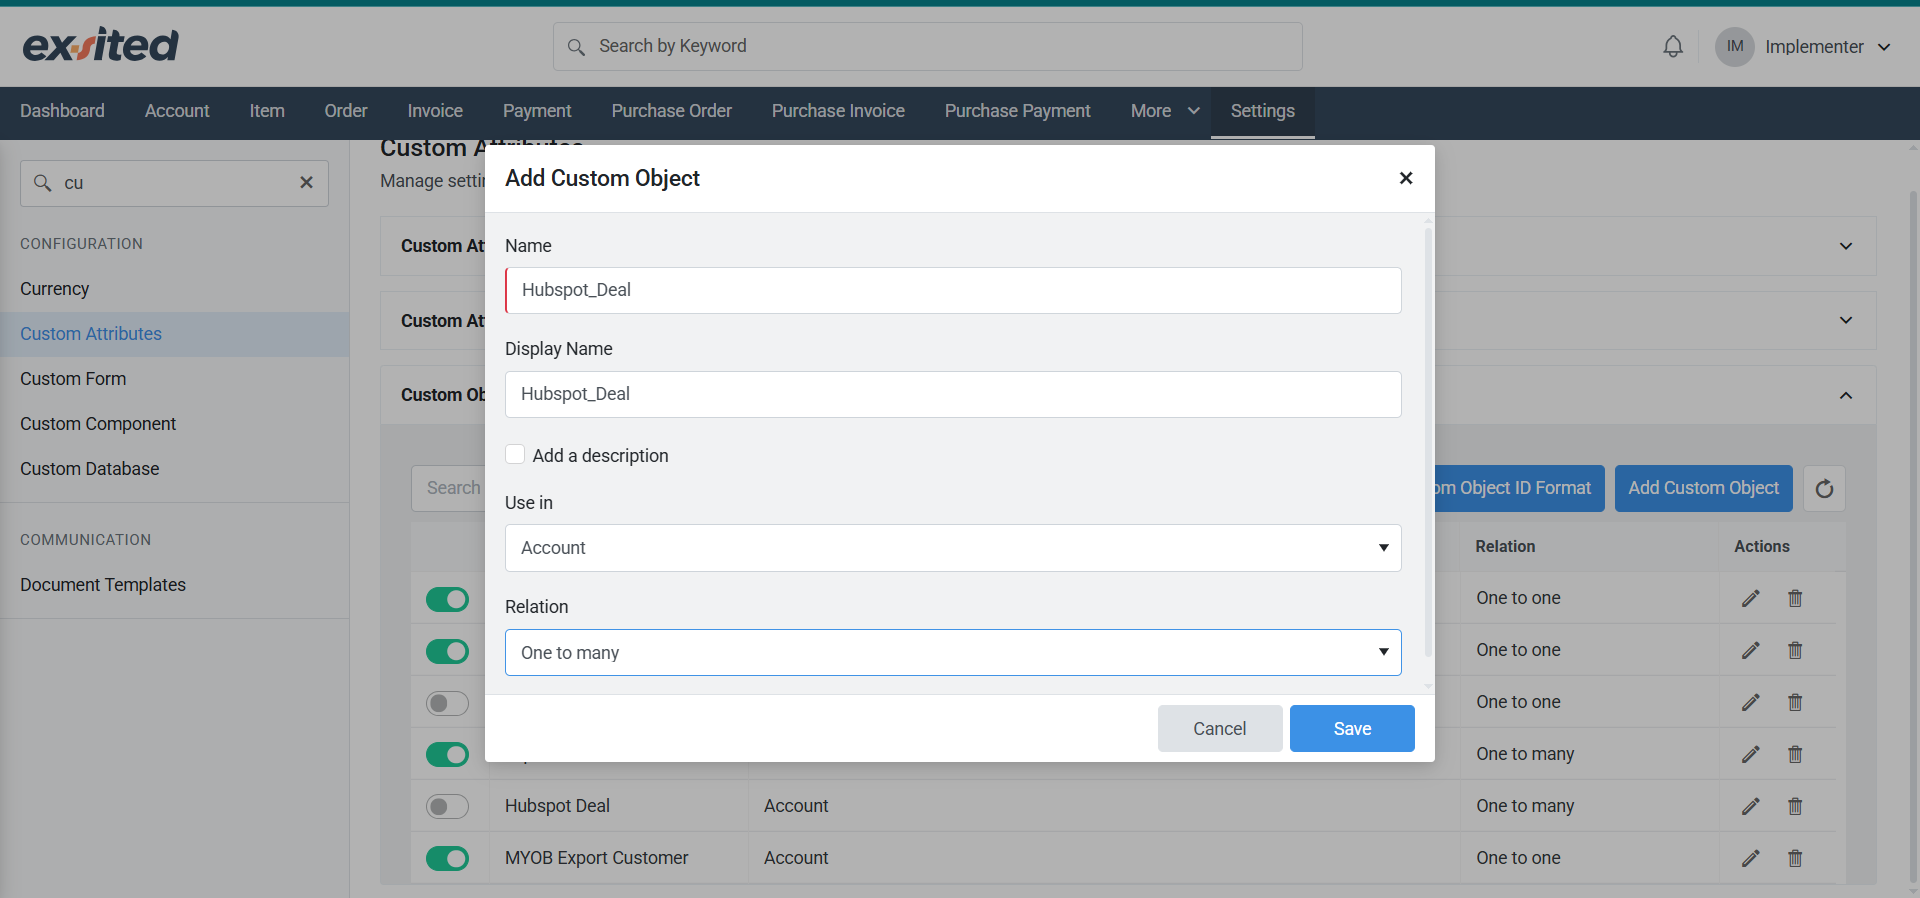
Since the selected mode is Company, which involves multiple connected deals, set the relation to “One to Many” to link HubSpot deals with existing accounts.
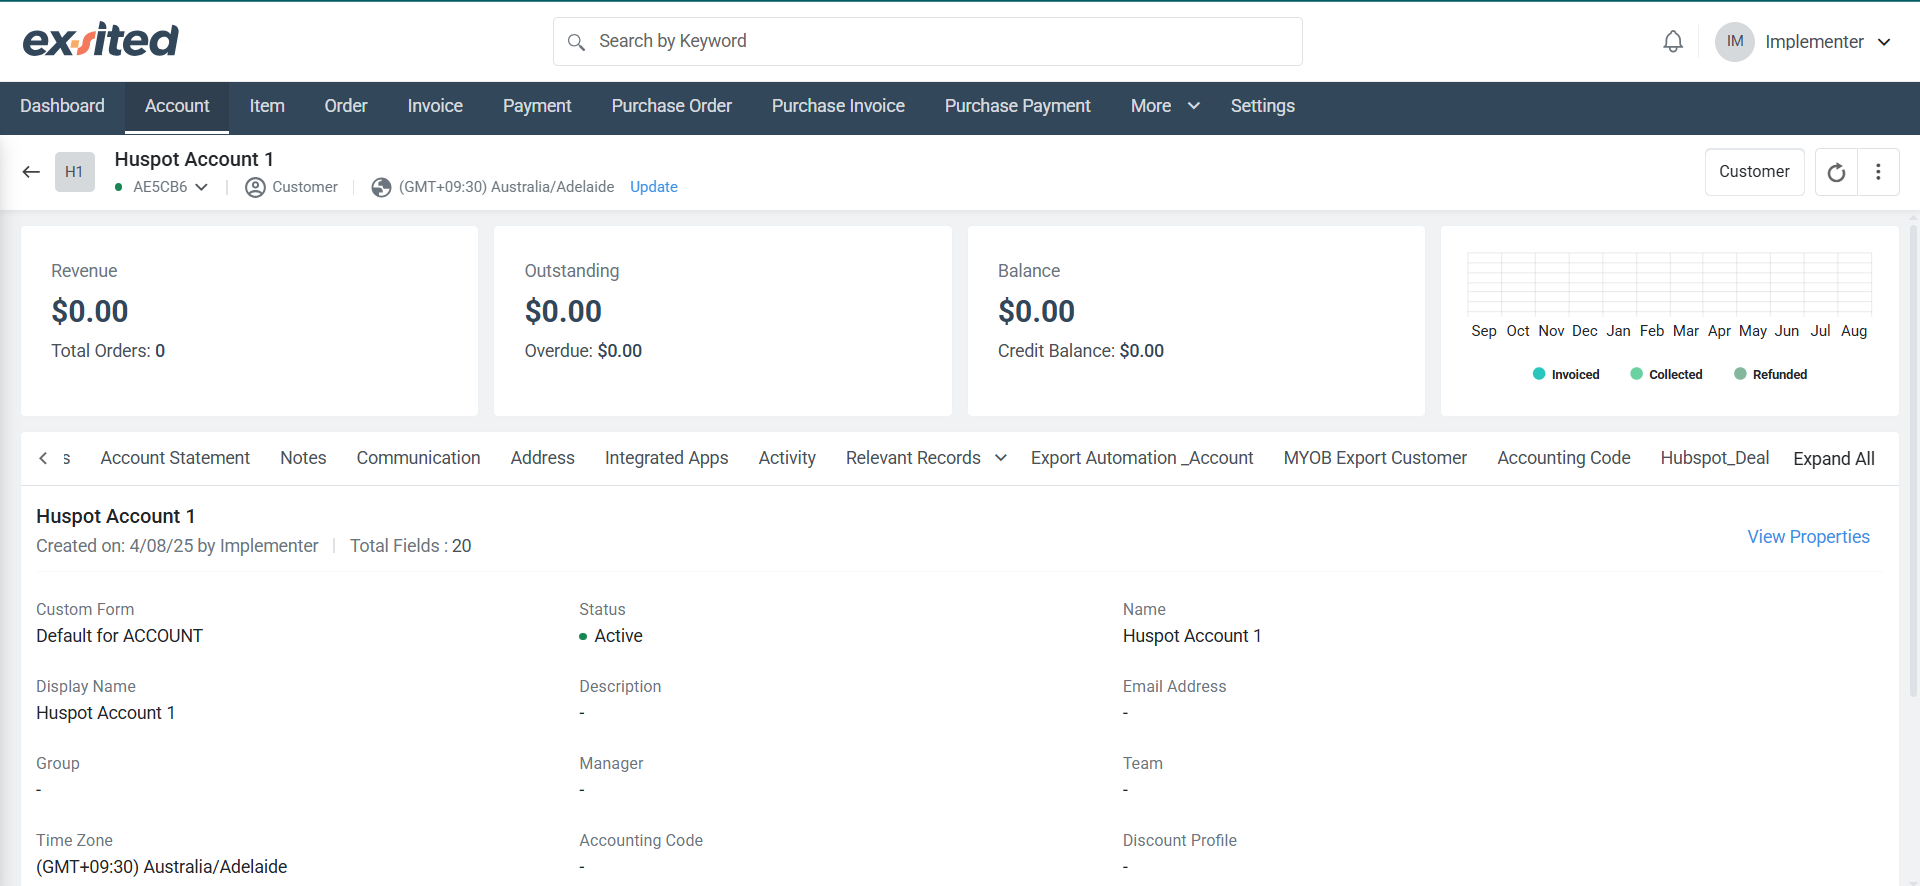
Users will also be able to view the created custom objects on the account details page.
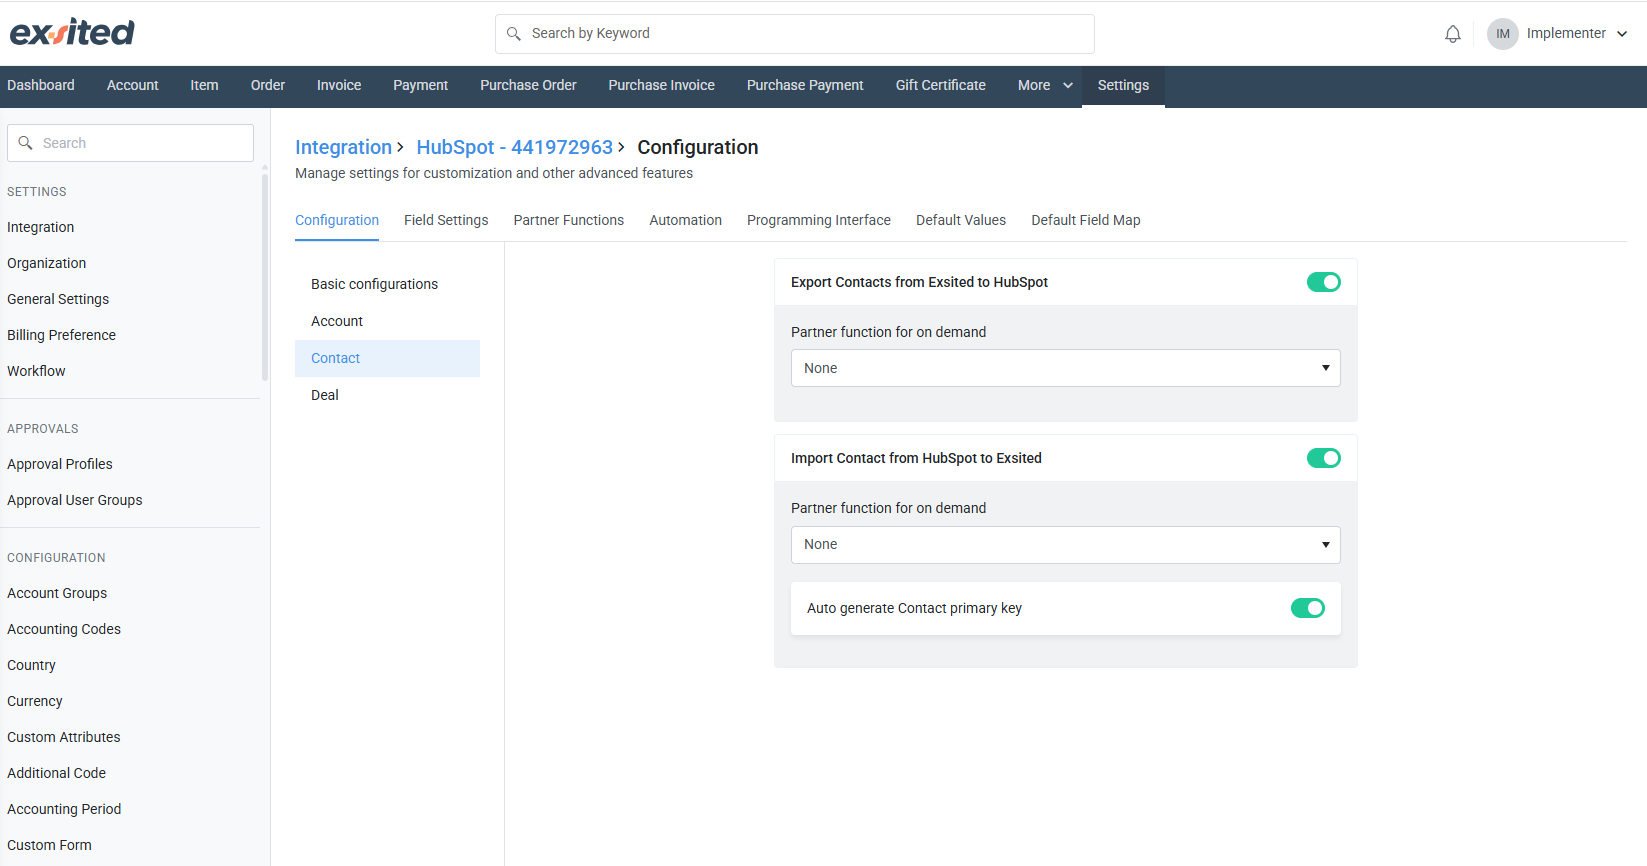
- Enable the Export/Import toggles for 'Account', 'Contact', and 'Deal' as required.
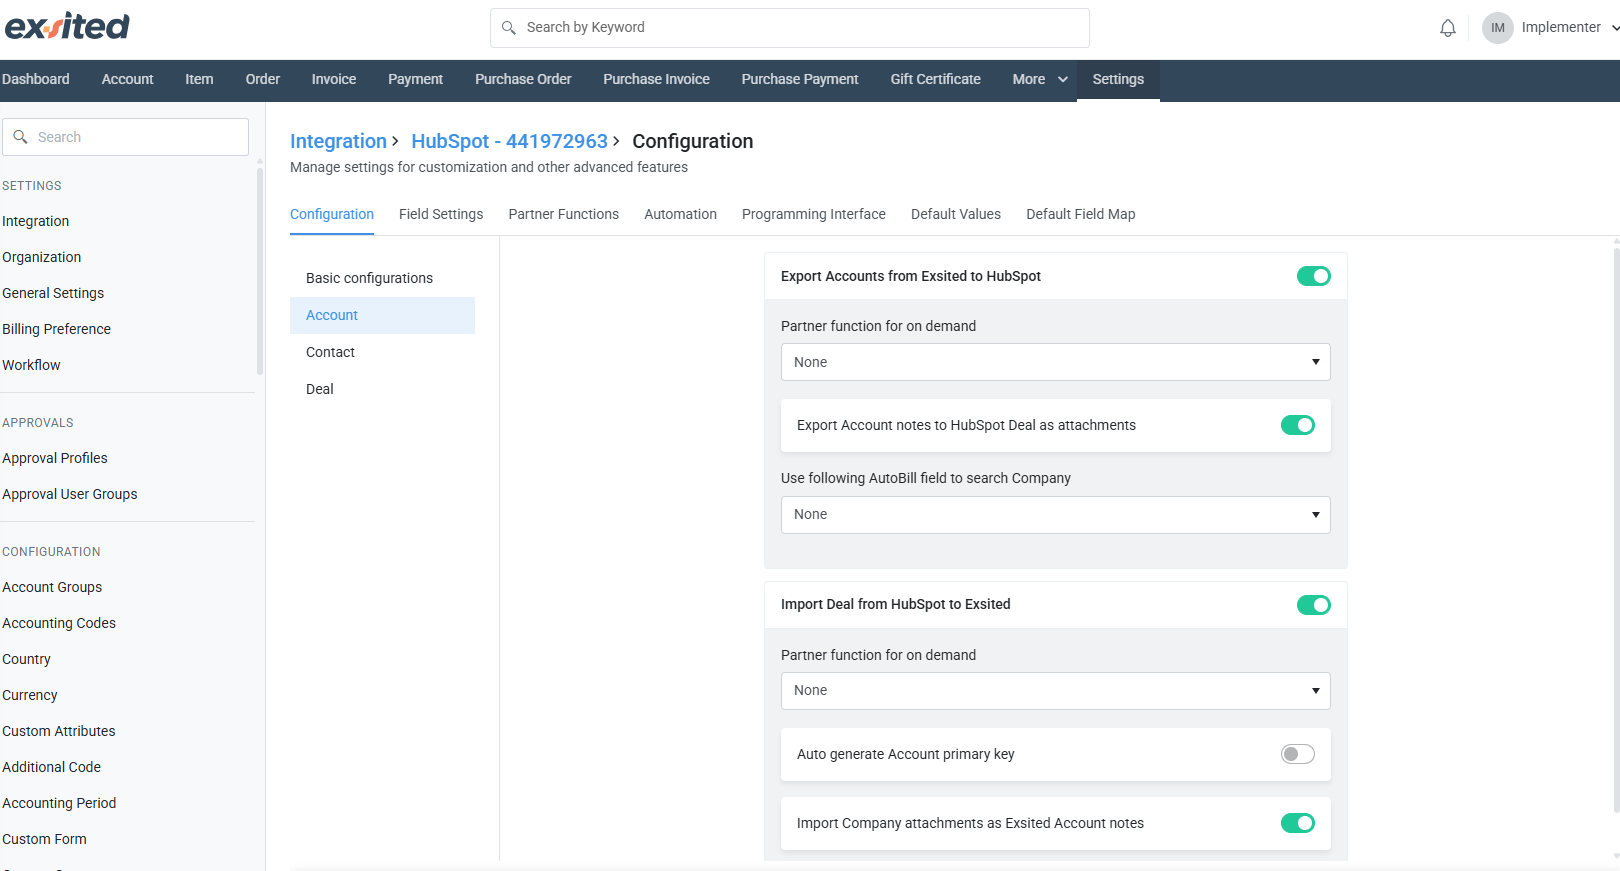
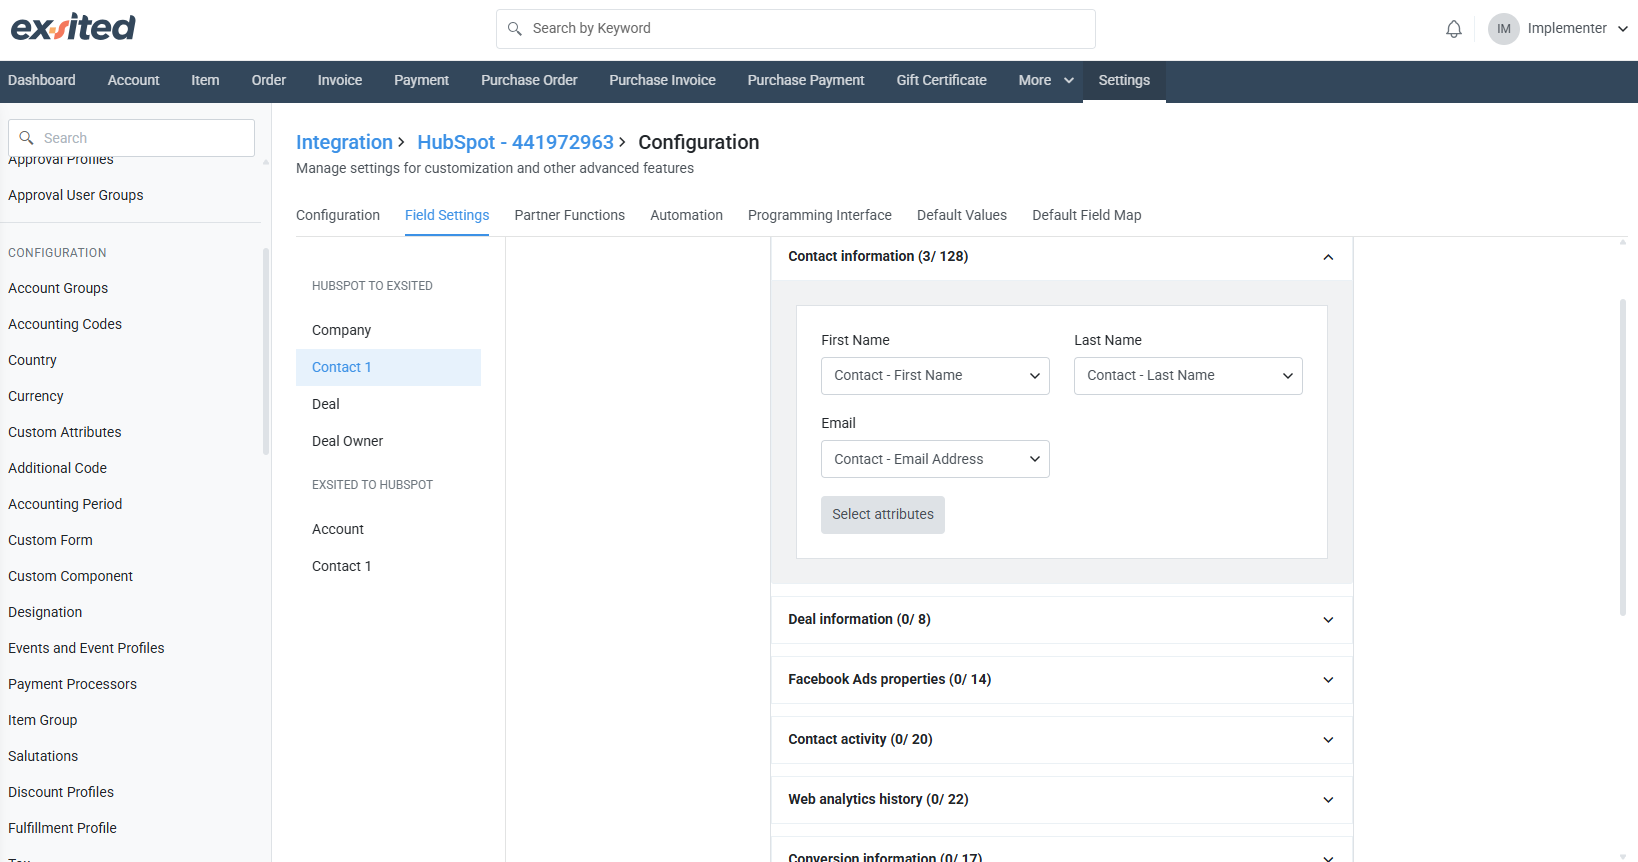
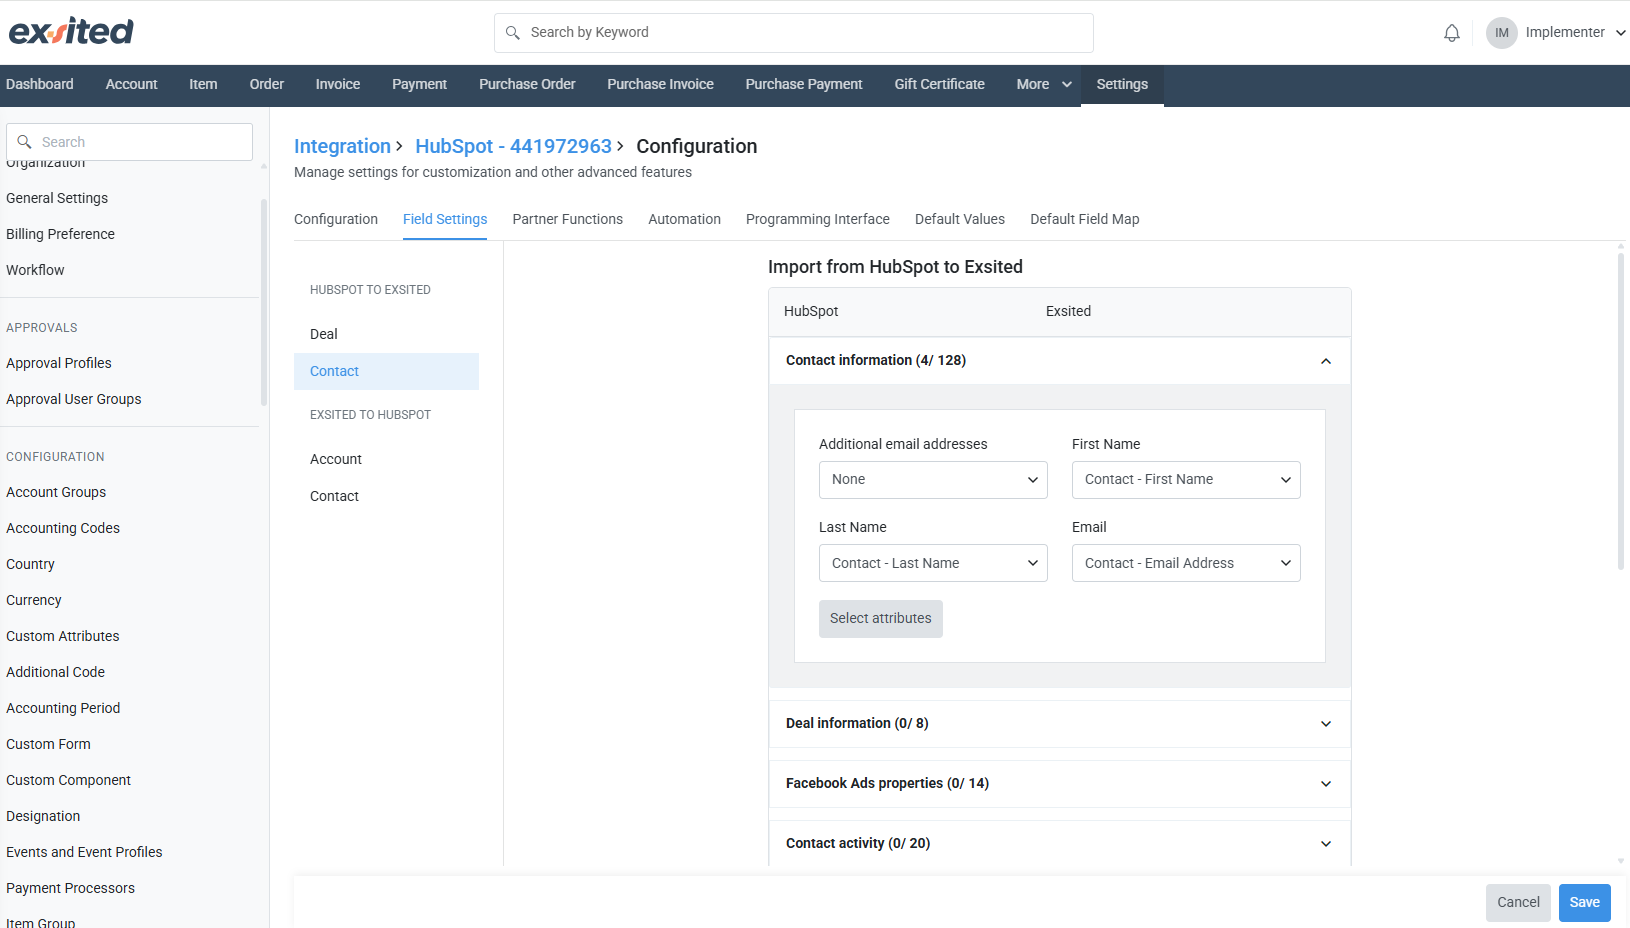
- Under Field Settings, map:
- Company Info fields (e.g., ABN, Website, Industry)
- Contact Info (e.g., Email, Phone)
- Deal information (e.g., Deal Name)
- Deal Owner
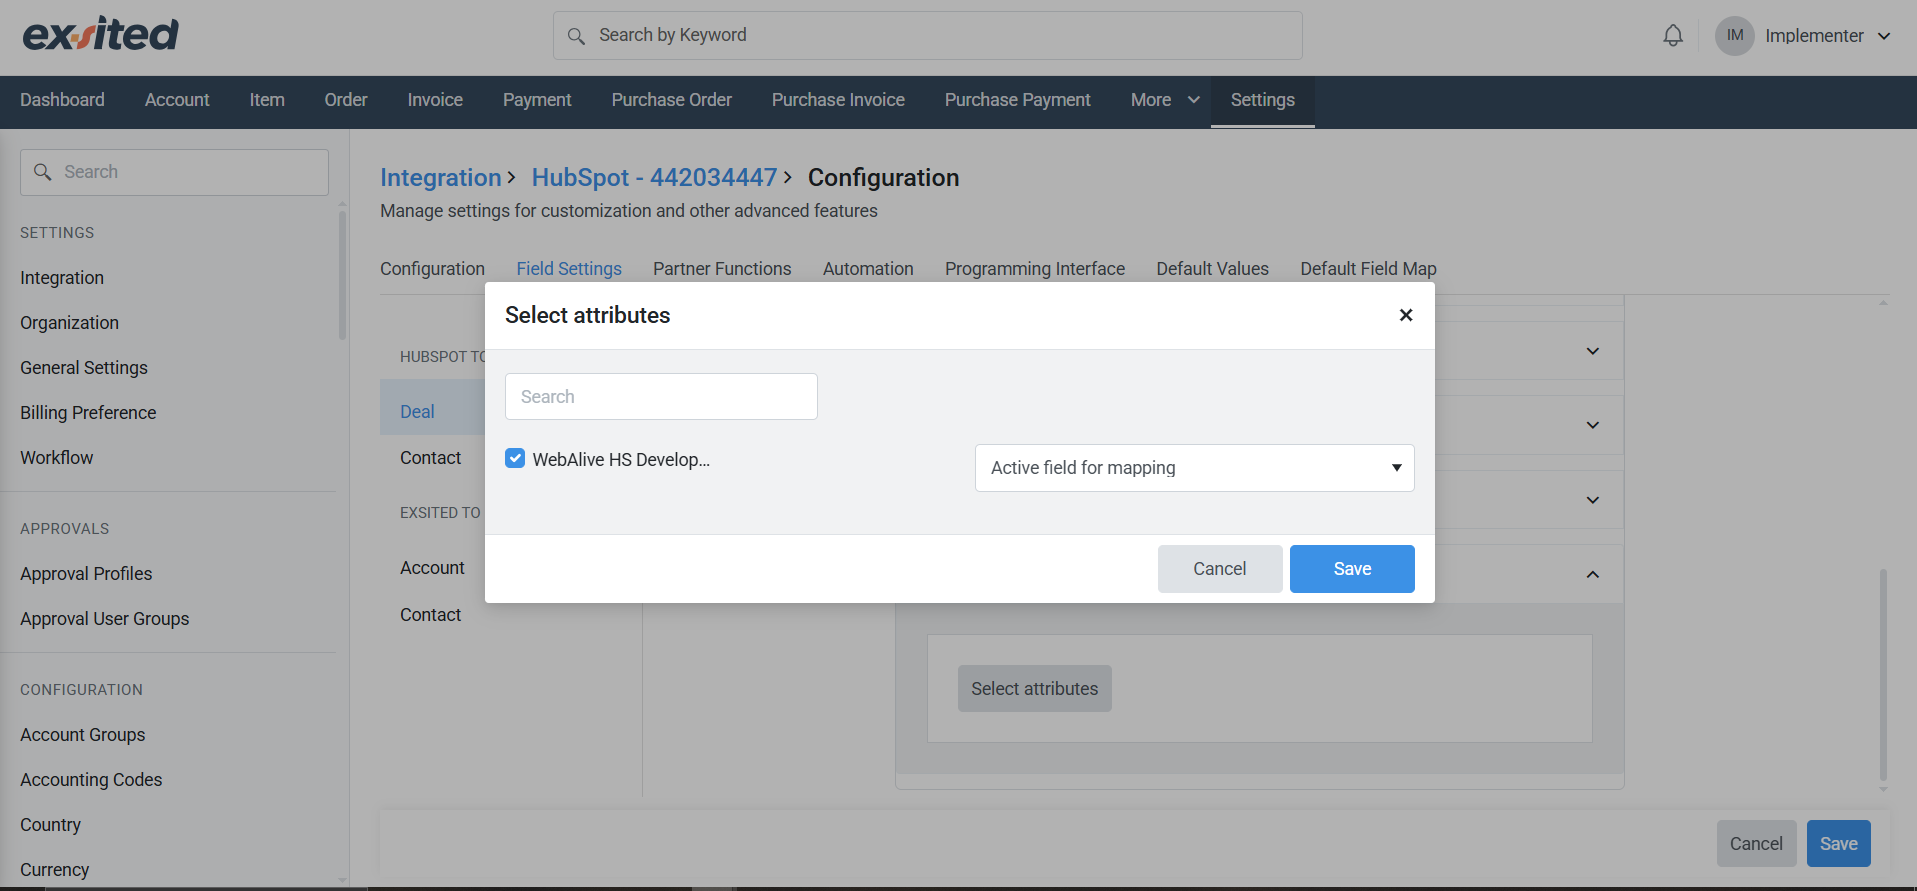
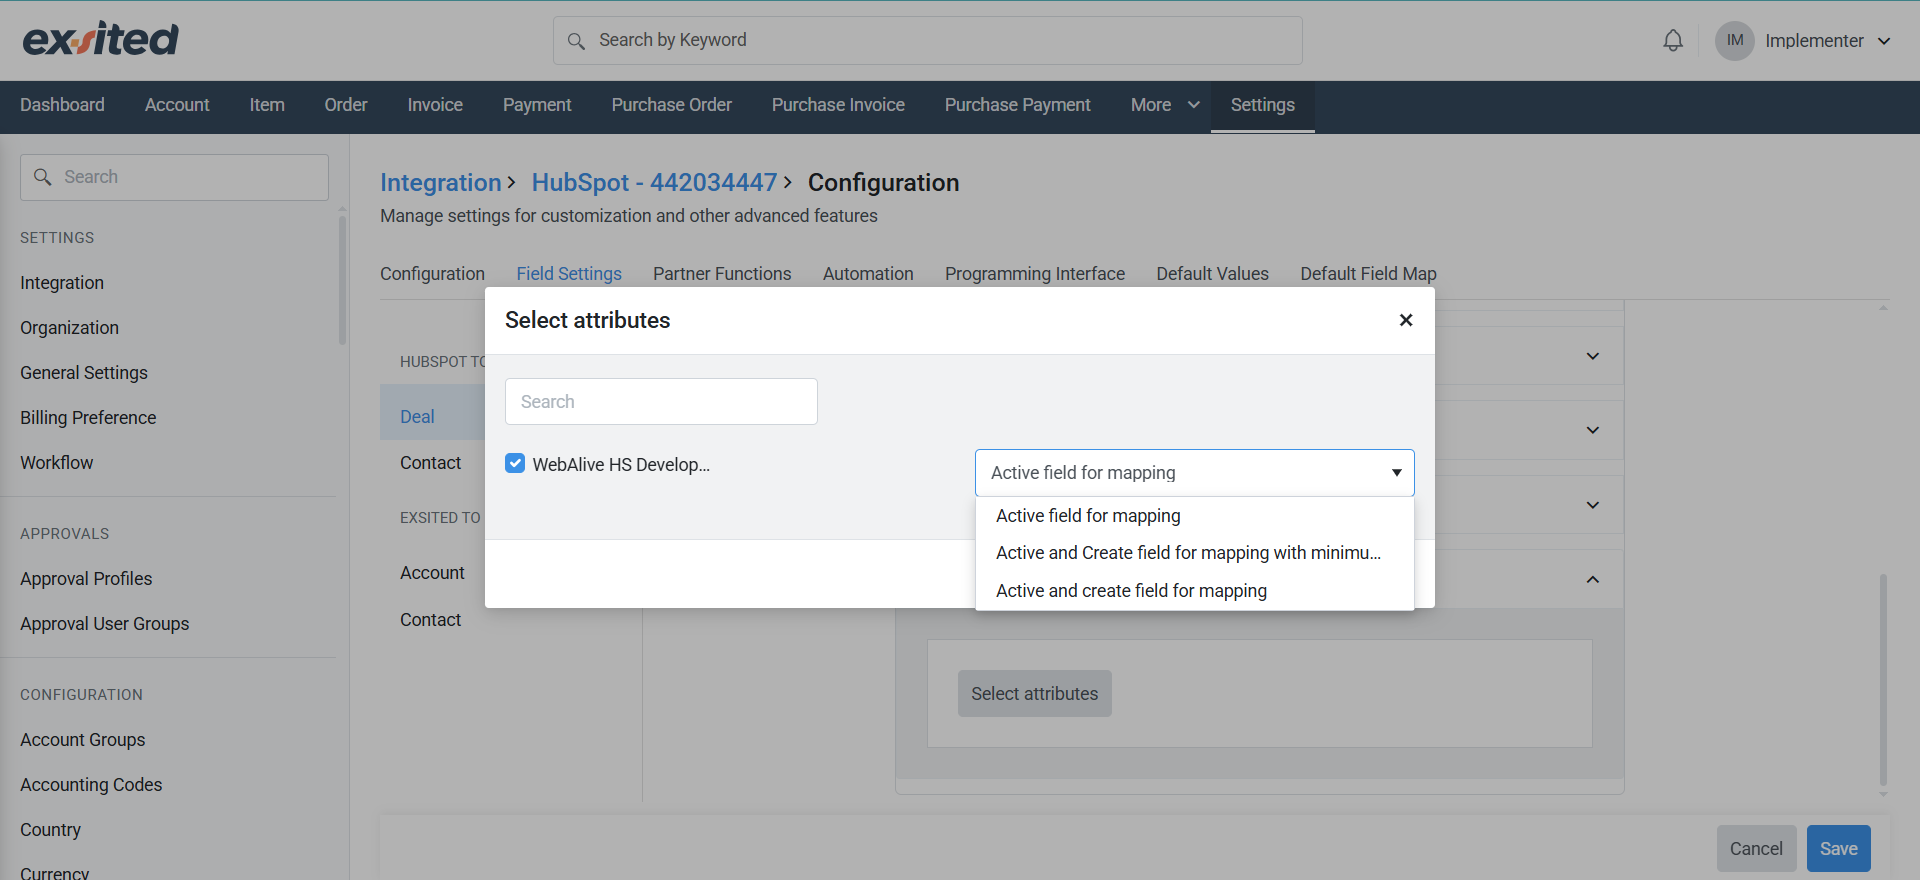
- Create custom attributes in Exsited if needed, and use them for the field mapping process explained later in the Attribute Mapping (Custom Fields) section of this guide.
Deal Model
If the user has only one-to-one deals to handle, select the “Deal Model” and click the “Save” button at the bottom.
If the user selects the 'Deal Model', there's no need to enable the toggles in 'Basic Configuration'
- Enable the Export/Import toggles for 'Account' and 'Contact' as required.

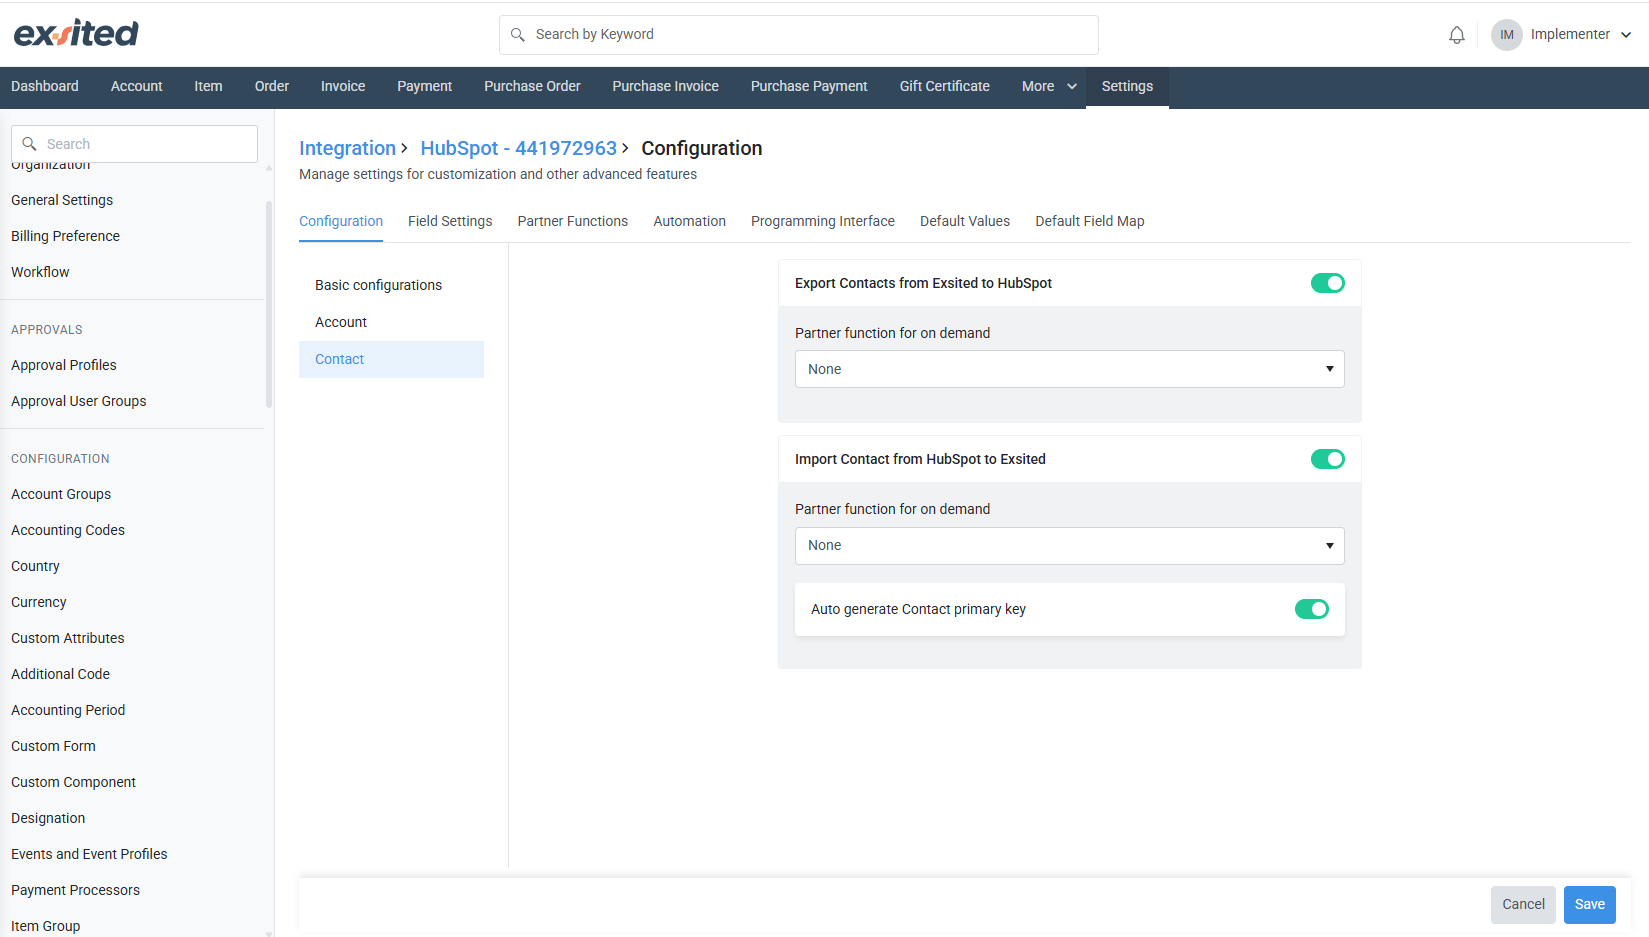
- Under Field Settings, map:
- Deal Info (e.g., Deal Name → Account Name)
- Deal Revenue
- Custom deal properties created in HubSpot
- Contact (e.g., First name, Last Name, email)
Field Mapping
- The user can configure field mapping and link the relevant attributes accordingly.
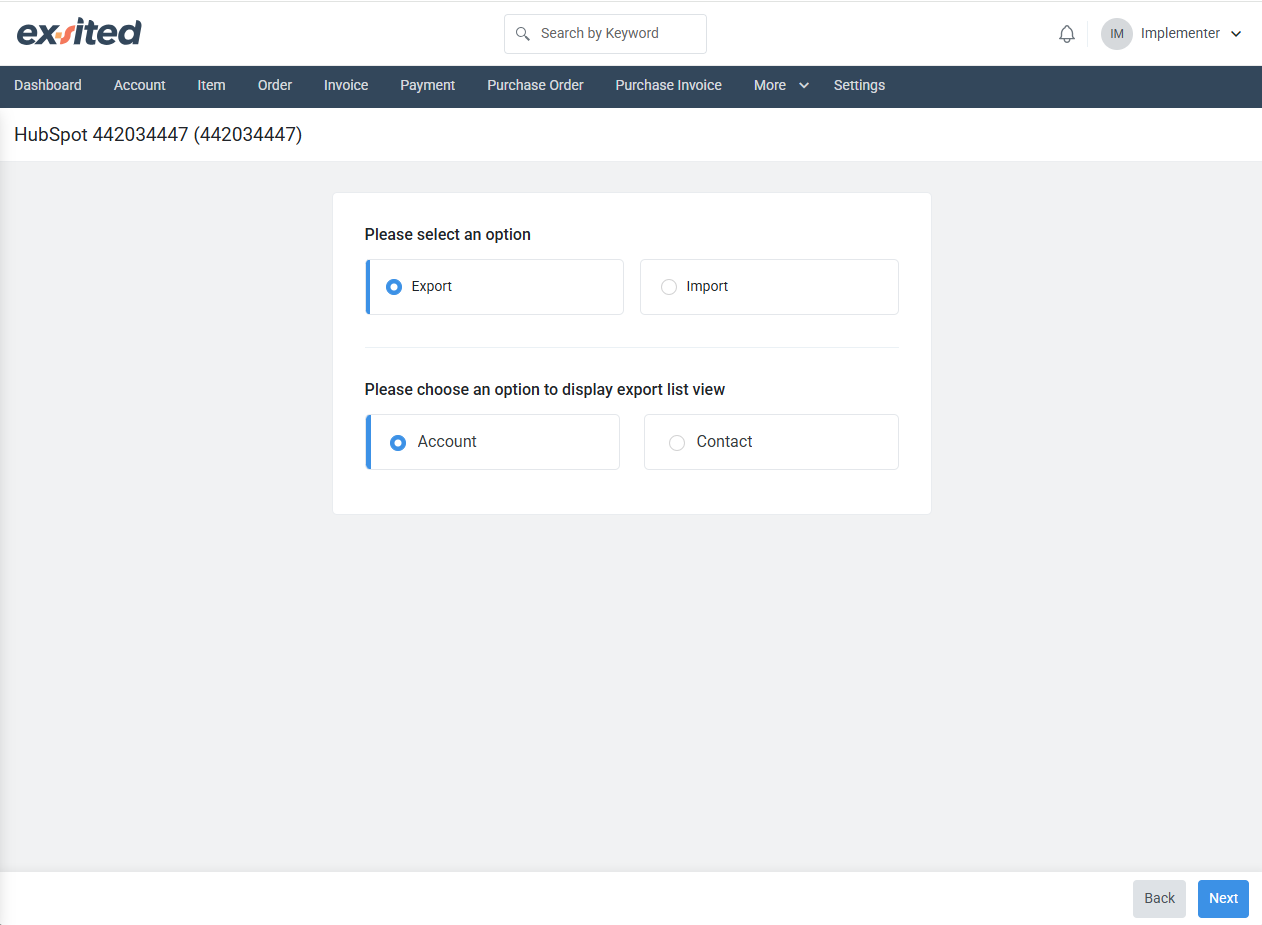
Importing HubSpot Data into Exsited
Importing Deals
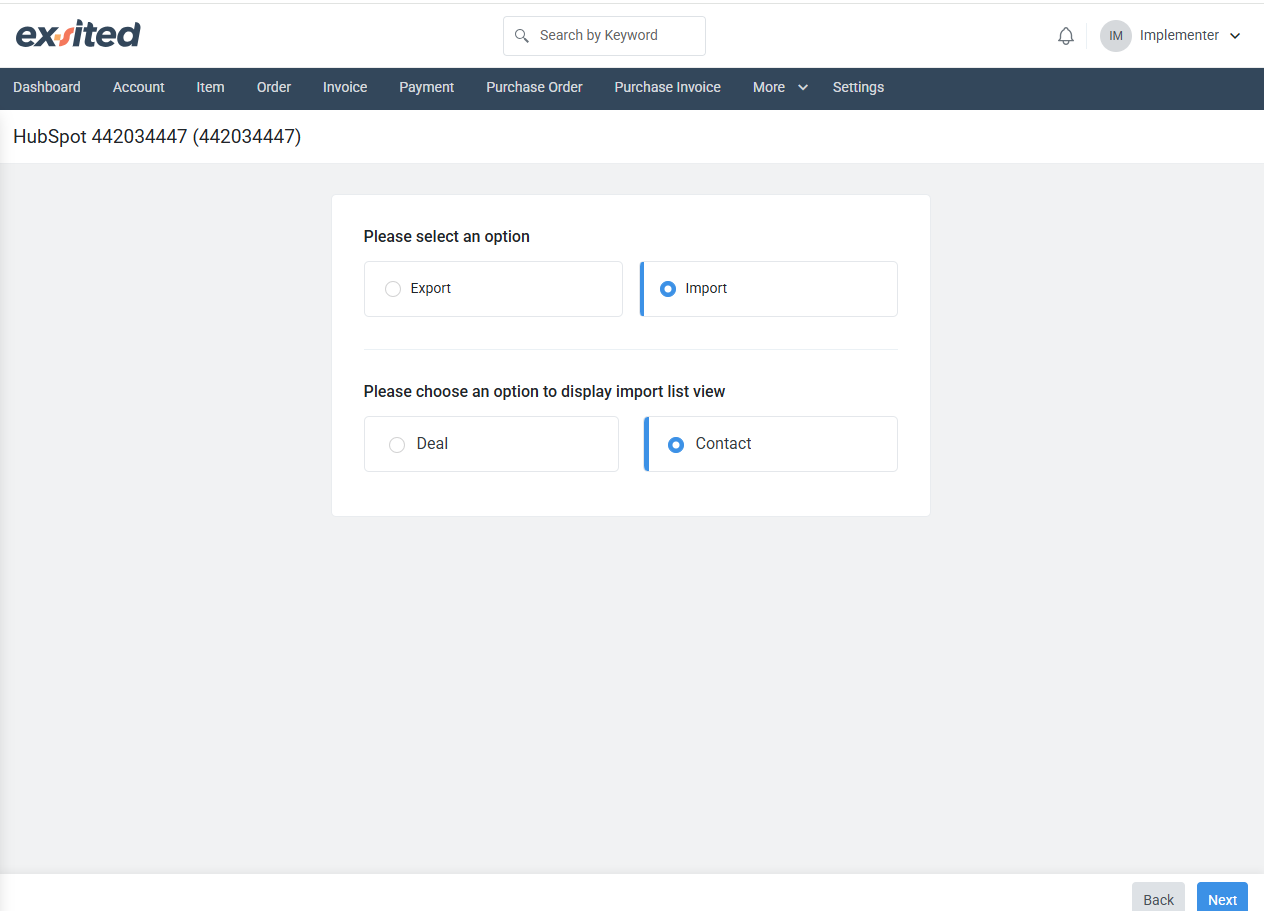
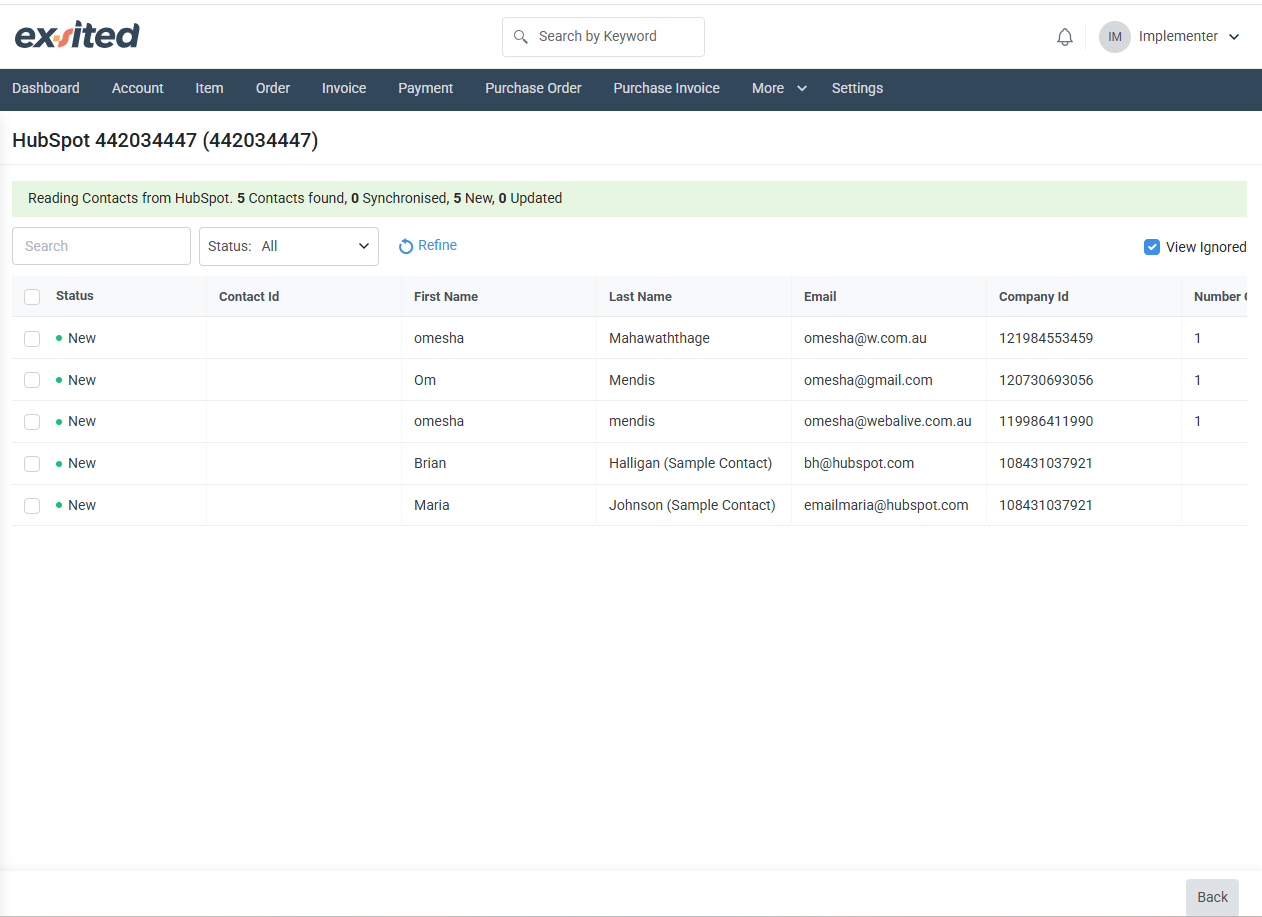
Navigation: Exsited > More > Hubspot > select account > click New > Import
- HubSpot Deals will be imported into Exsited as Accounts.
- Ensure required fields (Deal Name, Contact, etc..) are mapped.
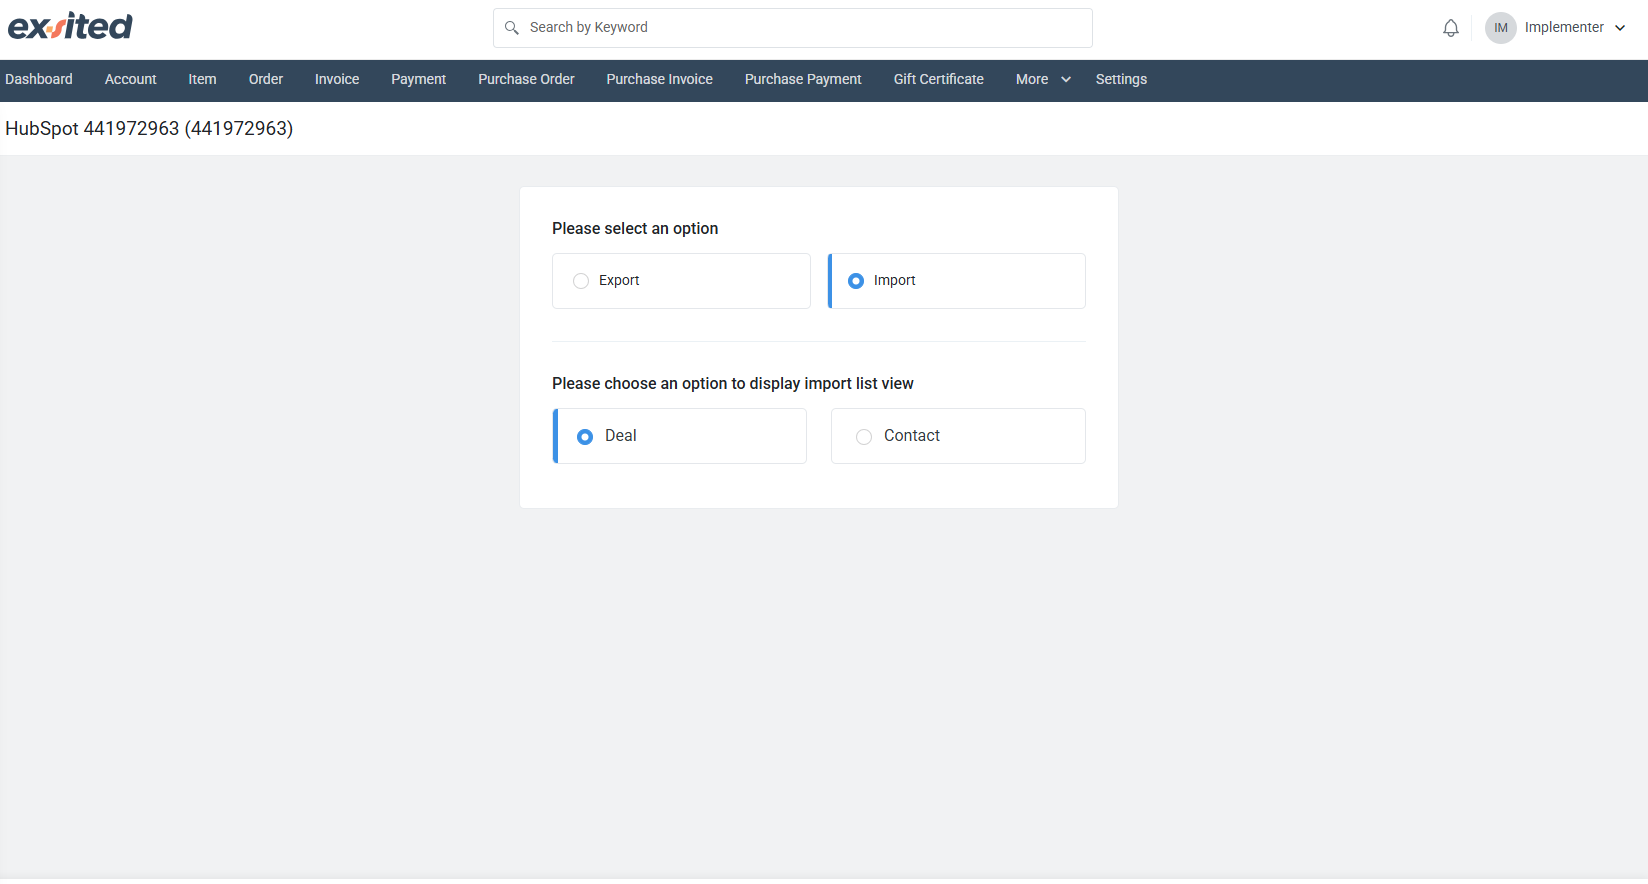
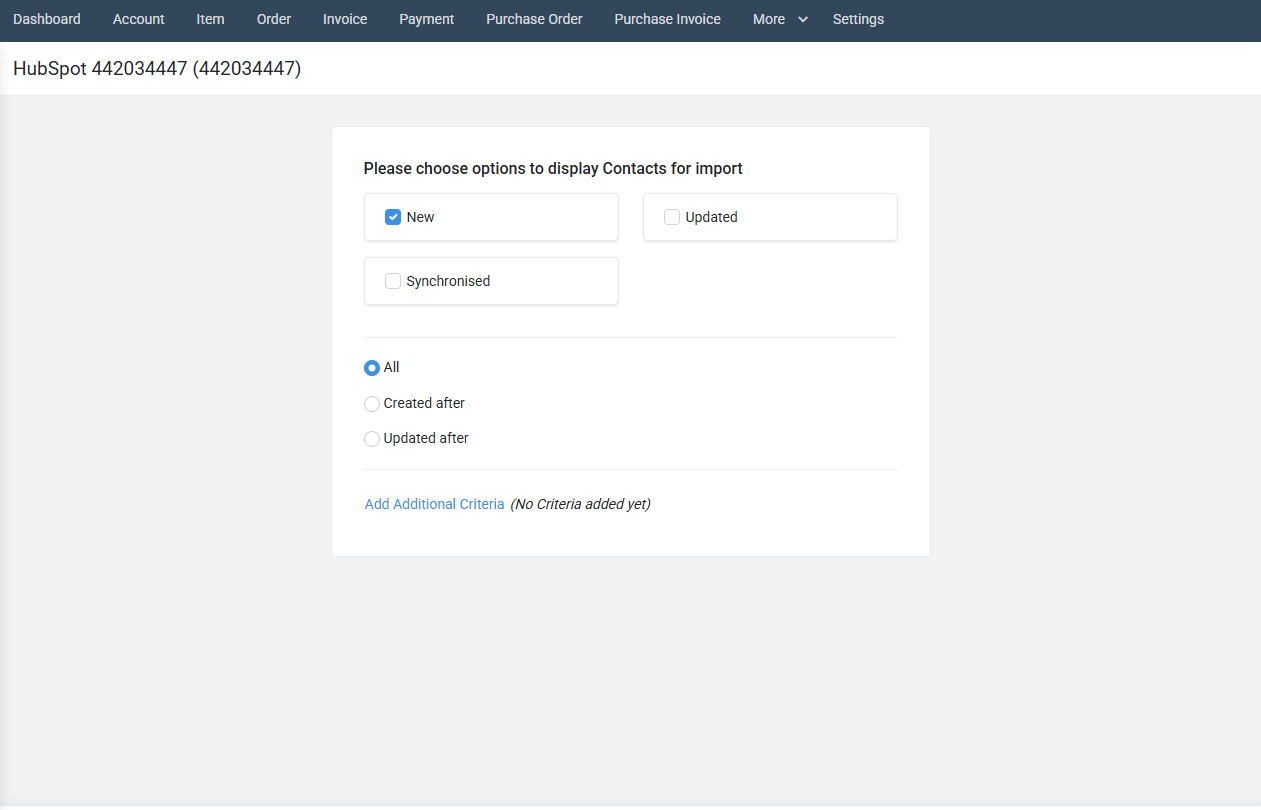
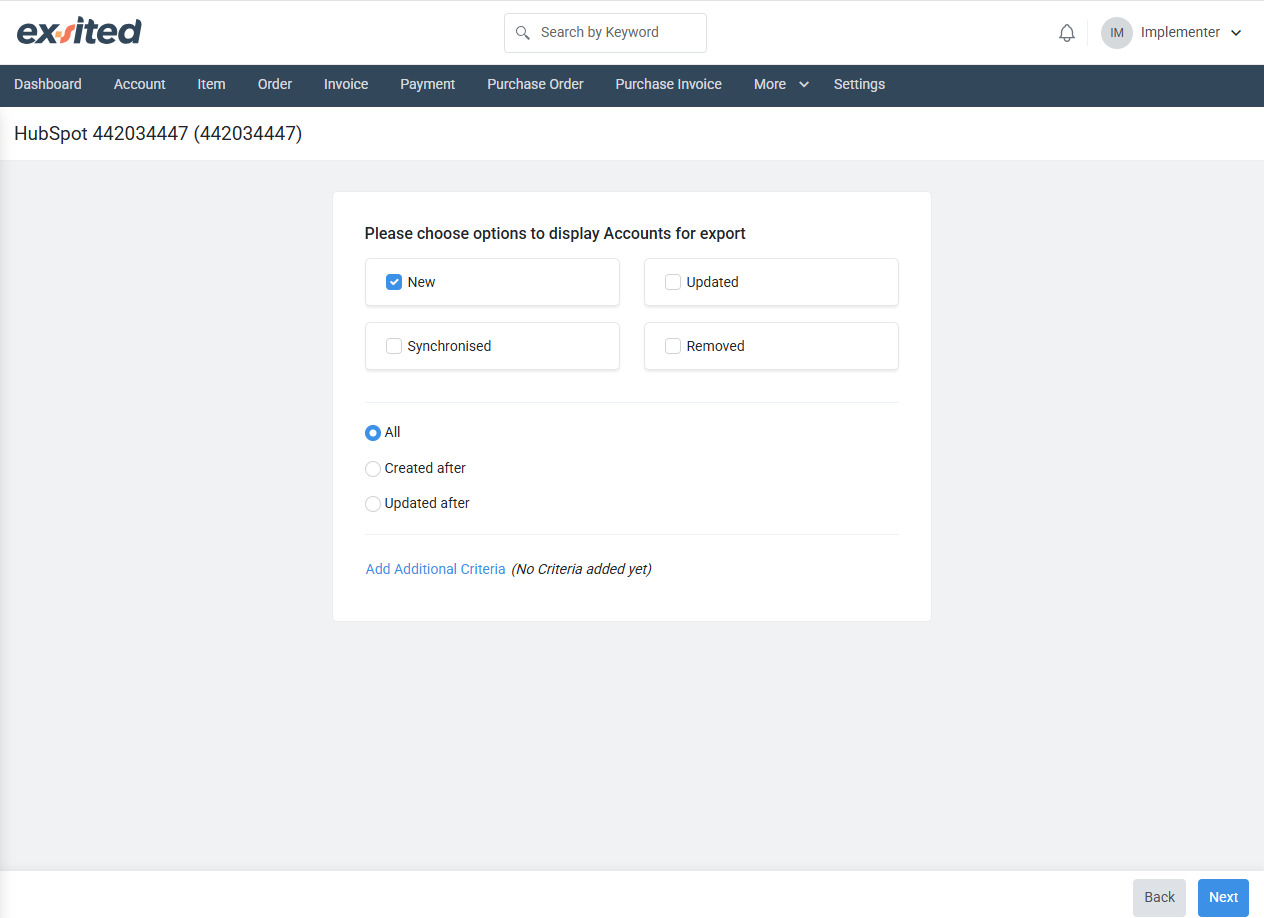
- Selecting “New” imports only items that have not yet been imported into Exsited.
- Choose “All” or any other options you want.
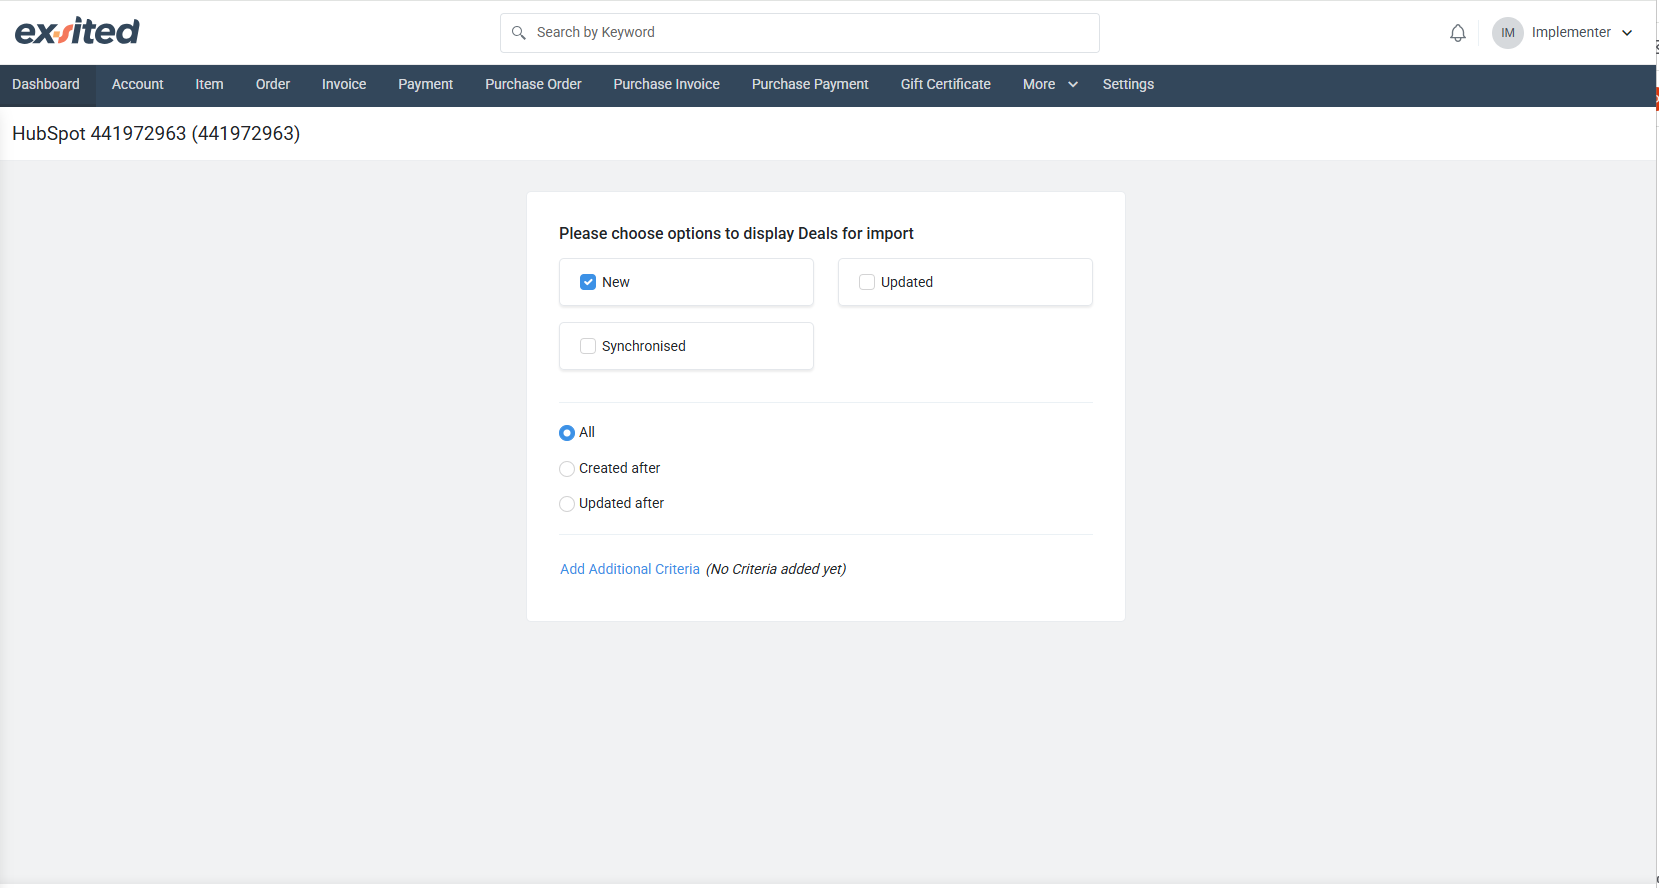
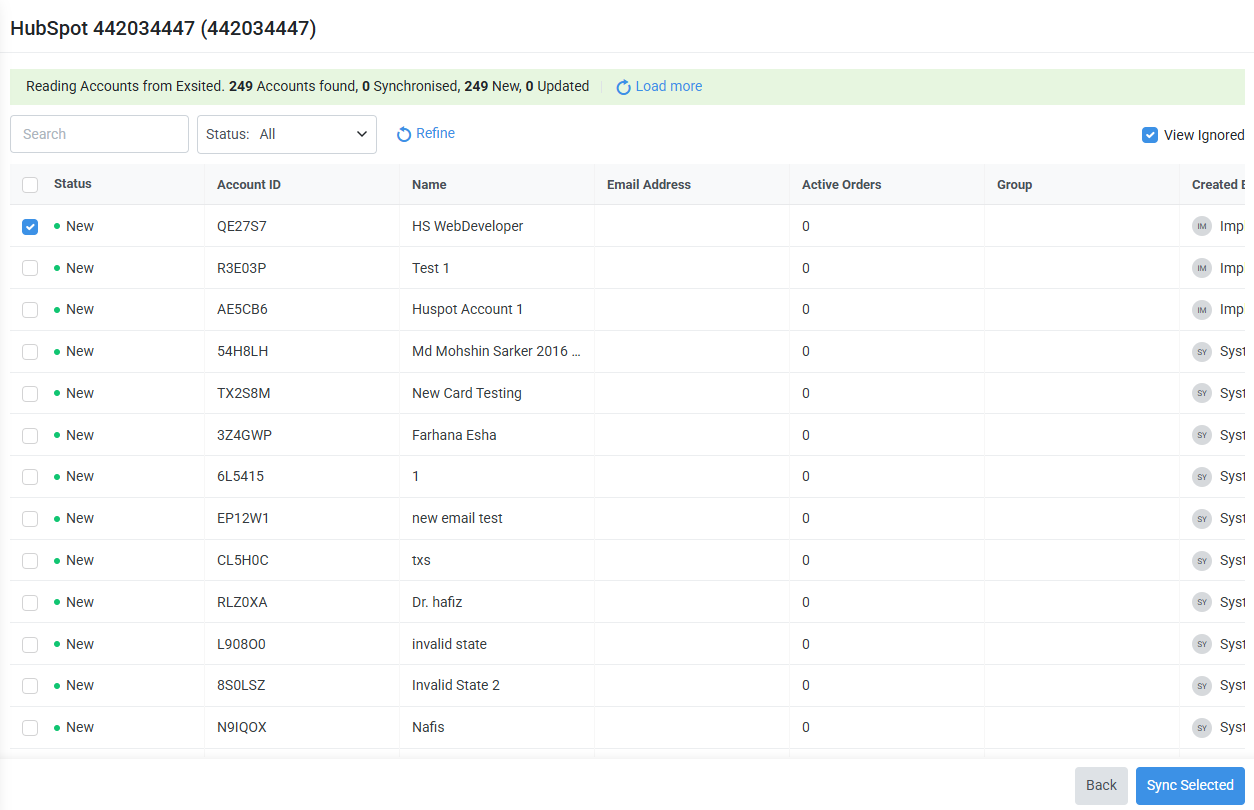
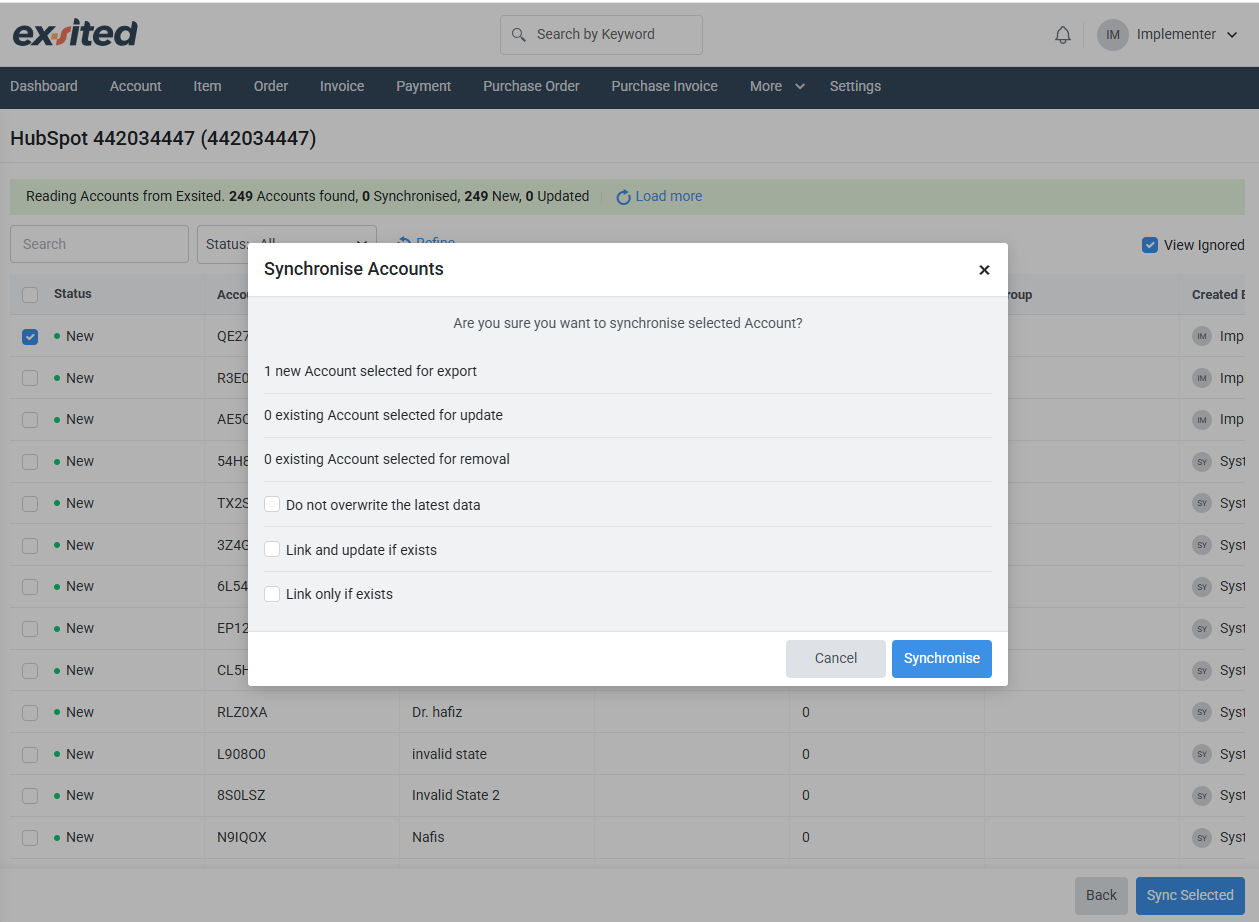
- Select all the entries you want to import, then click Synchronise to begin the import.
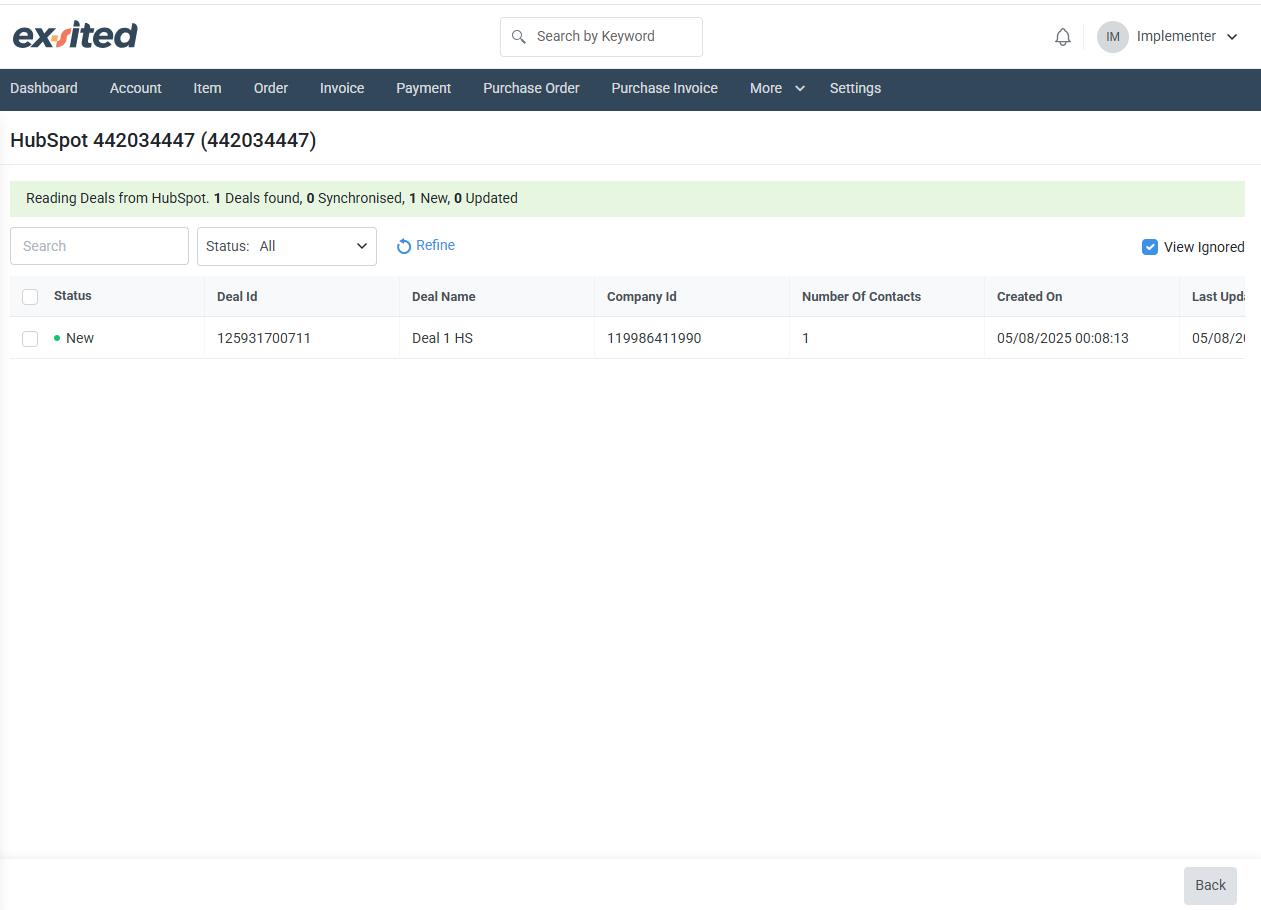
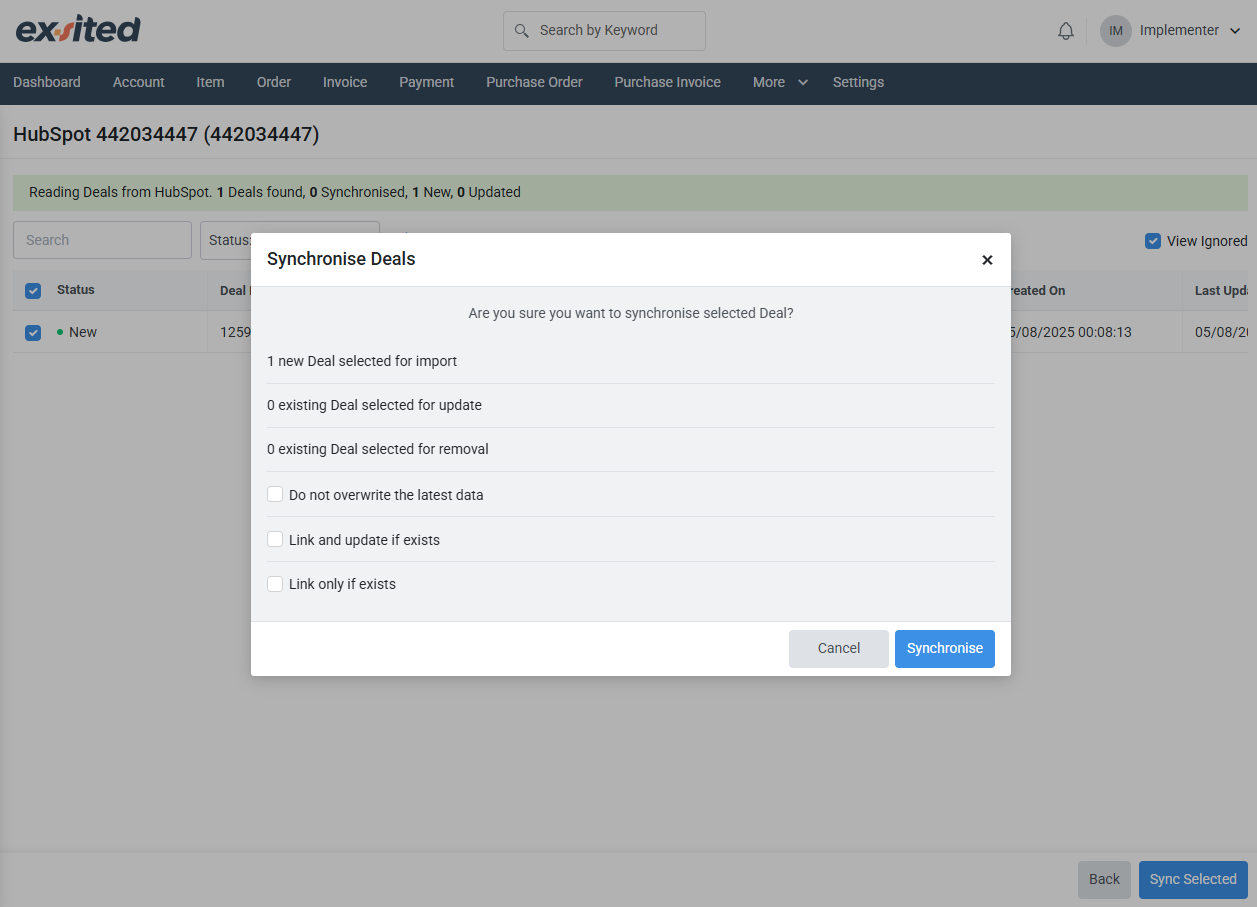
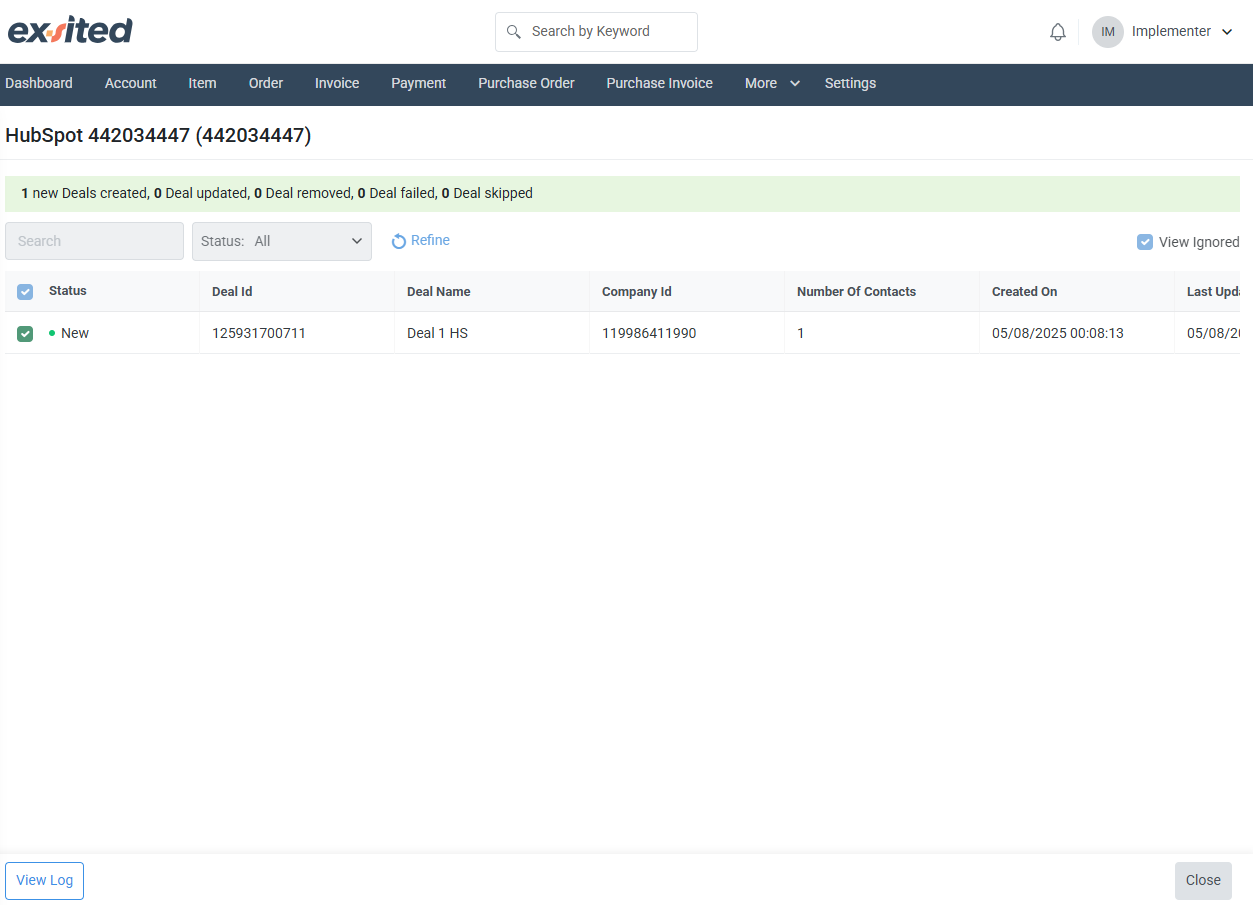
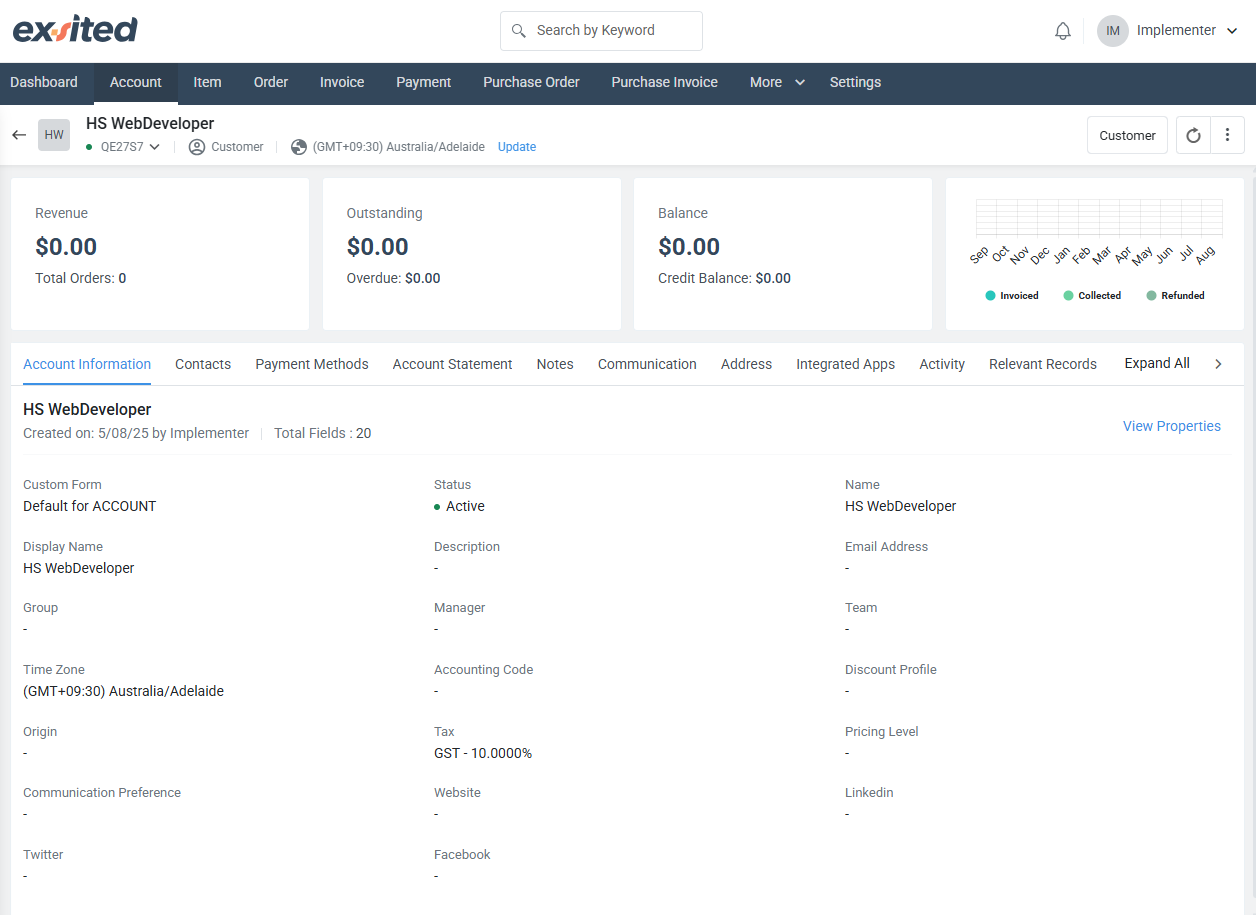
- After importing successfully, validate the items under Account in Exsited.
Importing Contacts
- If not already imported with the deal, go to:
- Exsited > Implementation > Import > Contacts
- Ensure:
- First Name, Last Name, and Email fields are mapped correctly

Exporting Exsited Details into HubSpot
- Go to
Account > Create Account
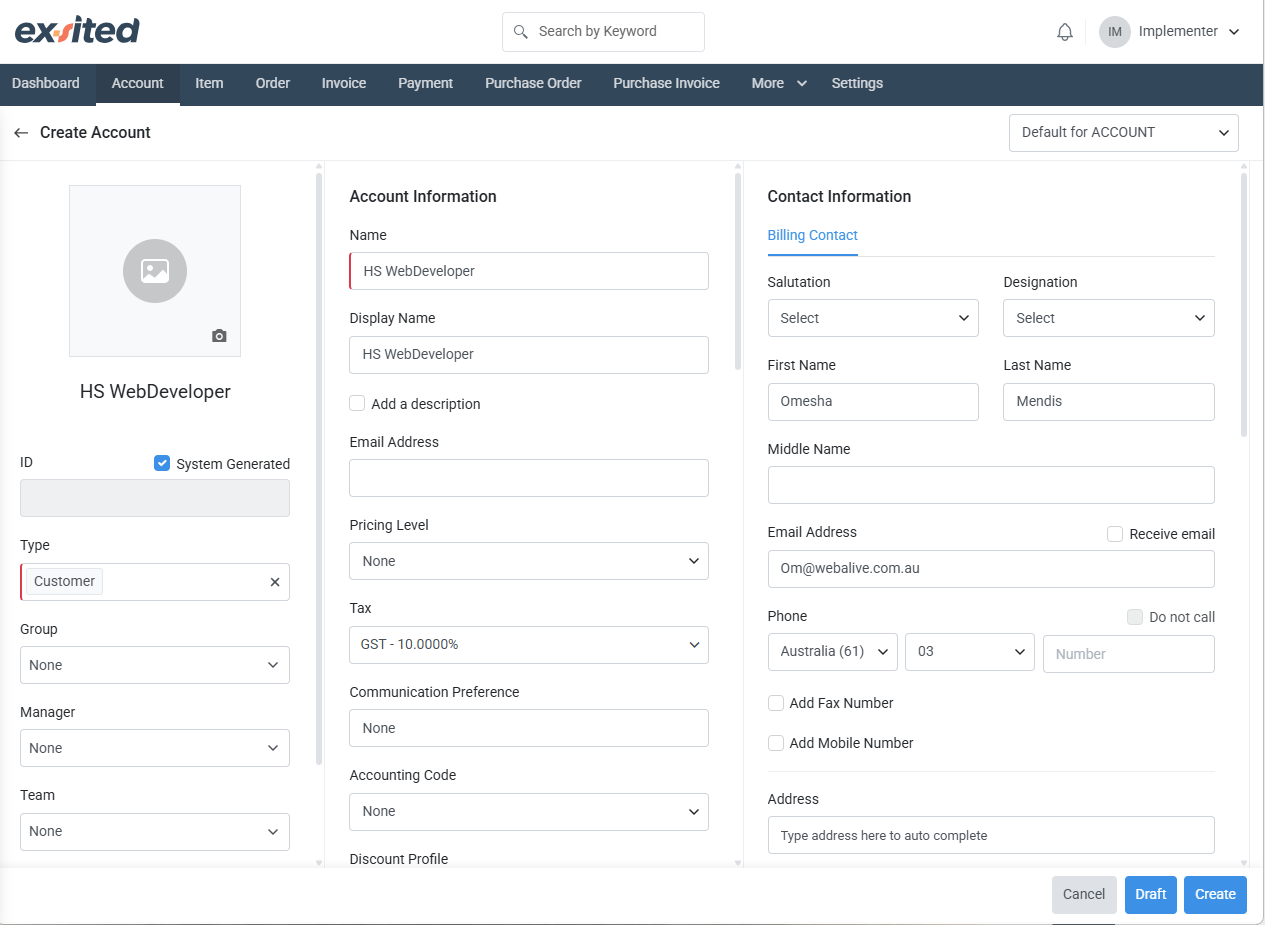
- Go to
More > HubSpot > New > Export
Automation Setup
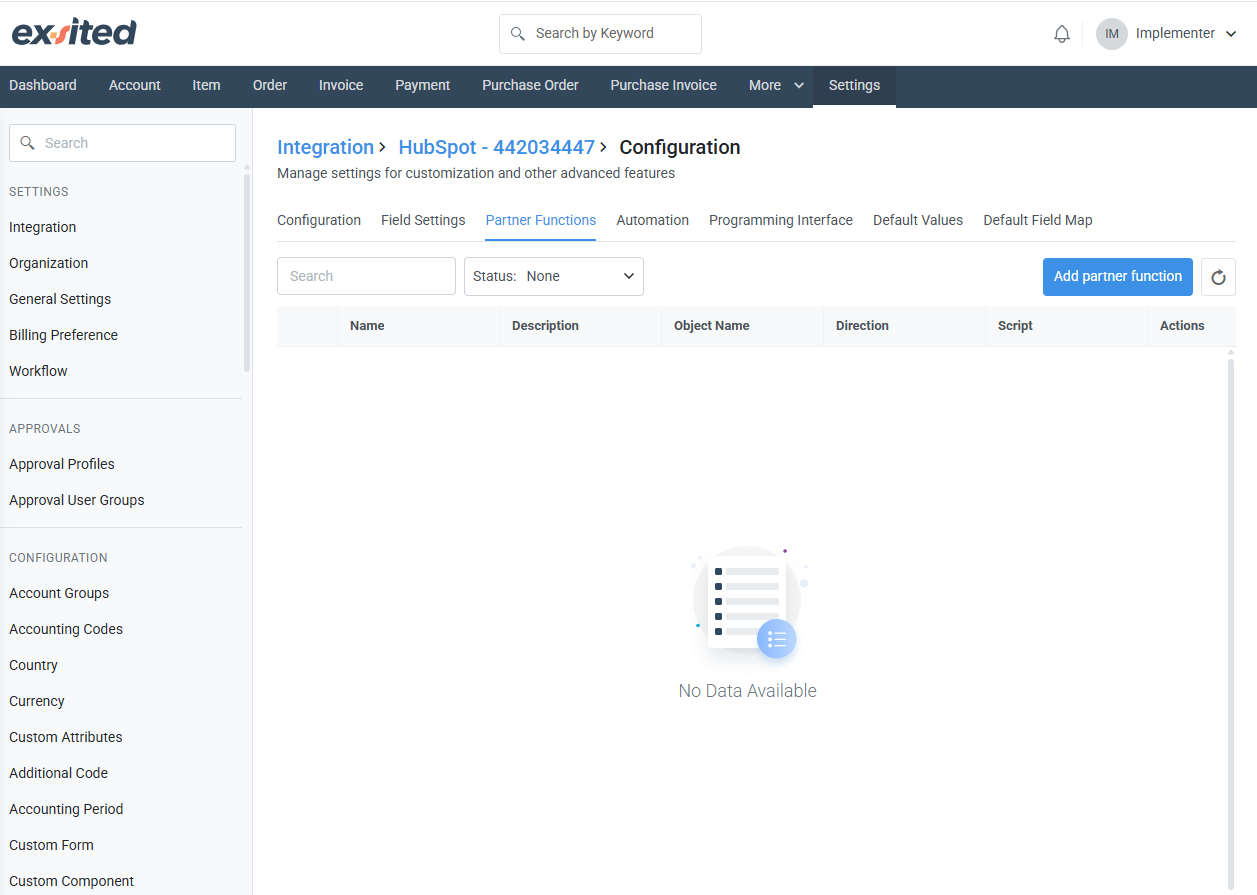
Create a Partner Function for Import and Export
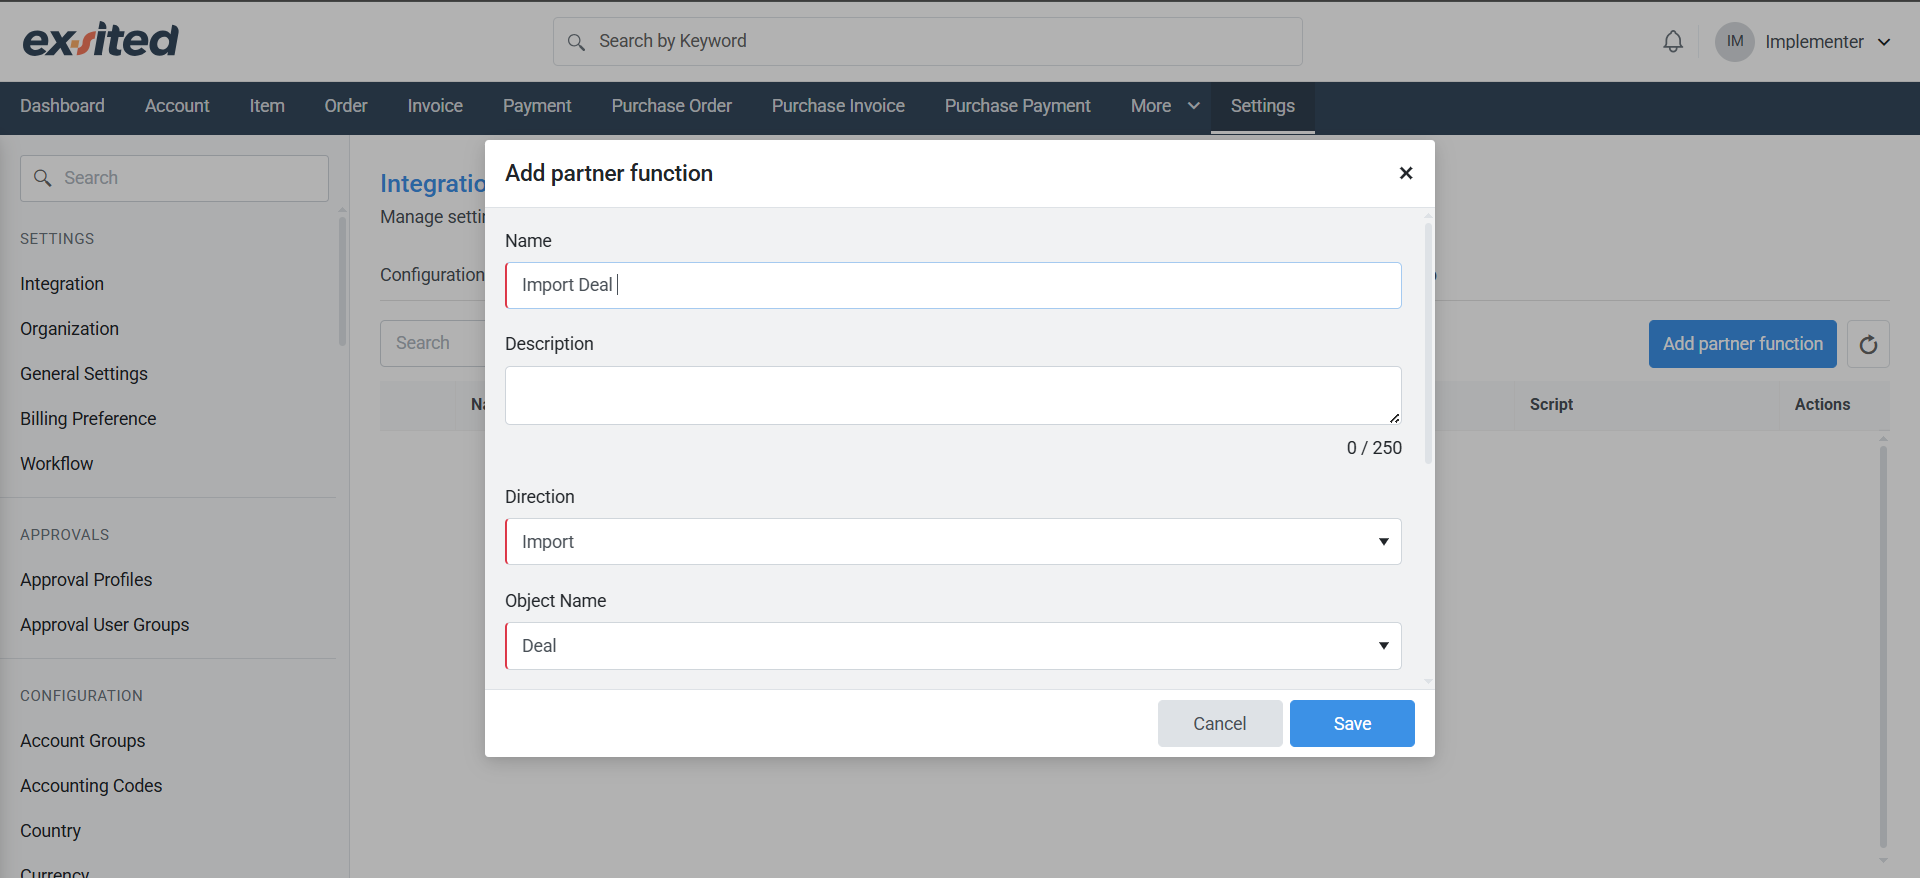
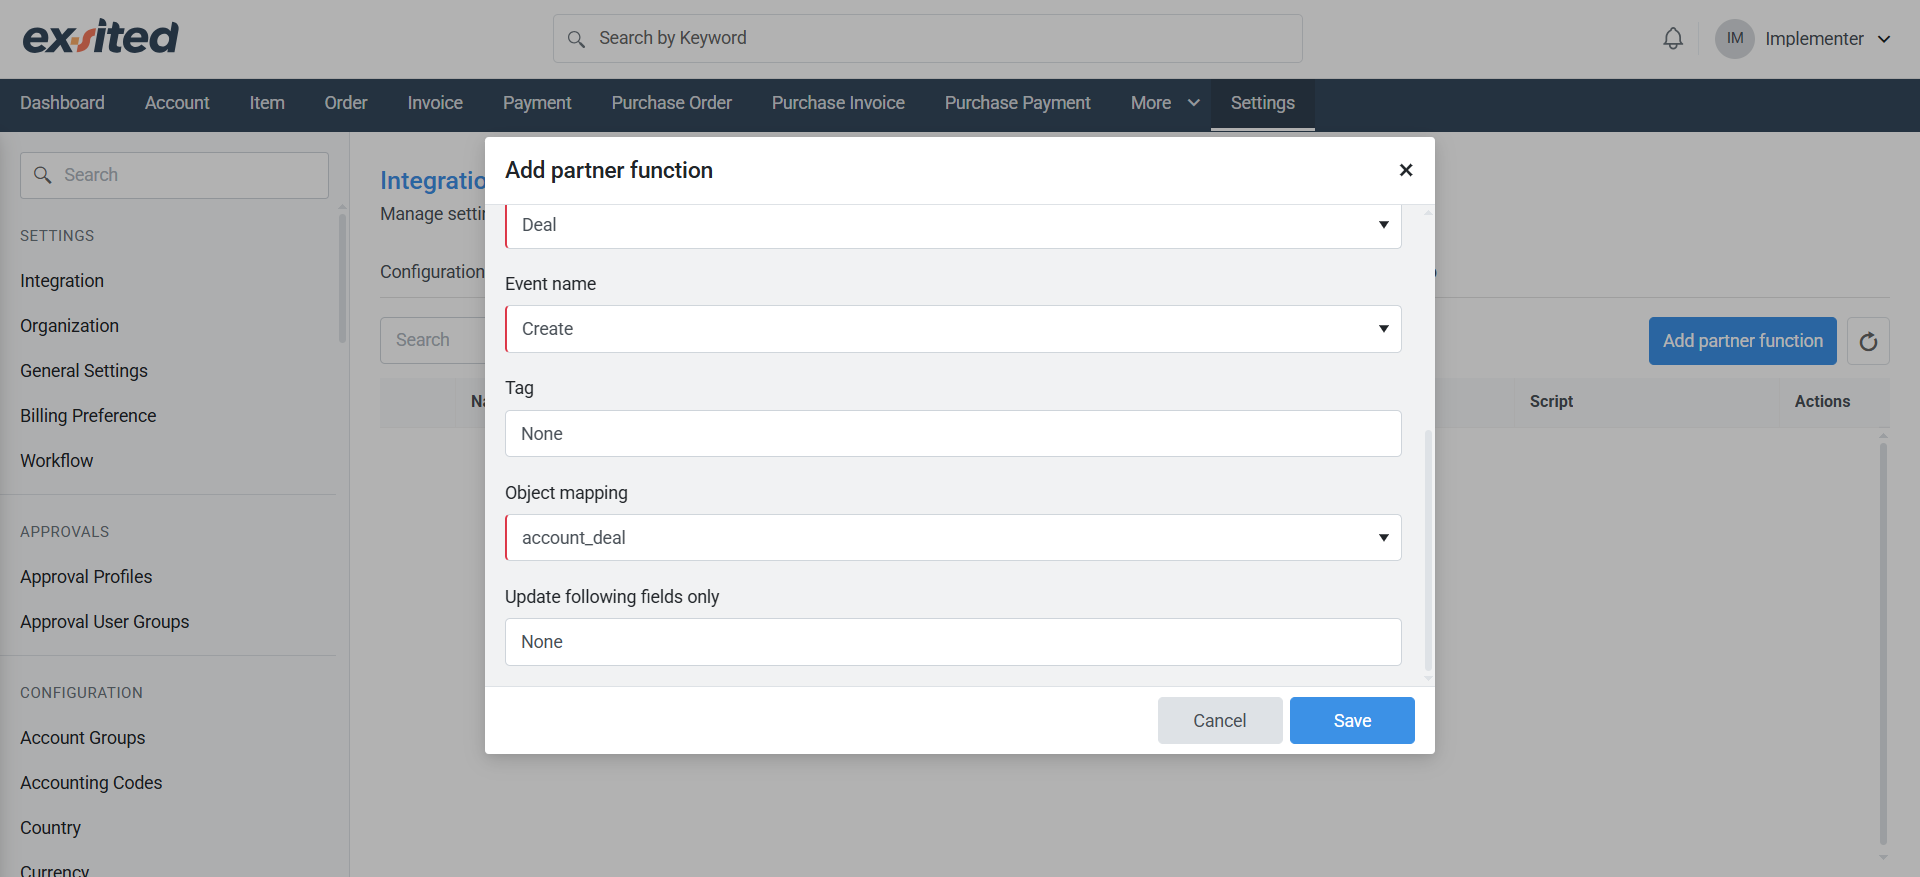
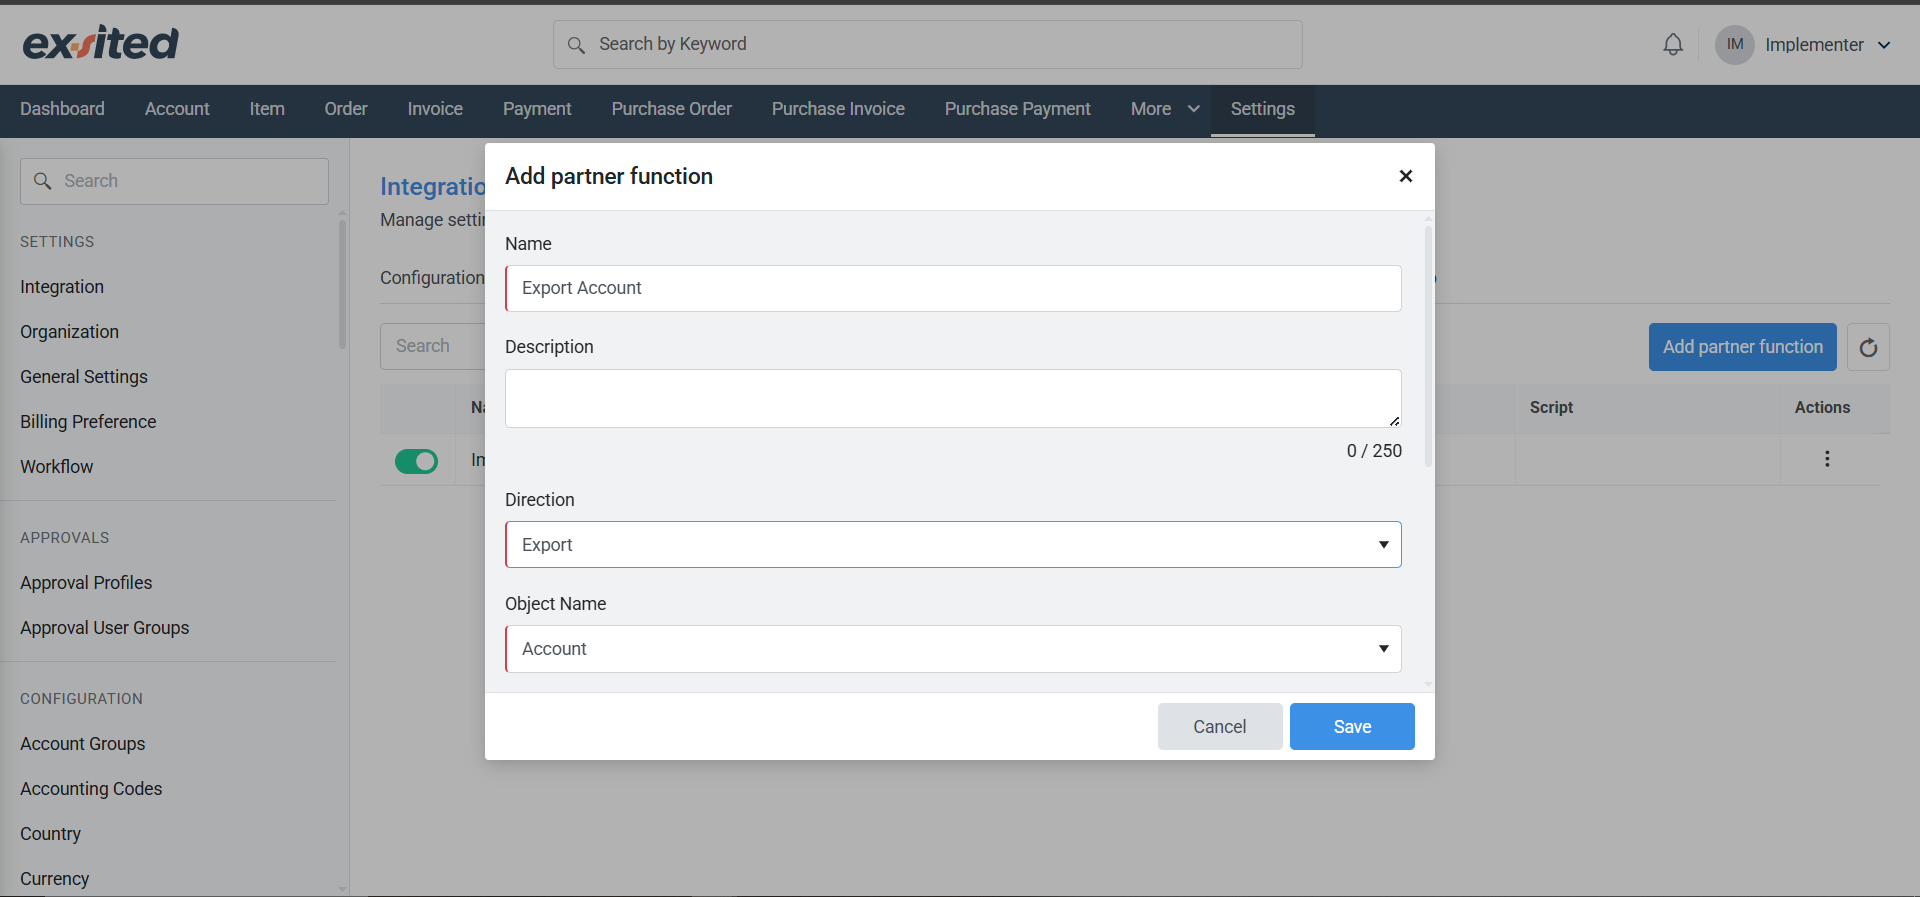
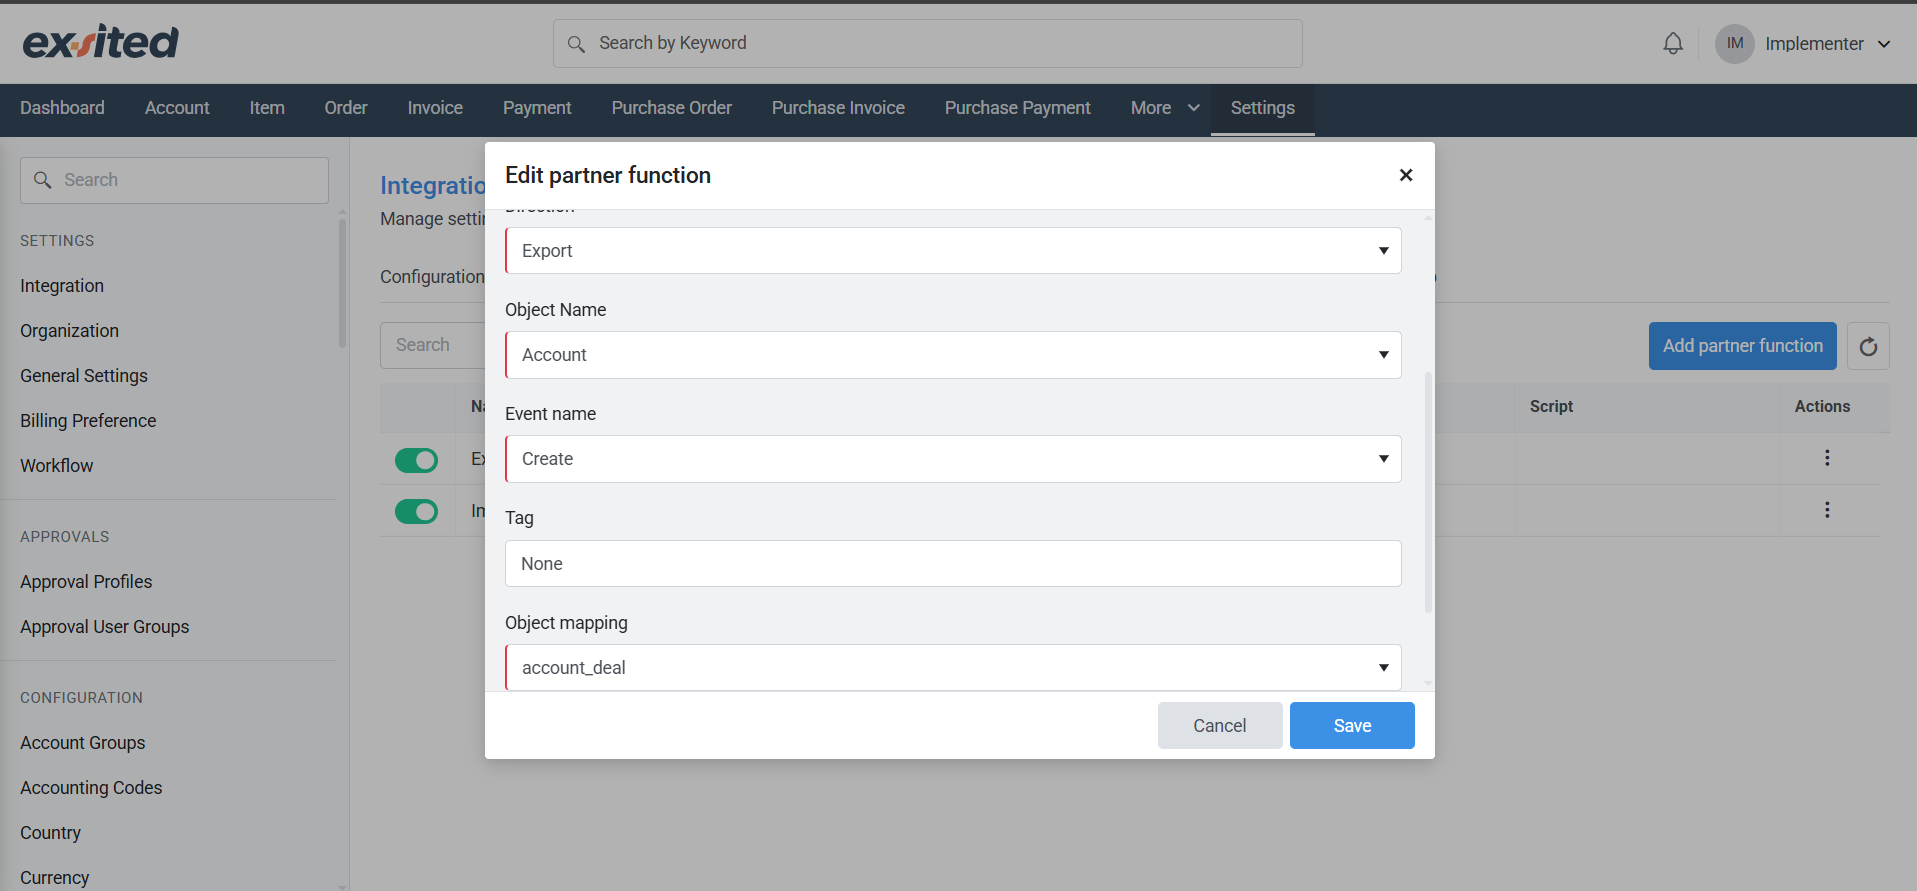
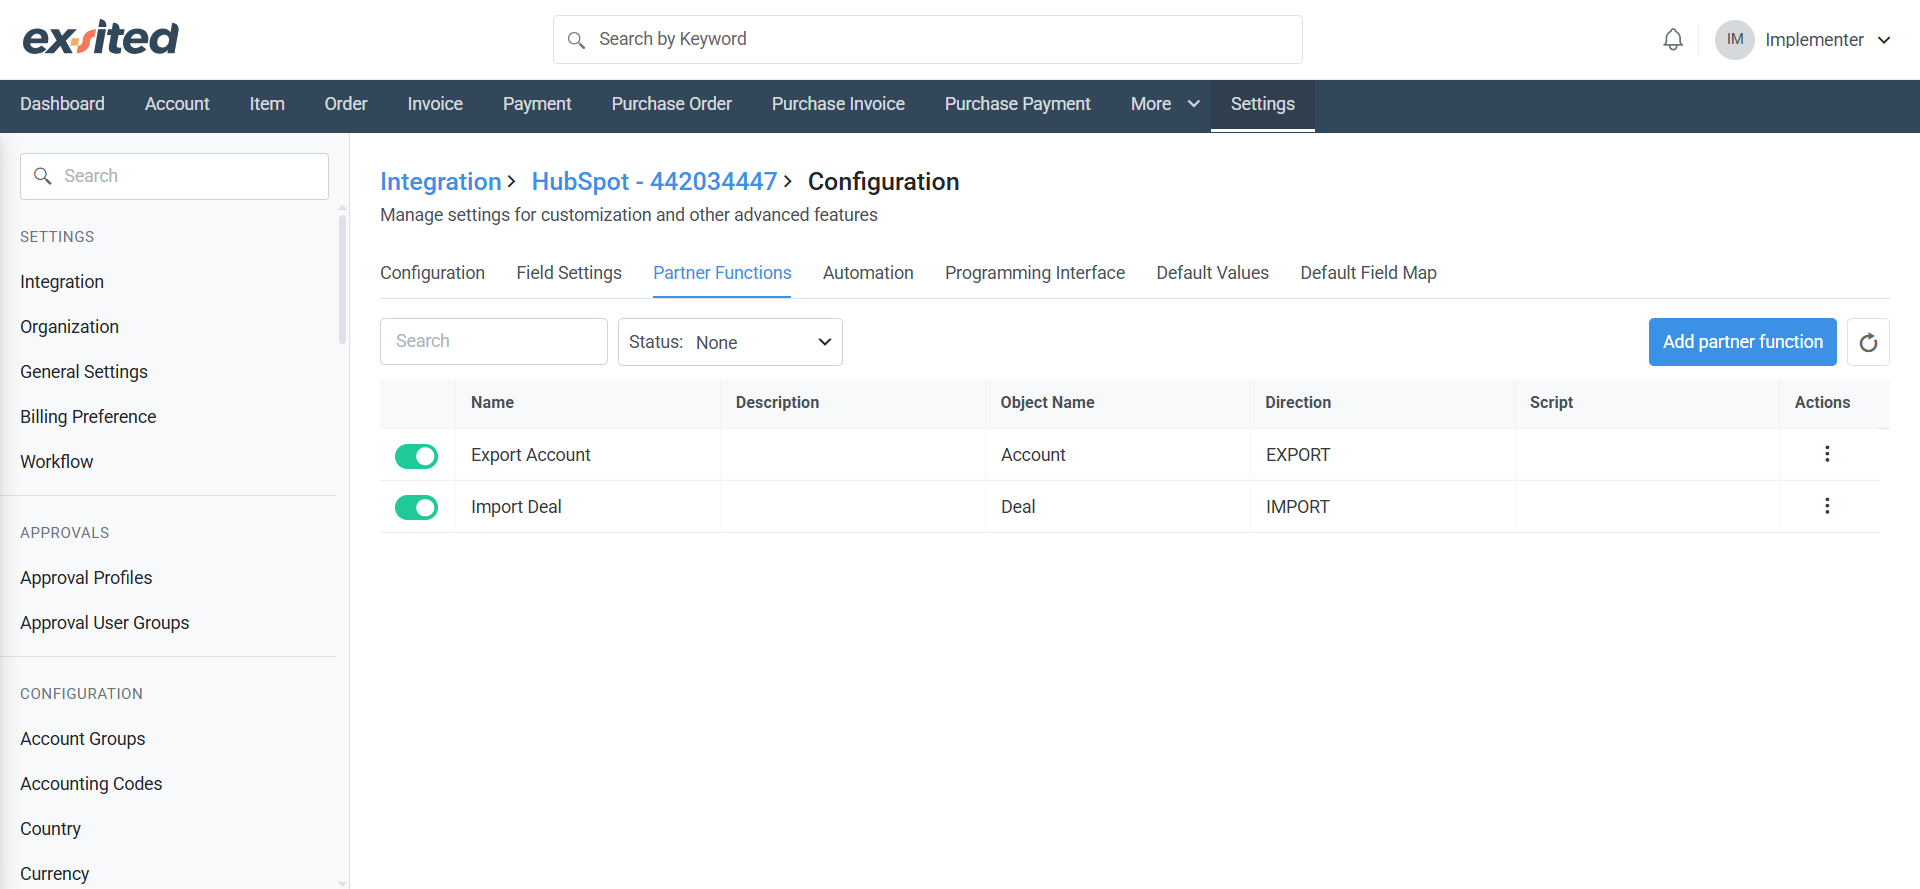
Navigation: Settings > HubSpot > Configuration > Partner Functions > Add Partner function
- To automate importing data from HubSpot into Exsited, a Partner Function needs to be defined with the direction set to Import and the appropriate object name (e.g., Company, Deal, Contact). According to the ‘Basic Configuration’ selection, the drop-down from object name is changing. This setup enables Exsited to continuously receive and process updated records from HubSpot without manual intervention. The import automation ensures that the latest master data from HubSpot is always synced and accessible within the Exsited platform.
2. On the other hand, to automate exporting data from Exsited to HubSpot, a separate Partner Function is configured with the direction set to Export. This allows real-time or scheduled export of records, such as Account, Contact, directly from Exsited into HubSpot.
Automation setup for Import Process
Navigation: Settings > HubSpot > Configuration > Automation > Add Automation
There are two ways to set up automation:
Choose one:
- Time-based automation runs on a schedule (for example, every 15 minutes or once per day). This is good if you want to sync regularly but don't need changes to appear instantly.
- Webhook-based automation happens in real-time. Exsited listens for changes in HubSpot and reacts immediately. This is ideal when you want your system to be updated instantly whenever something new is created in HubSpot.
By using Webhook-based import automation, businesses reduce manual work, improve accuracy, and keep their inventory and financial systems aligned at all times.
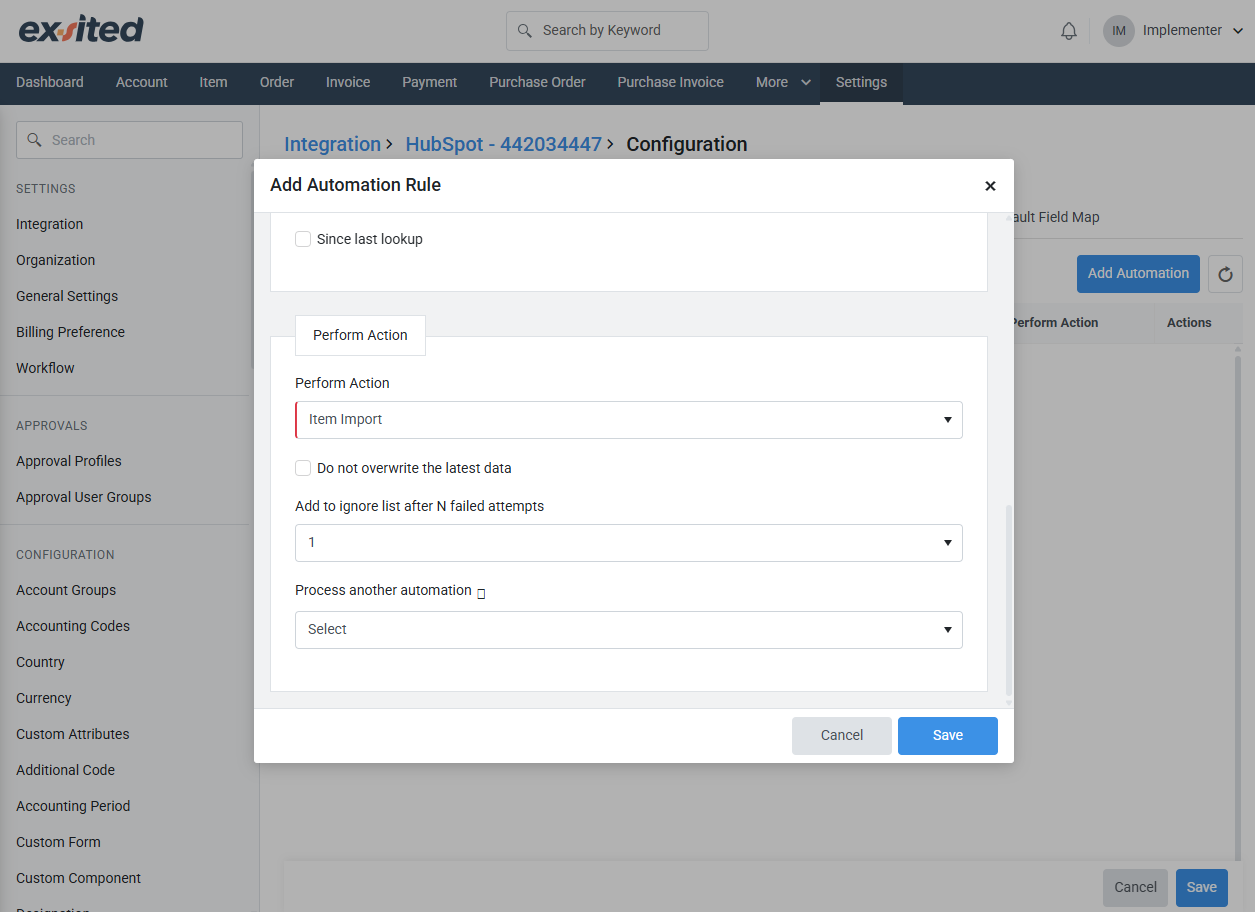
To automatically bring new data from HubSpot into Exsited without manual effort, we set up an import automation rule. This setup is important because it ensures that newly created contacts, deals in HubSpot are always up to date in Exsited. Without automation, users would have to perform manual imports each time a change happens, which increases the risk of data mismatch or delays in business processes.
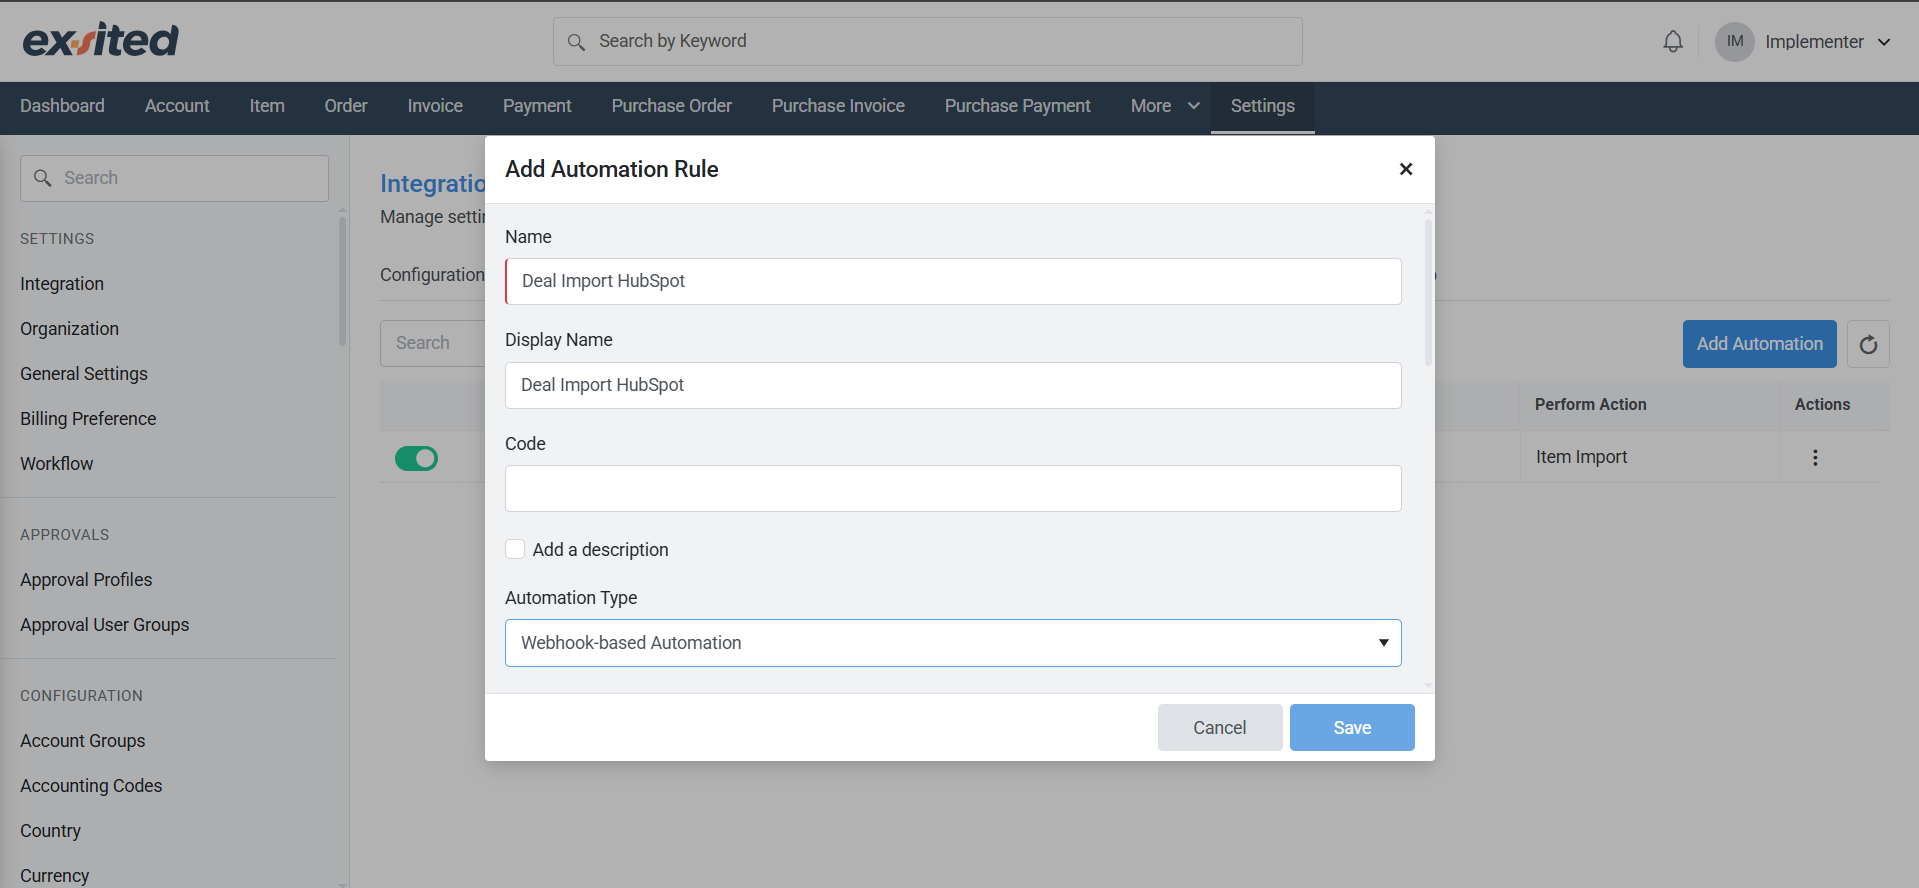
In this example, the automation rule is named "Deal Import HubSpot". The automation type selected is Webhook-based Automation, which means Exsited will automatically import data as soon as a new deal, contact is created in HubSpot. Under the Trigger Condition, the direction is set to Import, it applies to HubSpot - Deal, and it triggers when the data is New. This means every time a new deal is added in HubSpot, it will be instantly synced into Exsited without any delay.
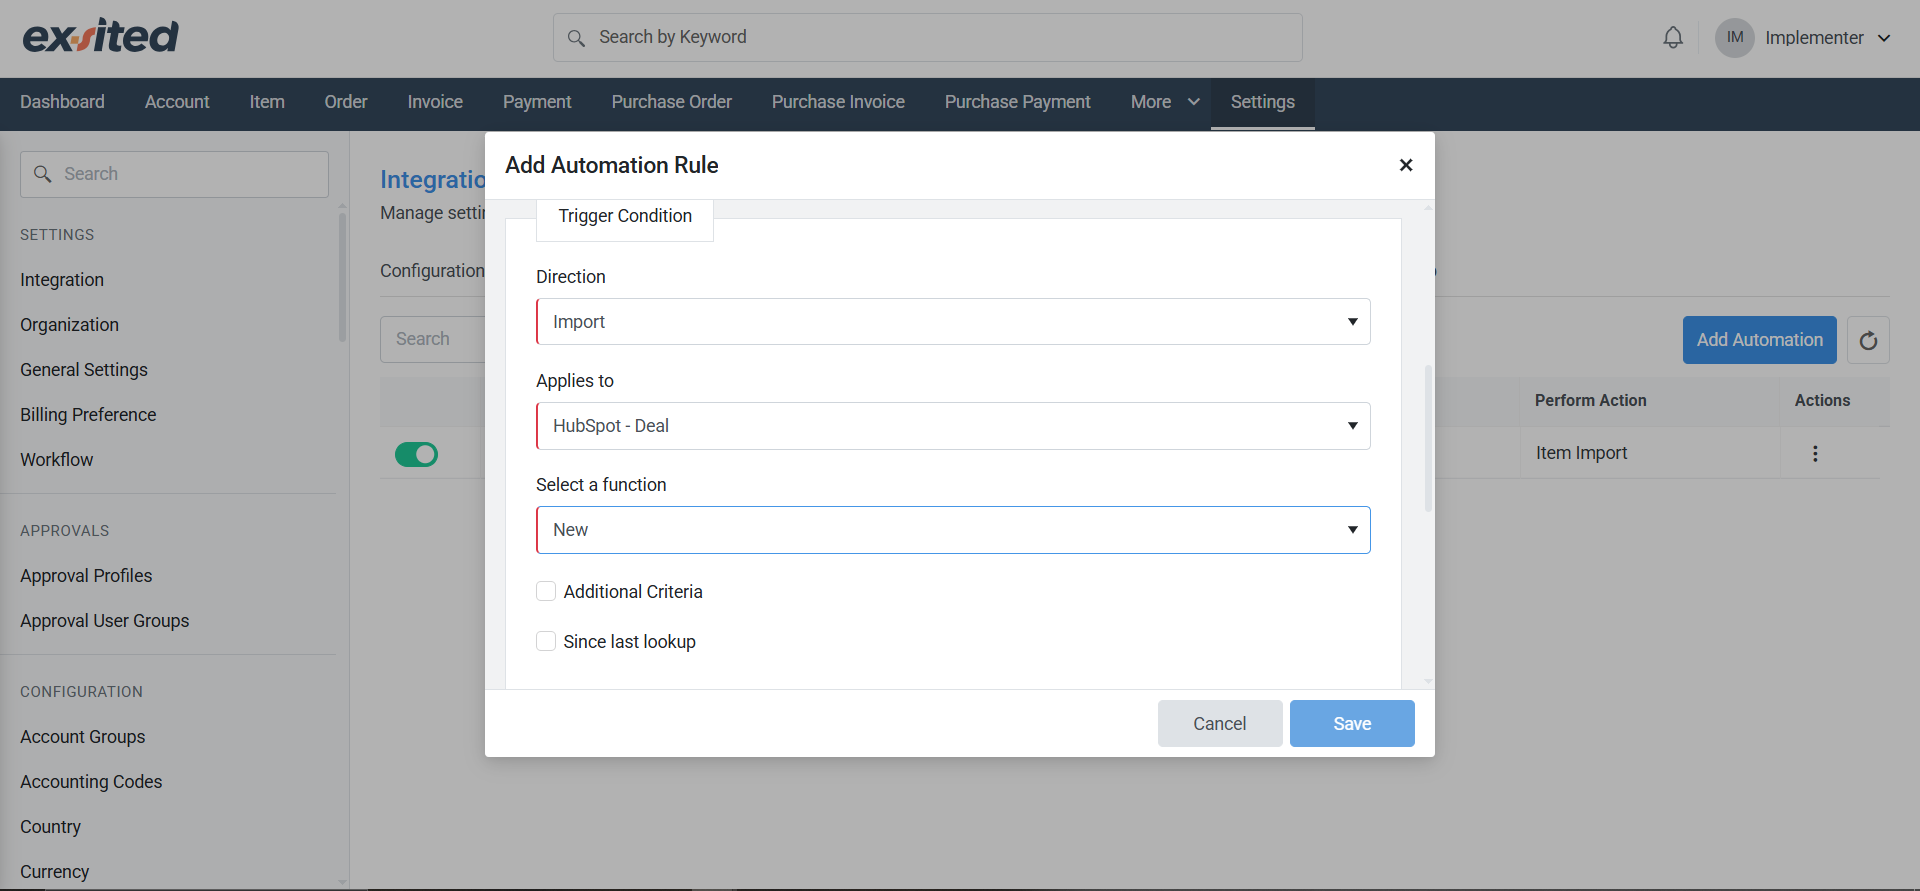
The Perform Action section defines what the system should do. Here, the action is HubSpot Item - Import, which tells Exsited to bring in the account, deal details. There are also helpful options like ignoring account, deal details after failed attempts or avoiding overwriting recent data. These controls help prevent system errors and protect the accuracy of your records.
Automation setup for Export Process
Add Custom Event for Export
Navigation: Settings > Events and Event Profiles > Custom Events > Add Custom Events
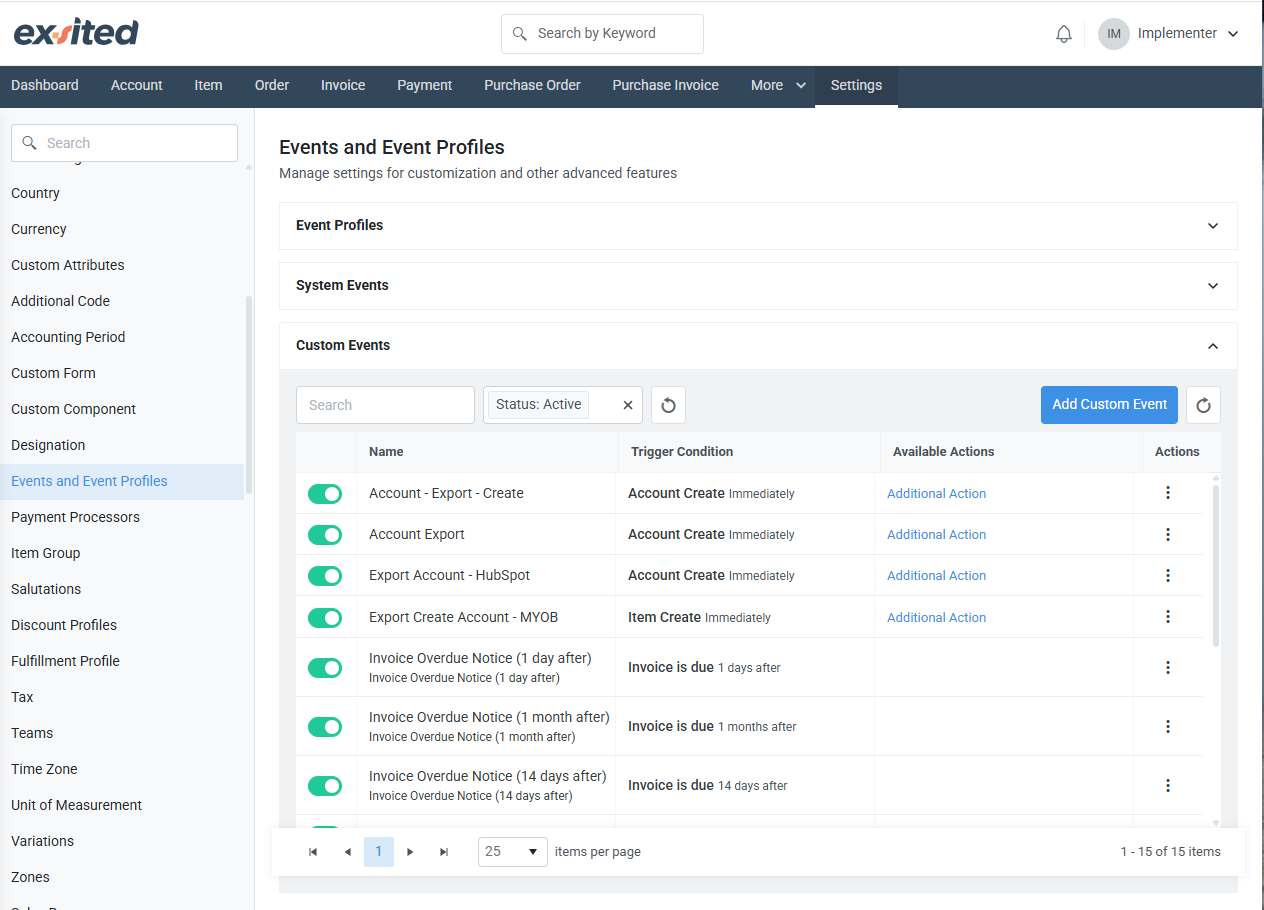
- Click Add Custom Event
- Configuration of triggers to start automated data exports.
a) To automate the export of accounts from Exsited to HubSpot, a Custom Event must be created. This event acts as a trigger that tells the system when to perform a specific action, such as exporting data based on defined system activity. The setup is essential for reducing manual work and ensuring that data updates in Exsited are reflected in HubSpot without delays.
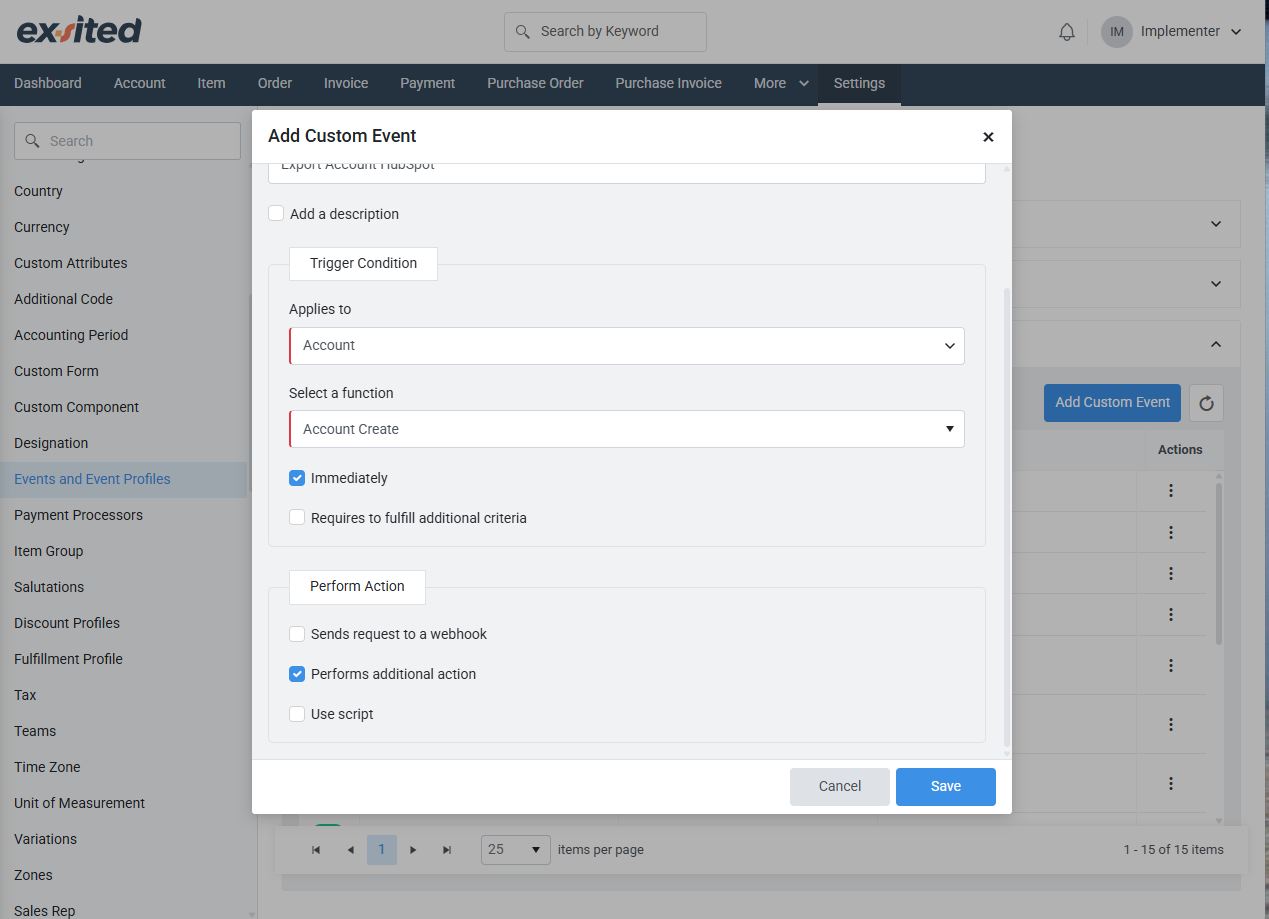
b) In the configuration screen, a Name and Display Name are defined for the event, for example, “Export Account HubSpot” The Applies to field is set to Account, which indicates that this automation rule will be triggered by Account-related actions. You then choose a specific function, such as Account Create, which means the export will trigger whenever a new account is created in Exsited.
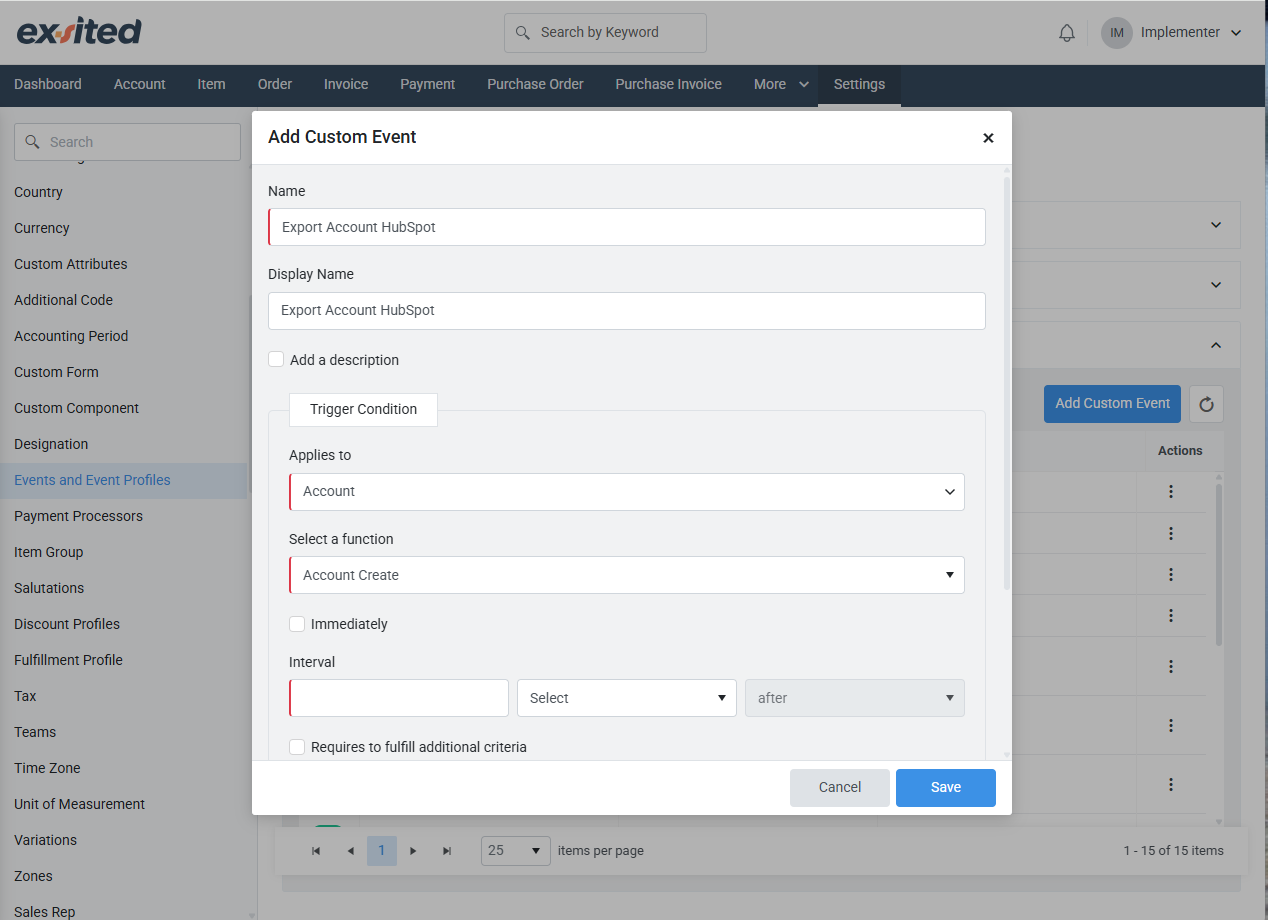
c) You also define the trigger timing and behaviour. In this example, the action is configured to execute immediately, meaning the export will be initiated as soon as the trigger occurs. The “Performs additional action” box is checked, which enables the system to carry out the export operation automatically. This ensures real-time data syncing without requiring the user to manually initiate an export every time.
d) By setting up this Custom Event, businesses can maintain consistent and up-to-date product records across both platforms. It plays a vital role in eliminating data entry duplication and ensures that HubSpot always contains the most current account information available in Exsited.
Add Event Profiles for Export
Navigation: Navigation: Settings > Events and Event Profile > Event Profile
After selecting the profile, click on the number under the “Associated Events” column to manage linked events. In the Custom Events tab, you will see a list of all available events. Locate your custom event (e.g., "Export Account HubSpot") and tick the Enabled checkbox to activate it. This step ensures the event will now respond to defined triggers such as account creation or updates, and perform the corresponding export actions.
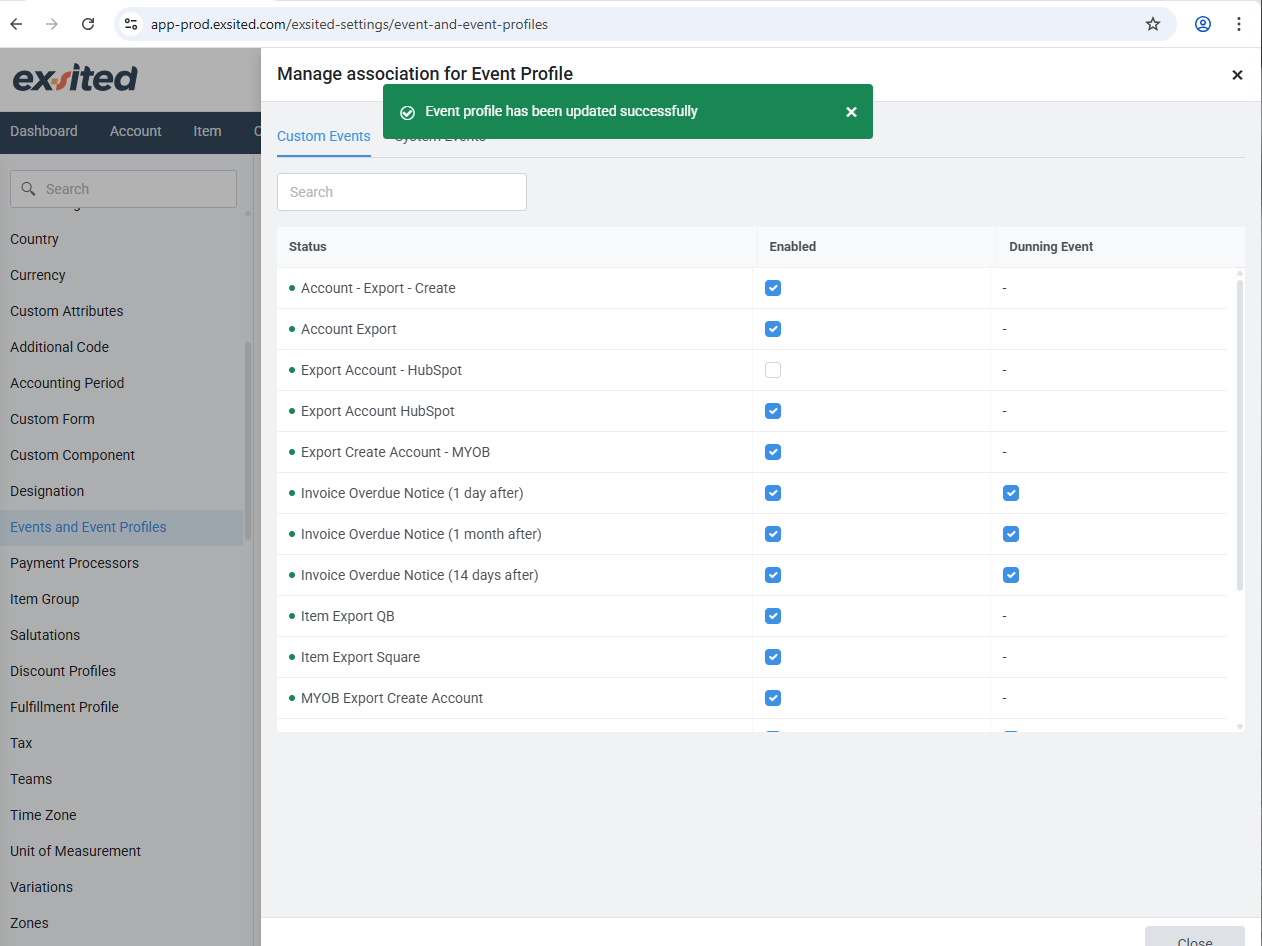
When the event is enabled successfully, you will see a green confirmation message stating “Event profile has been updated successfully.” This confirms that the automation is now live and ready to operate. If the event remains disabled, no automation will occur even if the account trigger is met.
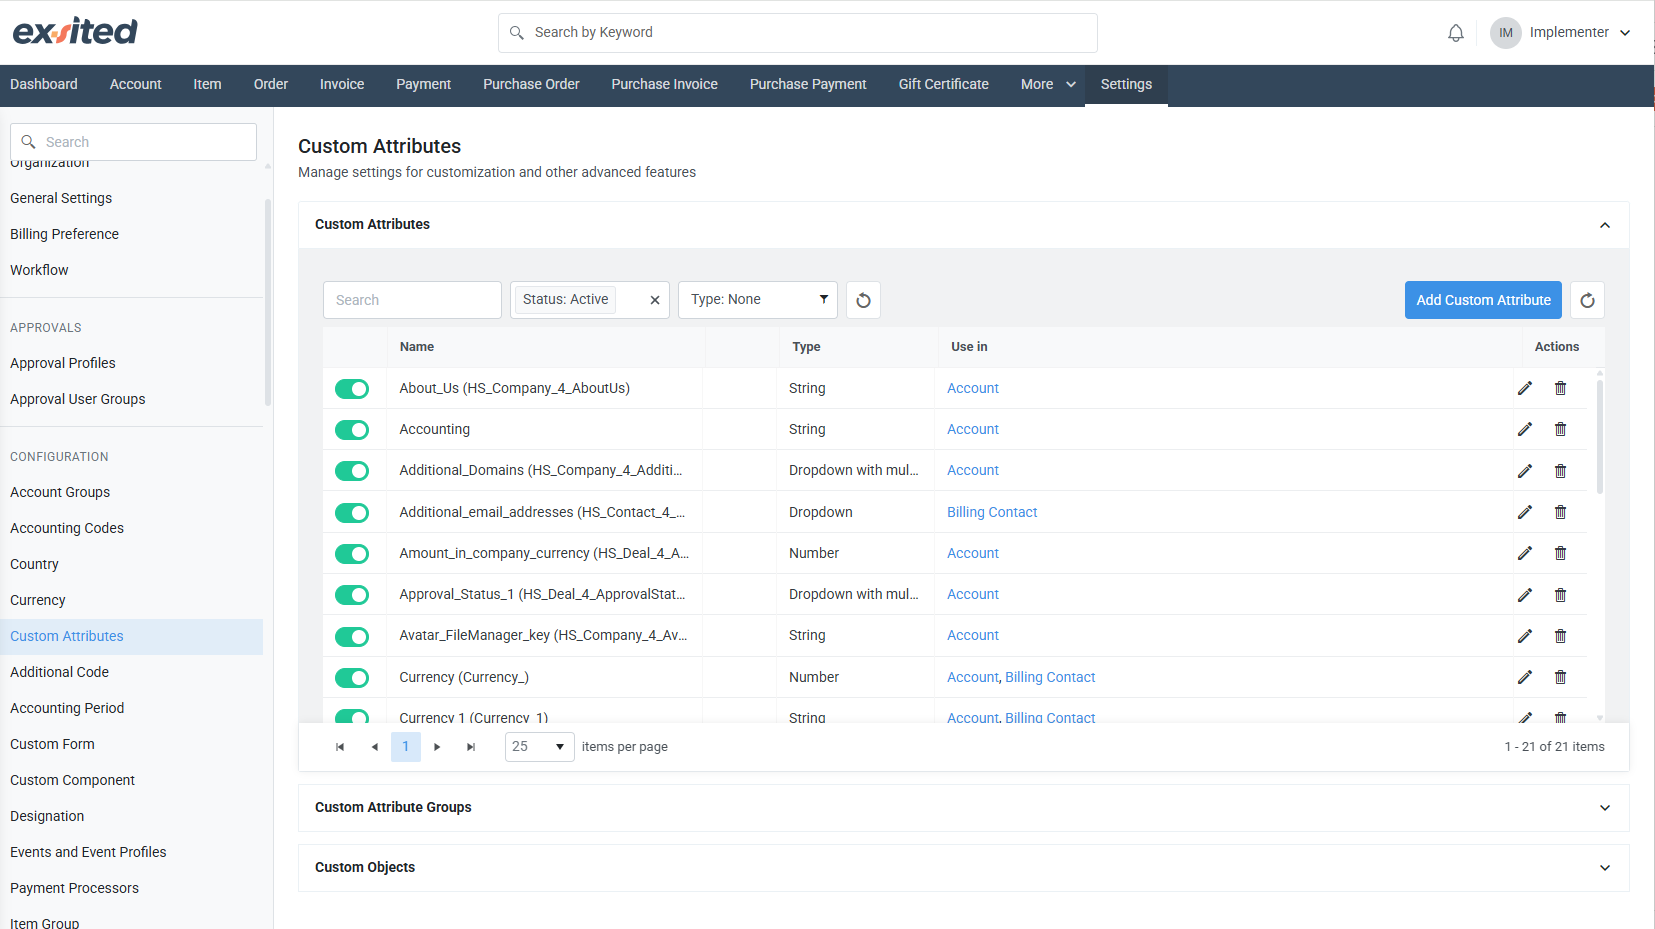
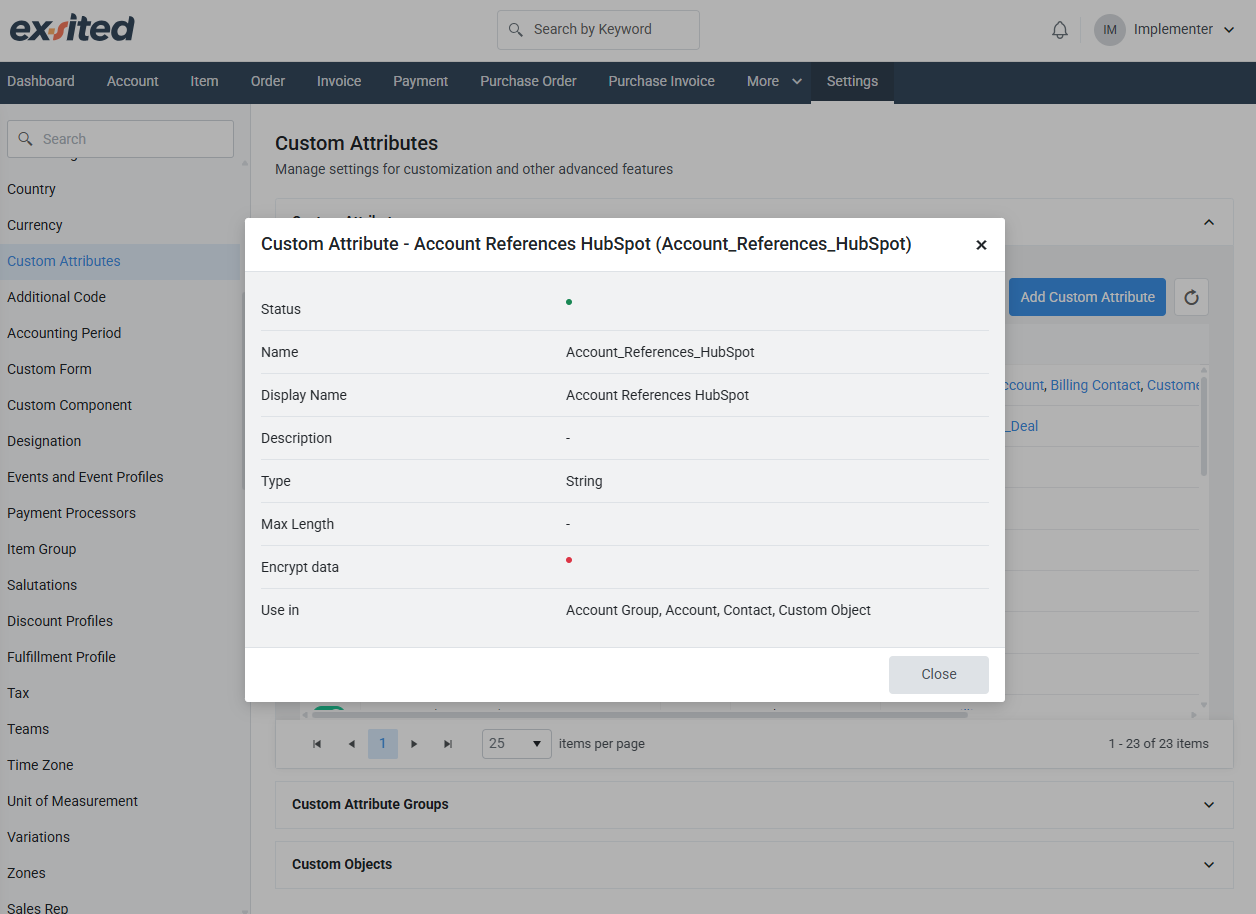
Attribute Mapping (Custom Fields)
The Custom Attributes section in Exsited enables users to define additional fields, like references, to be used across modules such as invoices, payments, and credit notes. These attributes help align Exsited records with HubSpot’s data requirements for successful integration.
Navigation: Settings > Configuration > Custom Attributes
To ensure accurate data mapping between Exsited and HubSpot, it's important to define customer reference fields. In Exsited, this is done by creating Customer Attributes.
This allows for:
- Proper linking of customer records during import/export
- Error-free syncing of customer-related data
- Improved integration accuracy and traceability
By setting up custom attributes in Exsited that mirror HubSpot's customer references, you establish a consistent and reliable mapping between the two platforms.
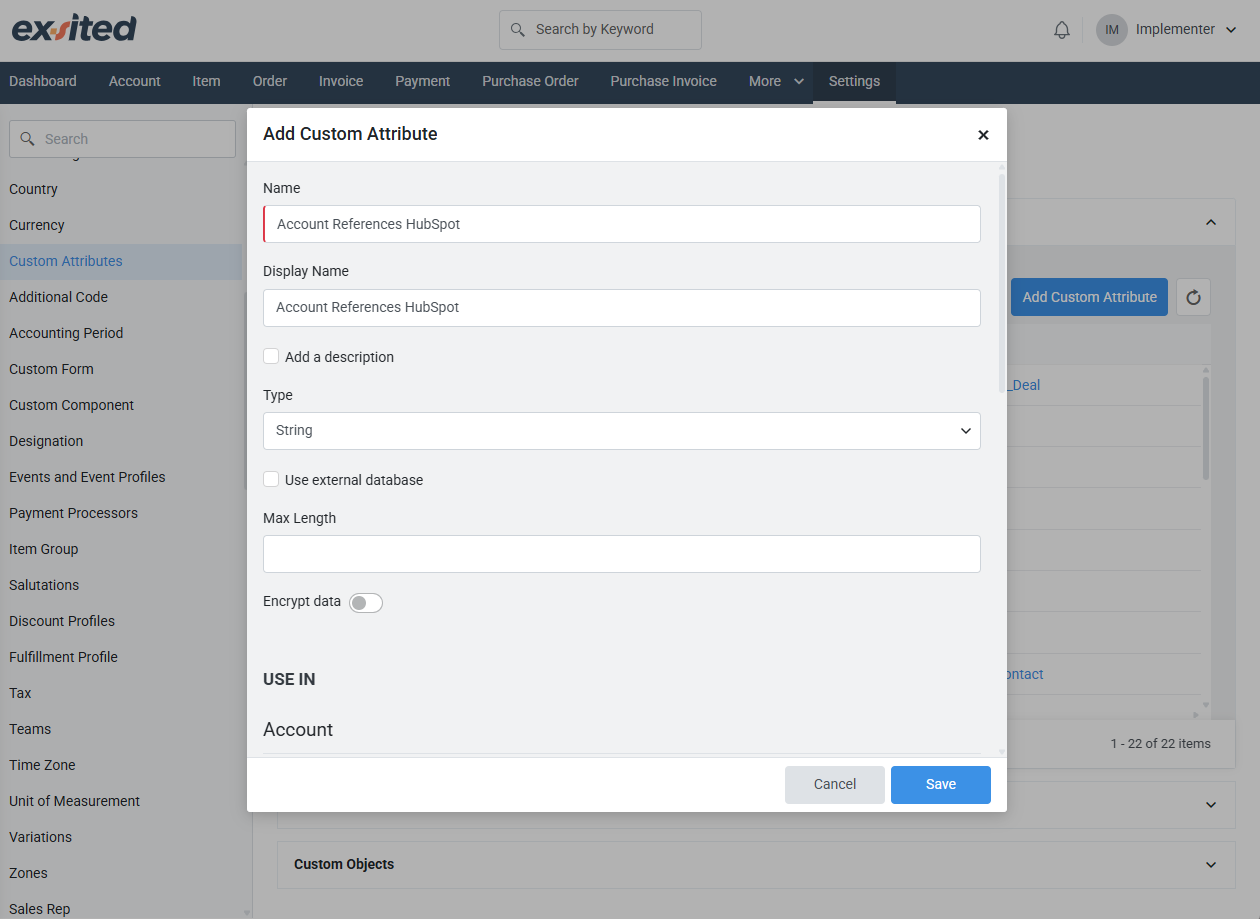
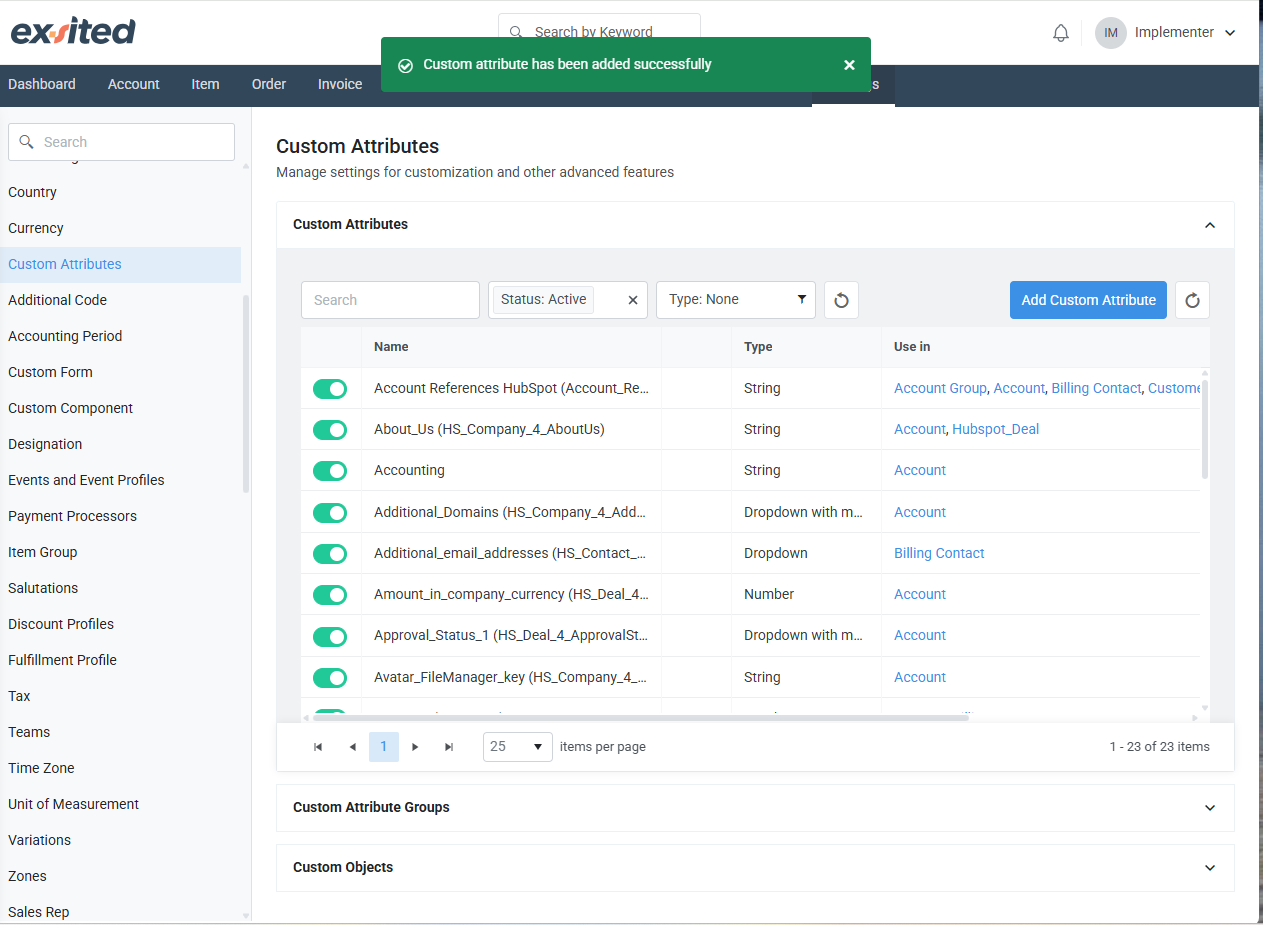
To support the export process in Exsited, custom attributes such as "Account References HubSpot" should be added and mapped to HubSpot fields. This ensures that essential identifiers are included during account, deal data exports for accurate data synchronisation.
This mapping ensures that data fields match correctly across both systems.
Once the field mapping is completed, you will be able to successfully export and import transactions between Exsited and HubSpot.
These integration processes can then be automated by using the Partner Function and Automation settings, allowing for seamless and real-time data synchronisation without manual effort.
Final Test & Validation
- Run manual imports/exports first
- Confirm accounts are correctly linked and synced
- Enable automation after validation
Best Practices
- Always test with a small sample before enabling full sync
- Maintain a backup of critical data
- Regularly review account mapping
- Monitor sync logs for errors or mismatches