Overview
This guide outlines how to integrate MYOB with Exsited. The integration enables real-time data exchange across inventory, customer and supplier records, invoicing, payments, and reporting. It is designed for administrators, finance managers, ERP consultants, and integration engineers, covering both setup and ongoing maintenance to ensure accurate and compliant data flow.
Benefits
- Automated data flow across finance and operations
- Fewer manual entry and reconciliation errors
- Streamlined accounting, inventory, and purchasing
- Improved tax and compliance accuracy
- Real-time financial and operational visibility
- Faster close with fewer data errors
Best Practice
Monitor sync logs, update mappings, and use automation. Refer to MYOB’s API documentation or your integration support team for technical help.
Prerequisites
Ensure the following are prepared before starting:
- Active MYOB Account (Business or AccountRight Live)
- Admin access to Exsited
- API Key or login access for both platforms
- MYOB authentication code (required for live access)
Set Up Your MYOB Organisation
Log in to MYOB and ensure your company profile is fully configured:
- Select MYOB from the available platforms
- Log in to your MYOB account using your credentials
- Approve OAuth Authentication – you may receive a verification code via email
- Choose the correct MYOB business file (if multiple businesses are listed)
- Click Authorise Access
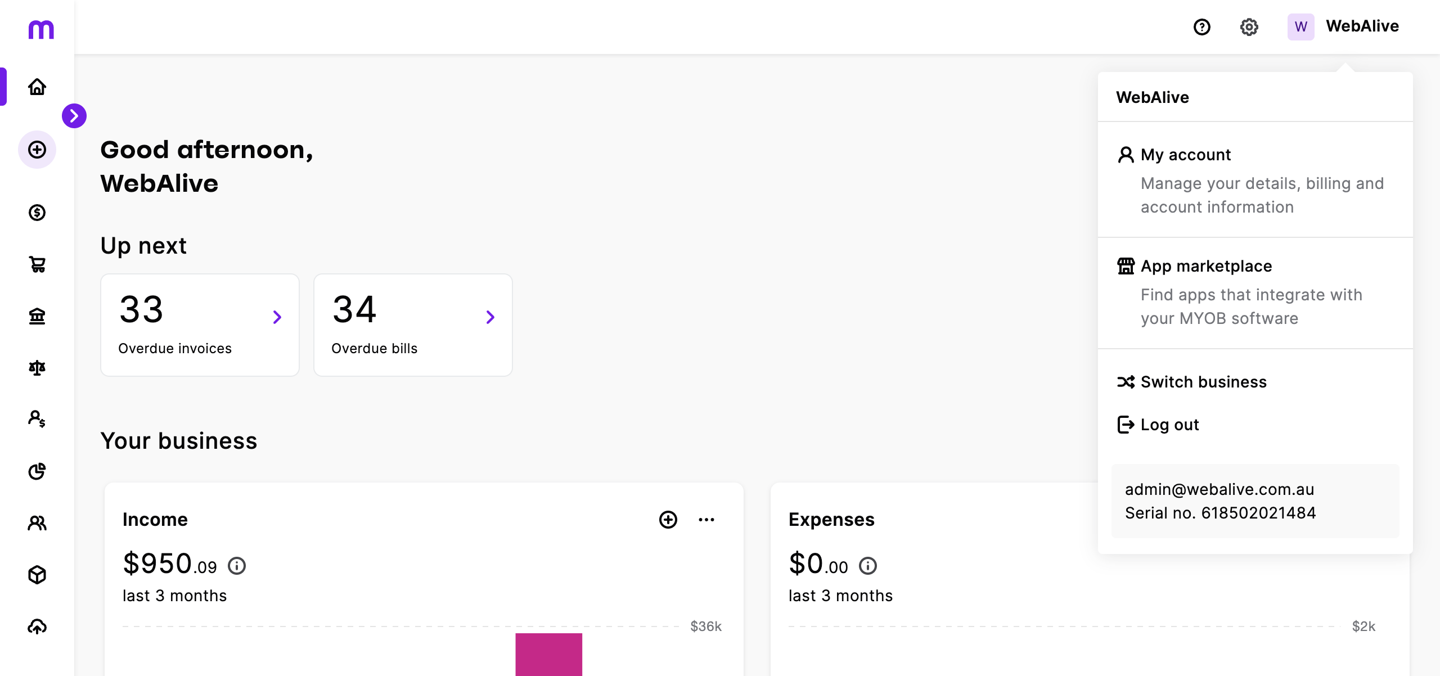
In MYOB, each business is managed as a separate company file, providing a dedicated environment for handling that organisation’s financial data, inventory, payroll, and tax compliance. Unlike platforms with multi-organisation dashboards, MYOB maintains a clear separation between business entities, ensuring focused control and minimising the risk of data overlap. Users can access and switch between multiple MYOB business files using their login credentials, but each file operates independently to maintain the integrity and accuracy of financial records.
The initial setup for adding a business in MYOB includes the business name, industry, country, and GST registration. Accurate setup here ensures correct tax handling, regional settings, and compliance from the start.
Accurate setup ensures compliance and enables correct financial mapping during integration.
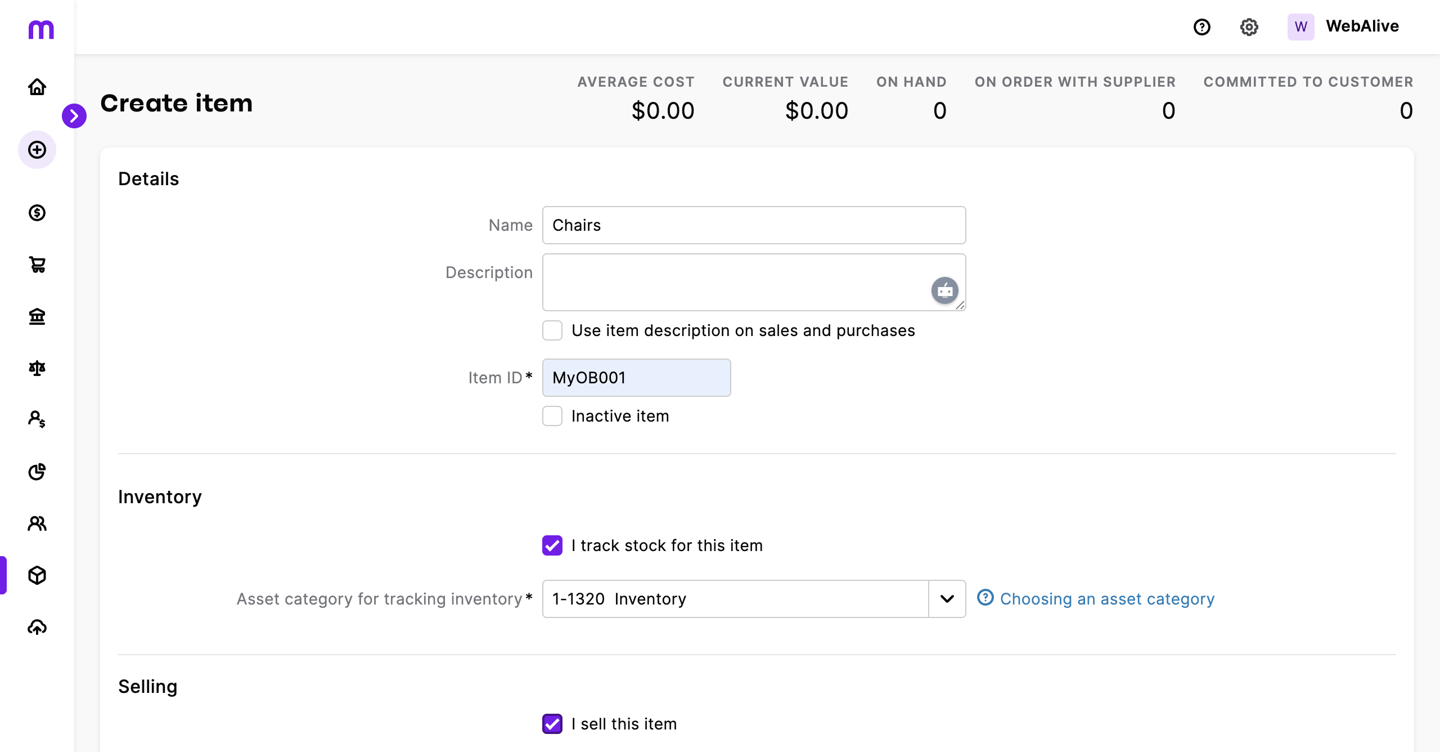
Add Inventory Items in MYOB
Navigation Path: MYOB > Products & services > Create Item
For each item:
- Provide Item Number and Name
- Enter Unit Price and Item Description
- Enable "I track stock for this item" for inventory control
- Assign:
- Inventory Asset Account
- Income Account (Sales Revenue)
- Cost of Sales Account
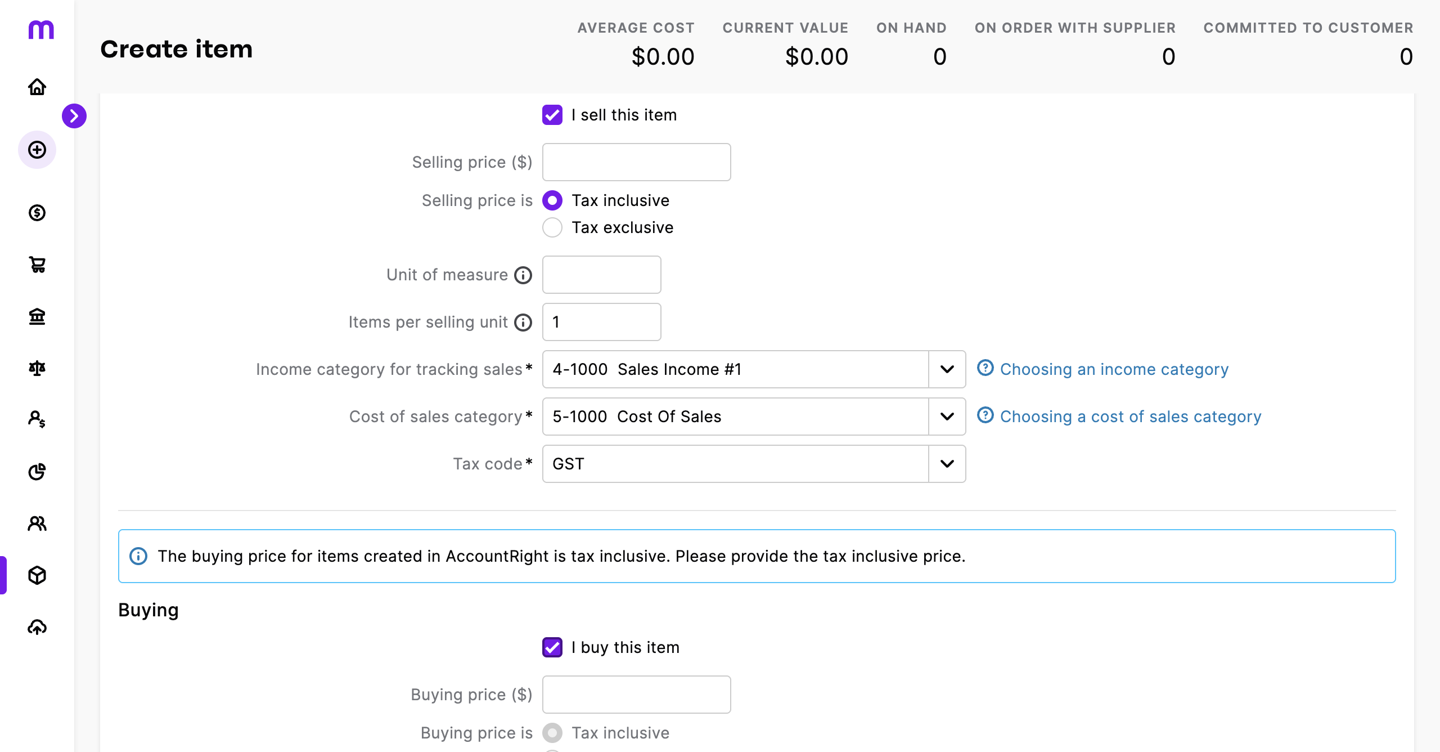
In this screen, users can create or edit an inventory item by assigning the correct Inventory Asset Account, Cost of Goods Sold Account, and Sales Account. Defining these accounts ensures accurate inventory tracking and proper financial reporting in the system.
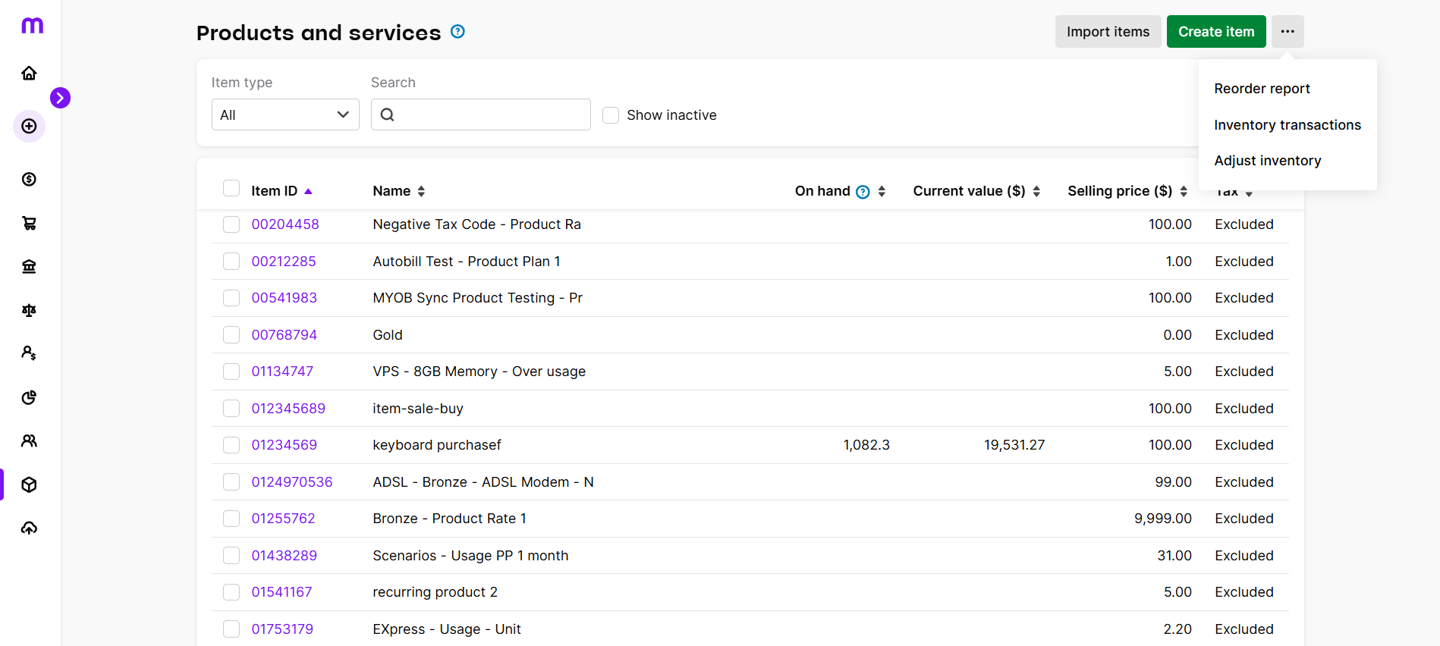
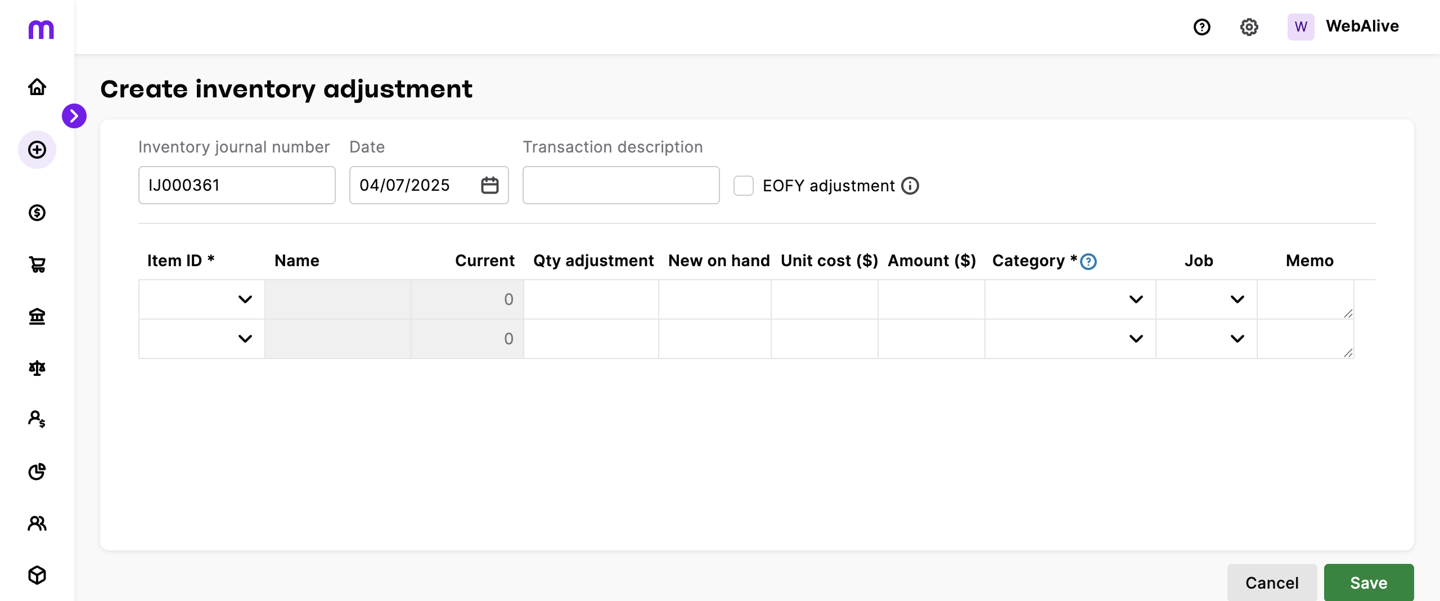
Inventory adjustments in MYOB enable users to modify item quantities, unit costs, or total value to reflect real-world stock levels accurately. These adjustments are processed through the Product and Services> Adjust Inventory functions, which automatically update linked accounts such as Inventory, Cost of Sales (COGS), and Inventory Variance. Each adjustment is recorded with supporting details and transaction references, ensuring auditability and alignment with financial reporting standards.
Connect MYOB to Exsited
Navigation Path: Exsited > Integrations > Add Integration
- Select MYOB from the available integration options
- Click "Connect"
- Choose your business organisation
- Allow data access when prompted
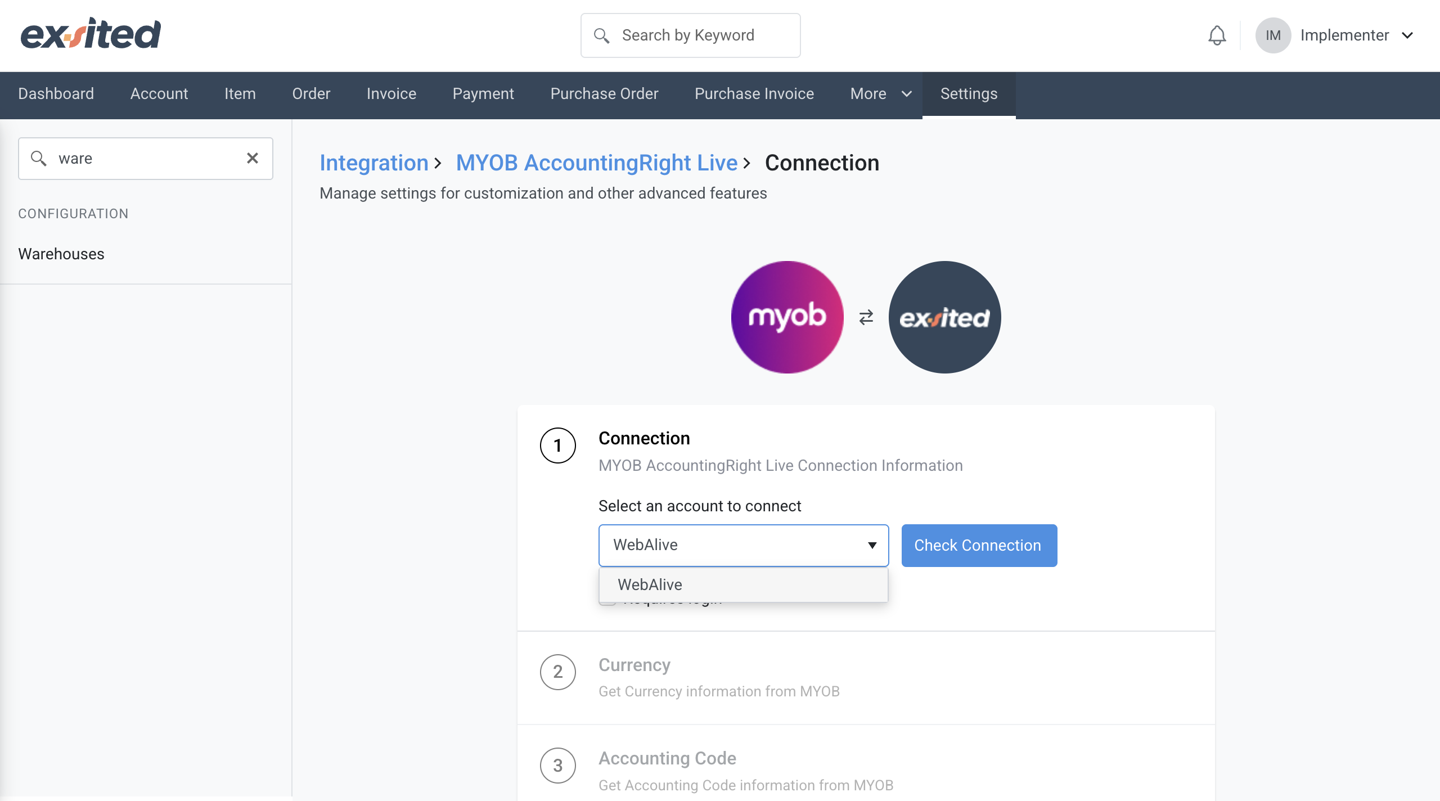
The authorisation step is where Exsited requests access to a MYOB business file. Users must log in to their MYOB account and select the appropriate business file to grant secure permission. This step ensures that Exsited can establish a trusted connection with the selected MYOB organisation, enabling accurate and controlled data integration between the two platforms.
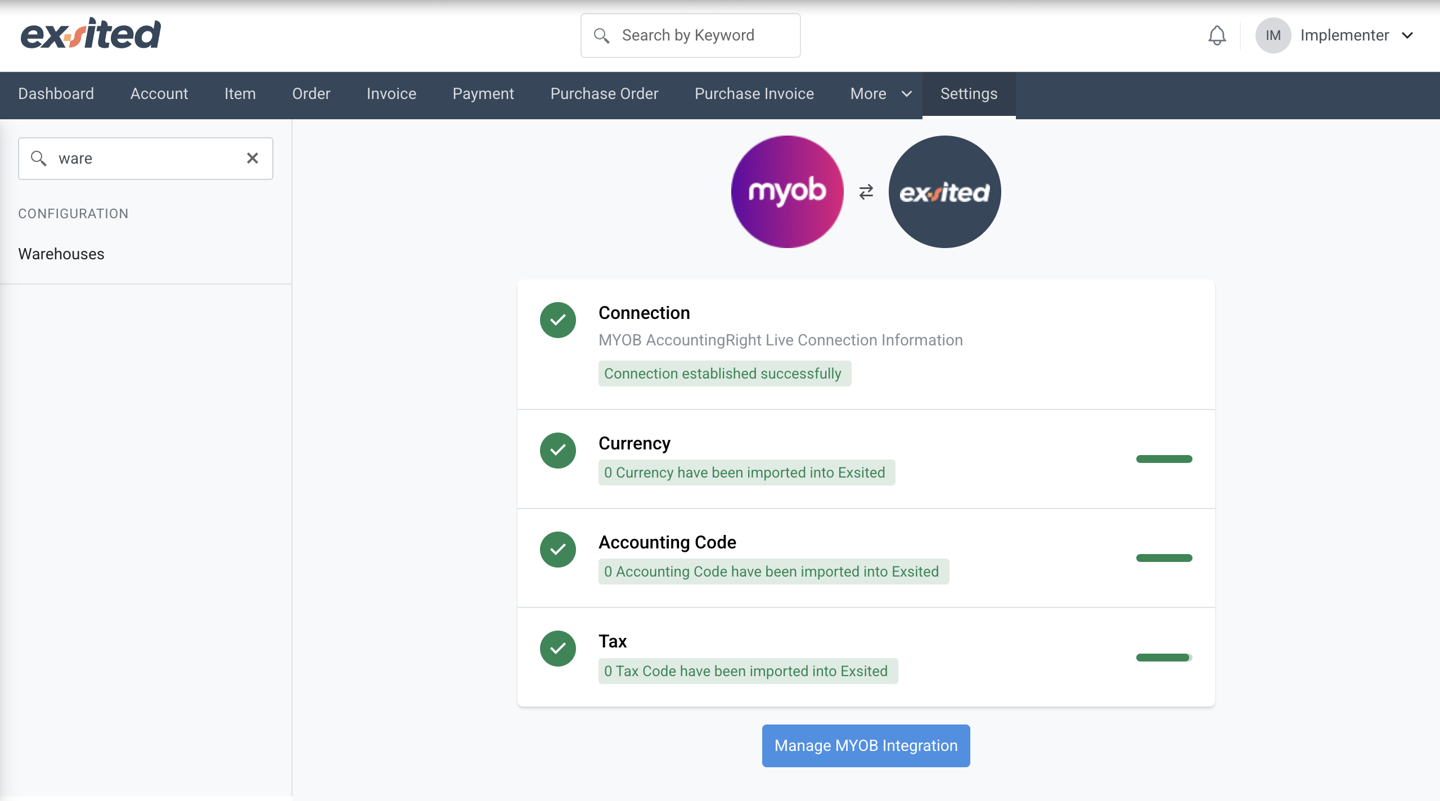
Exsited will now fetch your MYOB account, tax, and currency data.
Confirms the successful connection between MYOB and Exsited. It also displays the import status of currencies, account codes, and tax settings retrieved from MYOB, allowing users to verify the setup and manage the integration process with accuracy and confidence.
Configuration
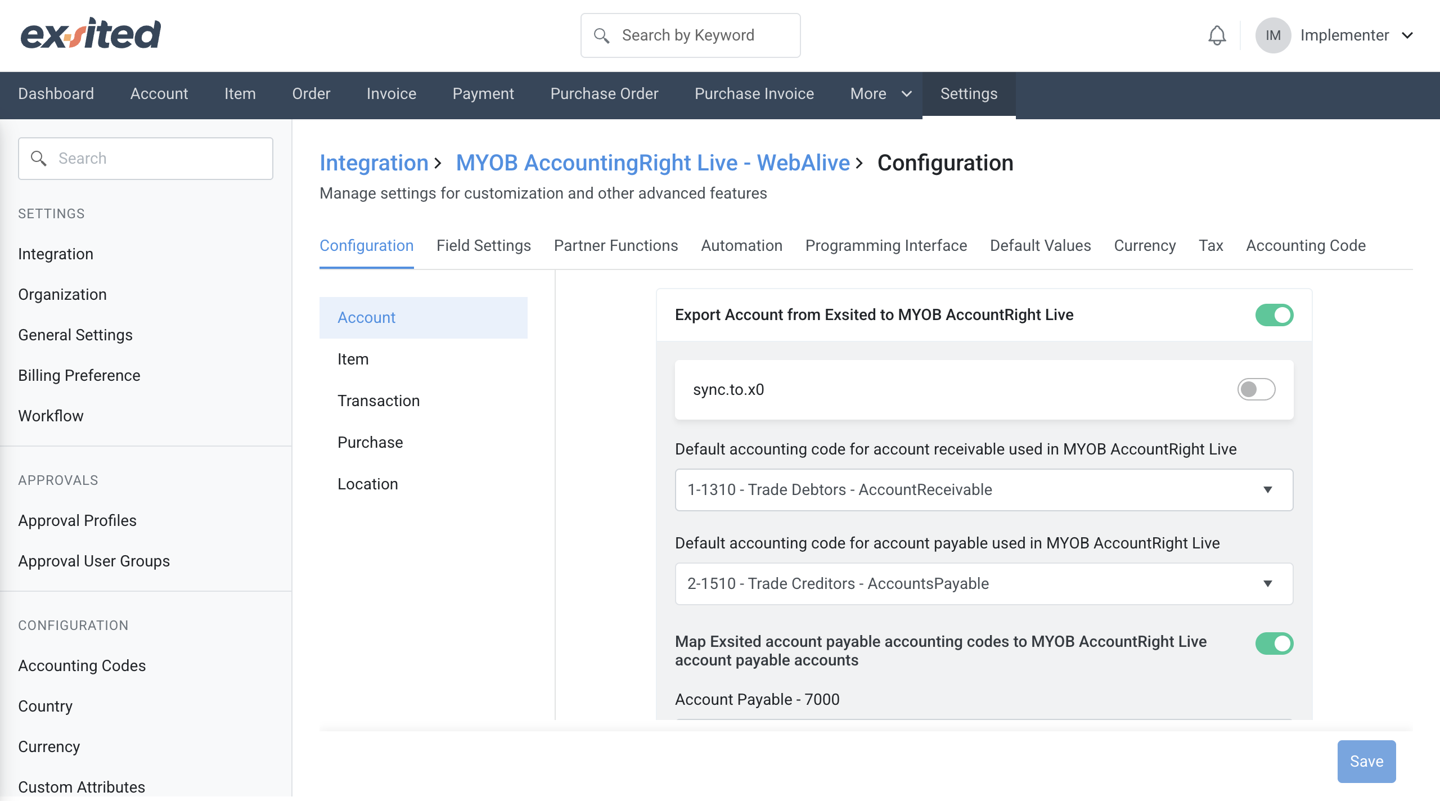
Account Configuration
- Navigation Path:
Settings → Integration → MYOB → Configuration → Account - Default Receivables Account: Set the MYOB account for customer receivables (e.g., 1-1200 Trade Debtors).
- Default Payables Account: Set the MYOB account for supplier payables (e.g., 2-2000 Trade Creditors).
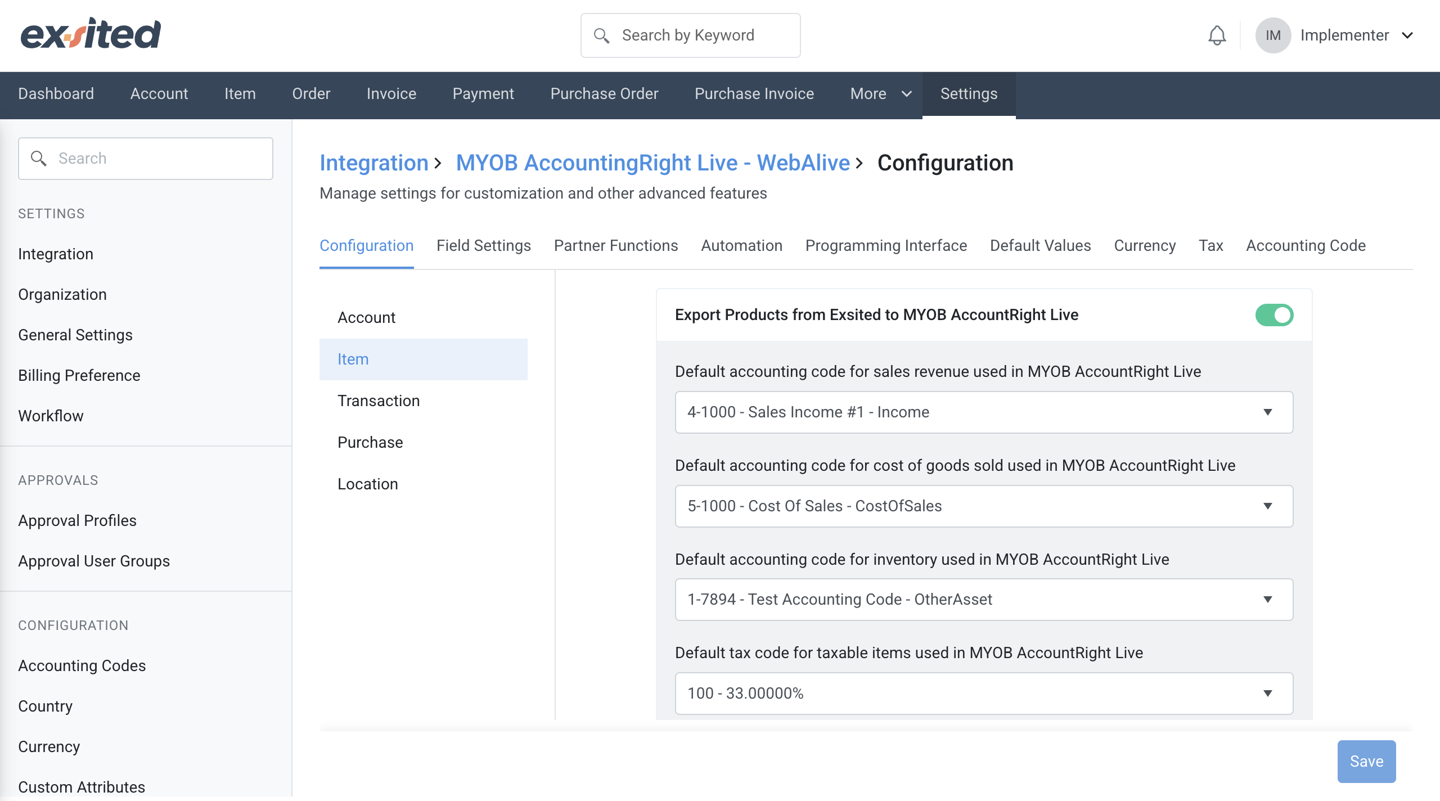
Item Configuration
Navigation Path: Settings → Integration → MYOB → Configuration → Item
- Toggle:
Export Products from Exsited to MYOB AccountRight Live
Default Sales Revenue Account:
➤ 4-1000 – Sales Income #1 – Income
This account will be used for revenue when an item is sold.
Default Cost of Goods Sold (COGS) Account:
➤ 5-1000 – Cost Of Sales – CostOfSales
Used to record the cost associated with sold items.
Default Inventory Account:
➤ 1-7894 – Test Accounting Code – OtherAsset
This is where your stock value is recorded in MYOB.
Default Tax Code:
➤ 100 – 33.000000%
Applied to taxable items during export.
Transaction Configuration
Typically used to manage how transactions like sales, purchase invoices, and payments are synced.
Navigation Path: Settings → Integration → MYOB → Configuration → Transaction
- Sales Invoice Format: Choose how Exsited invoices are exported into MYOB (e.g., as service or item-based invoices).
- Invoice Prefixing Rules: Configure invoice number patterns (e.g., INV-0001).
- Auto Sync Options: Enable/disable automatic sync of new invoices.
- Payment Method Mapping: Link Exsited payment methods (Credit Card, Cash, EFT) to MYOB equivalents.

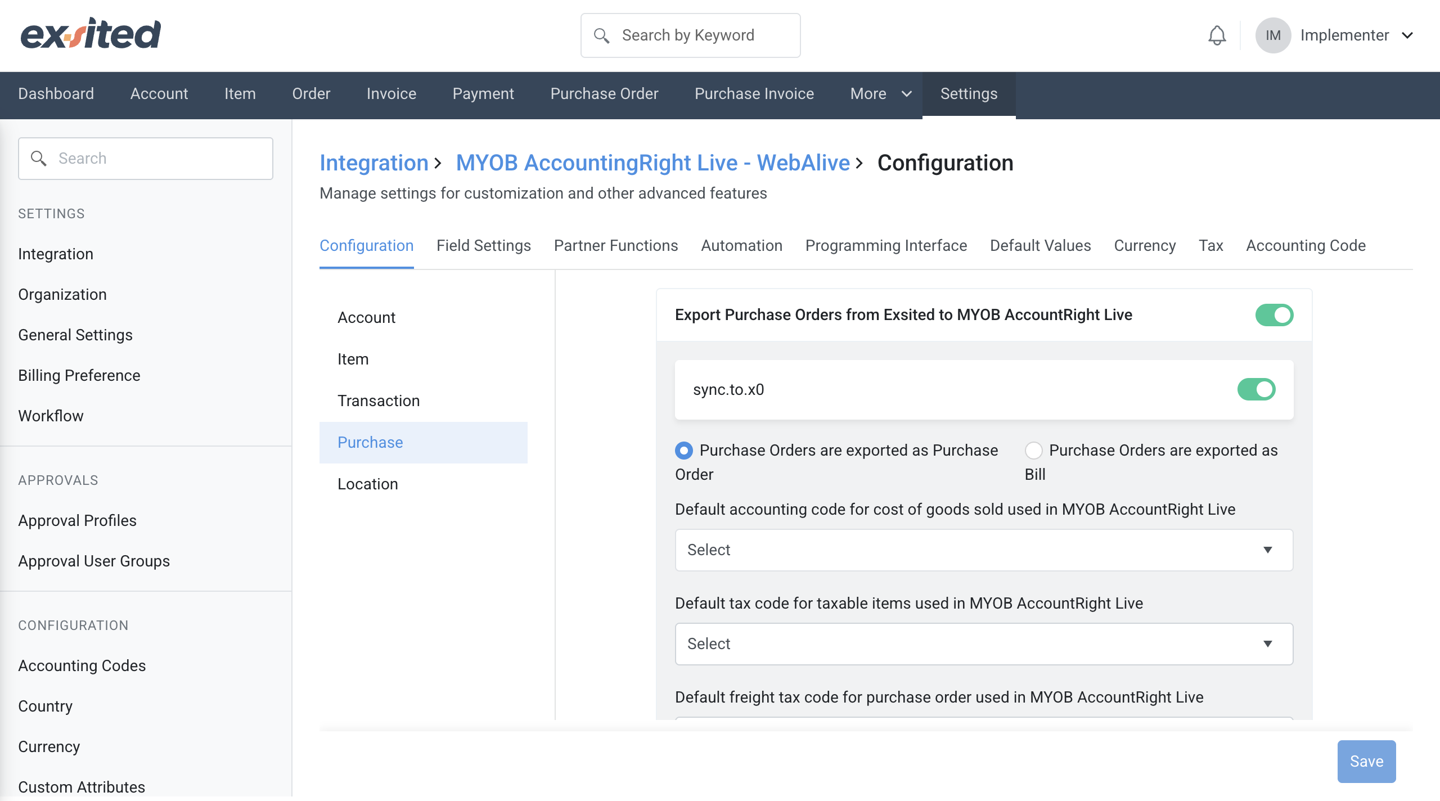
Purchase Configuration
Controls the synchronisation of Purchase Orders and Supplier Bills.
Navigation Path:
Settings → Integration → MYOB → Configuration → Purchase
- Default Expense Account: Assign an account like
General Purchases. - Default Tax Code for Purchases: Should match your purchase GST handling (e.g., 100 or N-T).
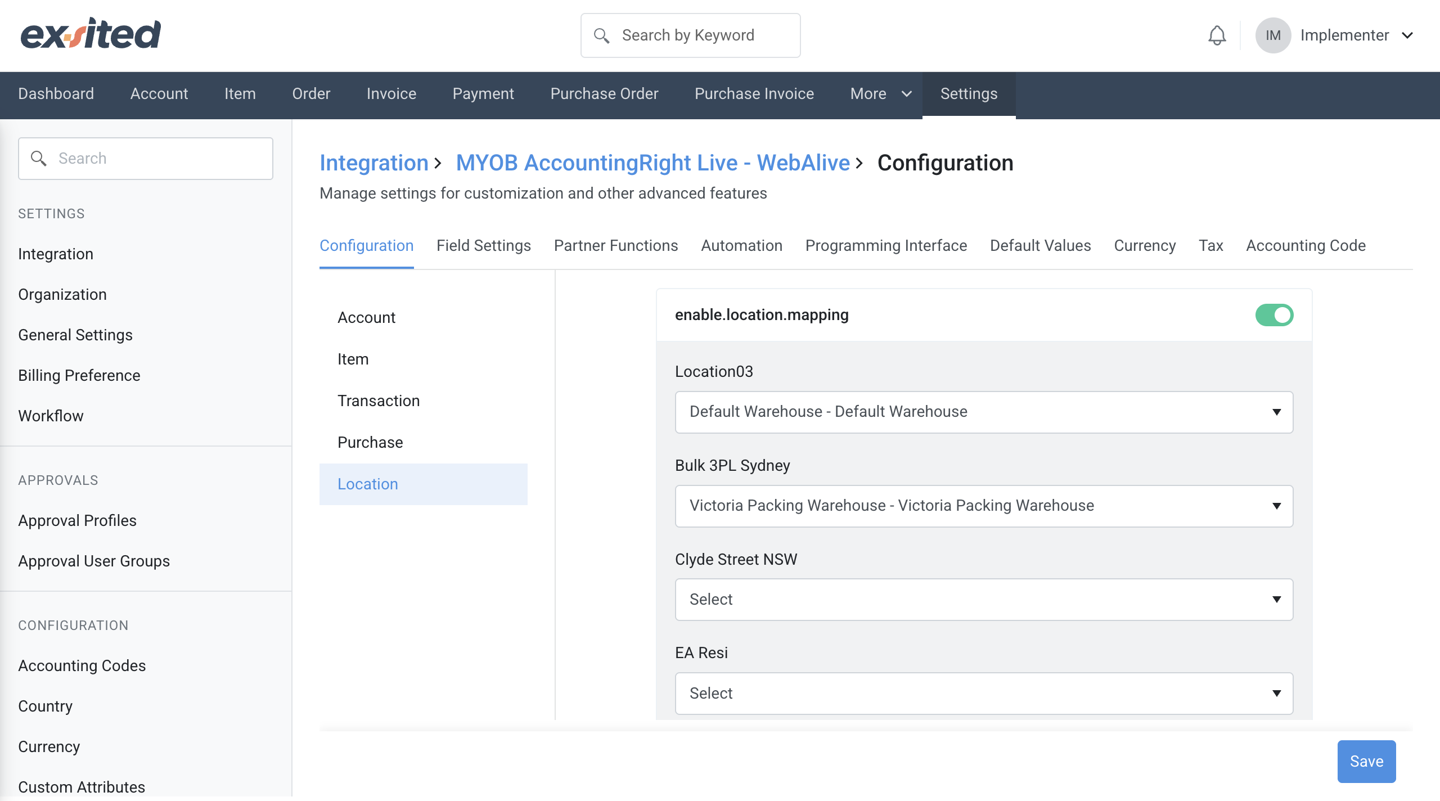
Location Configuration
Used to manage multi-location inventory mapping between Exsited and MYOB.
Navigation Path:
Settings → Integration → MYOB → Configuration → Location
- Location Mapping Table:
- Map each Exsited Warehouse or Branch to a MYOB Location ID.
- Example:
➤Melbourne Warehouse → MYOB Location A
➤Sydney Branch → MYOB Location B
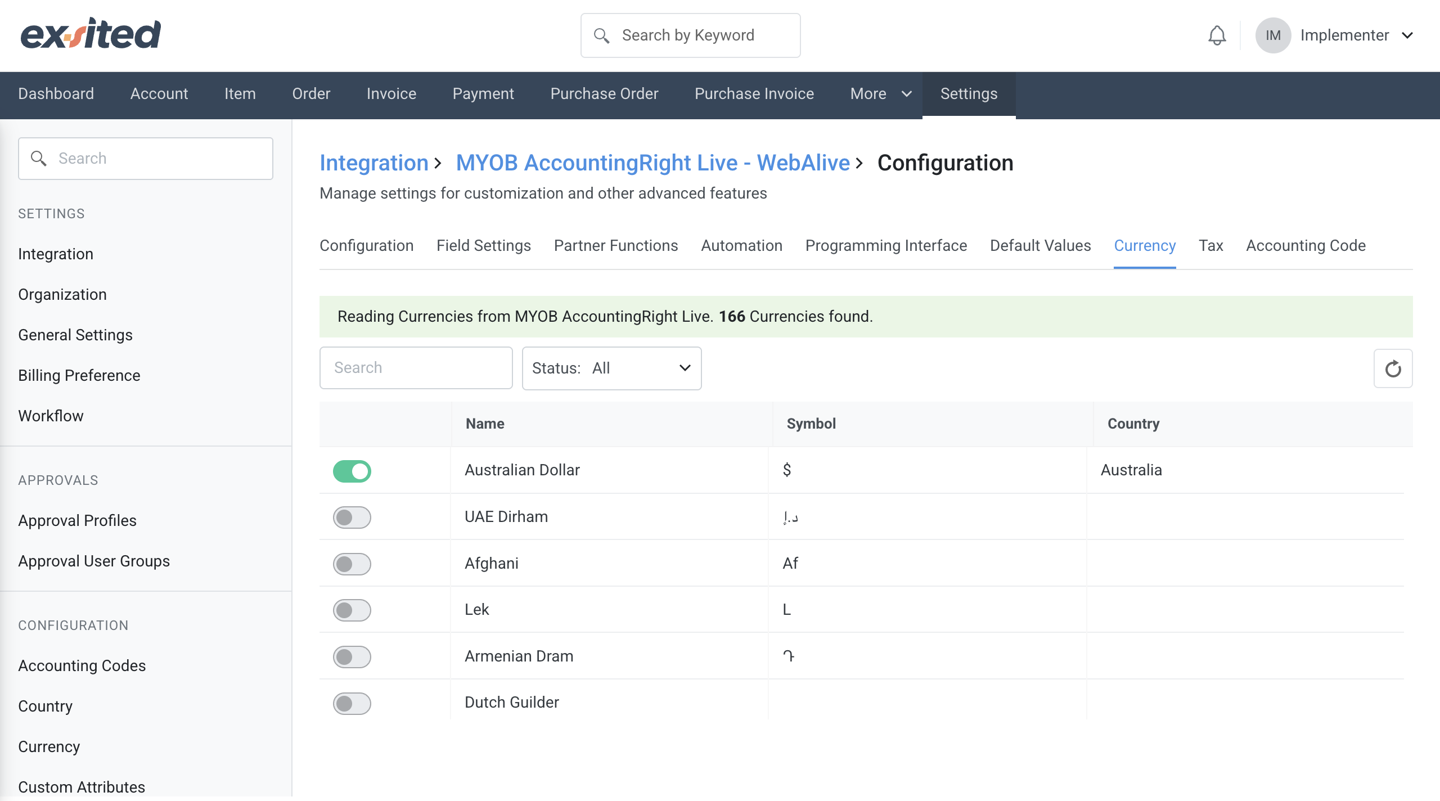
Enable Currency Configuration
Navigation Path: Exsited > Settings → Integration → MYOB > Currency Settings
- Enable all currencies used in MYOB
- Map default currency (e.g., AUD) for transaction-level matching
During the MYOB integration setup in Exsited, users must enable the appropriate currency (e.g., AUD) to support financial transactions. Enabling currency ensures consistent handling of monetary values between both systems.
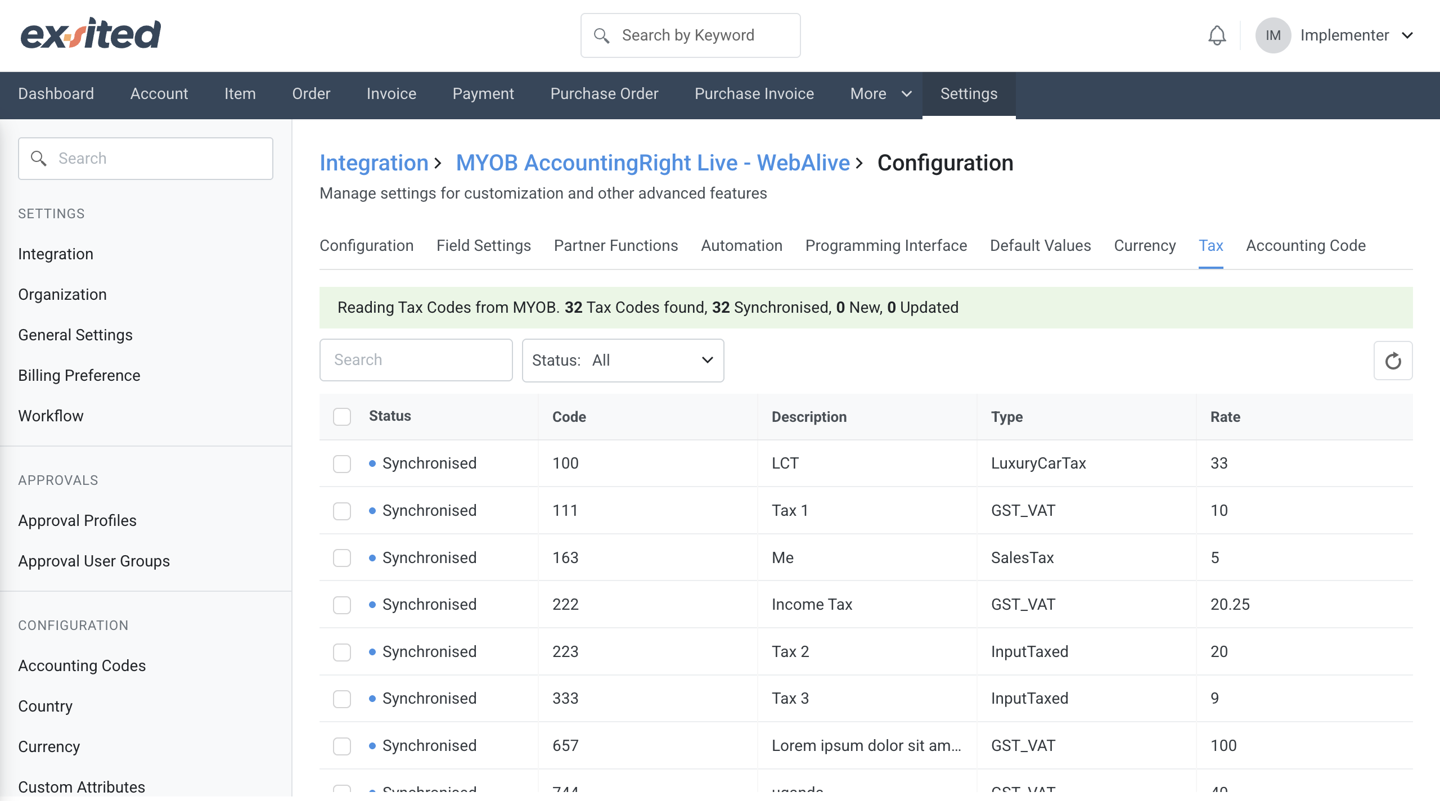
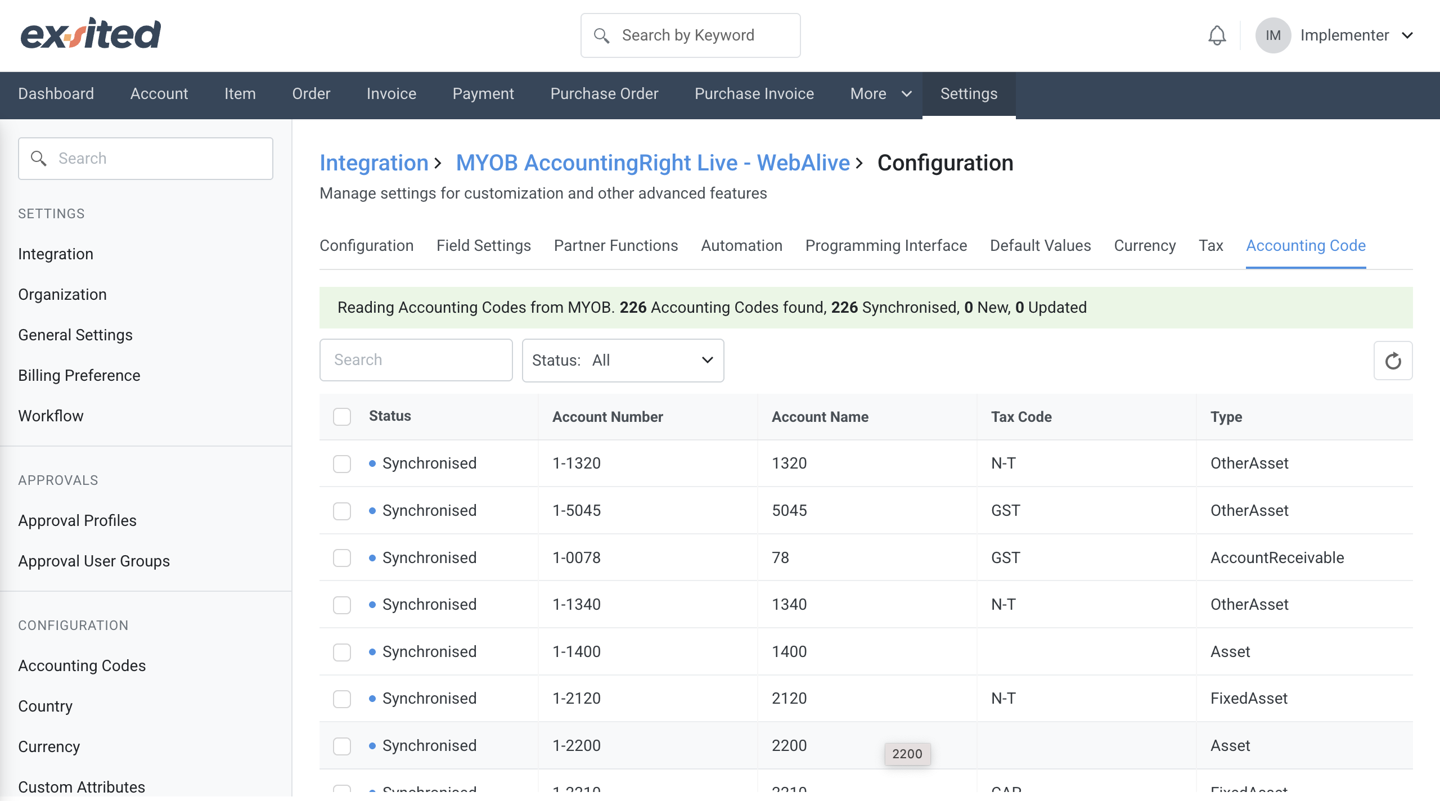
Tax & Account Code Mapping
Navigation Path:
Exsited > Settings > Tax ConfigurationExsited > Settings > Accounting Code
The Tax configuration tab in the Exsited–MYOB integration allows users to synchronise tax codes directly from MYOB to ensure consistency in financial records. In the displayed setup, 32 tax codes were successfully synchronised from MYOB, with their corresponding code, description, type (e.g., GST_VAT, LuxuryCarTax), and rate clearly visible. This synchronisation ensures that all taxable transactions processed through Exsited are accurately reported according to MYOB’s predefined rates and tax structures, minimising the risk of reporting errors.
The Accounting Code configuration tab imports and aligns 226 account codes from MYOB into Exsited, enabling proper categorisation of financial transactions. Each synchronised code includes the account number, name, associated tax code, and account type (e.g., OtherAsset, AccountReceivable, FixedAsset). This structured mapping supports accurate financial reporting, automated journal entries, and seamless syncing of income, expense, and inventory-related entries between the two platforms.
Item Synchronisation
Import Items from MYOB to Exsited
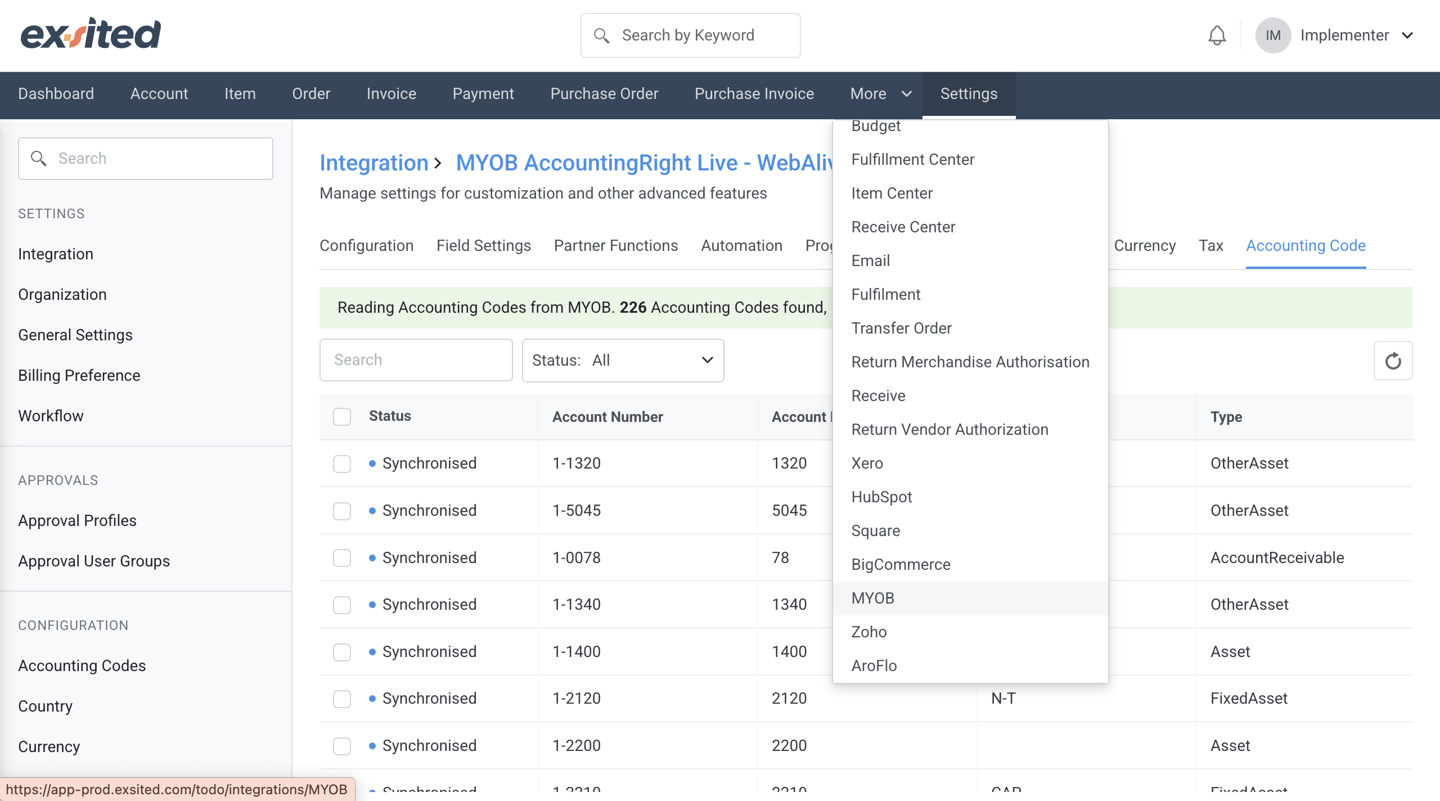
Navigation Path: Exsited > More > MYOB > Import Items
- Choose your MYOB Organisation
- Select Status: New, Updated, Synchronised, or All options
- Click Synchronise
- Go to
Item Listin Exsited to confirm successful import
At the start of the integration process, users must select a connected MYOB organisation within Exsited to initiate import and export operations. This step ensures that the correct data environment is linked before proceeding with sync actions.
This screen allows users to choose between importing data from Exsited and MYOB. Based on the selected option, users can then specify the type of records to sync, such as items, invoices, or contacts.
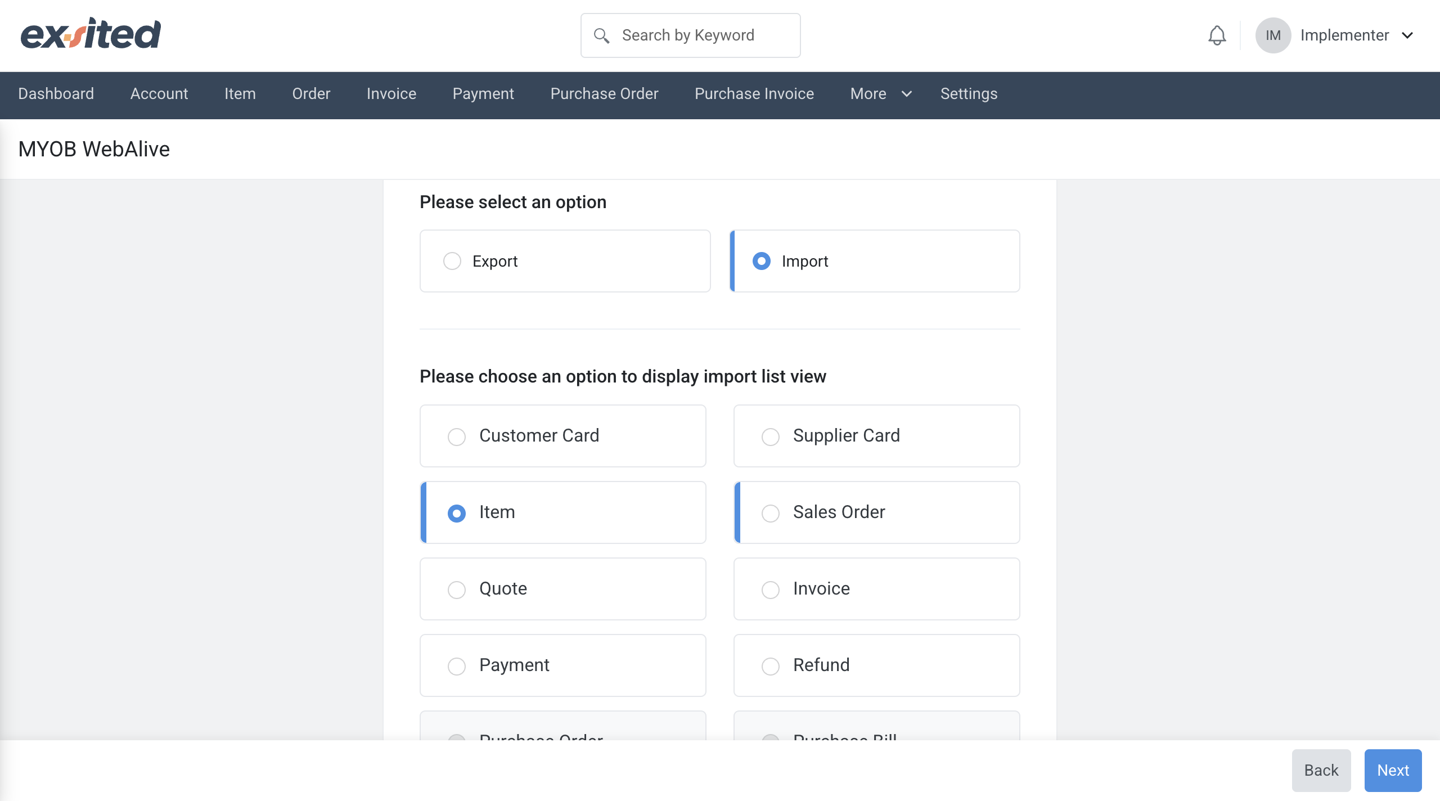
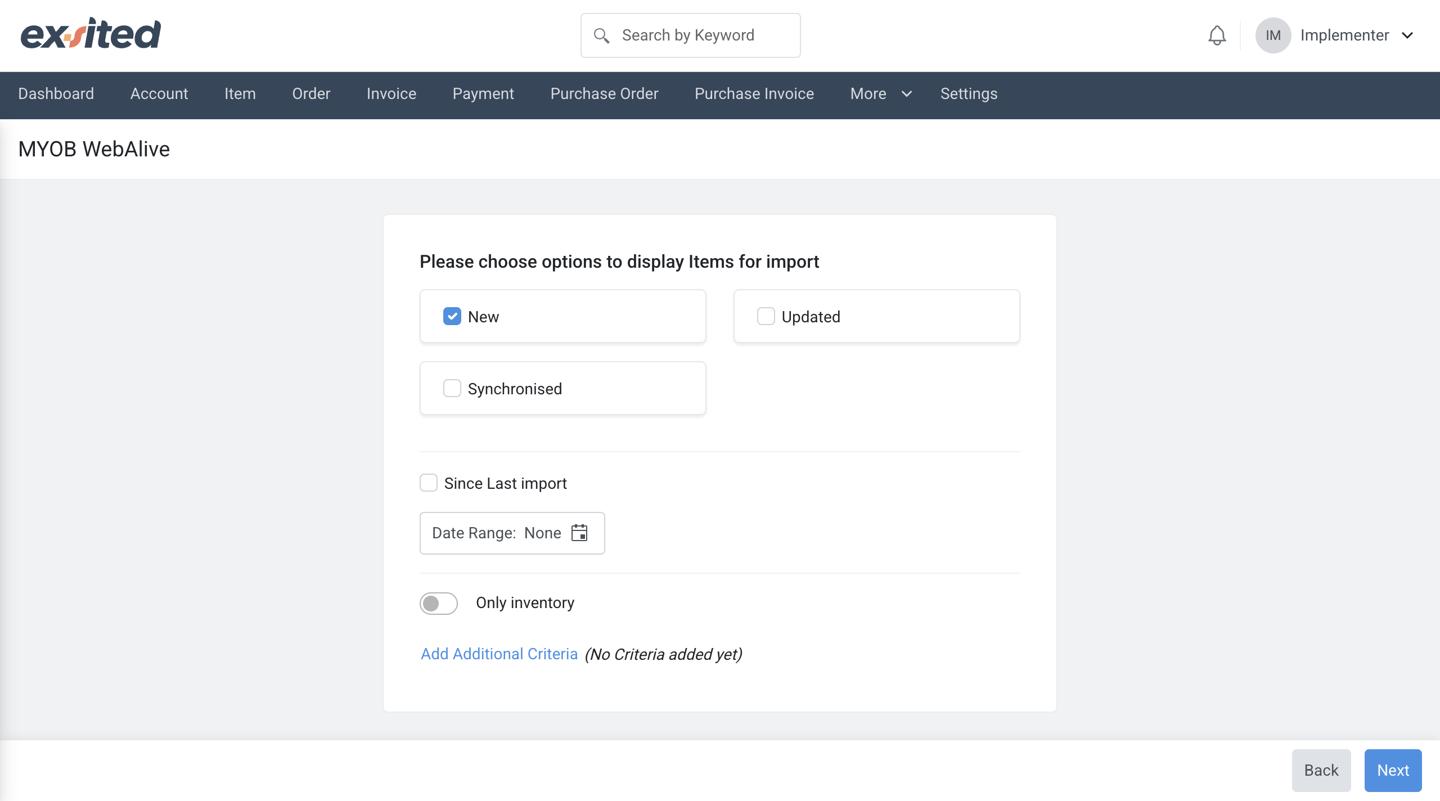
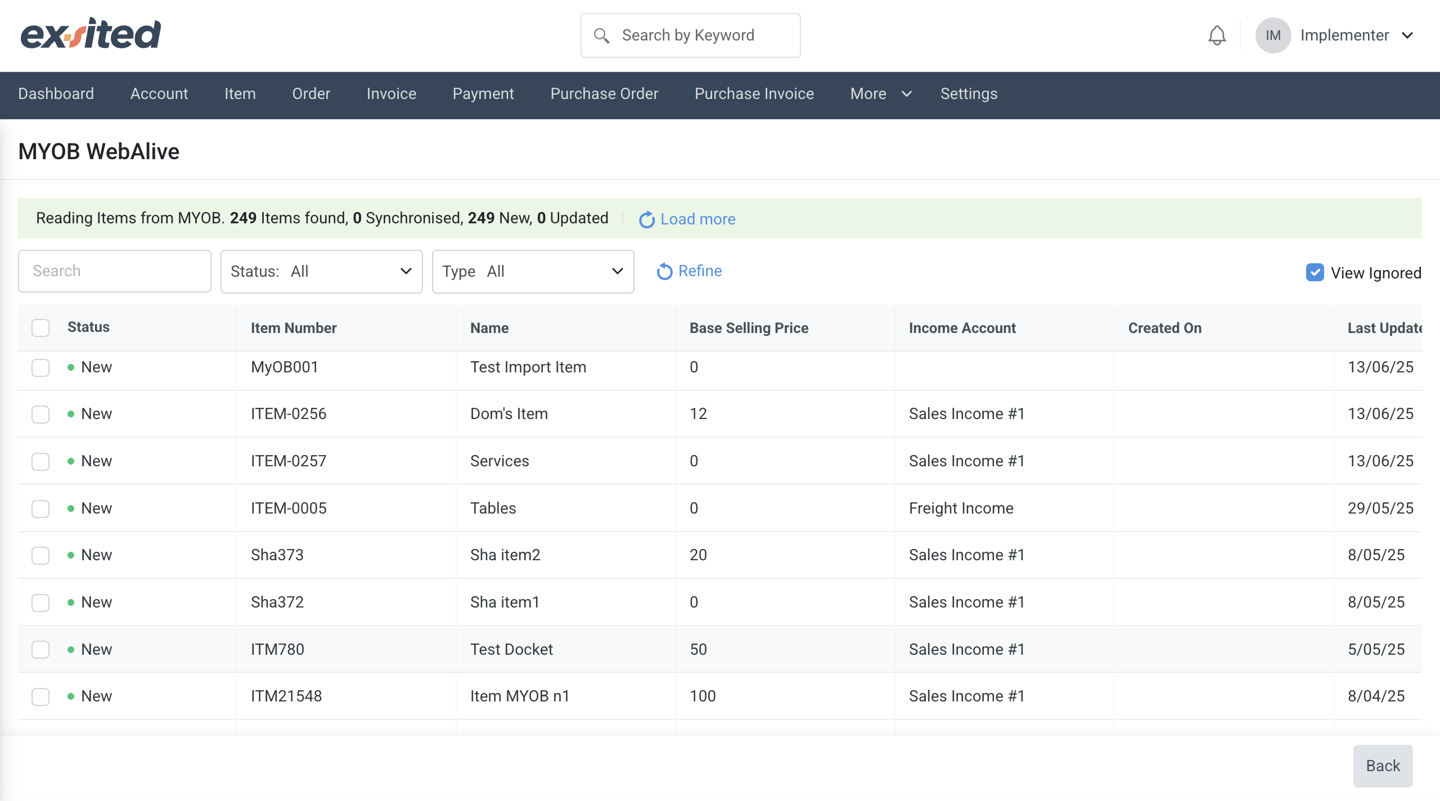
During item import, users can filter data by status (New, Updated, Synchronised) and choose to import only inventory items. The system then displays a list of items retrieved from MYOB, including item codes, names, prices, and revenue accounts, for review before synchronisation.
After completing the import from MYOB, all synced items appear in the Exsited item list with their respective codes, names, and timestamps. This view helps users verify successful imports and track item creation history by user and time.
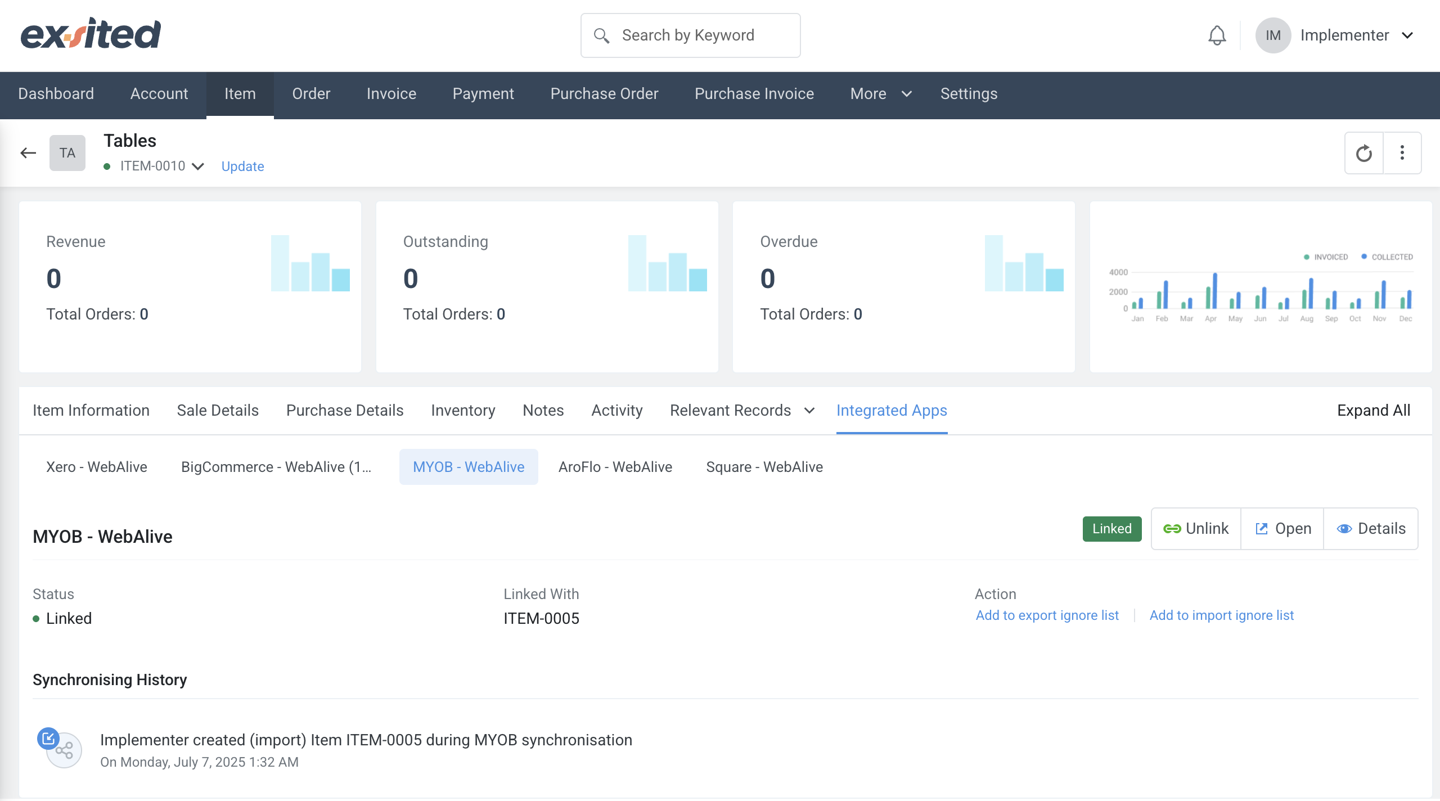
Once an item is successfully linked between Exsited and MYOB, users can view synchronisation history and manage the link status. If needed, users also have the option to manually unlink the item for correction or reconfiguration.
Export Items to MYOB
Navigation Path: More > MYOB > Export Items
- Select items in Exsited
- Filter by "New" for first-time syncs
- Click Export
- Monitor status and validate in the MYOB item list
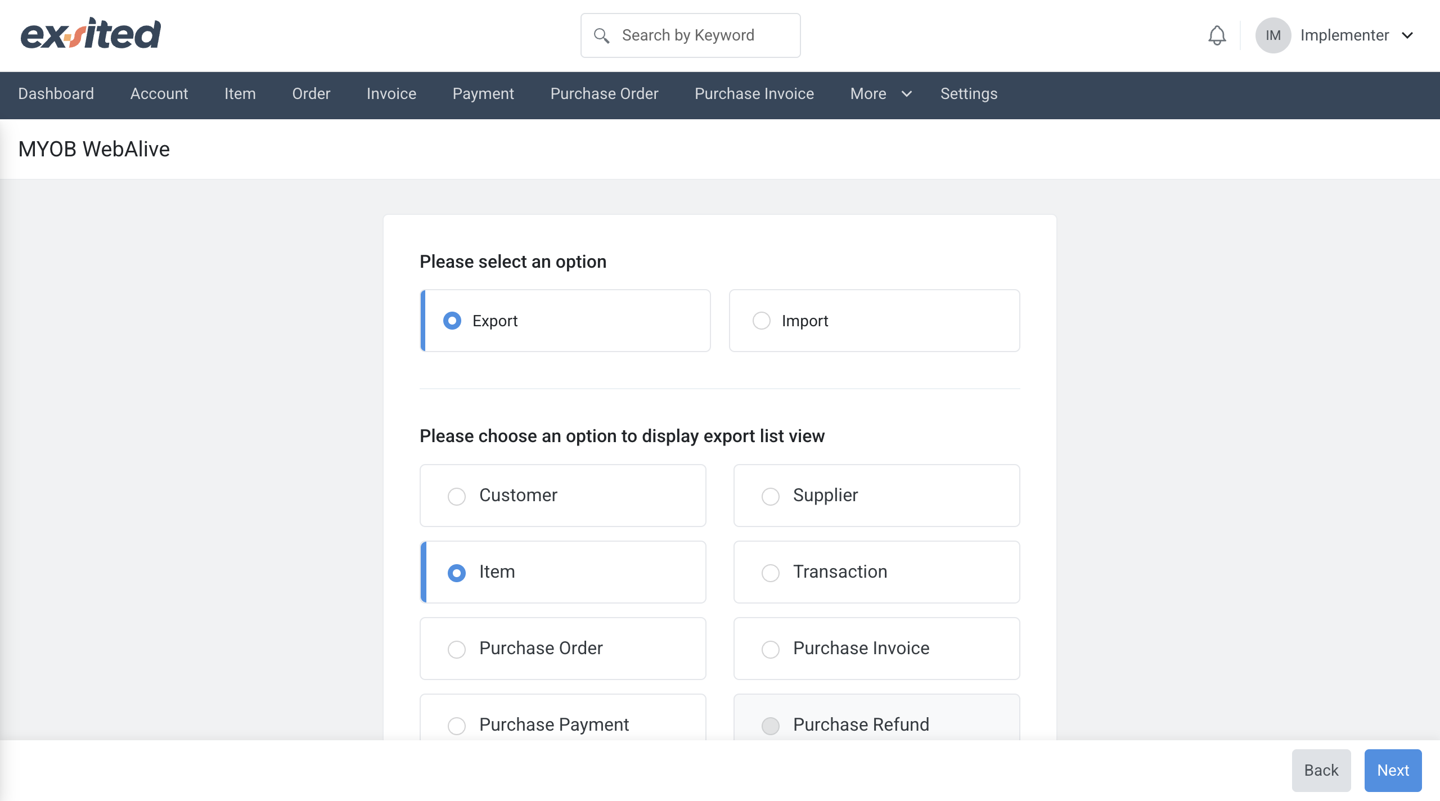
This screen allows users to choose between exporting data between Exsited and MYOB. Based on the selected option, users can then specify the type of records to sync, such as items, invoices, or contacts.
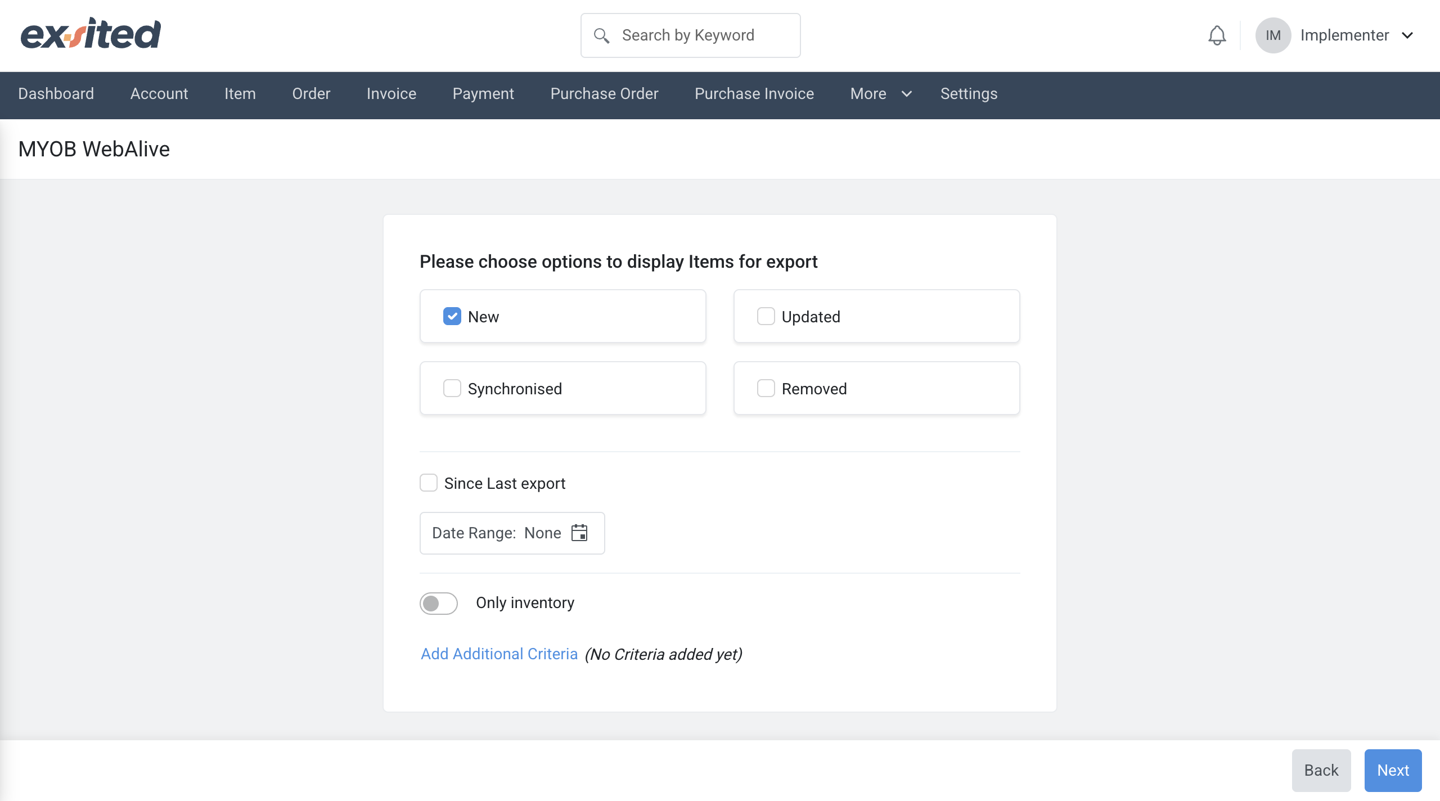
Before exporting items from Exsited to MYOB, users can filter records by status, such as New, Updated, or Removed, and optionally define a date range. These options help ensure only relevant items are included in the export batch.
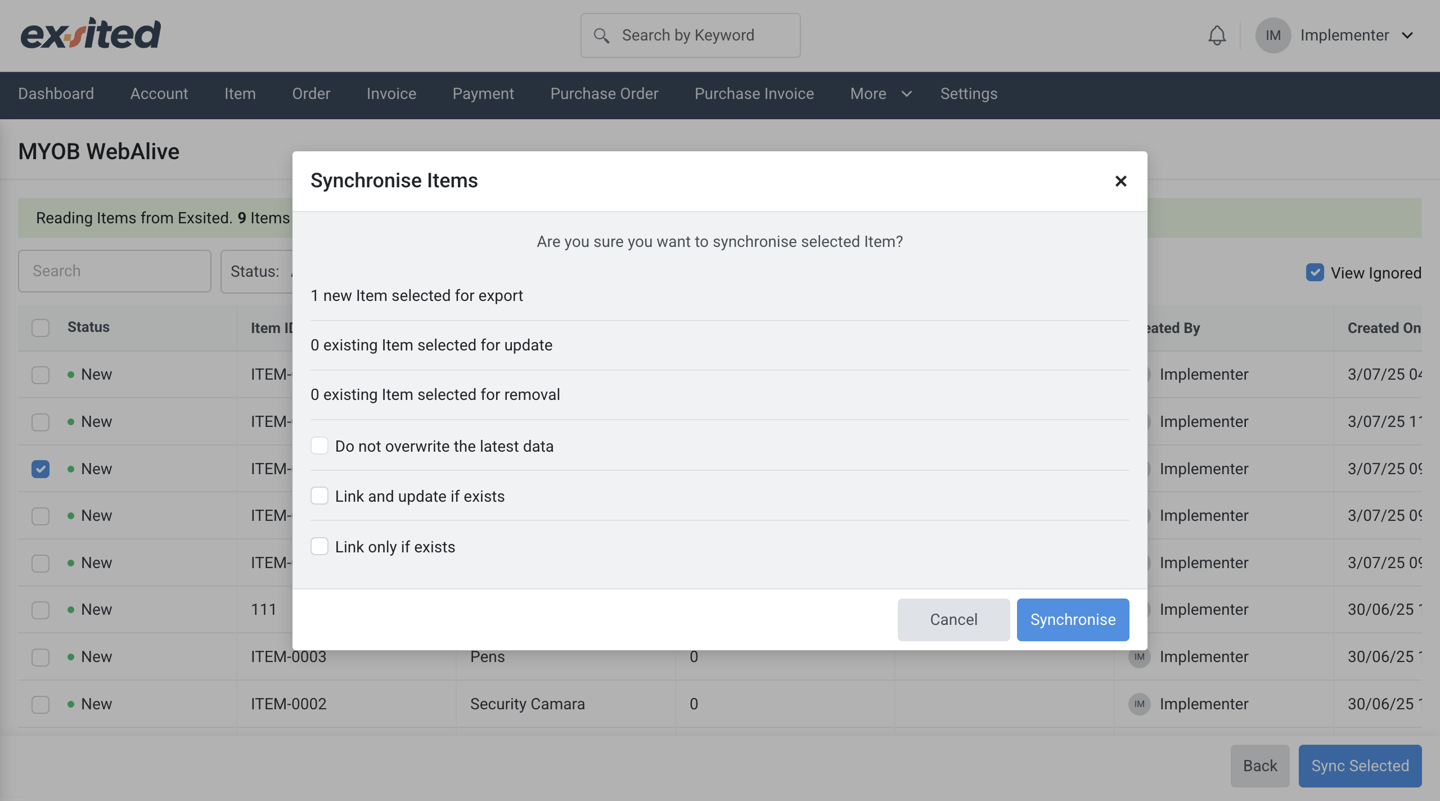
The synchronisation confirmation screen in Exsited provides detailed options before syncing items to MYOB, including whether to link, update, or skip existed records. This step helps ensure that data integrity is maintained during the export process.
Important: When creating or exporting a transaction from Exsited, make sure the item and warehouse used in that transaction already exist in MYOB. If not, you must first export those records from Exsited. Transactions referencing non-existent items or warehouses will fail to synchronise.
Process Automation
Automate Sync with Partner Function
Navigation Path: Exsited > Settings > Partner Function
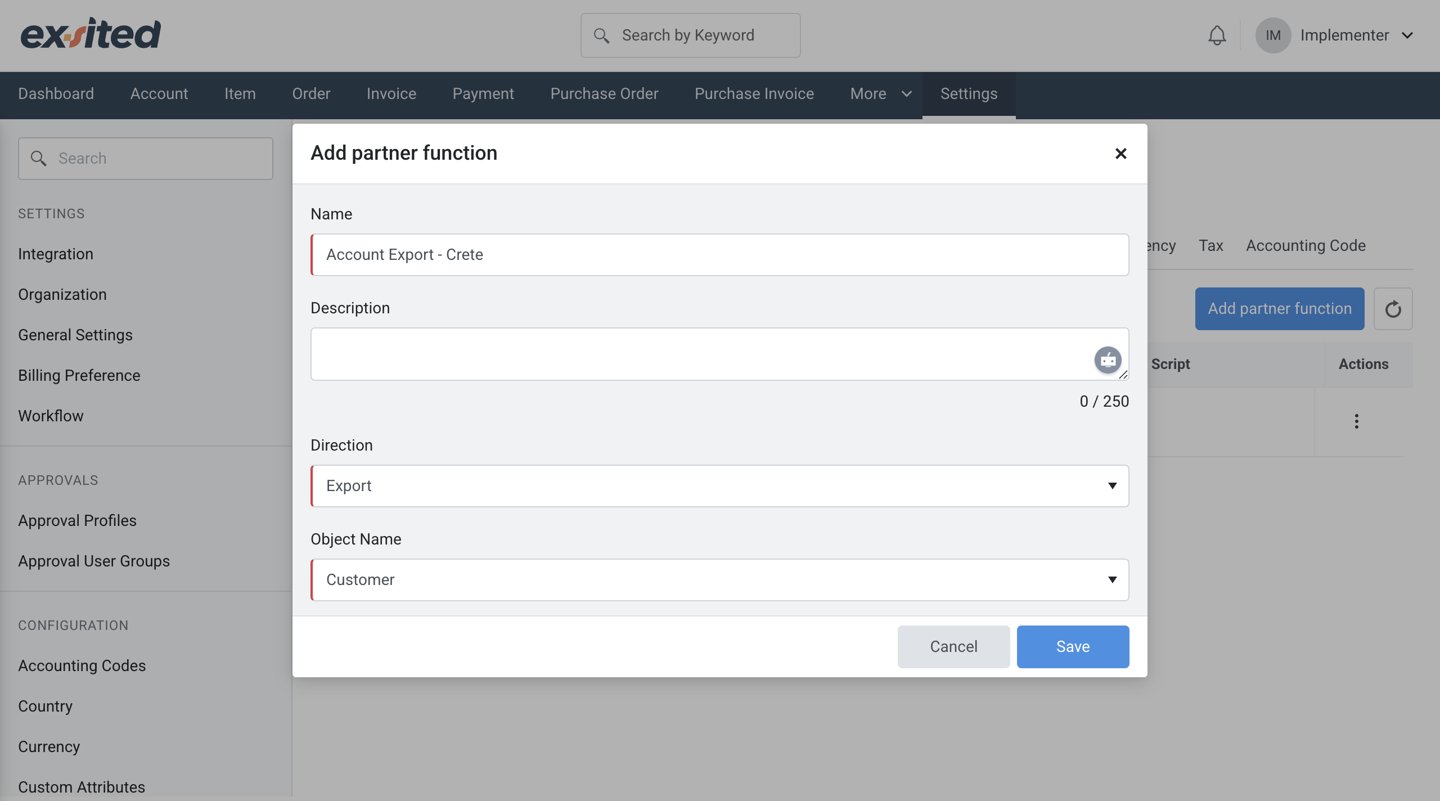
- Add a new Partner Function
- Select:
- Direction (Import / Export)
- Object Type (e.g., Customer, Invoice)
- Event Trigger (e.g., Create, Update)
Import Automation
The "Add Partner Function" allows users to define integration logic by specifying the direction (import/export), object type (e.g., Customer), and event trigger. This setup is essential for automating data flows between Exsited and external systems like MYOB.
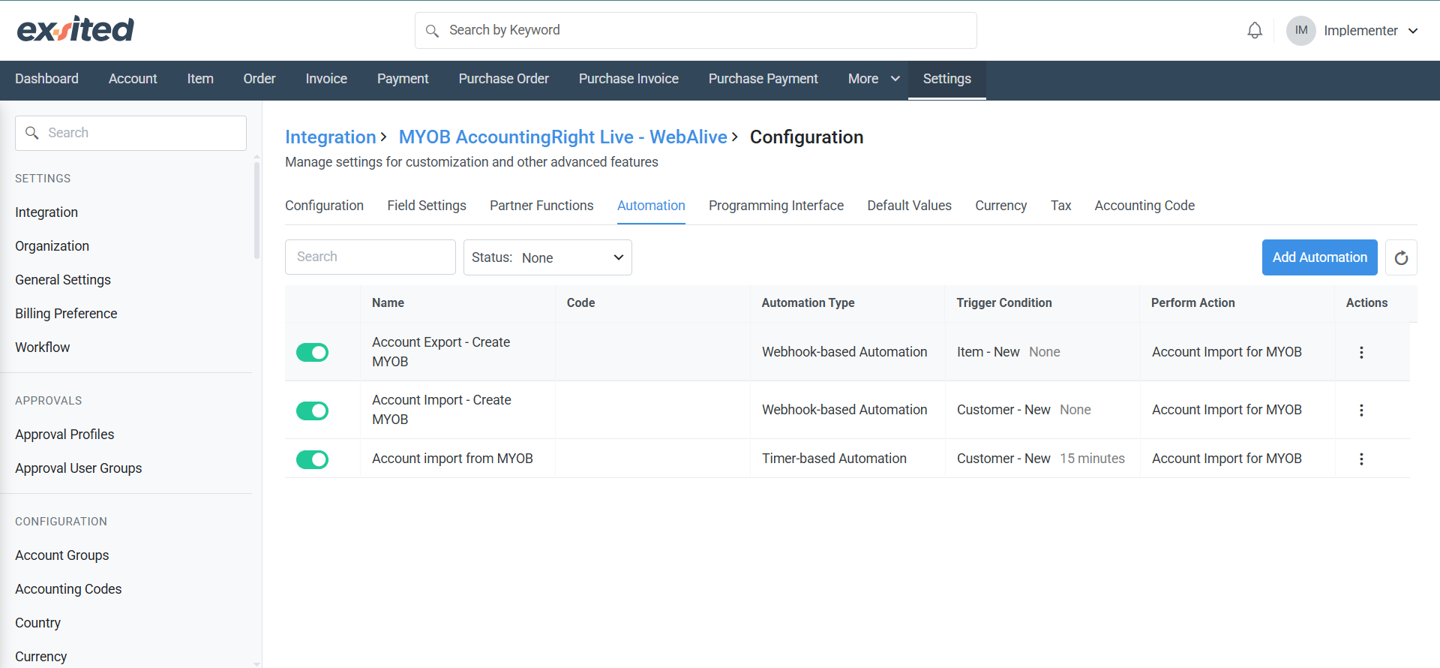
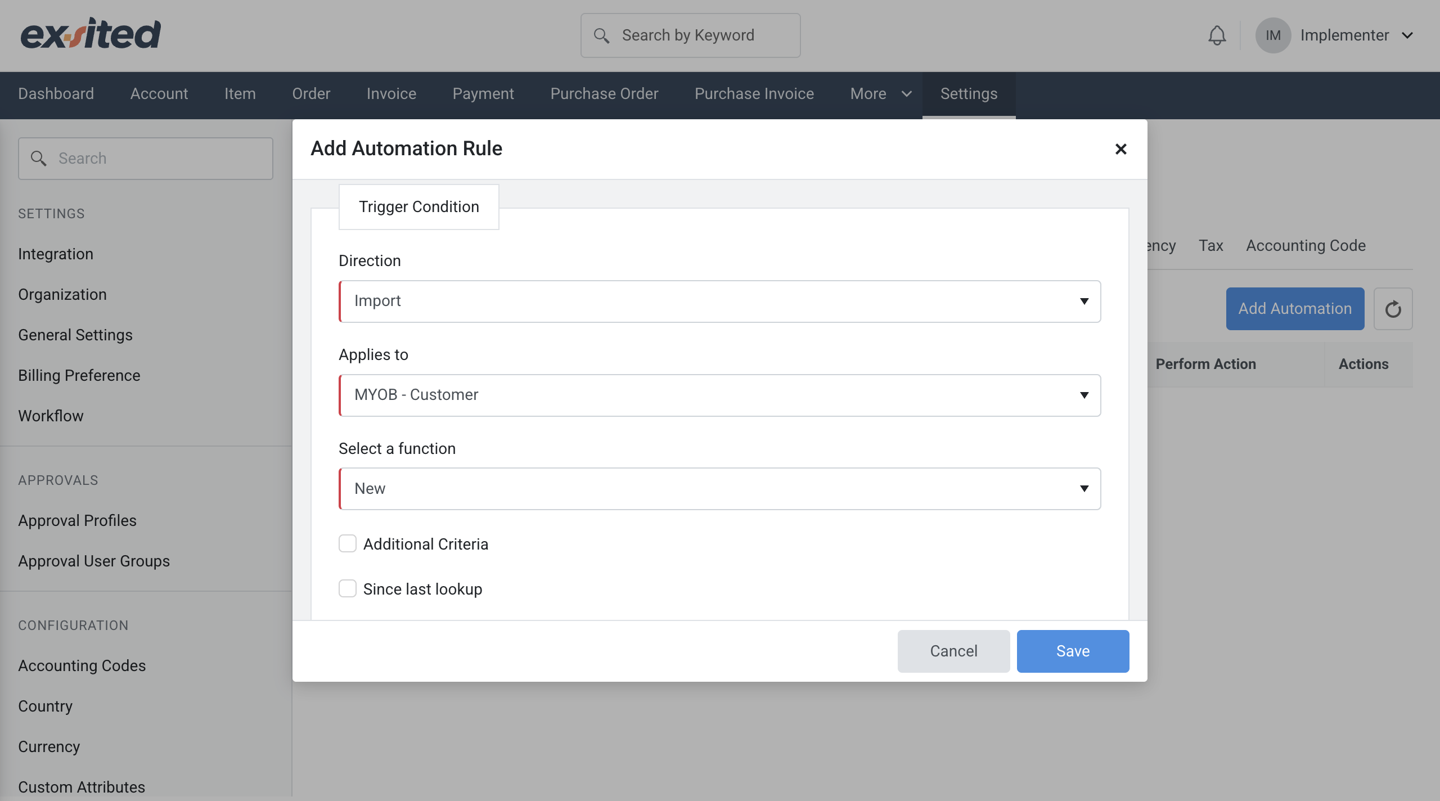
Then go to Exsited > Settings> MYOB > Configuration > Automation and “ Add Automation Rule”.
General Information:
- Name:
Account Import - Create - Display Name:
Account Import - Create - Code: Add a unique identifier (e.g.,
account_import_create_MYOB) - Leave Description unchecked unless needed.
Trigger Condition Tab:
- Direction:
Import - Applies to:
MYOB - Customer - Select a Function:
New - You may tick
Since last lookupif you only want new customers since the last sync.
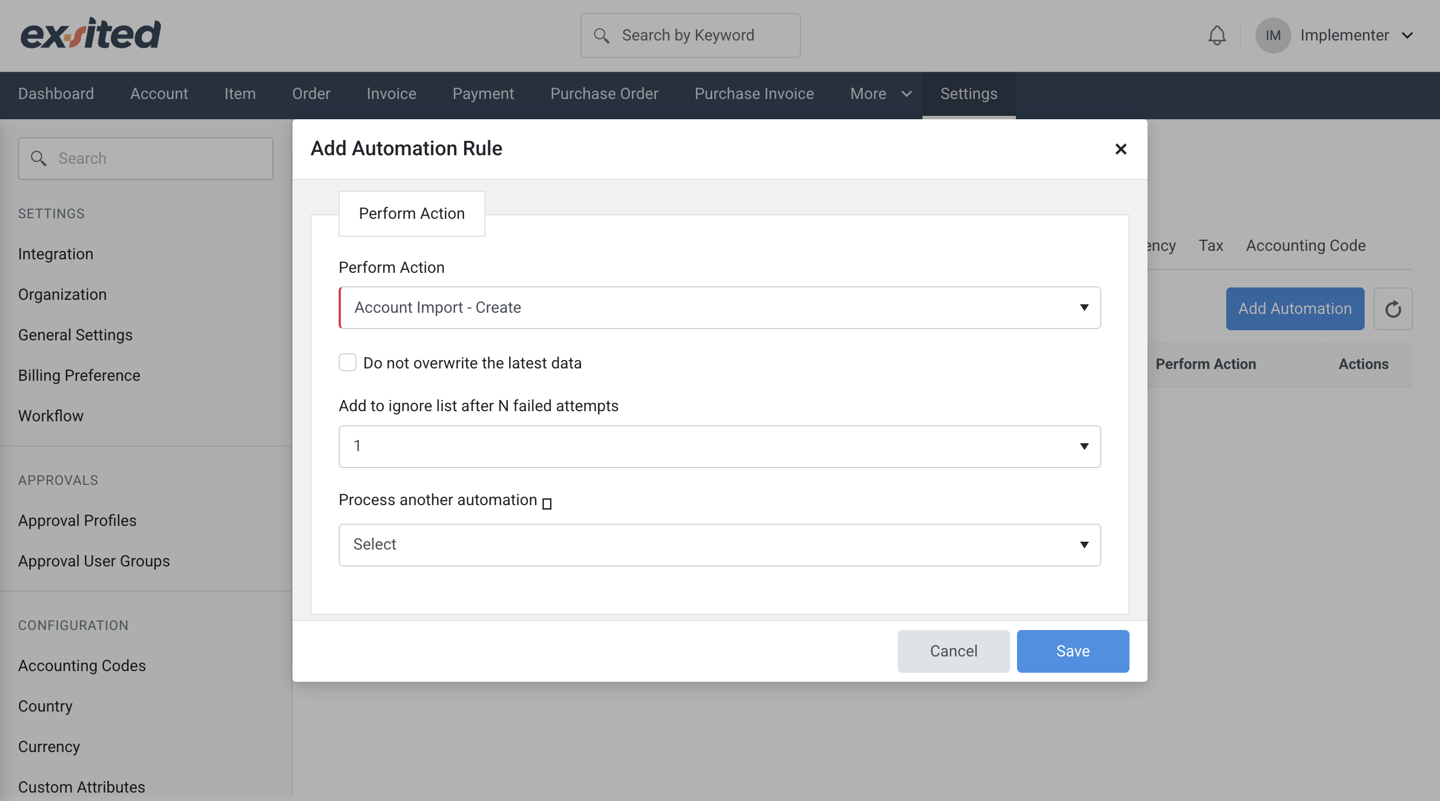
Perform Action Tab:
- Perform Action:
Account Import - Create - Tick/untick "Do not overwrite the latest data" based on your requirement.
- Set Add to ignore list after N failed attempts to 1 (or more if you want retries).
- Optionally, select another automation to trigger afterwards.
- Click Save.
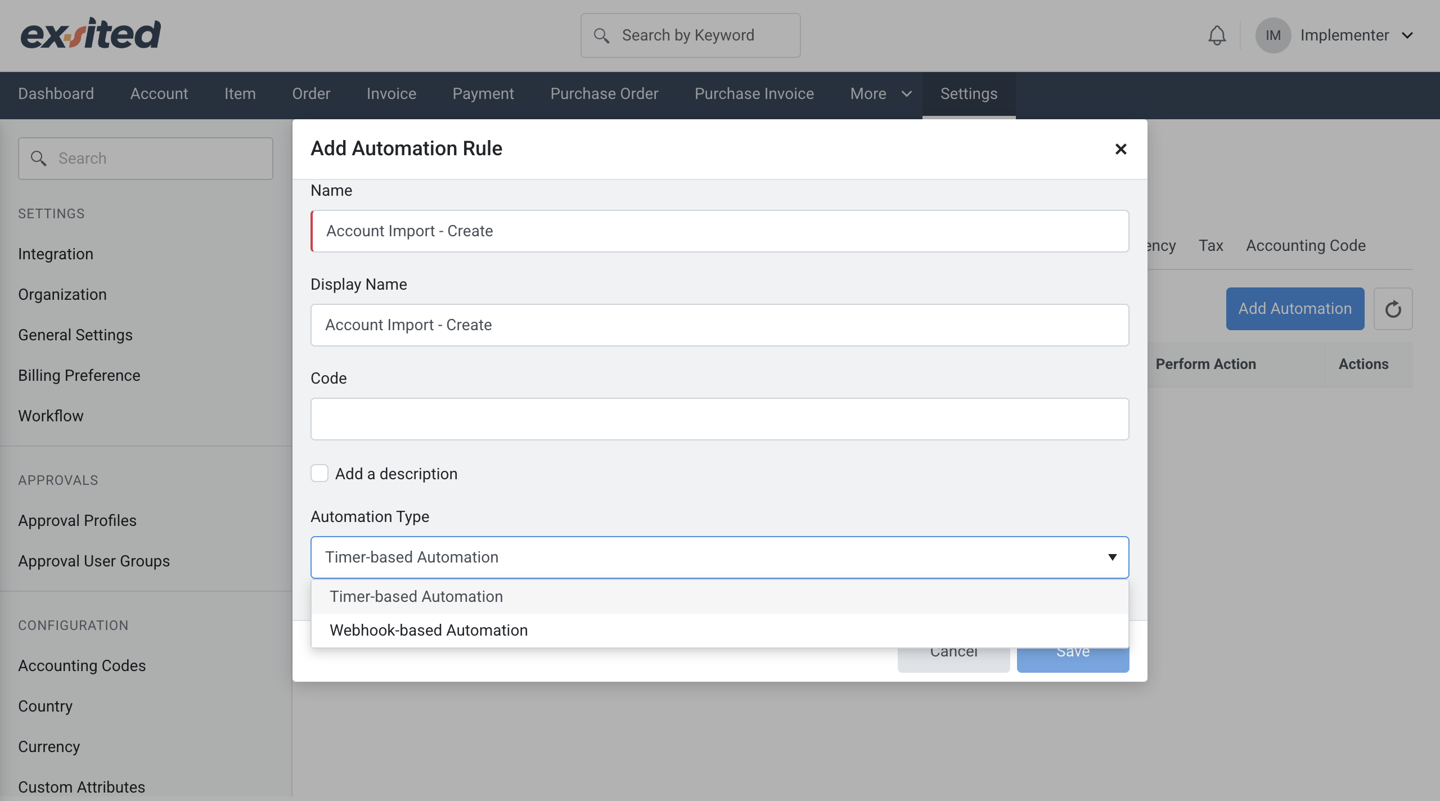
In the Automation Type settings within Exsited, there are two available options for automating data imports from MYOB:
- Time-Based Automation
- This method allows you to schedule data imports at specific time intervals (e.g., hourly, daily).
- It is useful when you want to run imports at regular, predefined times without manual intervention.
- Webhook-Based Automation
- This method enables real-time automatic data import as soon as a trigger event occurs in MYOB (e.g., new invoice created, item updated).
- It is ideal for ensuring that data in Exsited is always up to date with the latest changes from MYOB.
You can choose the appropriate automation type based on your business needs for data freshness and system performance.
This forms the foundation for automation rules.
Navigation Path: Webhook requires MYOB API to support event-based calls.
Export Automation
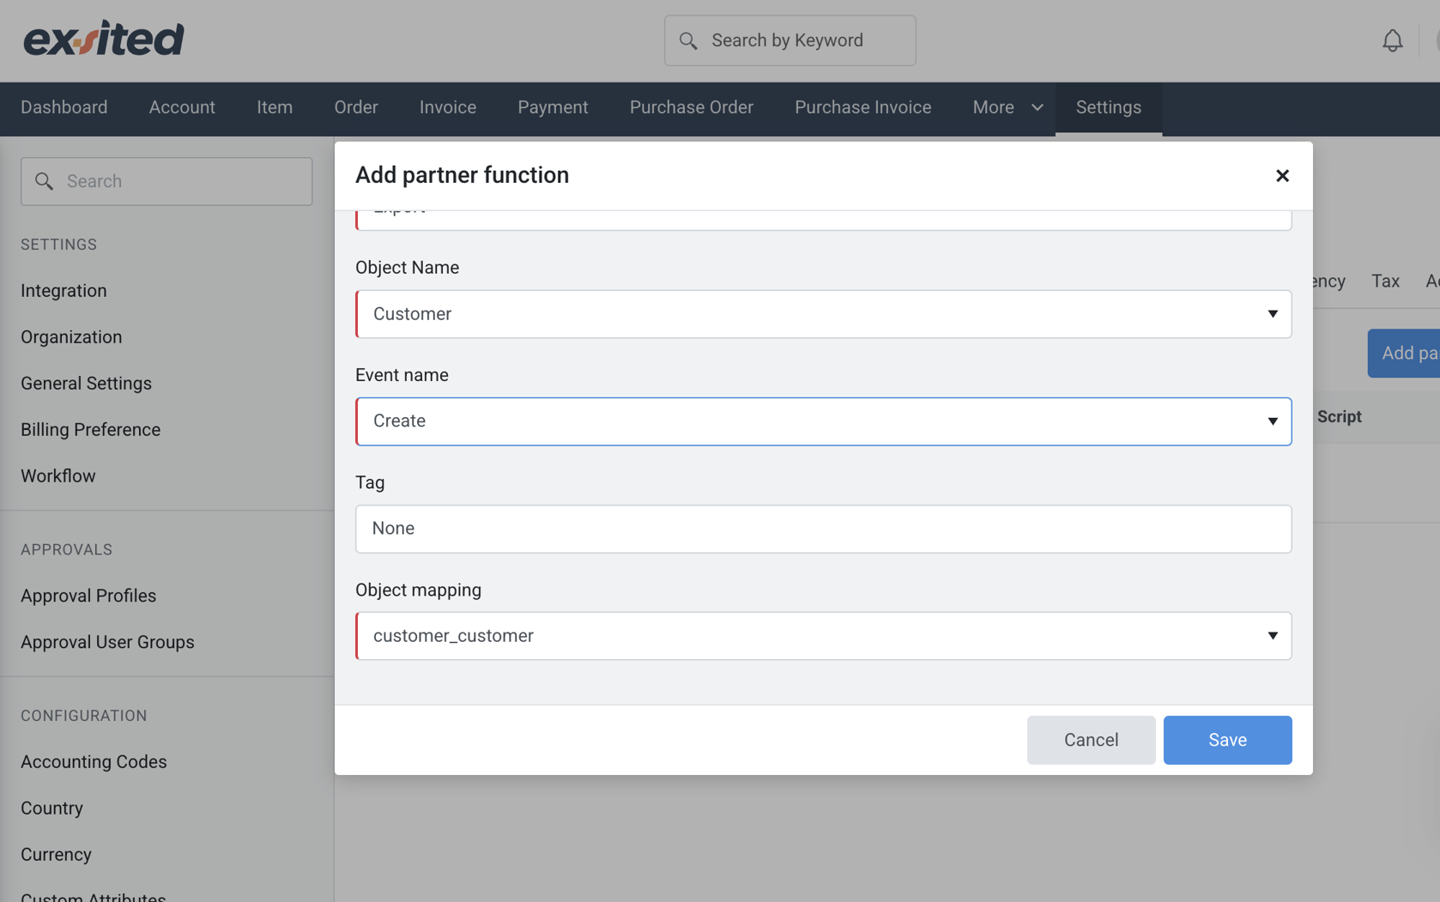
Add Partner Function
The “Add Partner Function” window lets users configure or update existing integration rules, such as exporting customer records when a “Create” event is triggered. This helps maintain precise control over automated data exchanges between Exsited and connected platforms.
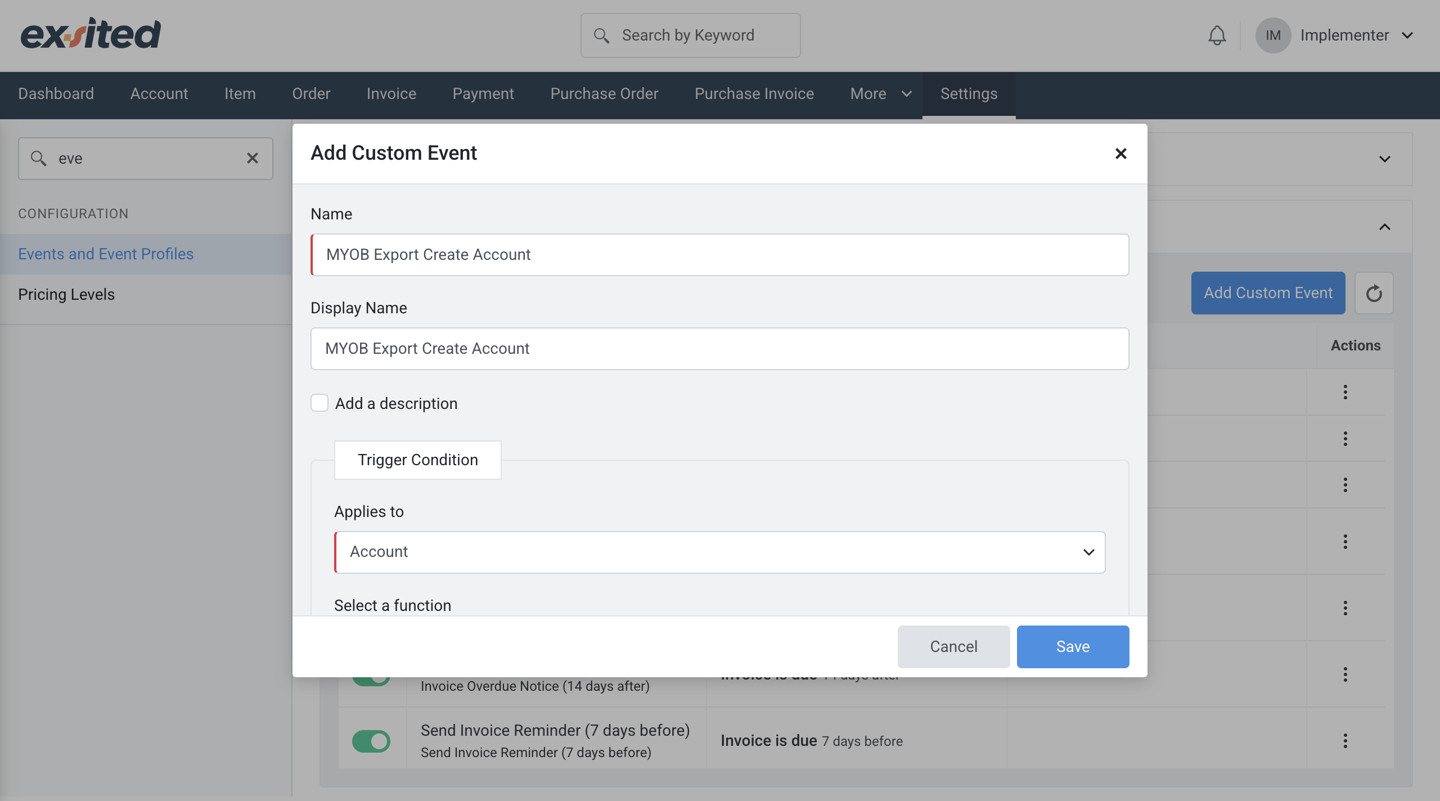
Add Custom Event
The "Add Custom Event" feature in Exsited enables users to define automation triggers such as account creation, with flexible execution timing and actions. Users can choose to send webhook requests, run scripts, or perform additional actions based on defined criteria.
Navigation Path: Exsited > Settings > MYOB > Configure > Events and Event Profiles > Custom Events

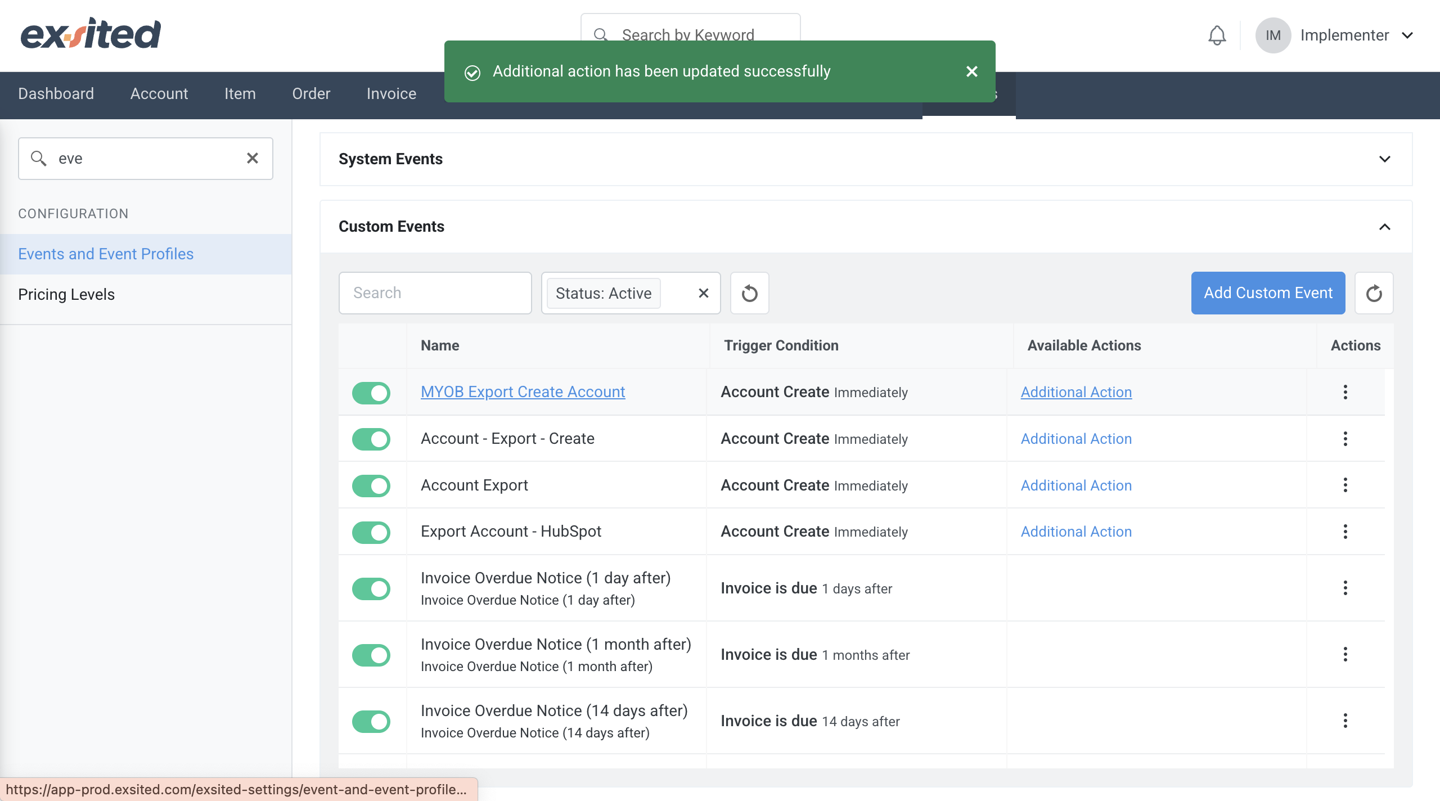
This screen allows users to manage the association of custom and system events with a specific event profile in Exsited. Events such as invoice reminders or exports to MYOB can be toggled on or off to control automation behaviour.
- Navigation:
Settings > Event and Event Profile > Event Profile >click onAssociated EventsEnable the Custom Events which is required
.png)
- Navigation:
Settings > Event and Event Profile > Custom EventsClick onAdditional Action
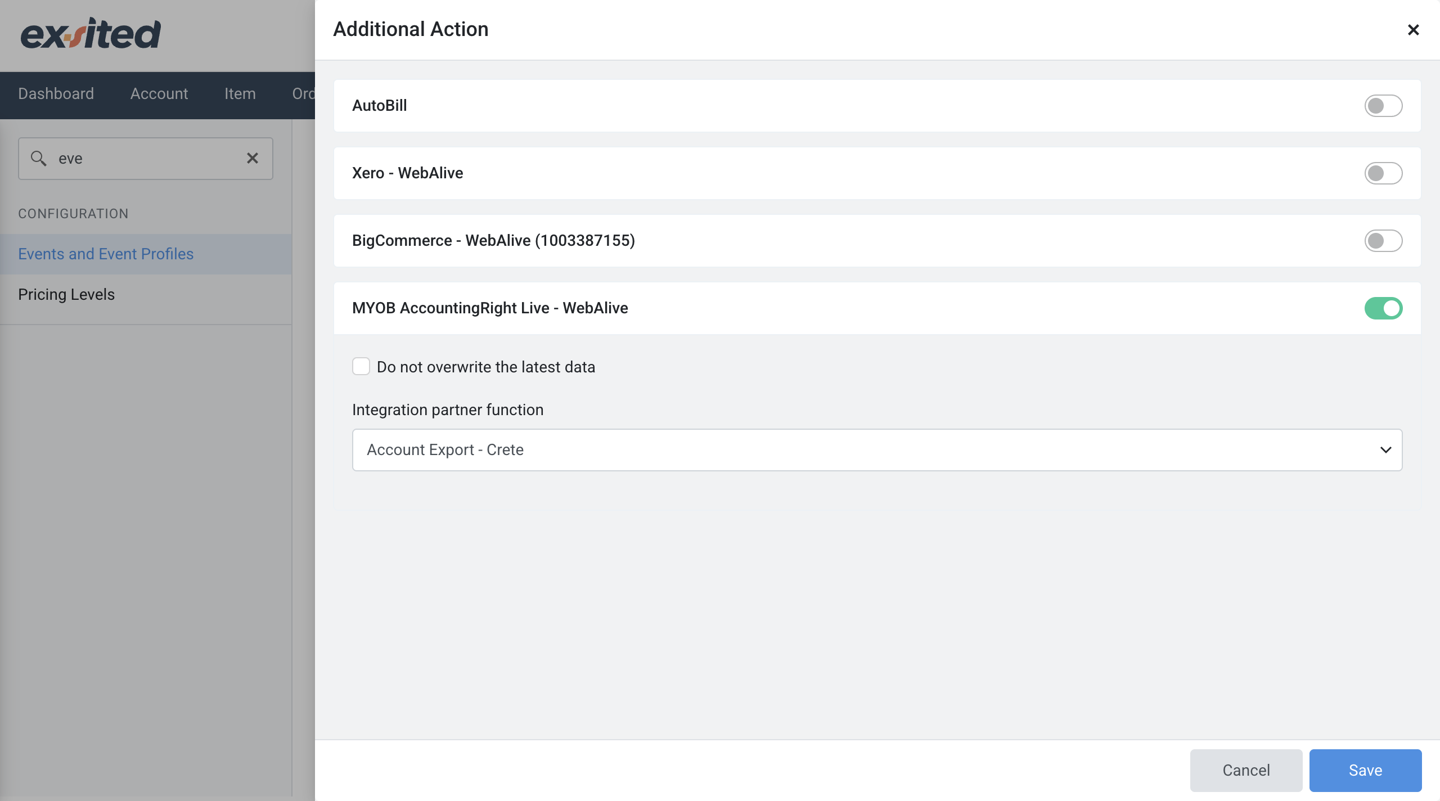
These attributes enable traceable, bidirectional linking between Exsited and MYOB.
Final Testing and Validation
- Perform test imports/exports before enabling automation
- Confirm item links and invoices are correctly synced
- Enable automation after validation
Best Practices
- Always test with a small sample before enabling full sync
- Maintain a backup of critical financial data
- Regularly review account and tax code mapping
- Monitor sync logs for errors or mismatches