User Settings & System Logs Overview
This section of the Exsited ERP user manual provides a detailed explanation of the "My Space" configuration options and associated logs (System Log, Event Log, Integration Log). These tools empower users to customise their workspace, troubleshoot issues, and track integration activity.
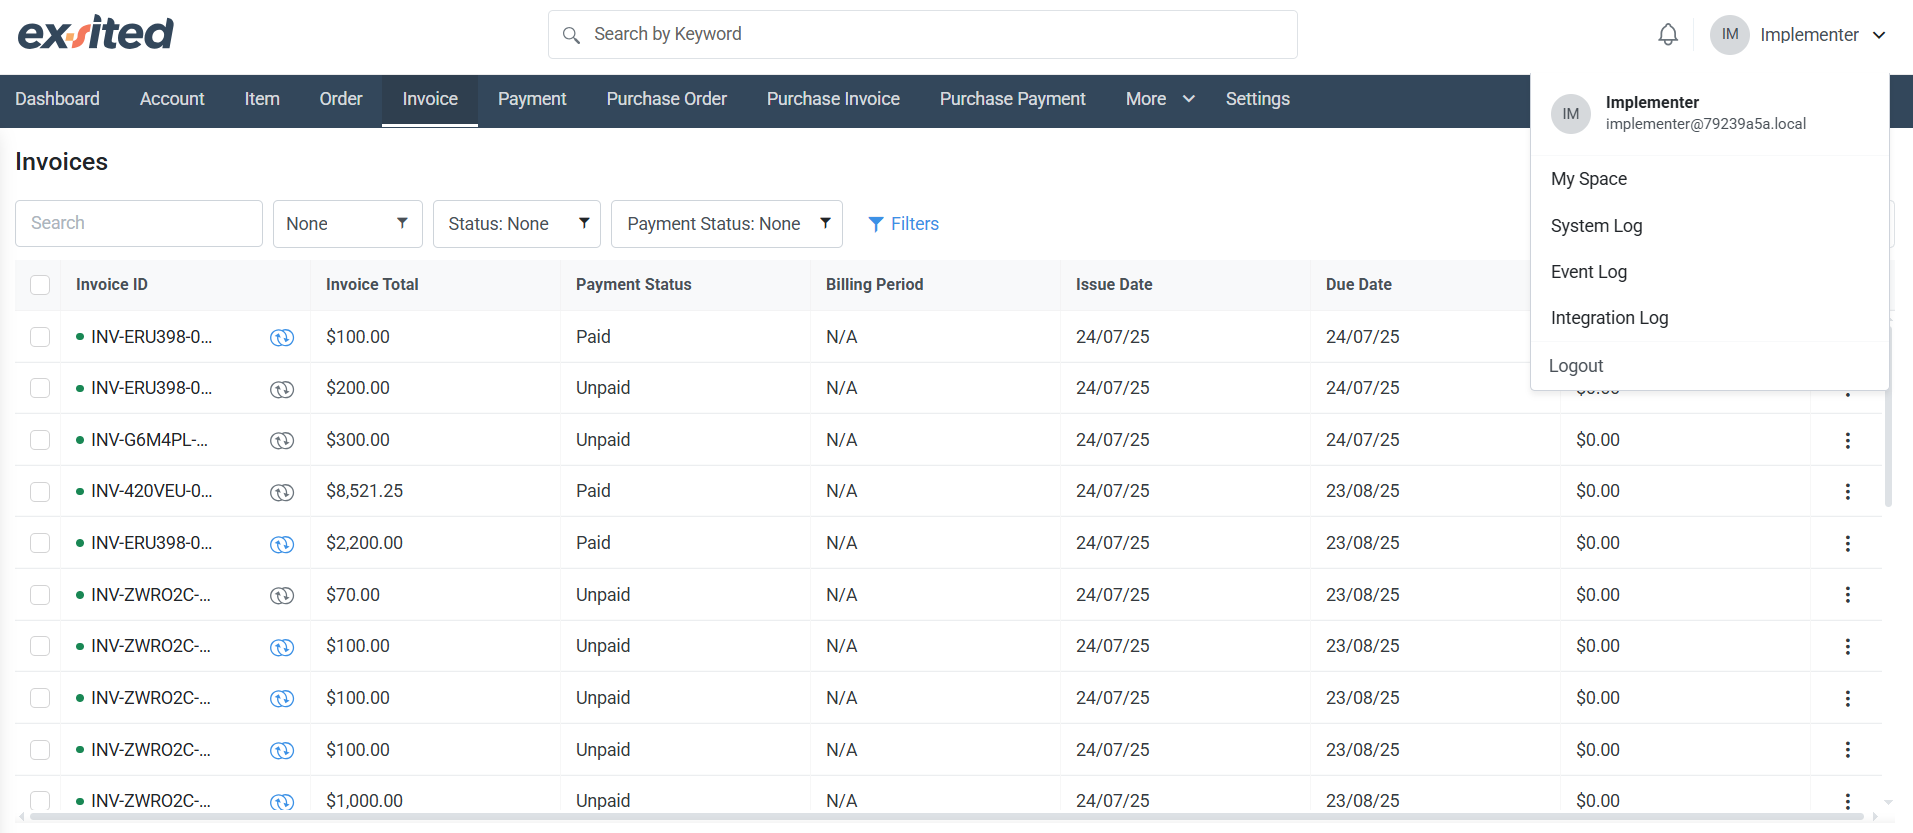
Accessing User Controls
Navigation Path:
Top-Right Corner → Click on the User Profile Icon → Dropdown Menu
Available Options:
- My Space
- System Log
- Event Log
- Integration Log
- Logout
Purpose:
This dropdown allows individual users to manage their personal space and access backend logs for integration or system activity tracking. It is essential for implementers, finance users, administrators, and support teams who need visibility into real-time actions and errors.
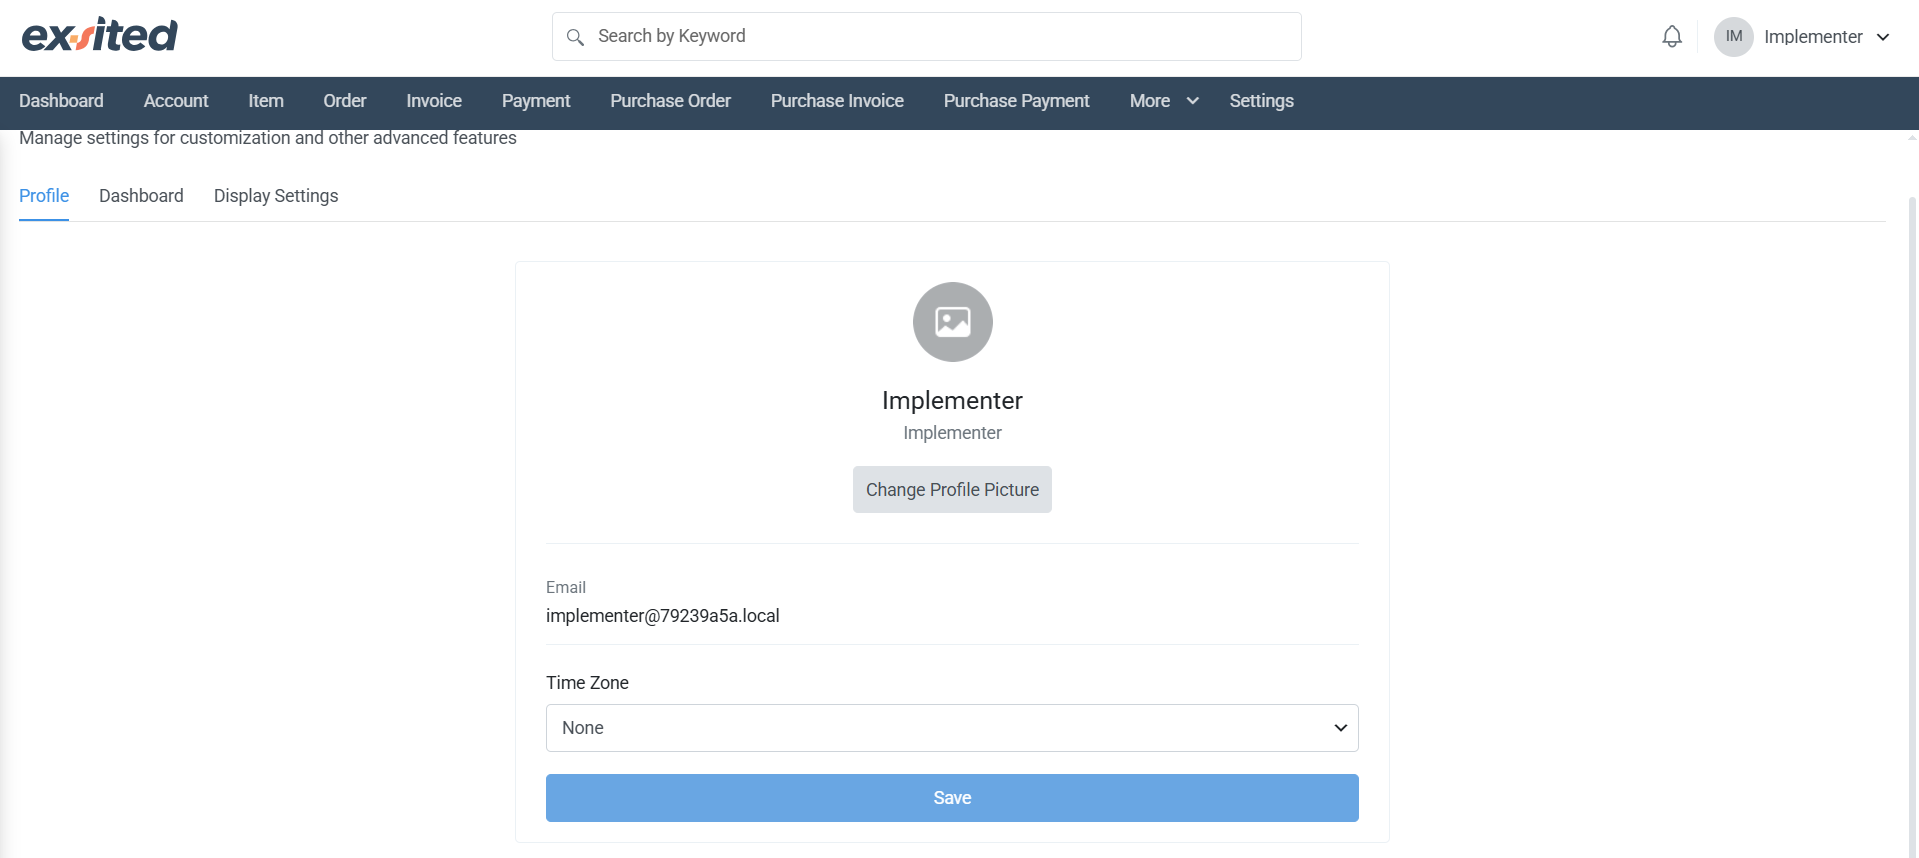
My Space – Profile Settings Tab
Path:
User Profile → My Space → Profile
Overview:
The Profile section allows each user to personalise their workspace with basic identification settings. It also enables time zone configuration, which directly affects log timestamps and system job scheduling.
Fields Explained:
- Profile Picture: Users can upload/change their image using the “Change Profile Picture” button.
- Email: Displays the user's registered login email. This field is non-editable and used for identity and log tracking.
- Time Zone: Dropdown field to select the correct local time zone. This ensures all logs and scheduled jobs (like imports or automation) reflect the correct time.
Best Practice:
Always set the correct time zone before enabling automation or testing integrations. Misaligned time zones may cause scheduling discrepancies.
My Space – Dashboard Tab
Path:
User Profile → My Space → Dashboard
Purpose:
This tab allows users to toggle which dashboards are visible and set a default dashboard view depending on their department or preference.
Dashboard Options (Toggle Controls):
- Executive
- Finance
- Sales
- Production
- Accounting
- Purchase
Each toggle enables or disables the dashboard panel for that function.
Default Dashboard (Dropdown):
Allows the user to select which module should load by default when they log into Exsited. For example, a Finance Manager might choose “Finance” as the default dashboard.
Use Case:
Highly useful for users who want to streamline their workflow by reducing on-screen clutter and accessing the most relevant dashboard first.
.png)
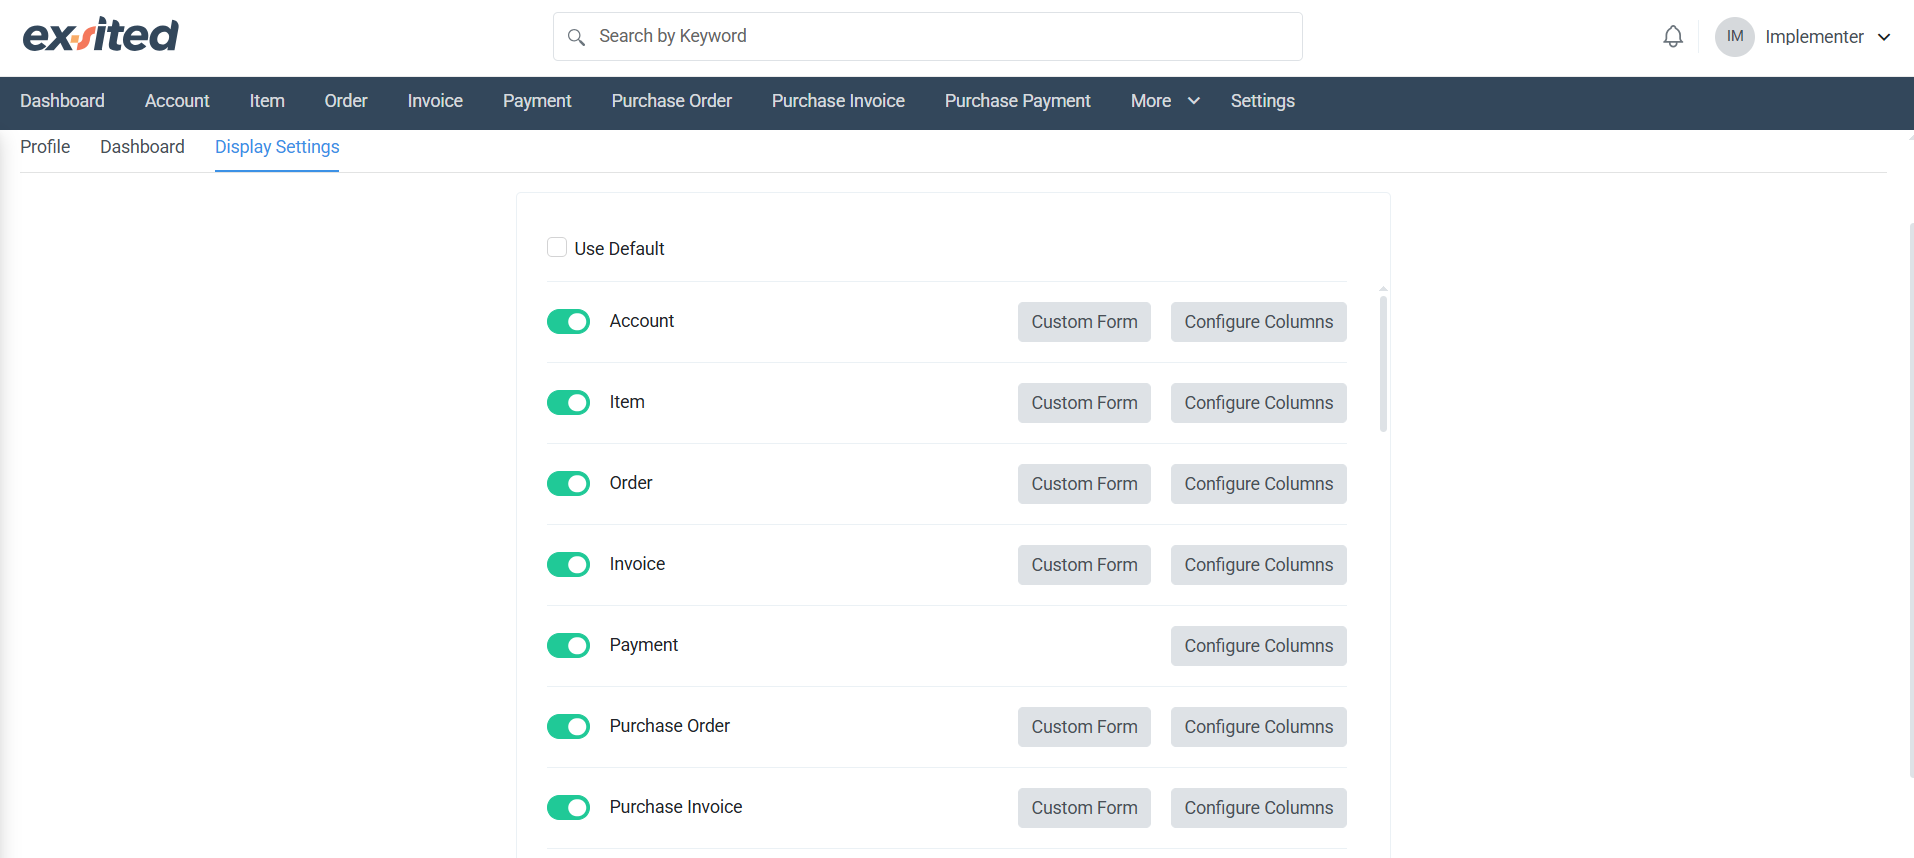
My Space – Display Settings Tab
Path:
User Profile → My Space → Display Settings
Purpose:
This section controls the look and feel of module forms and table columns. It provides two major options for each module:
Features:
- Custom Form:
Opens a configuration interface where the user can modify which fields are shown, hidden, or marked as mandatory in data-entry forms (e.g., Invoice form or Purchase Order form). - Configure Columns:
Controls which columns are visible in the list/grid views for each module (e.g., which fields to show on the Purchase Invoice listing screen).
Available Modules for Configuration:
- Account
- Item
- Order
- Invoice
- Payment
- Purchase Order
- Purchase Invoice
- Purchase Payment
Use Case:
Perfect for departments that want to simplify their view (e.g., Sales may not need to see backend accounting columns). This improves usability and reduces cognitive load.
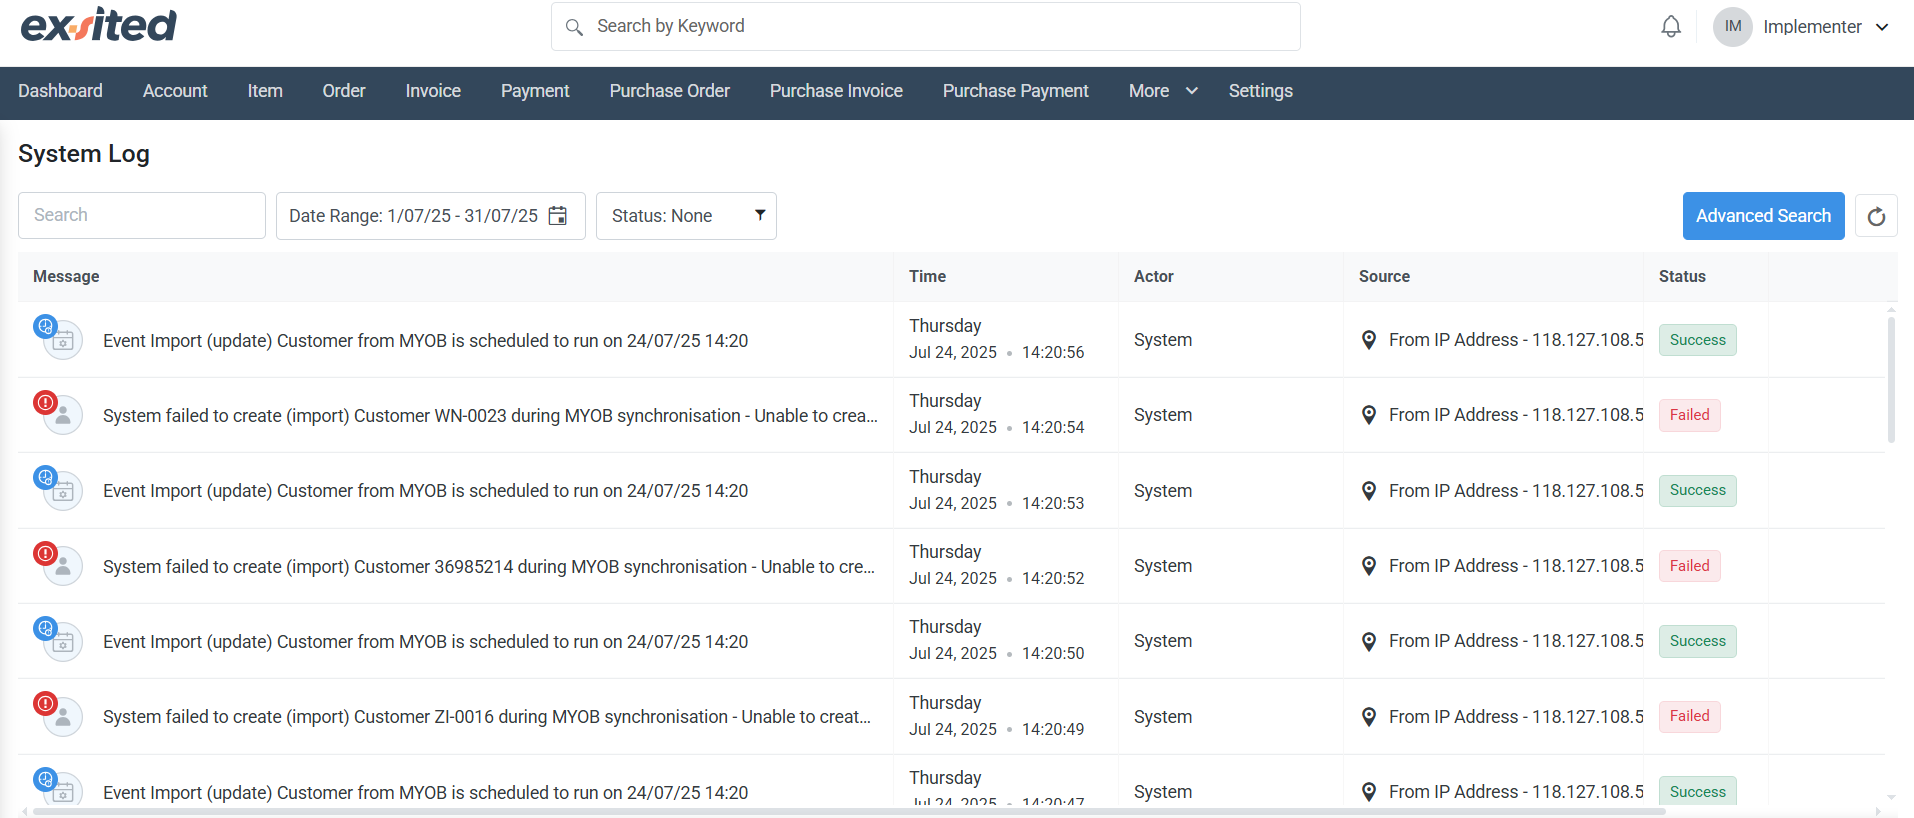
System Log
Path:
User Profile → System Log
Purpose:
Displays a detailed history of system activities, especially those triggered by automation or scheduled tasks (e.g., importing customers from MYOB).
Key Columns:
- Message: Details of the event (e.g., “Event Import: Customer from MYOB scheduled to run...”)
- Time: Exact time of the event
- Actor: Usually System (shows who/what triggered the event)
- Source: IP address or source system (e.g., MYOB, Shopify)
- Status: Shows whether the event was successful or failed
Filters:
- Date Range – Allows filtering logs for a specific time period
- Status Filter – Useful for quickly viewing only failed jobs
Use Case:
Helps implementers and support staff identify when and why sync or automation processes failed. For example, if customer records failed to import due to missing fields, this log helps pinpoint the failure timestamp.
Event Log
Path:
User Profile → Event Log
Purpose:
This screen lists each event execution triggered either manually or automatically. It is more granular than the System Log.
Columns Explained:
- Event: Unique ID for the process instance (e.g., import job)
- Schedule: When the job was supposed to run
- Object: Type of data being processed (e.g., “Customer”)
- Status:
- Scheduled: Waiting to run
- Completed (Failed): Attempted but failed
- Invalid state: Indicates a bad data structure
- Unable to create Account: Shows validation failure from MYOB side
Use Case:
Supports troubleshooting for data integration processes, especially when multiple jobs are scheduled in quick succession. Helps in diagnosing whether issues are systemic or tied to specific data.

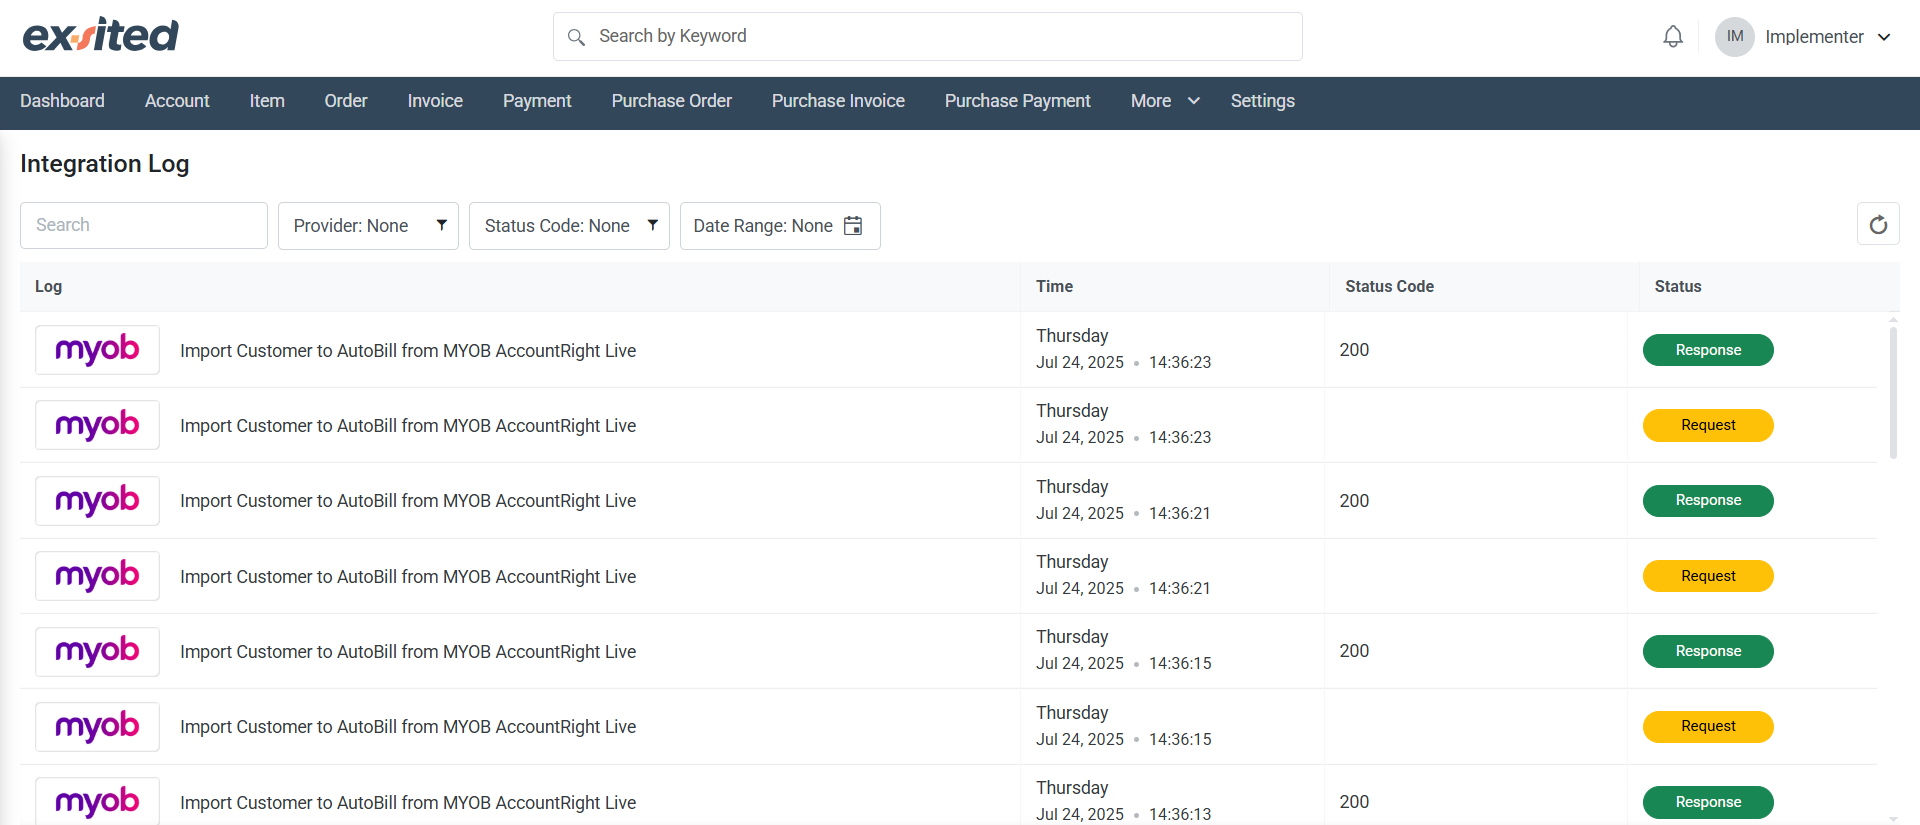
Integration Log
Path:
User Profile → Integration Log
Purpose:
Monitors the actual API communication between Exsited and connected third-party platforms (e.g., MYOB).
Column Descriptions:
- Log Description:
e.g., “Import Customer to AutoBill from MYOB AccountRight Live” - Time: When the event occurred
- Status Code: HTTP response code (e.g., 200 = Success)
- Status: Shows if the request is being processed, pending, or successfully responded
Troubleshooting Tips:
- If Status Code is 200 but the Event Log shows "Invalid state", the issue is in the payload—not in the connection.
- Alternating Request/Response logs indicate two-way communication was attempted.
Use Case:
Essential for technical users to verify the backend connection is working and that the data pipeline from tools like MYOB, Shopify, etc. is healthy.