Overview
This guide provides a step-by-step walkthrough for integrating Xero, a leading cloud-based accounting platform, with Exsited.
The integration enables real-time data exchange between finance and operations, including inventory, supplier and customer records, invoices, payments, and financial transactions.
Connecting Xero with Exsited allows organisations to:
- Automate financial data across departments
- Eliminate manual entry and reduce errors
- Maintain data consistency and regulatory compliance
- Improve coordination across finance, procurement, and inventory
- Access faster, more accurate insights for decision-making
This guide is designed for system administrators, finance managers, consultants, and integration engineers responsible for setting up and maintaining a reliable, secure connection between Xero and Exsited.
Prerequisites
Before initiating the integration, ensure that the following preconditions are met:
- Access Credentials: You must have working usernames and passwords for both Xero and Exsited platforms.
- Permission Control: Your user roles must include administrative rights or integration privileges in both systems.
- Warehouse Setup: At least one warehouse must be created and configured in Exsited for inventory tracking purposes.
- Item Preparation: Ensure that inventory or non-inventory items are already created and properly classified in Xero.
- Customer Reference Fields: Define custom customer attributes in Exsited that mirror identifiers used in Xero.
- Object Planning: Clearly identify which objects (e.g., items, suppliers, invoices, customers, accounts) are part of the integration plan.
Meeting these prerequisites helps ensure a smooth, error-free data sync between Xero and Exsited.
Create a Warehouse in Exsited
Navigation Path: Exsited > Settings > Warehouses
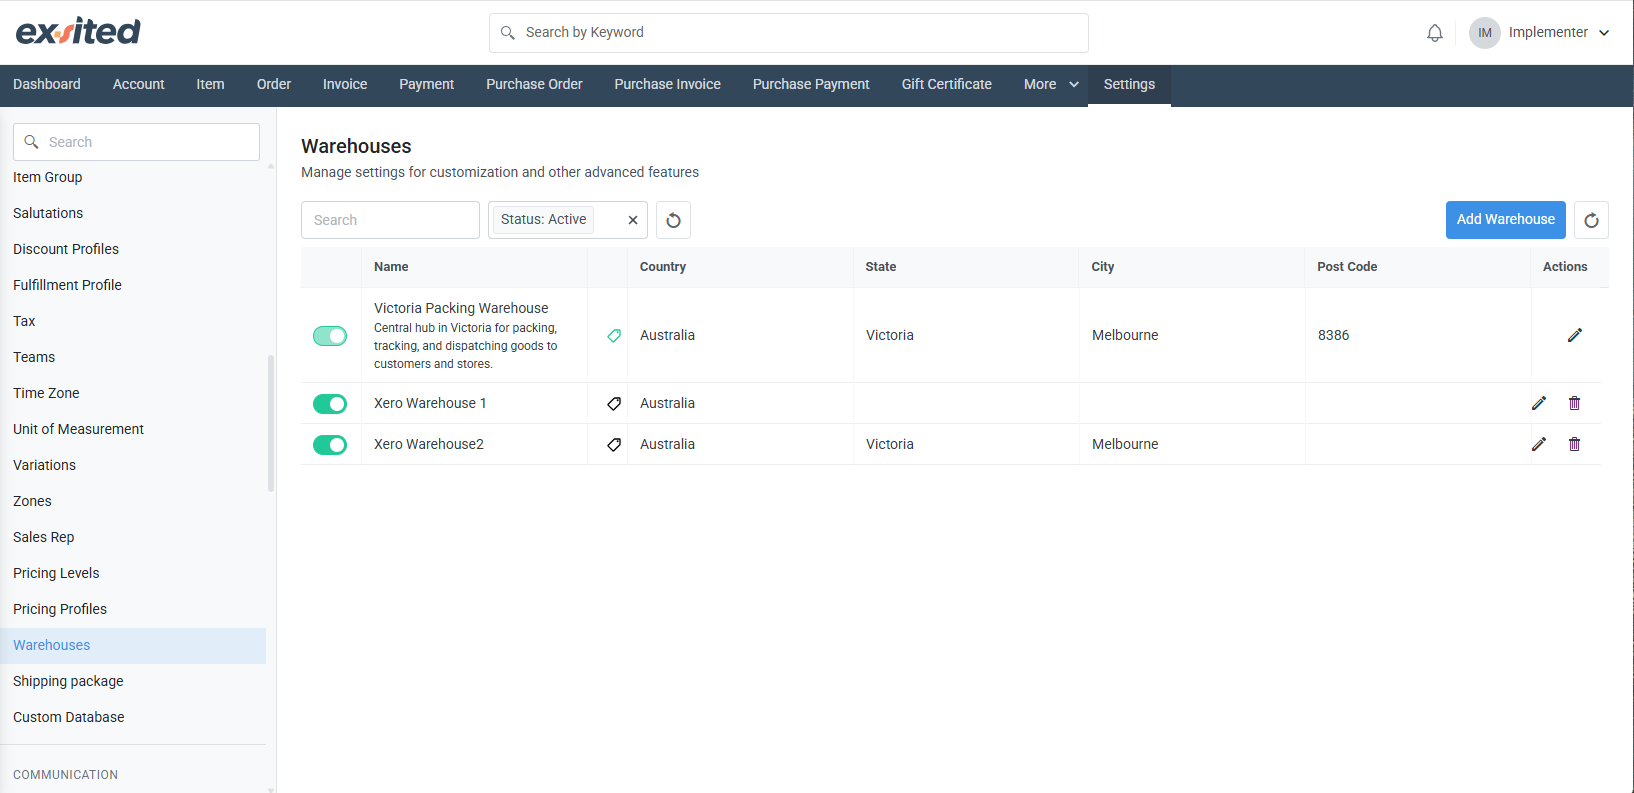
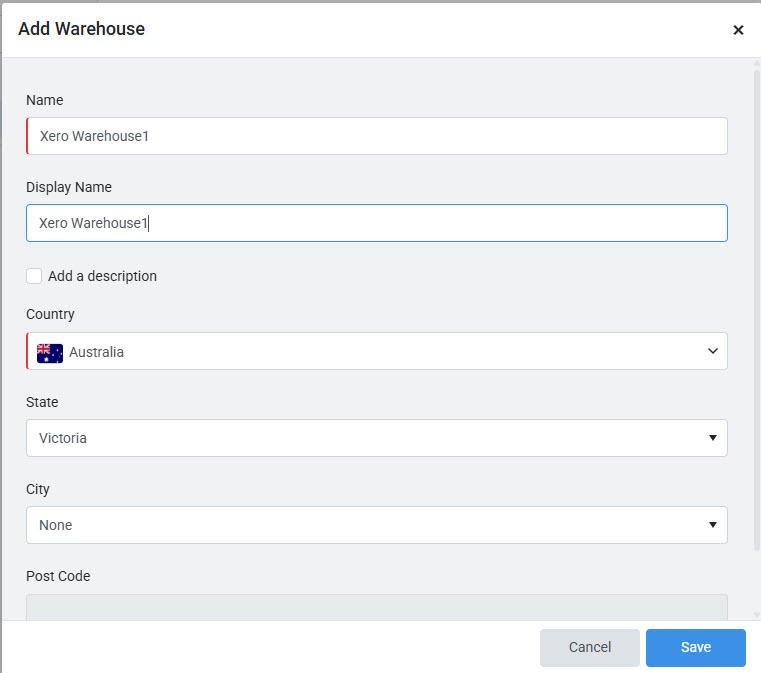
Create a new warehouse with a unique name and location identifier by clickingn the “Add Warehouse” button. This allows users to define a new warehouse with a unique name, display name, and location details, including country, state, and city. The setup is essential for accurately linking inventory operations and synchronising warehouse data with Xero.
This warehouse acts as the default for all inventory-related transactions. Accurate warehouse setup ensures correct inventory allocations and reporting during item import/export cycles.
Set Up Your Xero Organisation
Navigation: Xero > Organisations > Add a new organisation
In Xero, users can manage multiple organisations from a single dashboard by selecting from the organisation list or adding a new one. This central view helps streamline access to financial data, bank connections, and invoicing activity.
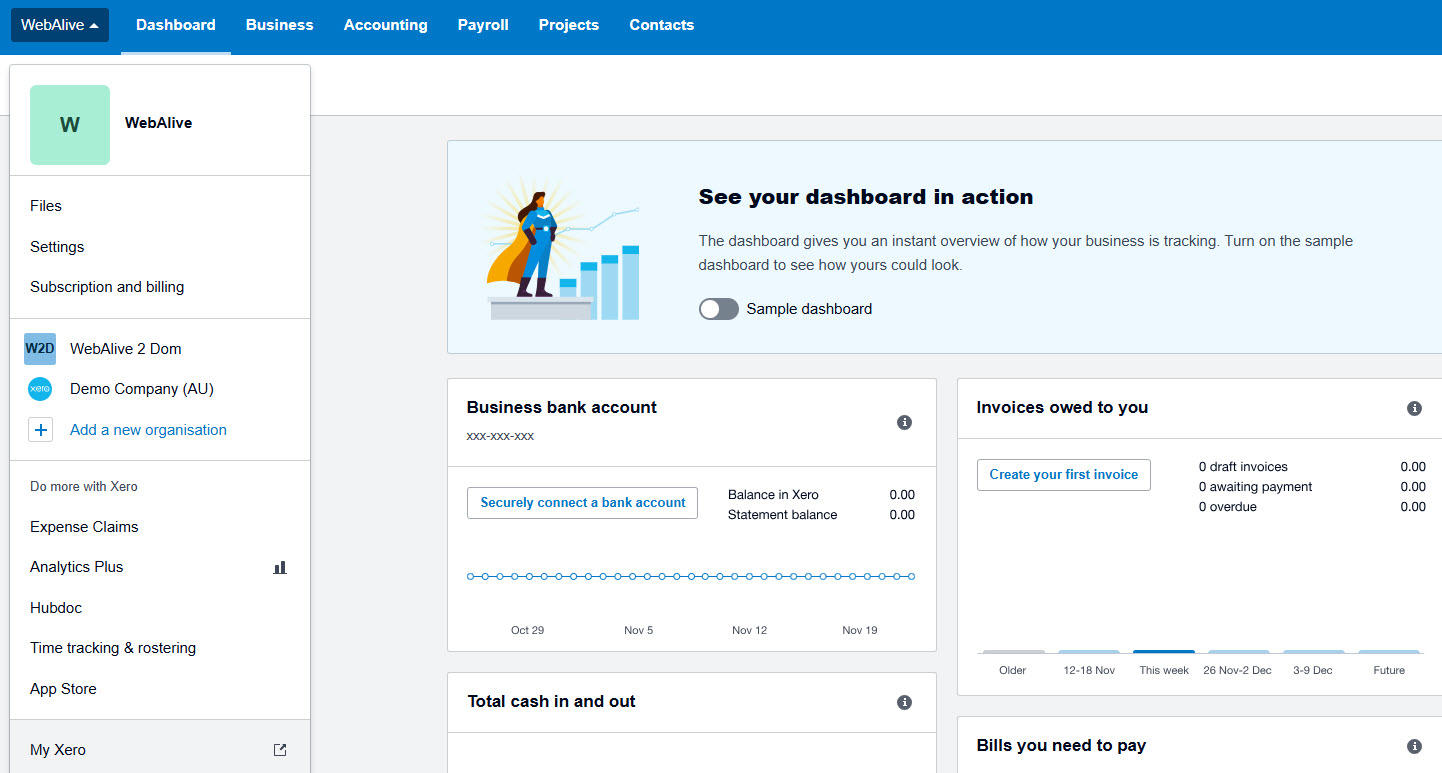
Fill in your business details (name, country, time zone). This creates the identity that will be synced with Exsited.
The initial setup for adding a business in Xero includes the business name, industry, country, and GST registration. Accurate setup here ensures correct tax handling, regional settings, and compliance from the start.

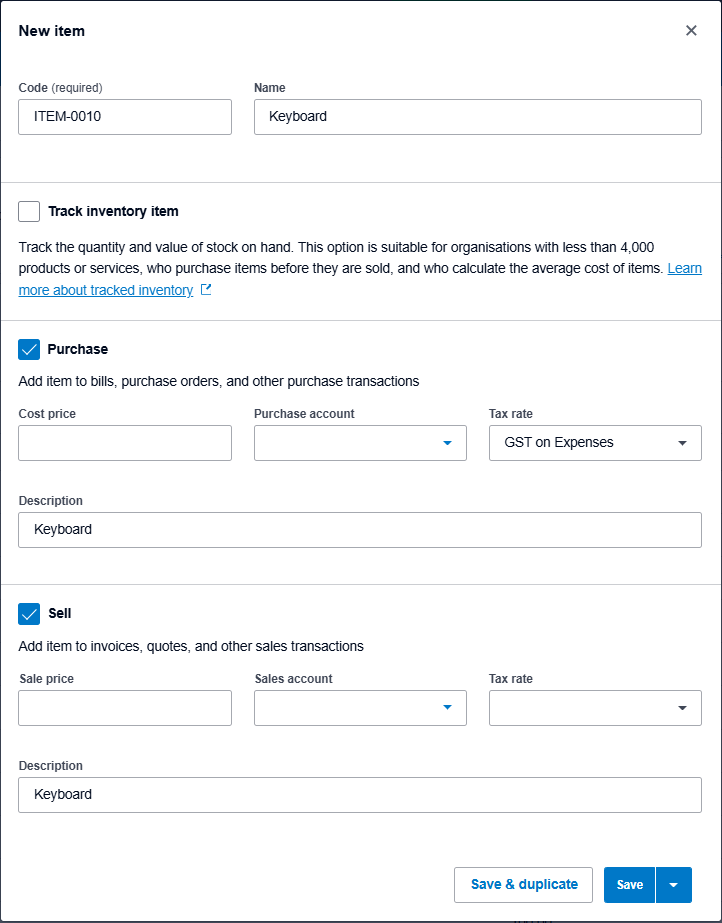
Add Inventory Items in Xero
Navigation Path: Xero > Business > Products and Services > New Item
- Add details such as Item Code and Name.
- Tick the checkbox labelled "Track inventory item" to enable inventory management.
- Assign ledger accounts:
- Inventory Asset Account for stock valuation
- Inventory adjustments in Xero enable users to update item quantities, costs, and values through a controlled adjustment process. The adjustment reflects in relevant accounts (e.g., Inventory and COGS) and includes reference tracking for audit purposes.
.png)
- If not enabling inventory management, proceed to create a non-inventory item in Xero.
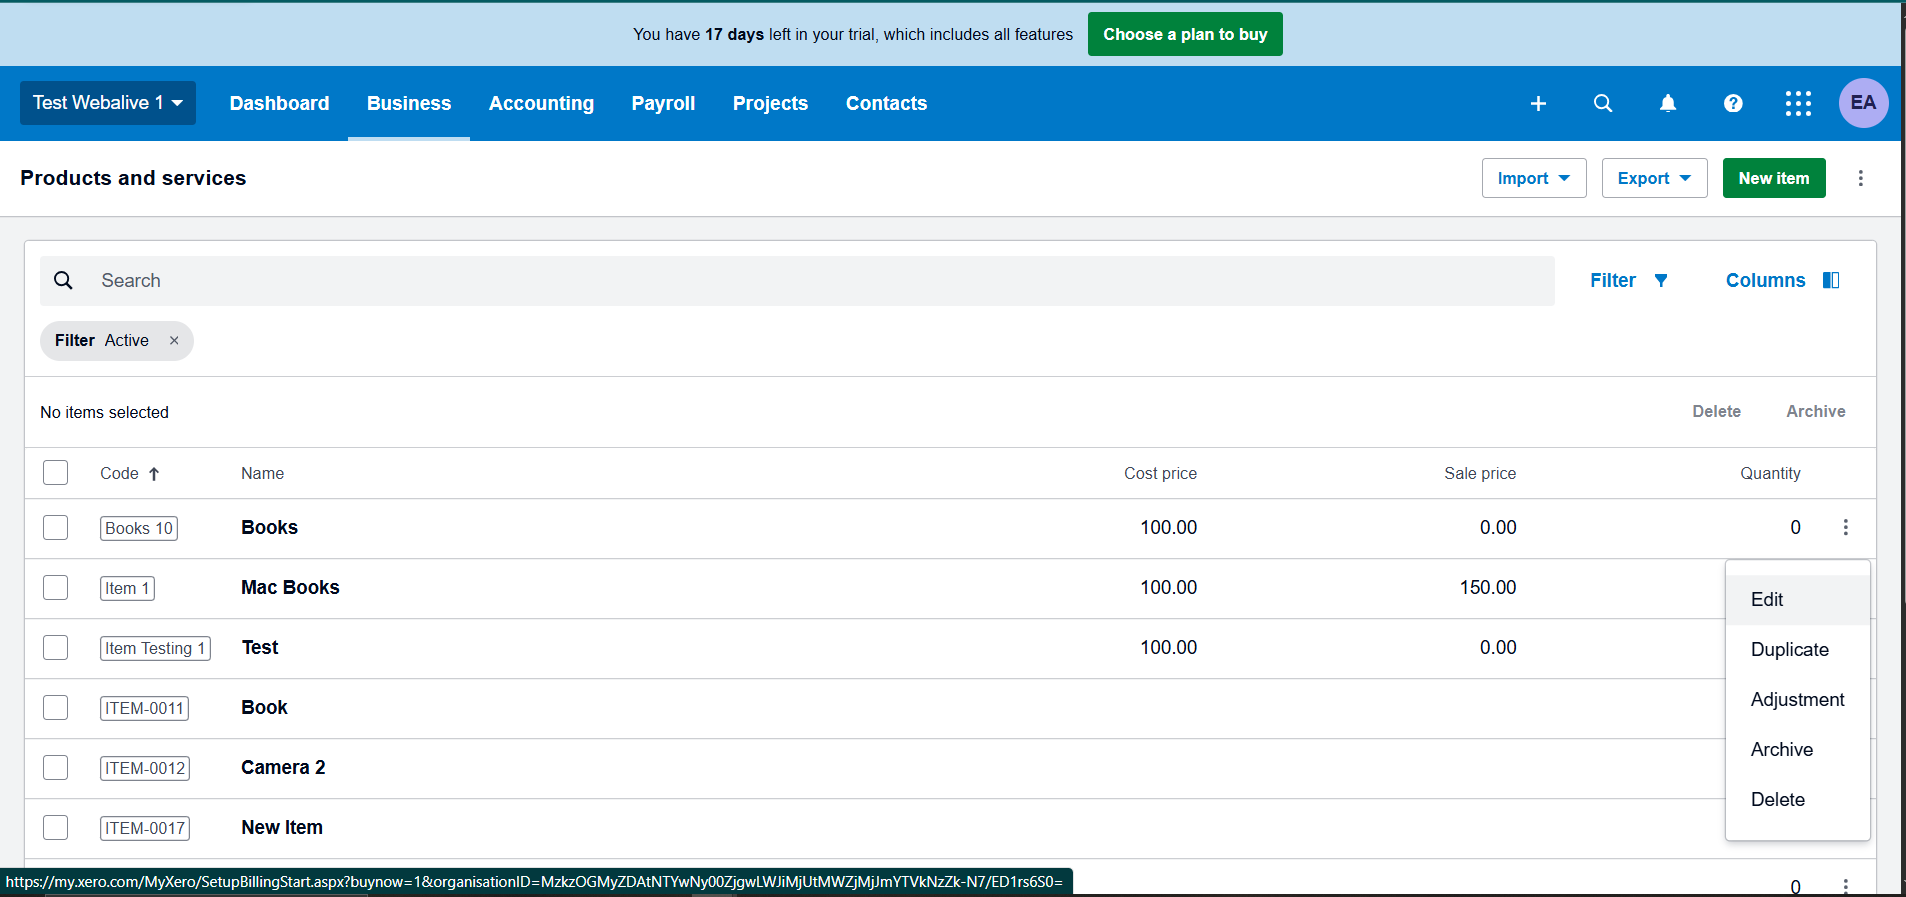
The view shows a list of inventory items that have been added to the system. After creating a new item, it appears in the list along with its details.
On the right side of each item row, there is an options menu (three dots) where you can choose to Edit, Duplicate, Adjust, Archive, or Delete the item.
Connect Exsited to Xero
Navigation: Exsited > settings > Connect other applications > Xero > Connect > Add Integration
If it’s already connected: Exsited > settings > Connected applications > Xero > Manage
- In the Exsited platform, go to 'Add Integration'.
- Select Xero and click 'Connect'.
- You will be redirected to the Xero dashboard.
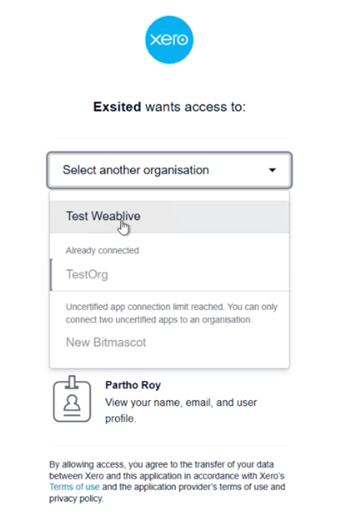
- Choose the newly created organisation and click 'Allow Access'
At the authorisation step, where Exsited requests access to a Xero organisation, users must select the appropriate organisation to grant permission for secure data integration between the two platforms.
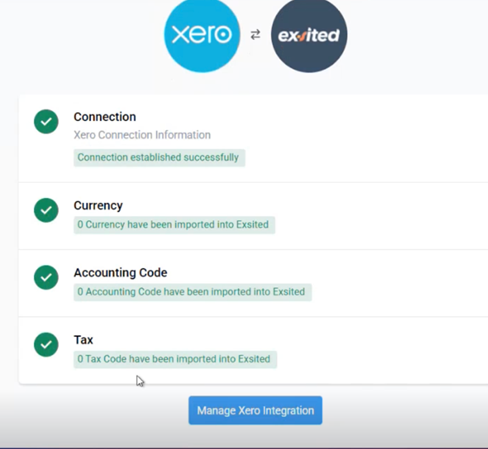
Once connected, Exsited fetches account details and tax codes from Xero and confirms the successful connection between Xero and Exsited. It also displays the import status of currencies, accounting codes, and tax codes, enabling users to manage the integration efficiently.
Configurations
Basic Configurations
- Navigation:
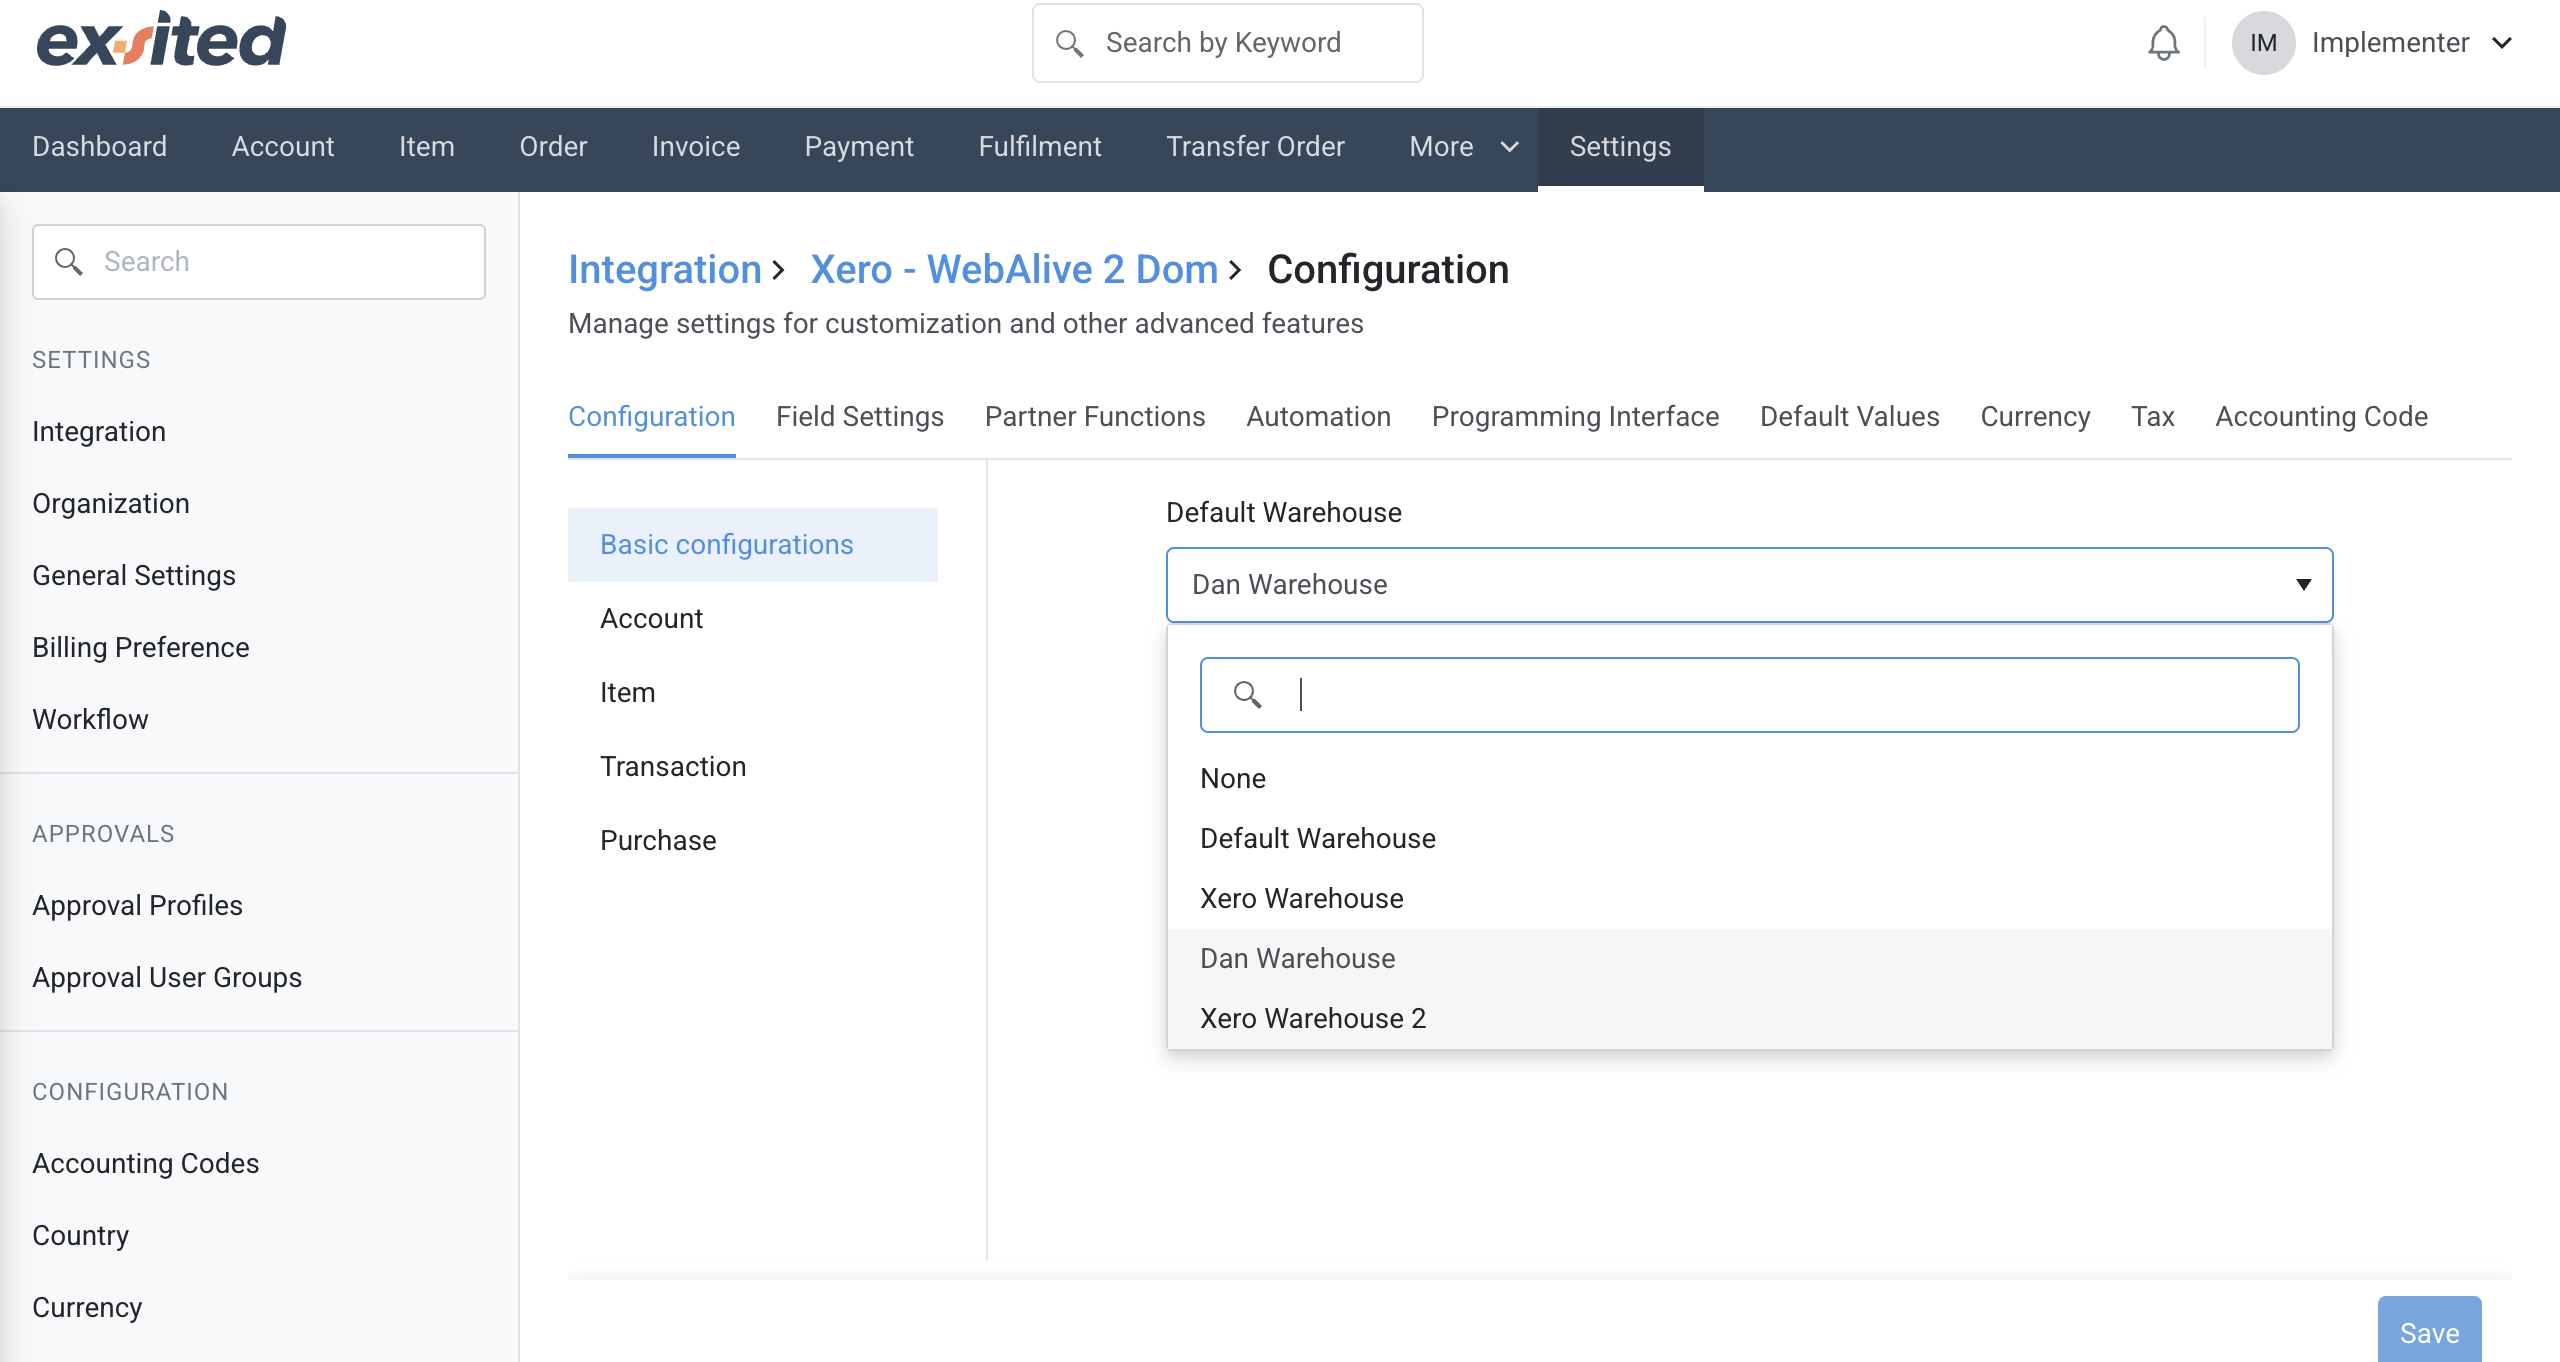
Exsited > Settings > Xero > Configure > Basic Configurations - Set the warehouse created earlier as the default.
- This ensures that all inventory imports from Xero are assigned to a valid, traceable warehouse location.
The default warehouse setting in Exsited allows users to assign a specific warehouse for all inventory transactions synced from Xero. This ensures consistent item mapping and accurate stock tracking during the integration process.
Account
For the integration setup between Exsited and Xero, it is important to select the most appropriate default accounting codes.

Item
- Navigate to Item Sync Settings within the Xero Integration module.
- Assign account mappings:
- Sales
- Purchases
- Inventory
In Exsited's integration settings, users can map Xero's revenue, cost of goods sold, and inventory accounts to corresponding Exsited accounting codes. This ensures accurate financial classification during item transactions synced between the two systems.

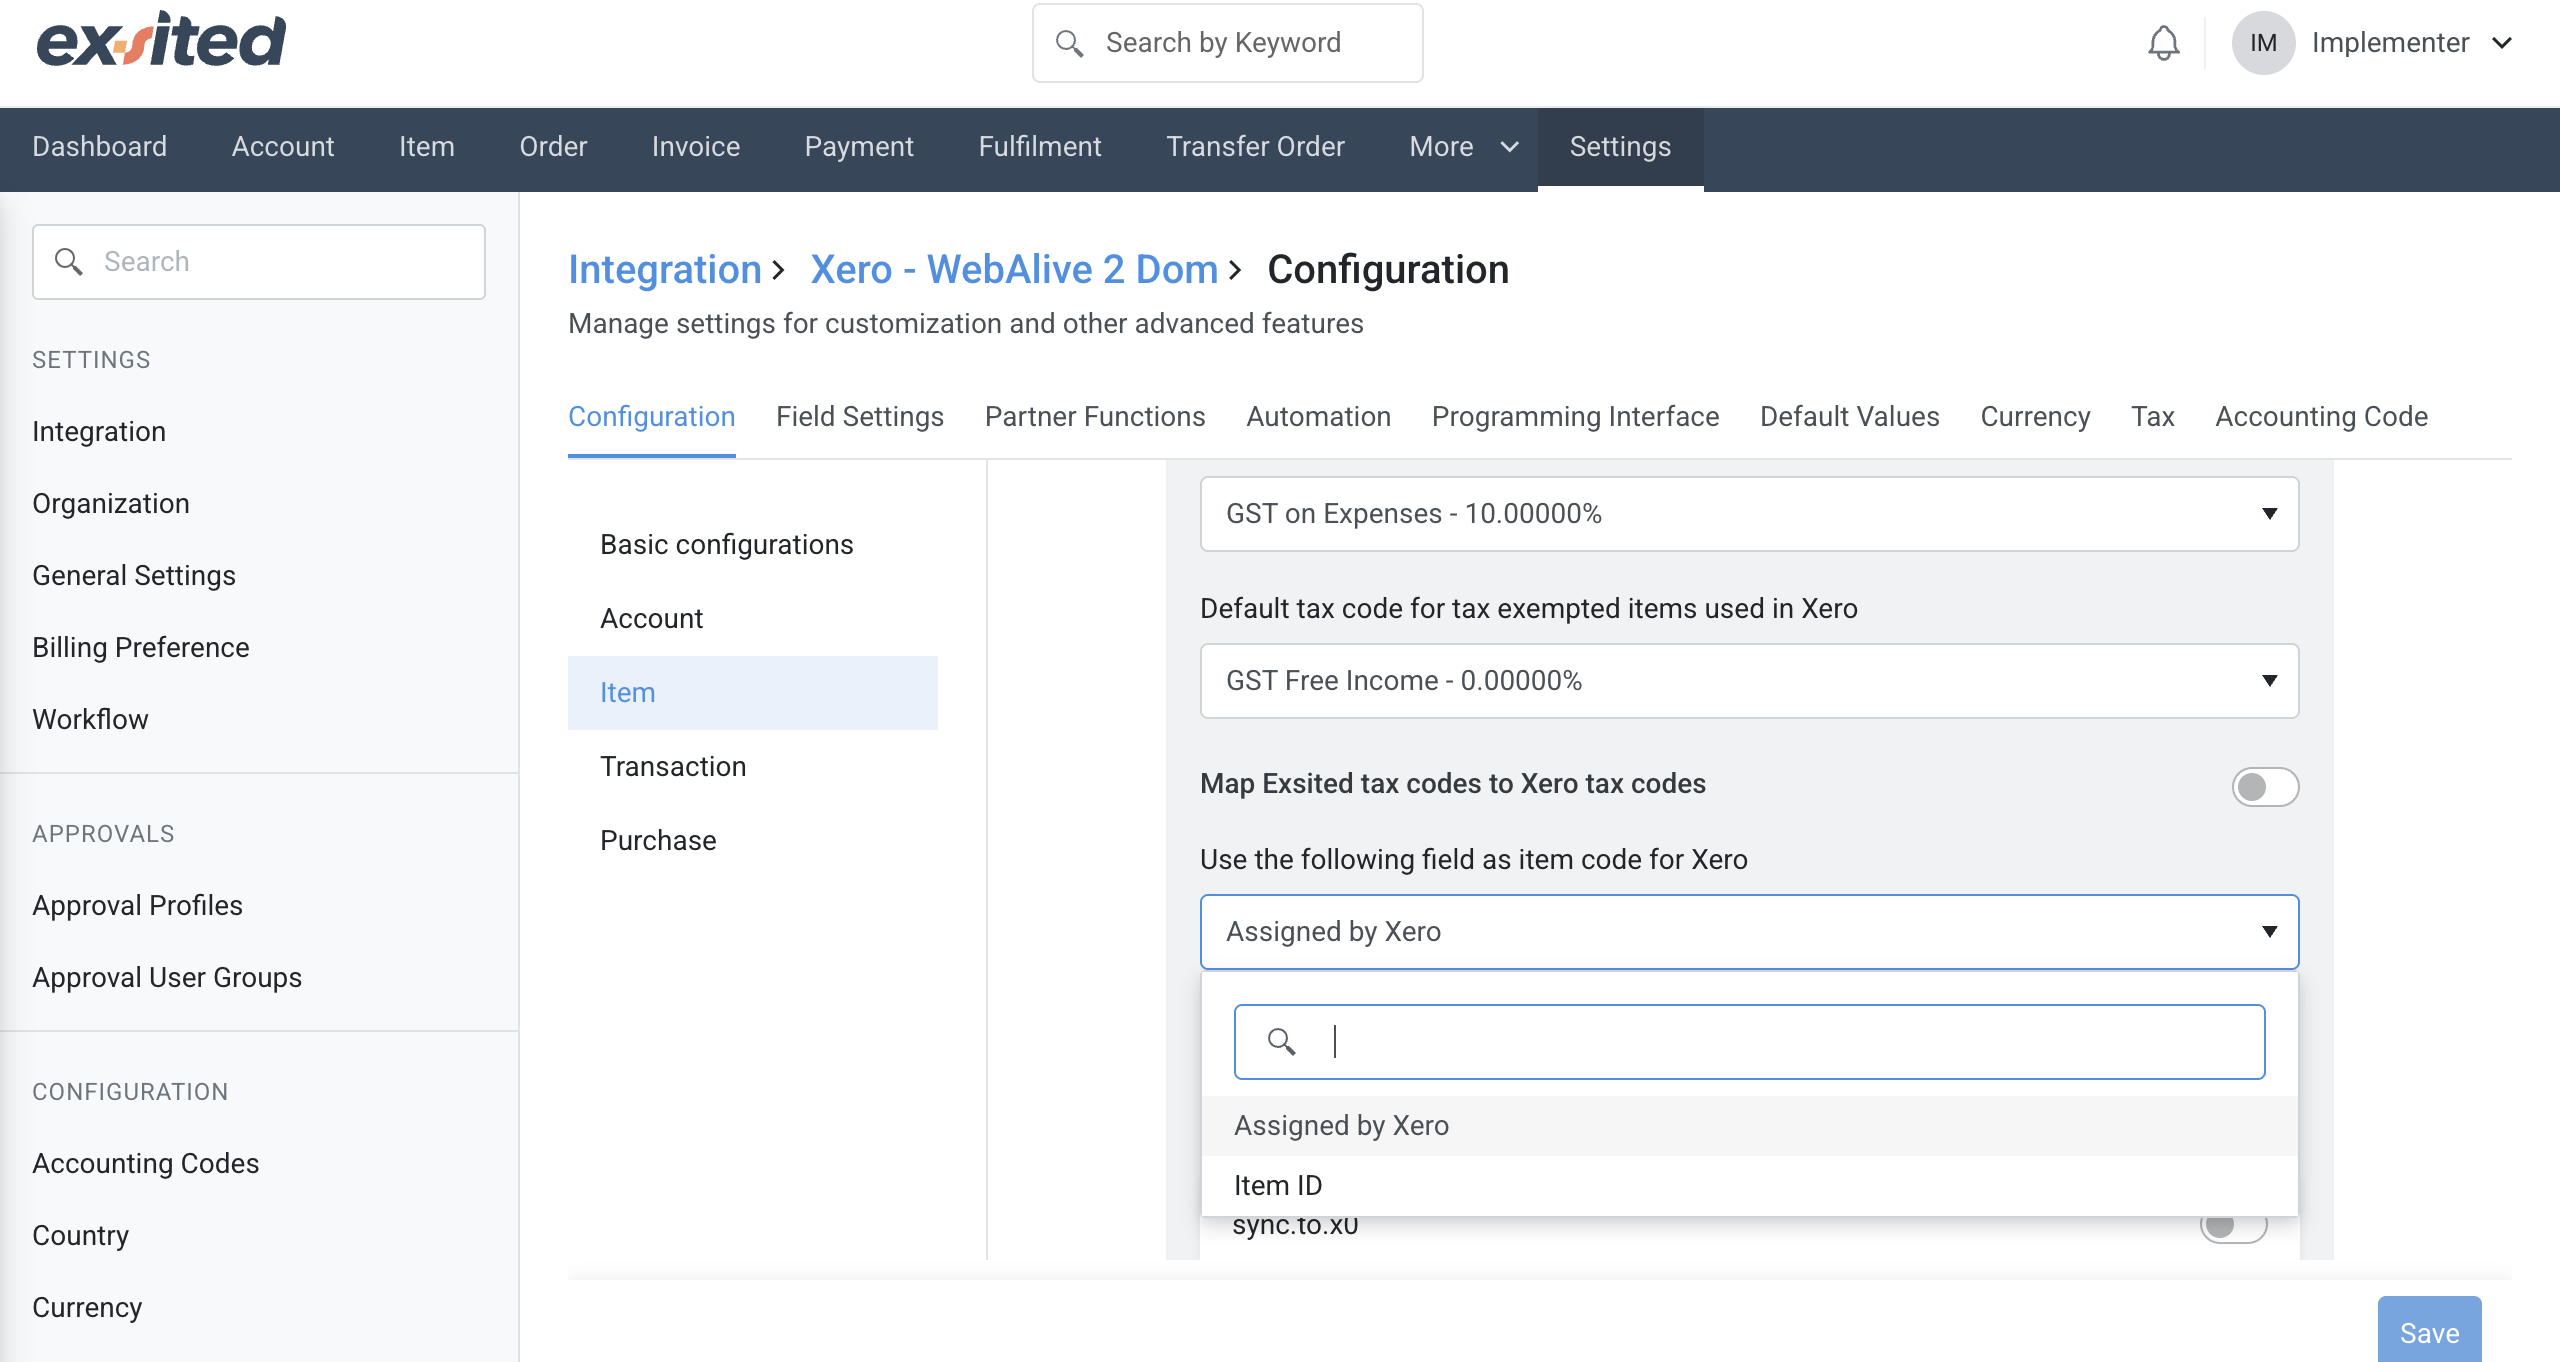
Choose Assign by Xero Code for item ID assignment. This ensures internal control over item identifiers and prevents duplication or mismatches.
Exsited allows users to define how item codes are handled during integration with Xero, either by using Xero’s item code or assigning one internally. Choosing the correct item code method is critical for preventing duplication and ensuring seamless item synchronisation.
Field Settings
- Define field directionality:
- Xero to Exsited (Imports): Ideal for importing invoices, items, and customers.
- Exsited to Xero (Exports): Used for pushing sales, account data, or items.
- Account-level mappings must be reviewed regularly to reflect changes in your chart of accounts.
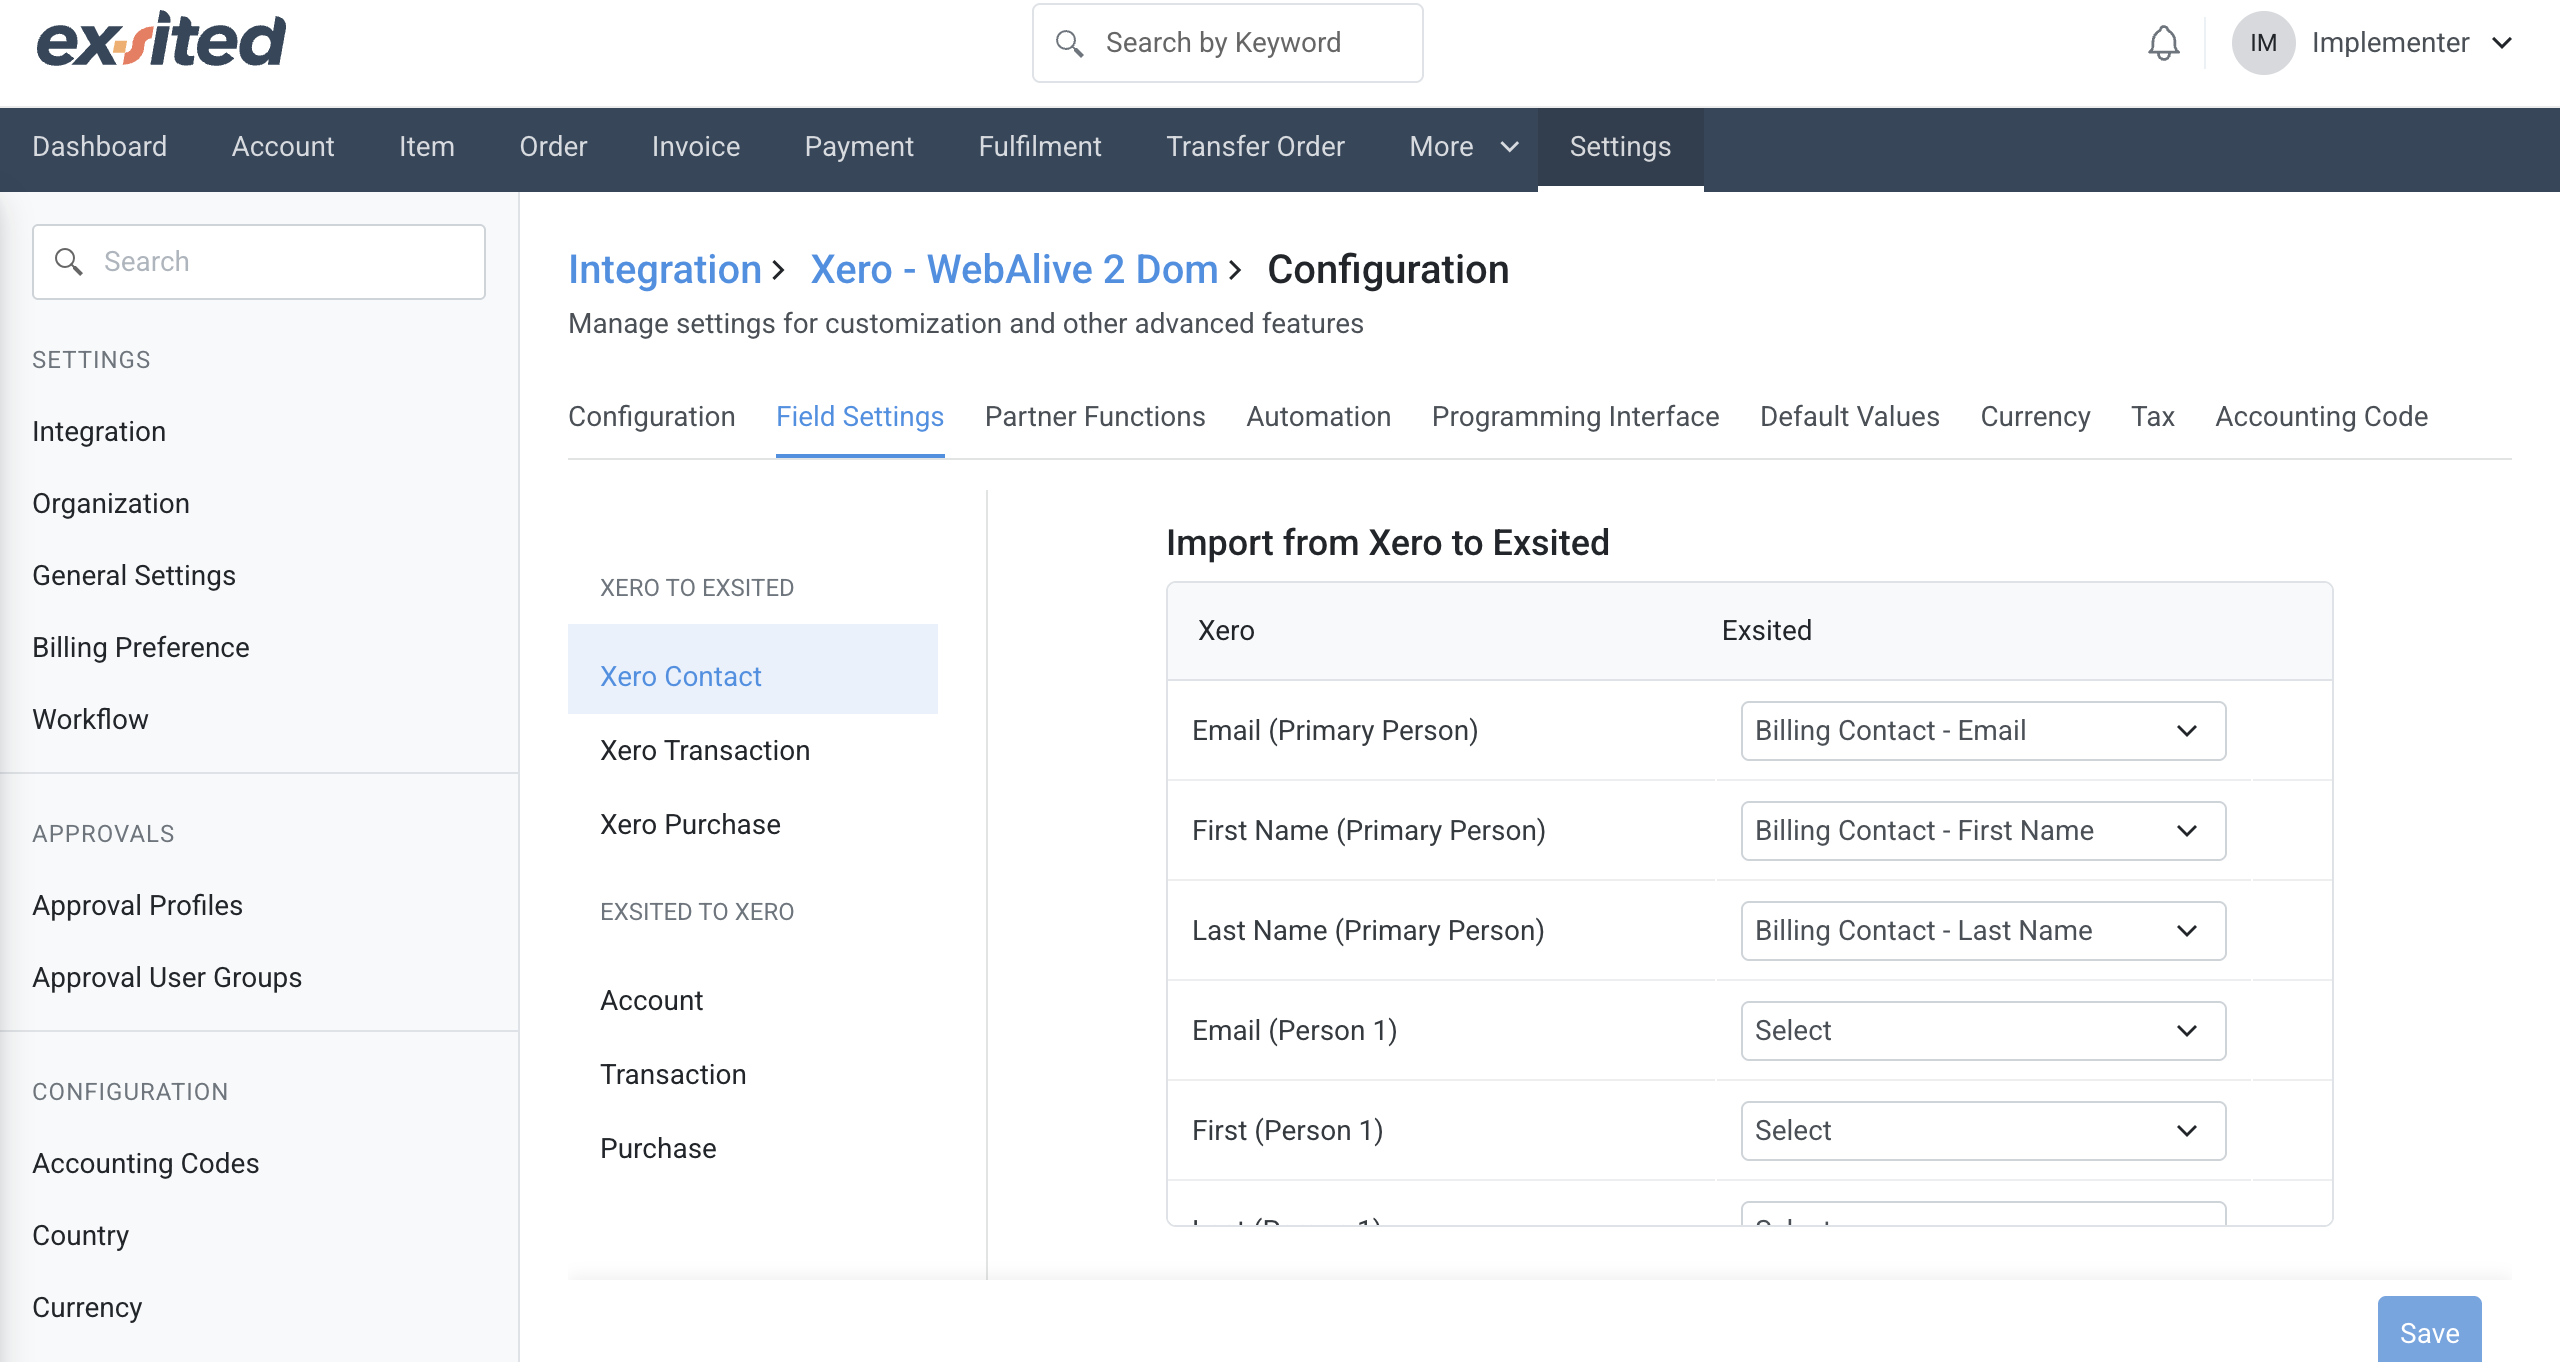
In the field settings section, users can map Xero contact fields, such as email and names, to corresponding fields in Exsited. Accurate field mapping ensures customer and supplier data are correctly imported and linked across both systems.
Currency
- Navigate to the Currency Settings in Exsited.
- Activate multi-currency processing if your Xero organisation operates in multiple currencies.
- This will enable an accurate exchange rate application during invoice imports and financial reporting.
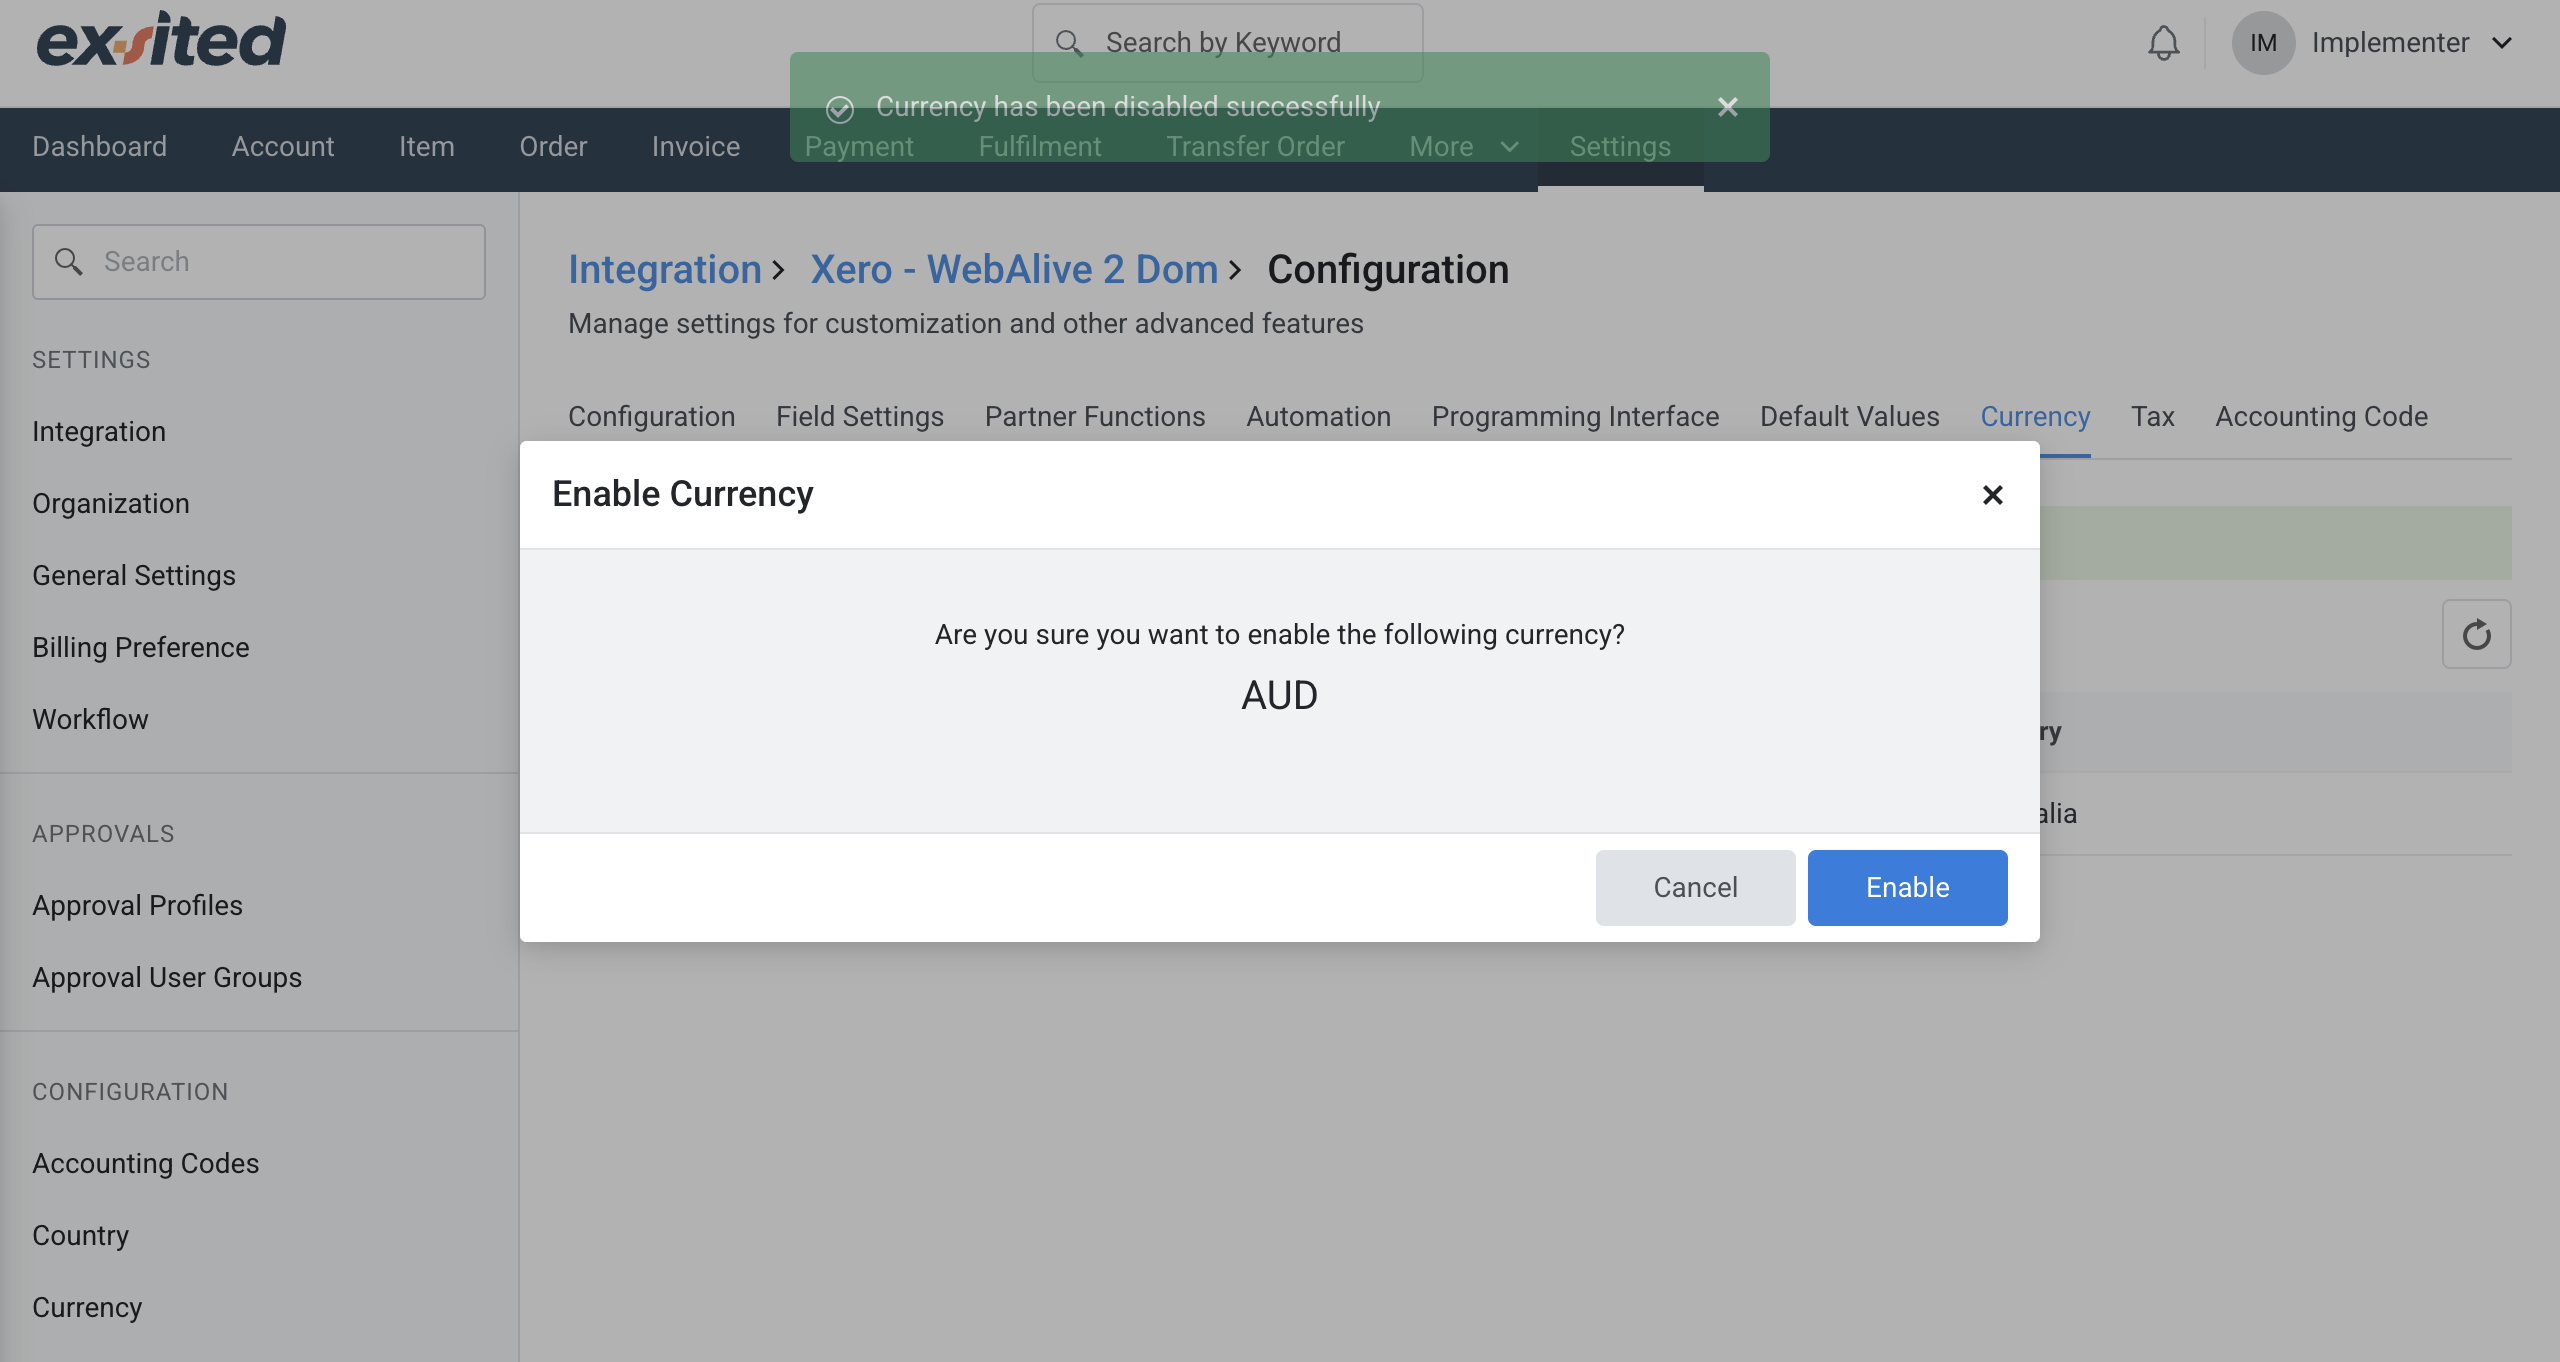
During the Xero integration setup in Exsited, users must enable the appropriate currency (e.g., AUD) to support financial transactions. Enabling currency ensures consistent handling of monetary values between both systems.
Tax
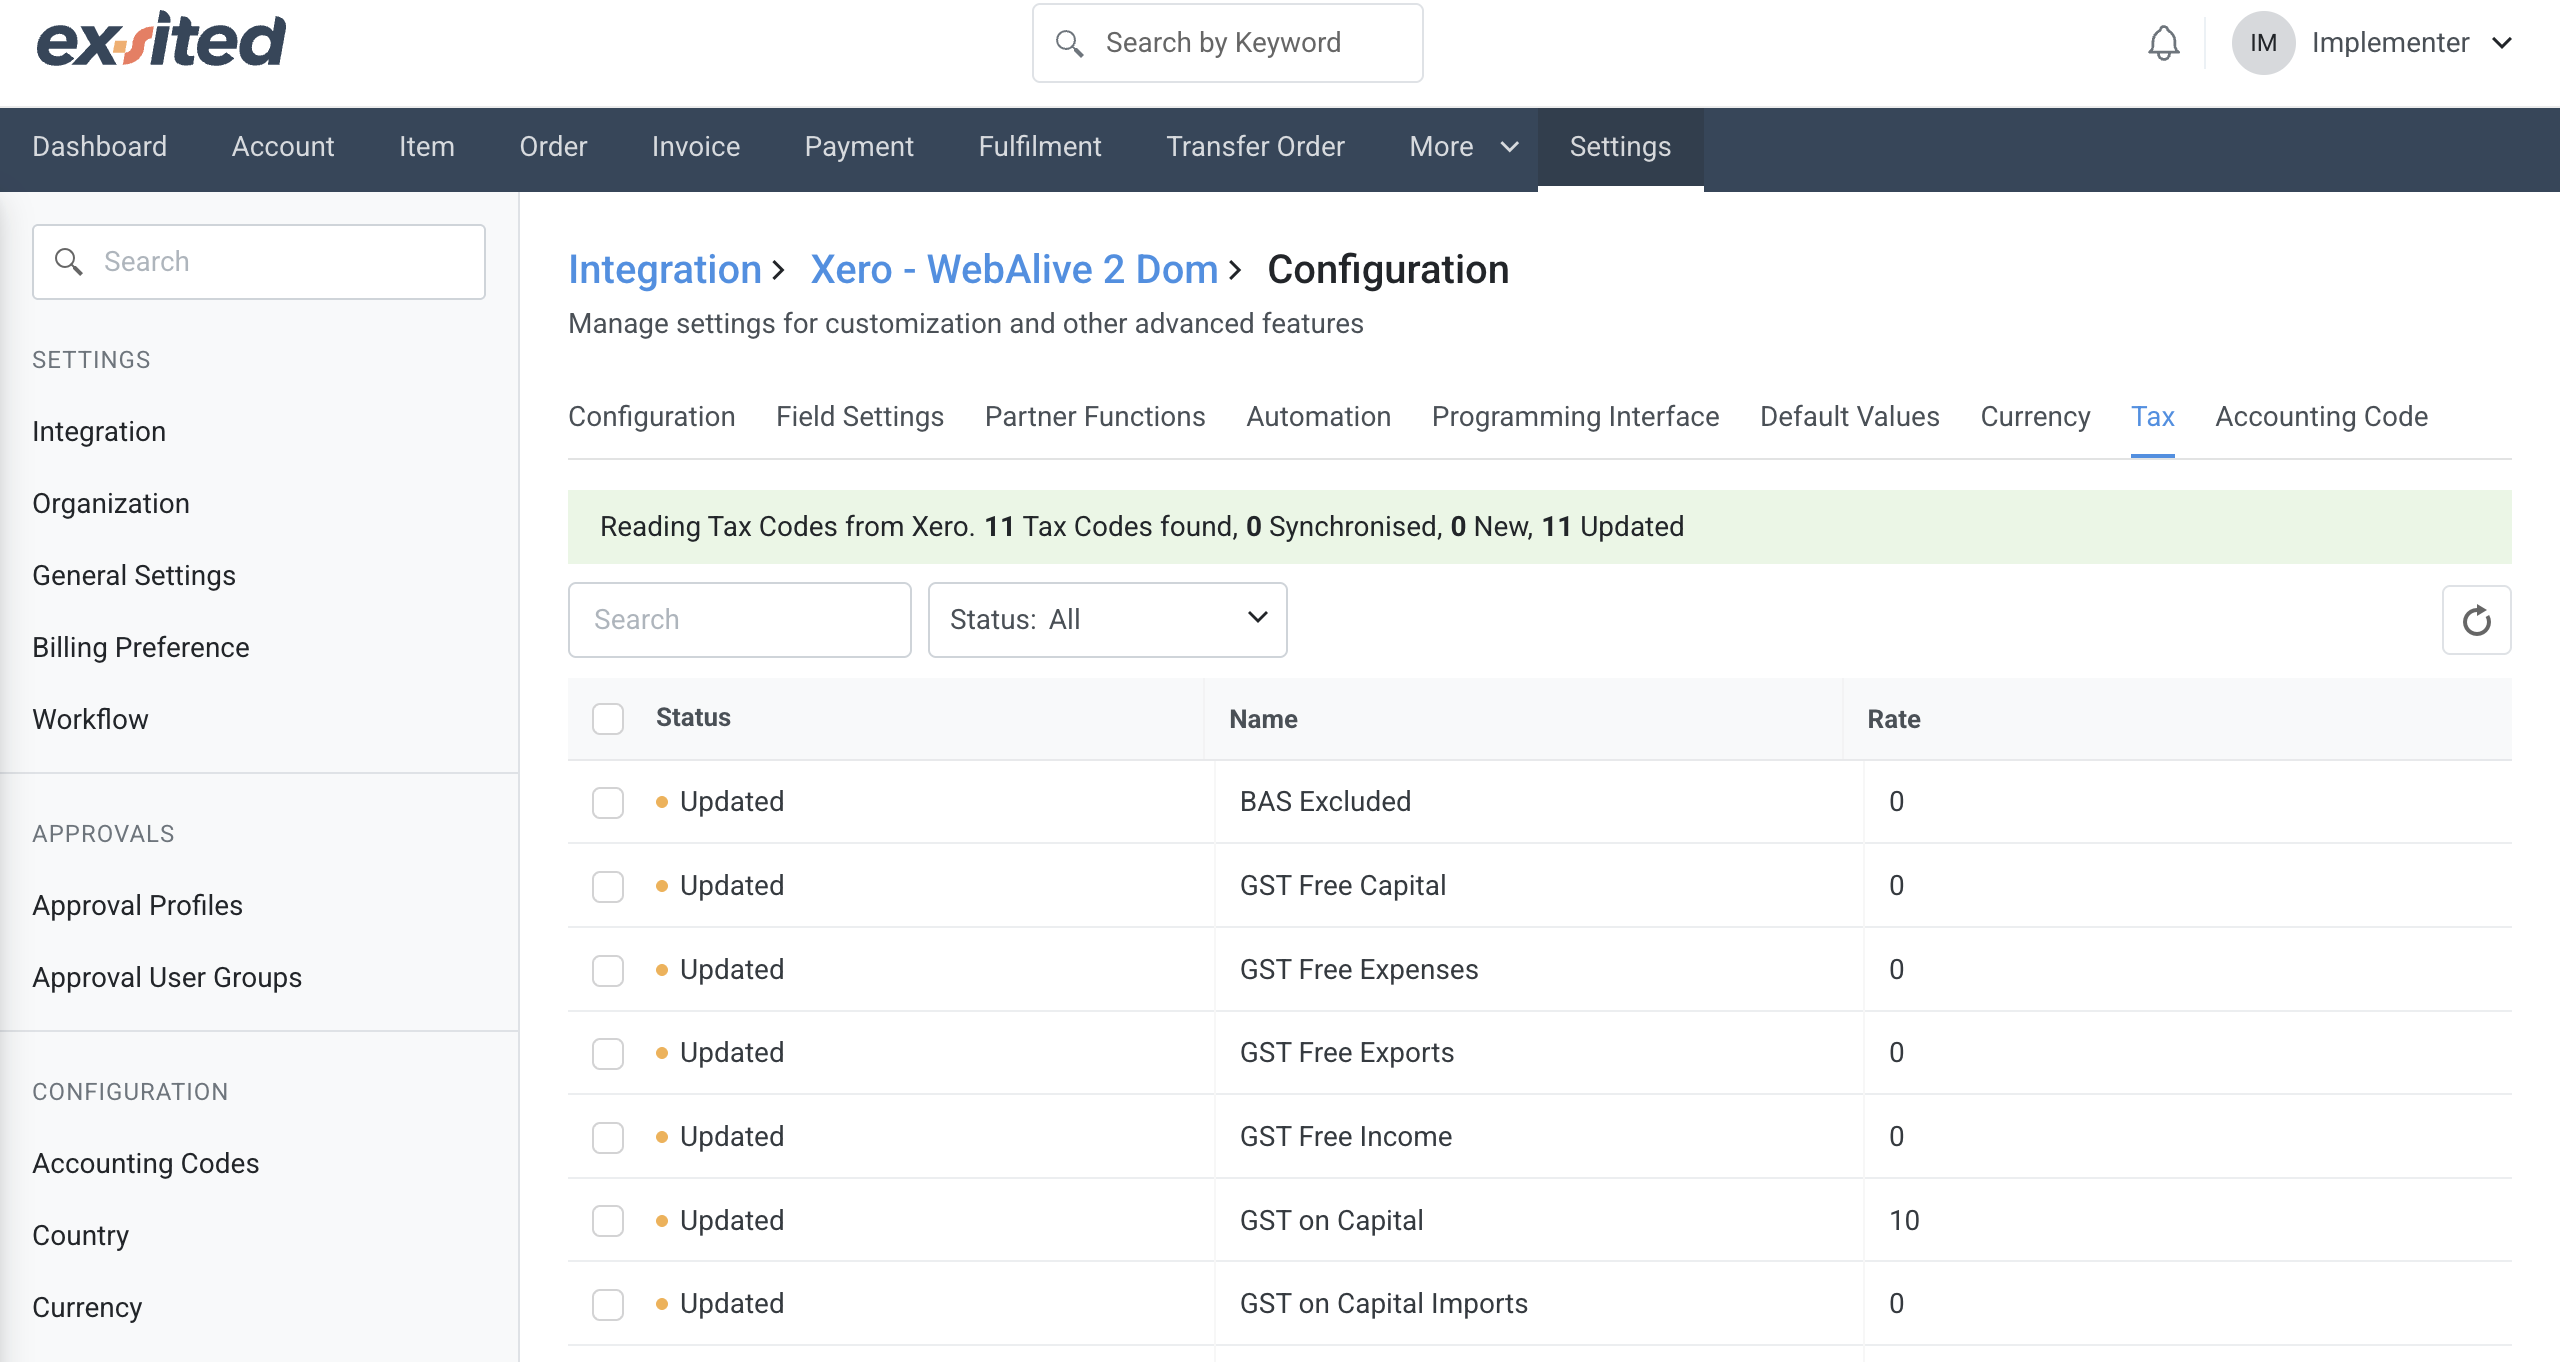
The tax section exists to manage and apply the correct tax treatments for all financial transactions. The tax codes synchronised from Xero define how transactions are treated for Goods and Services Tax (GST) reporting. These codes classify sales and purchases for accurate Business Activity Statement (BAS) lodgement and compliance with Australian taxation requirements. They determine whether GST applies, the applicable rate, and ensure correct allocation for GST-free or exempt items.
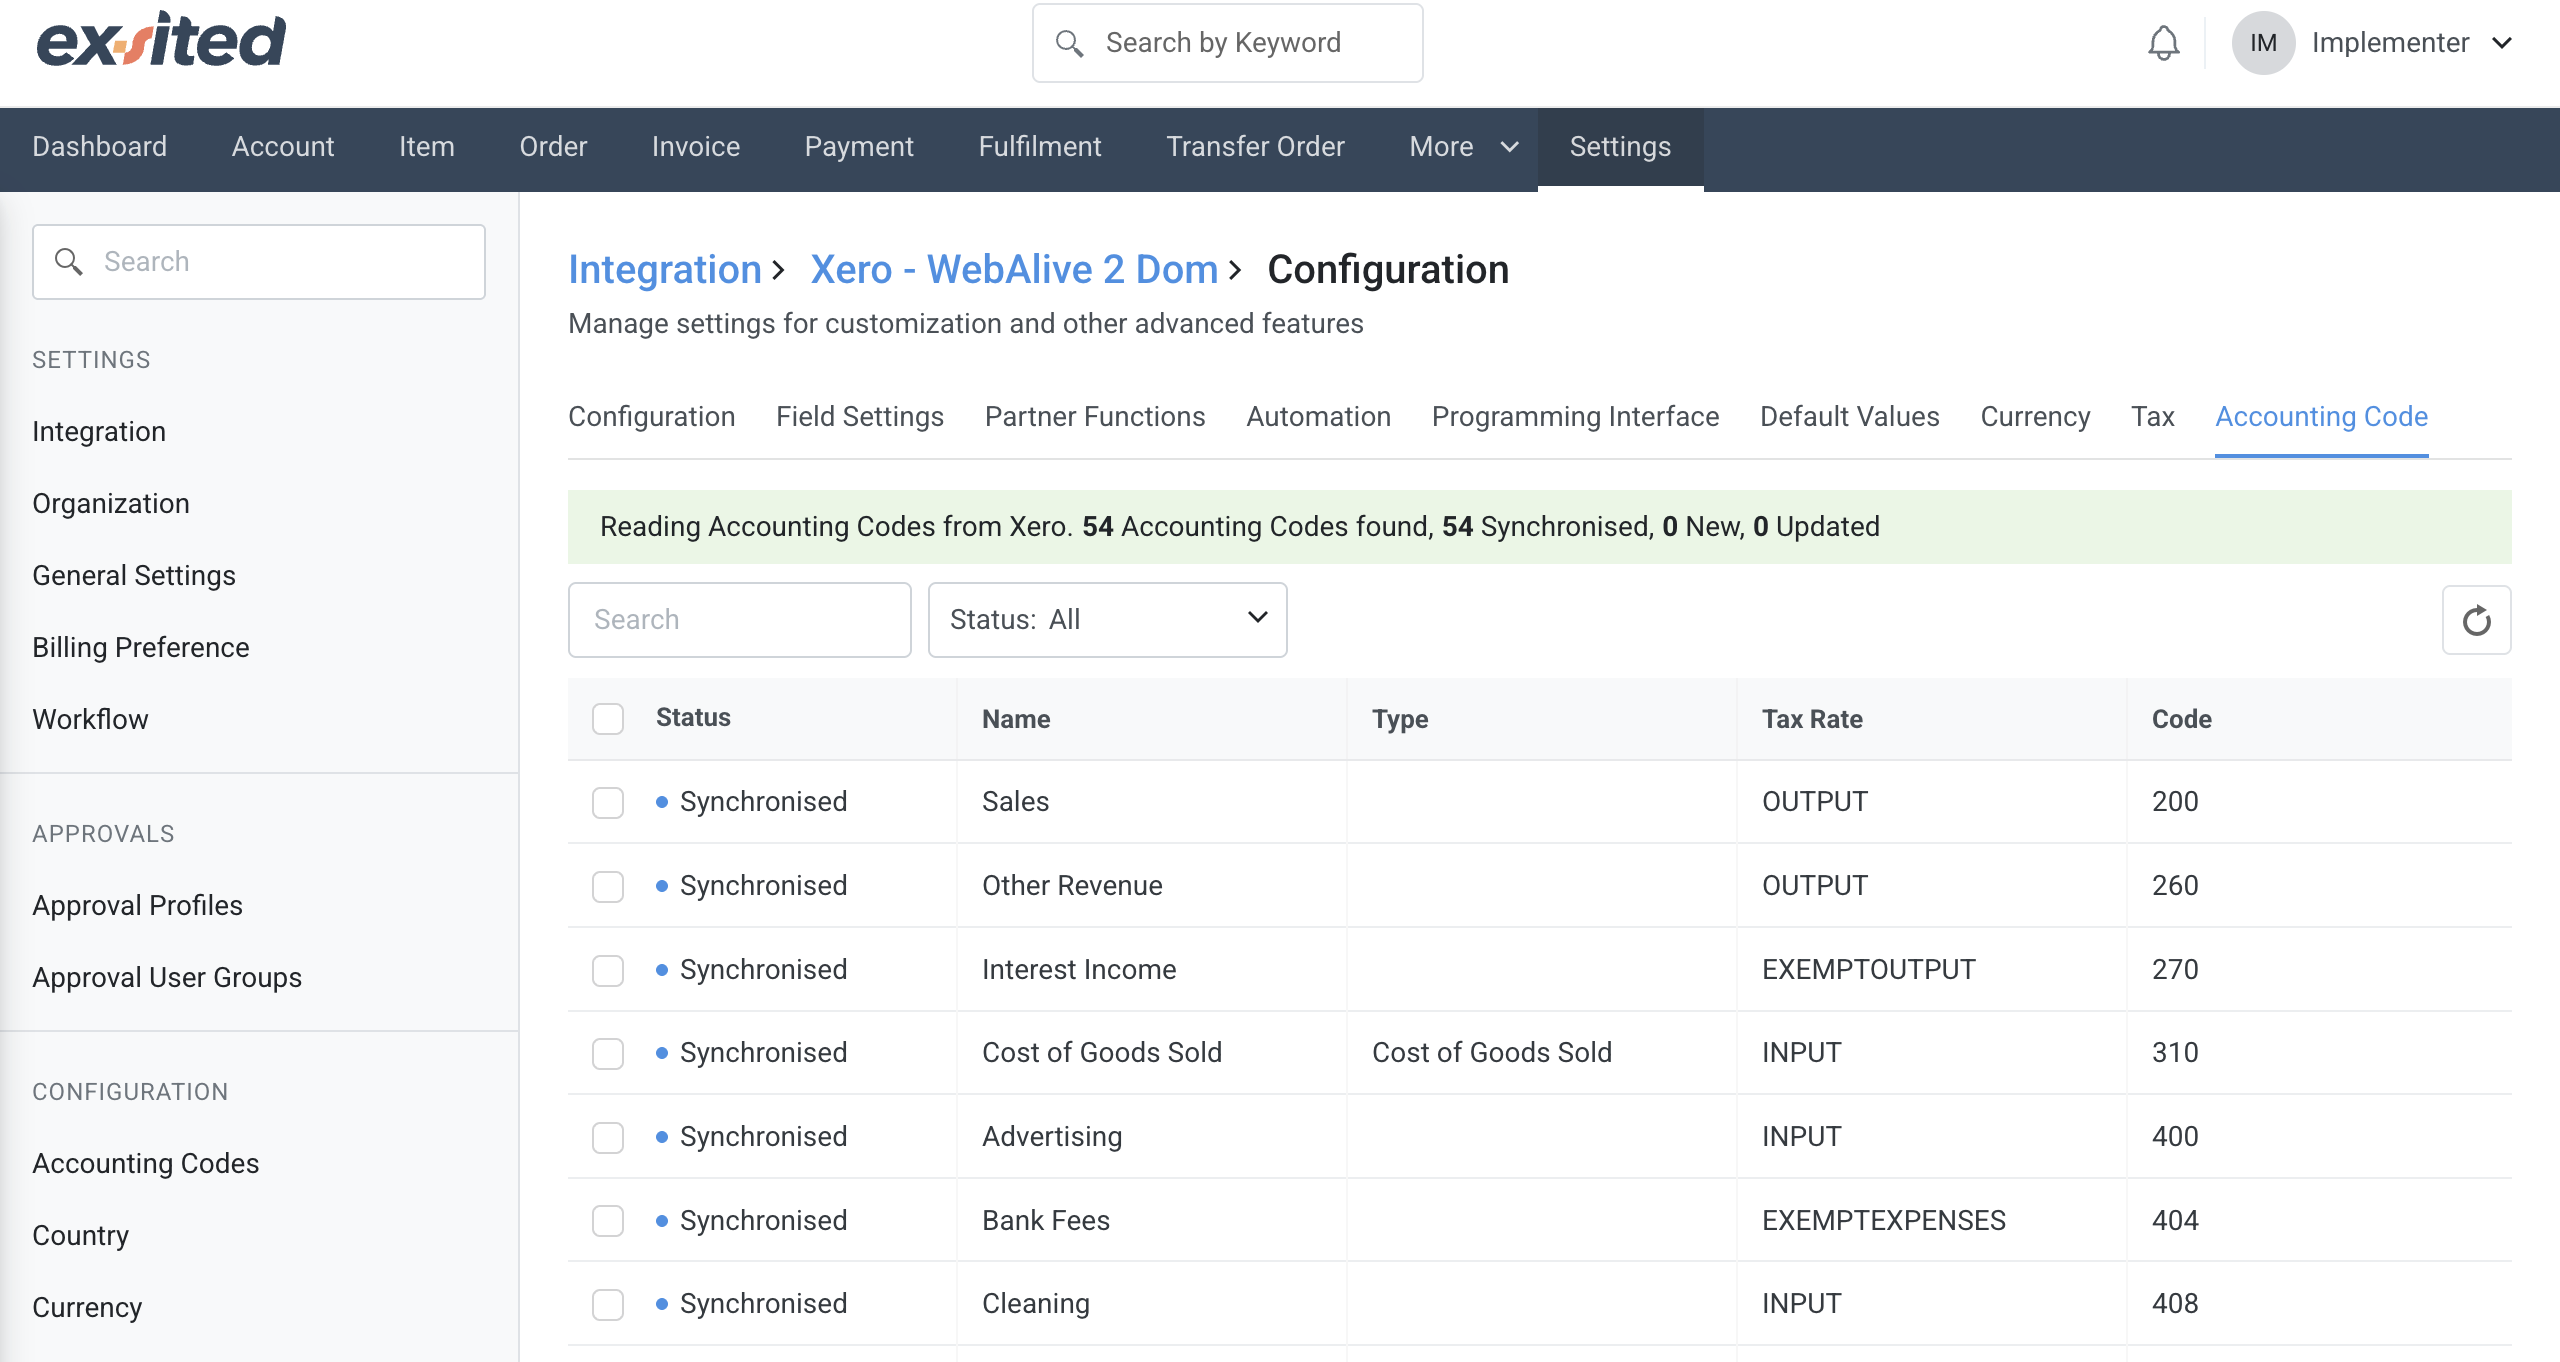
Accounting Code
The accounting code section exists to categorise all financial transactions into specific ledger accounts for accurate bookkeeping and reporting. The accounting codes synchronised from Xero define how income, expenses, assets, liabilities, and equity transactions are recorded in the general ledger. Each code is linked to a tax rate type to ensure correct GST application and compliance with Australian Taxation Office (ATO) requirements. This setup supports accurate preparation of financial statements, detailed expense tracking, and consistent classification of revenue streams. By maintaining standardised accounting codes, businesses can streamline financial management, improve reporting accuracy, and ensure seamless integration between operational and accounting systems.
Item Synchronisation
Import Items from Xero to Exsited
Navigation: More > Xero > Import Items
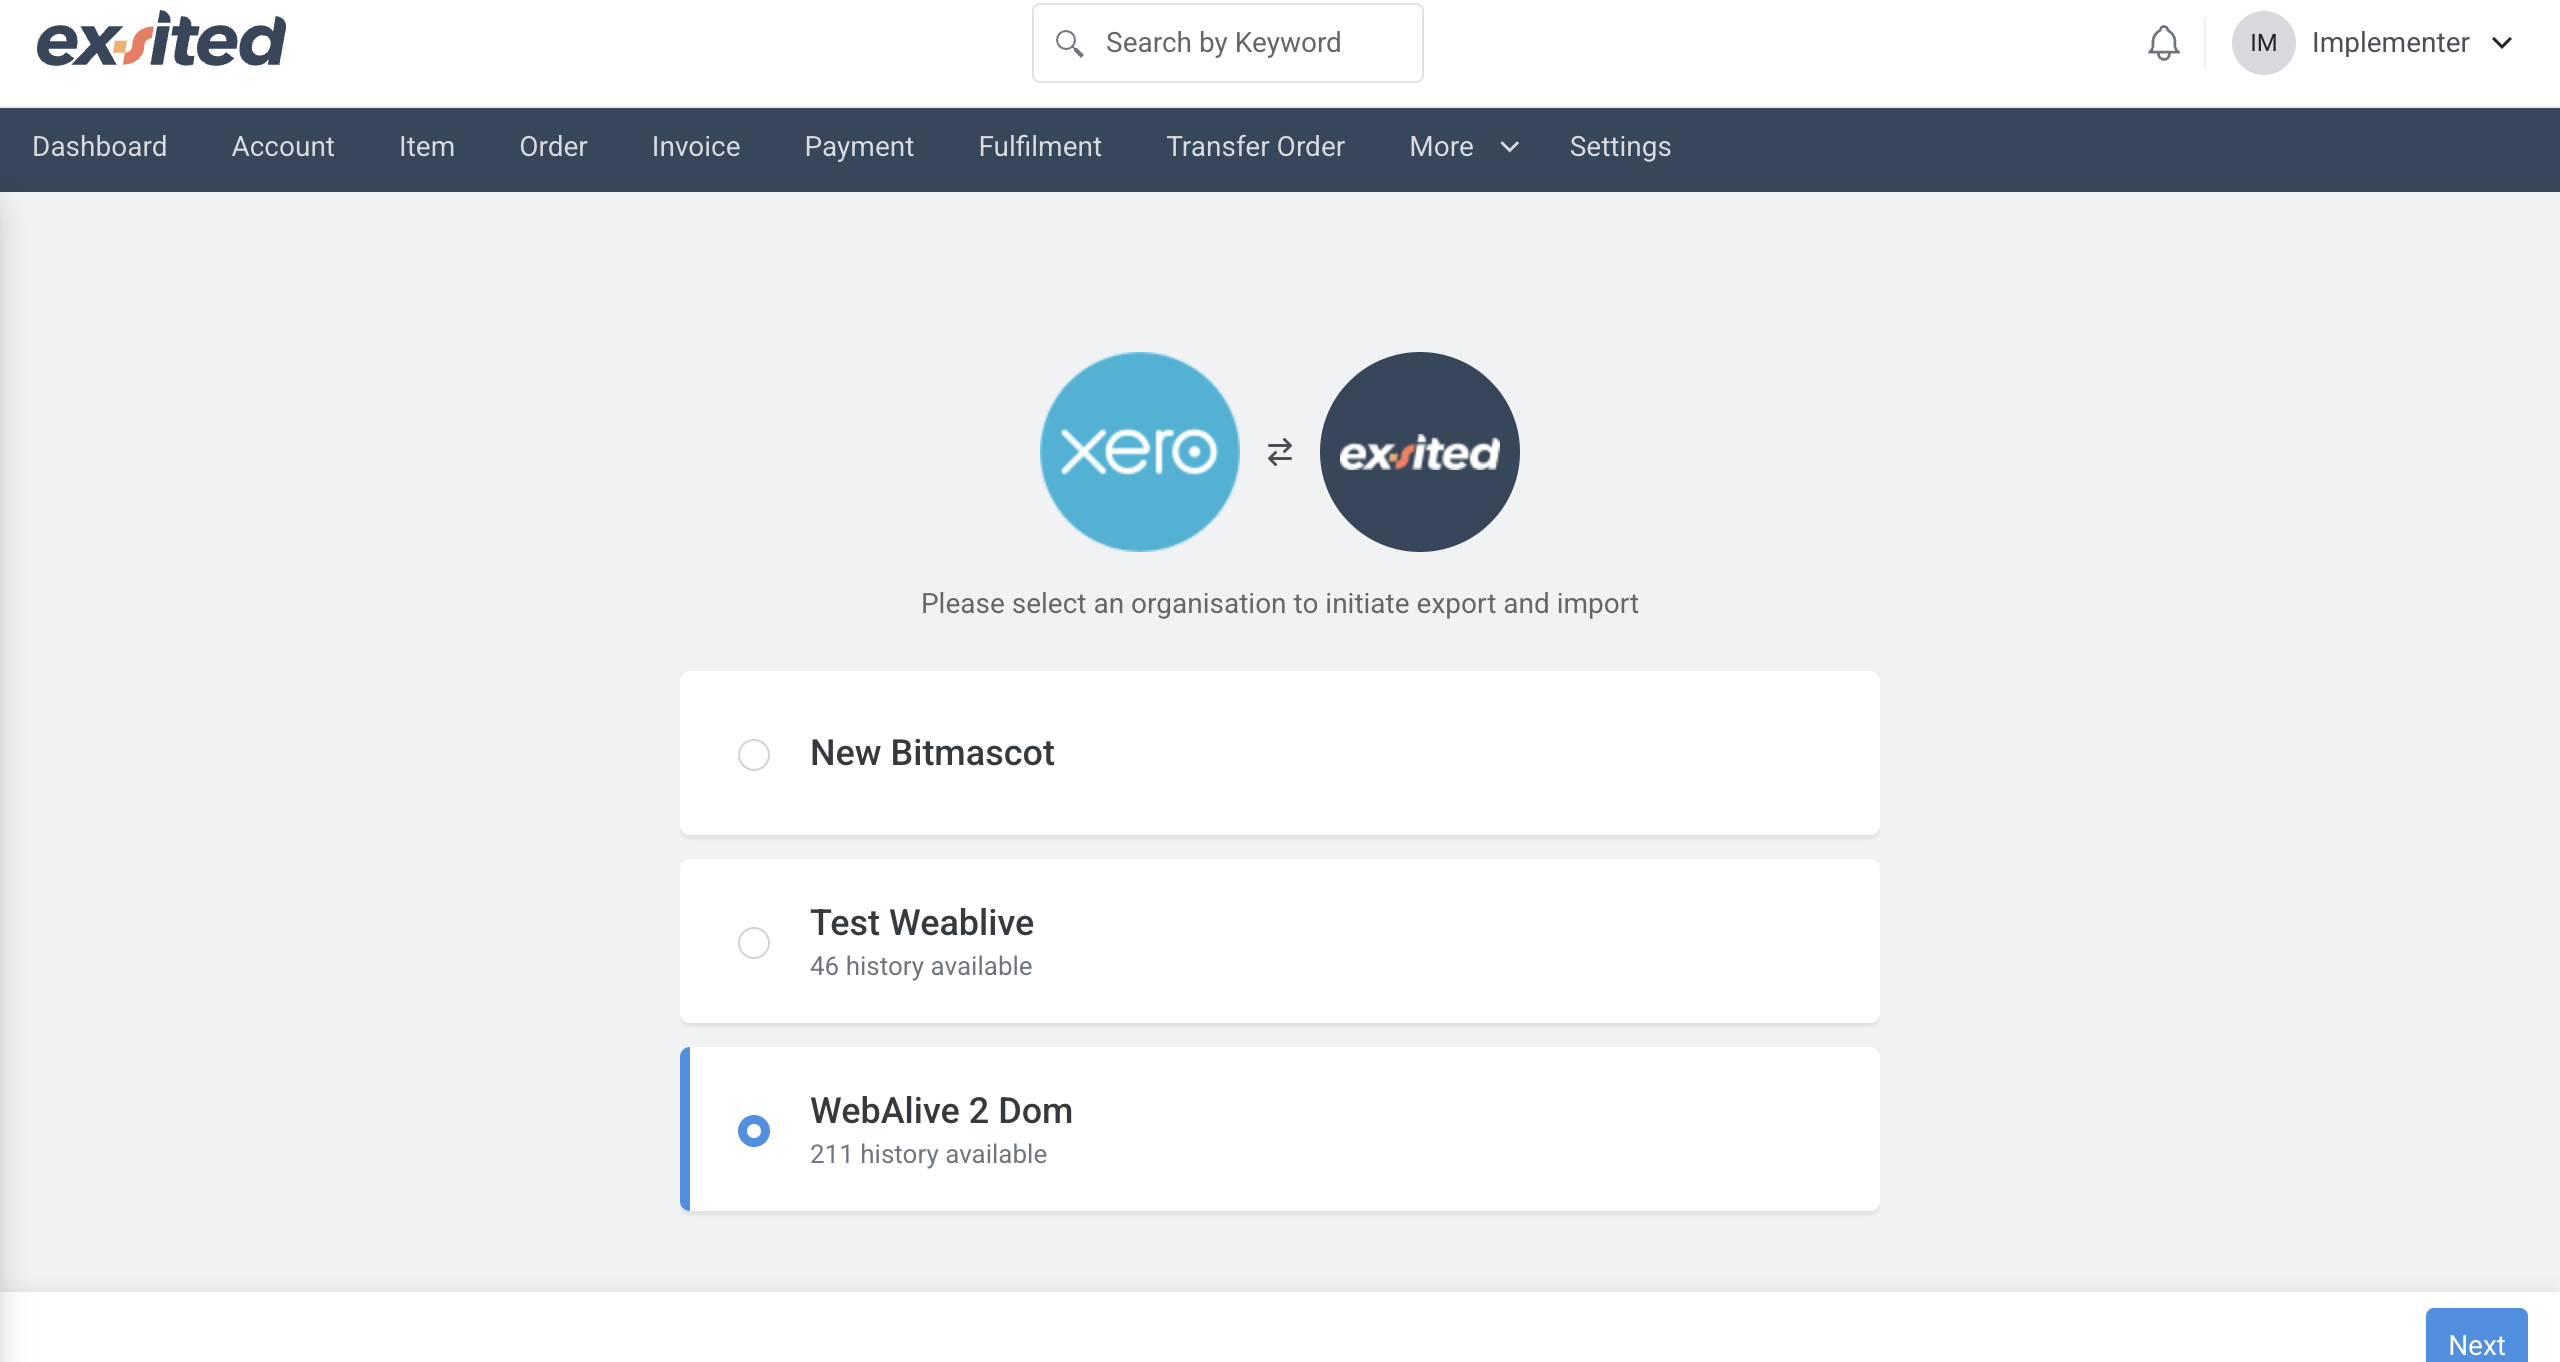
At the start of the integration process, users must select a connected Xero organisation within Exsited to initiate import and export operations. This step ensures that the correct data environment is linked before proceeding with sync actions.
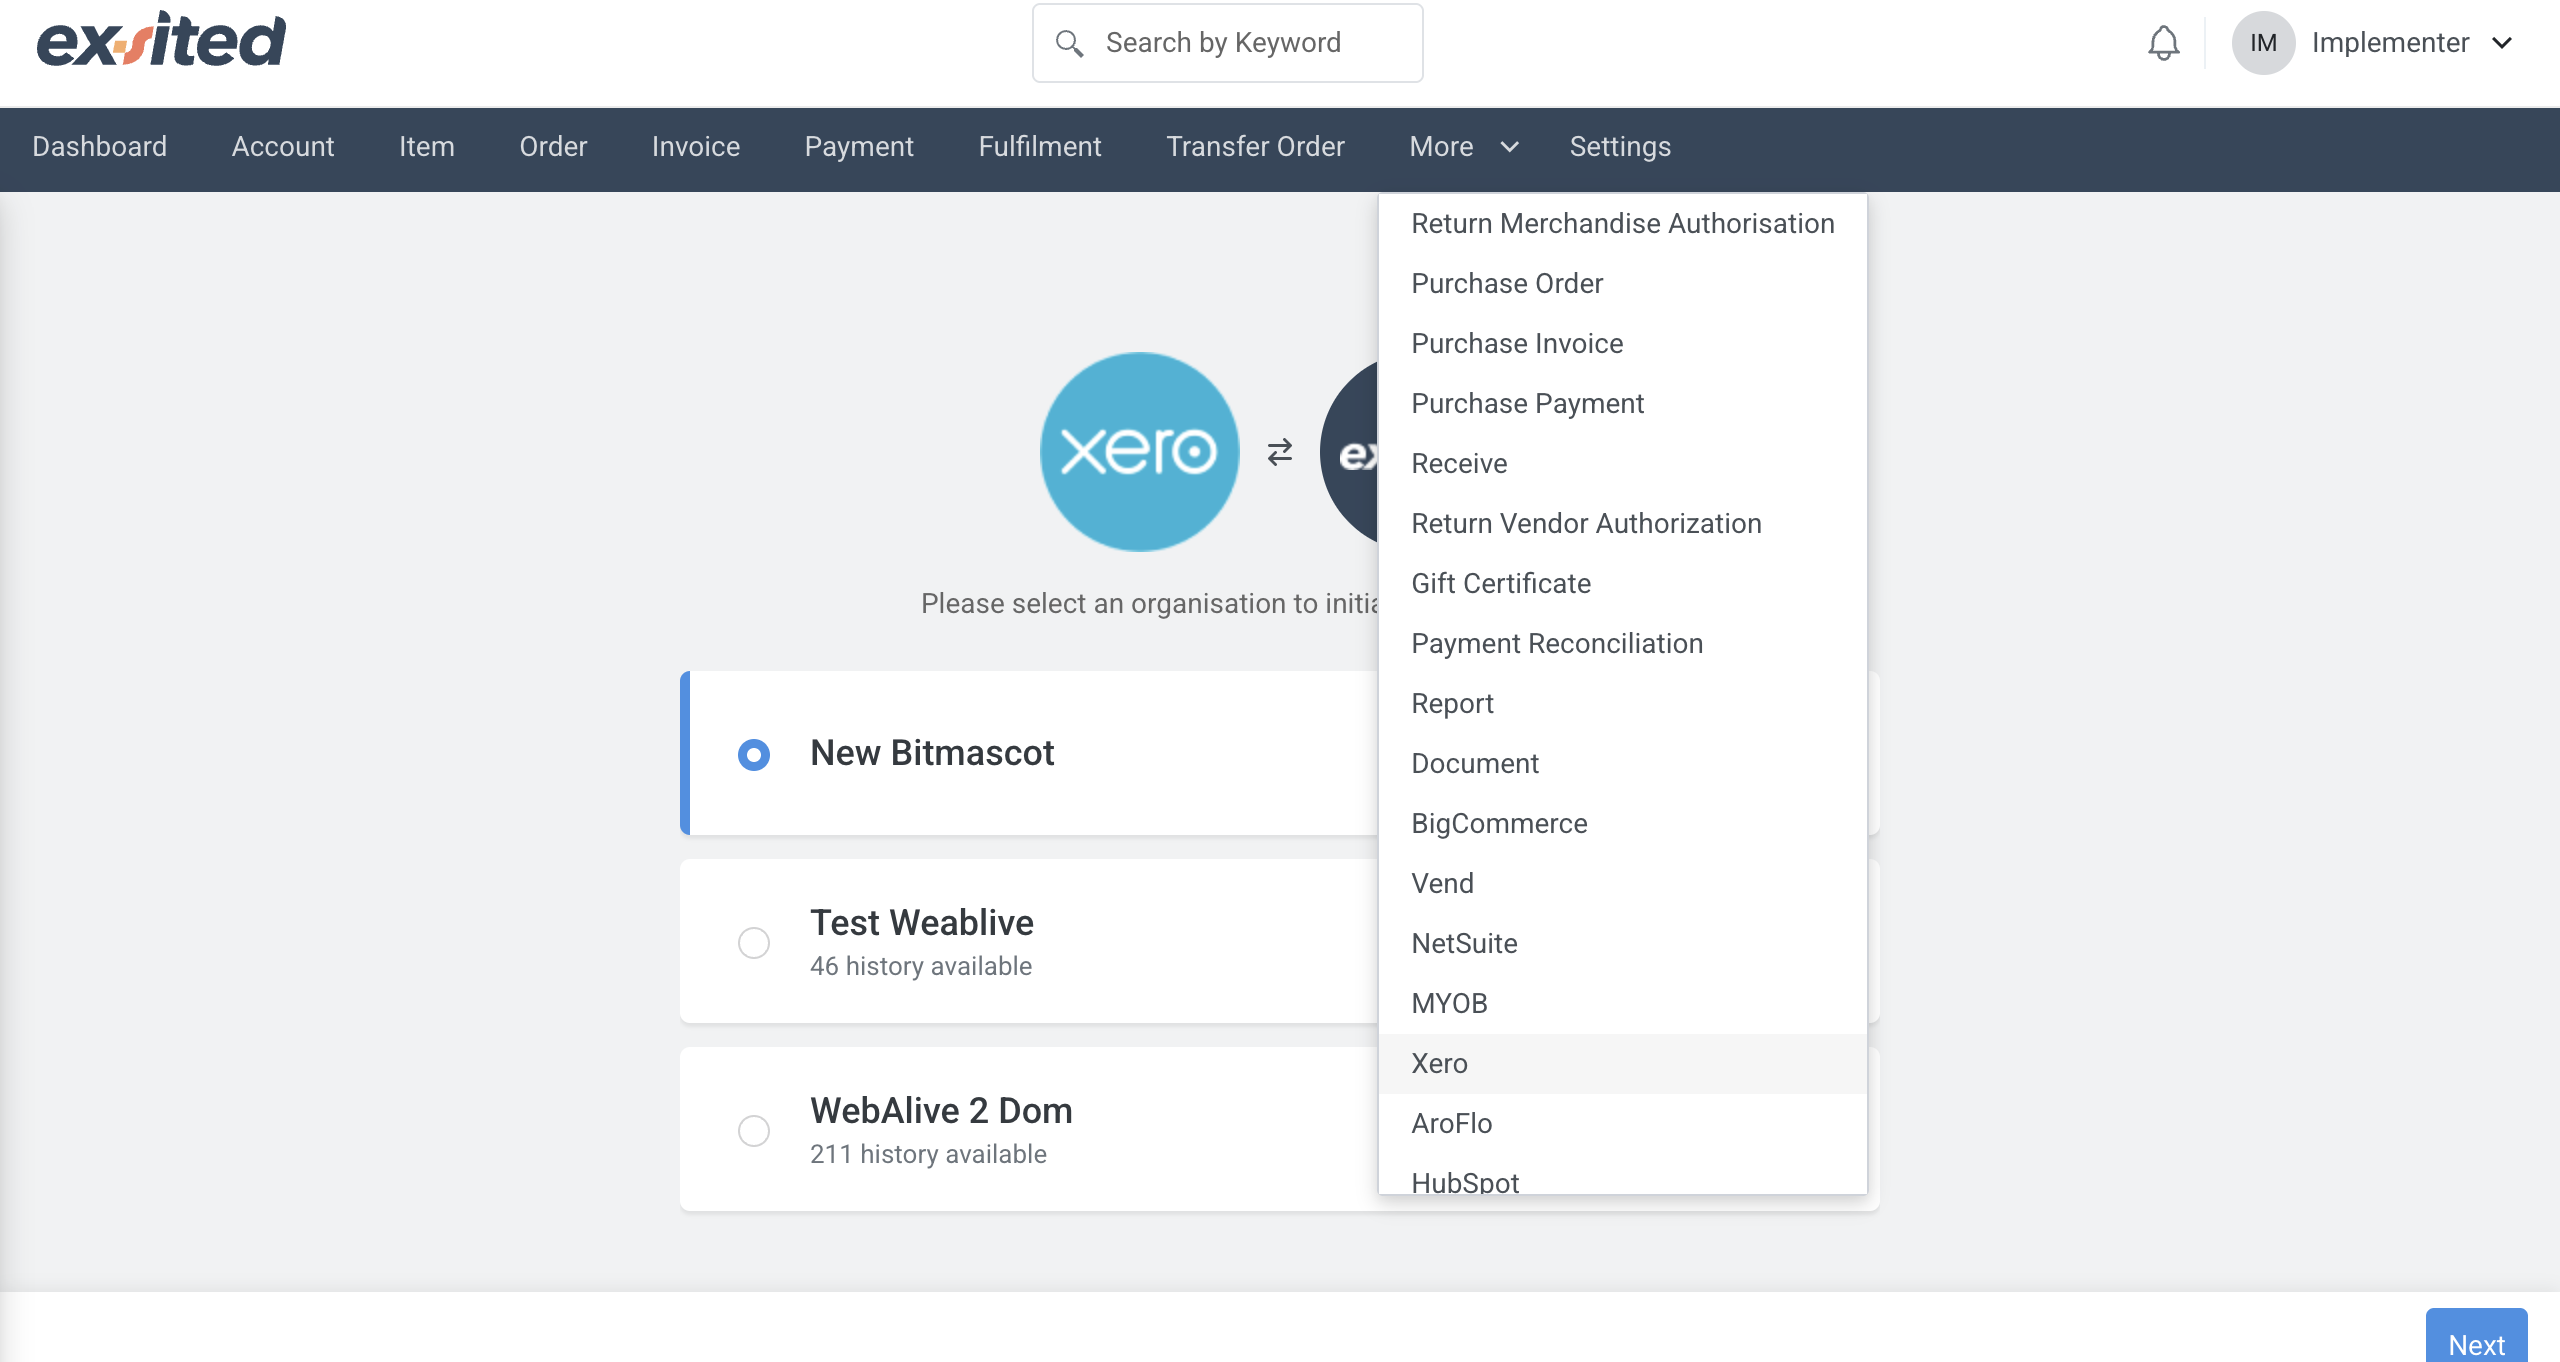
- Choose the Xero organisation
- Click “New”
- Select items to Import
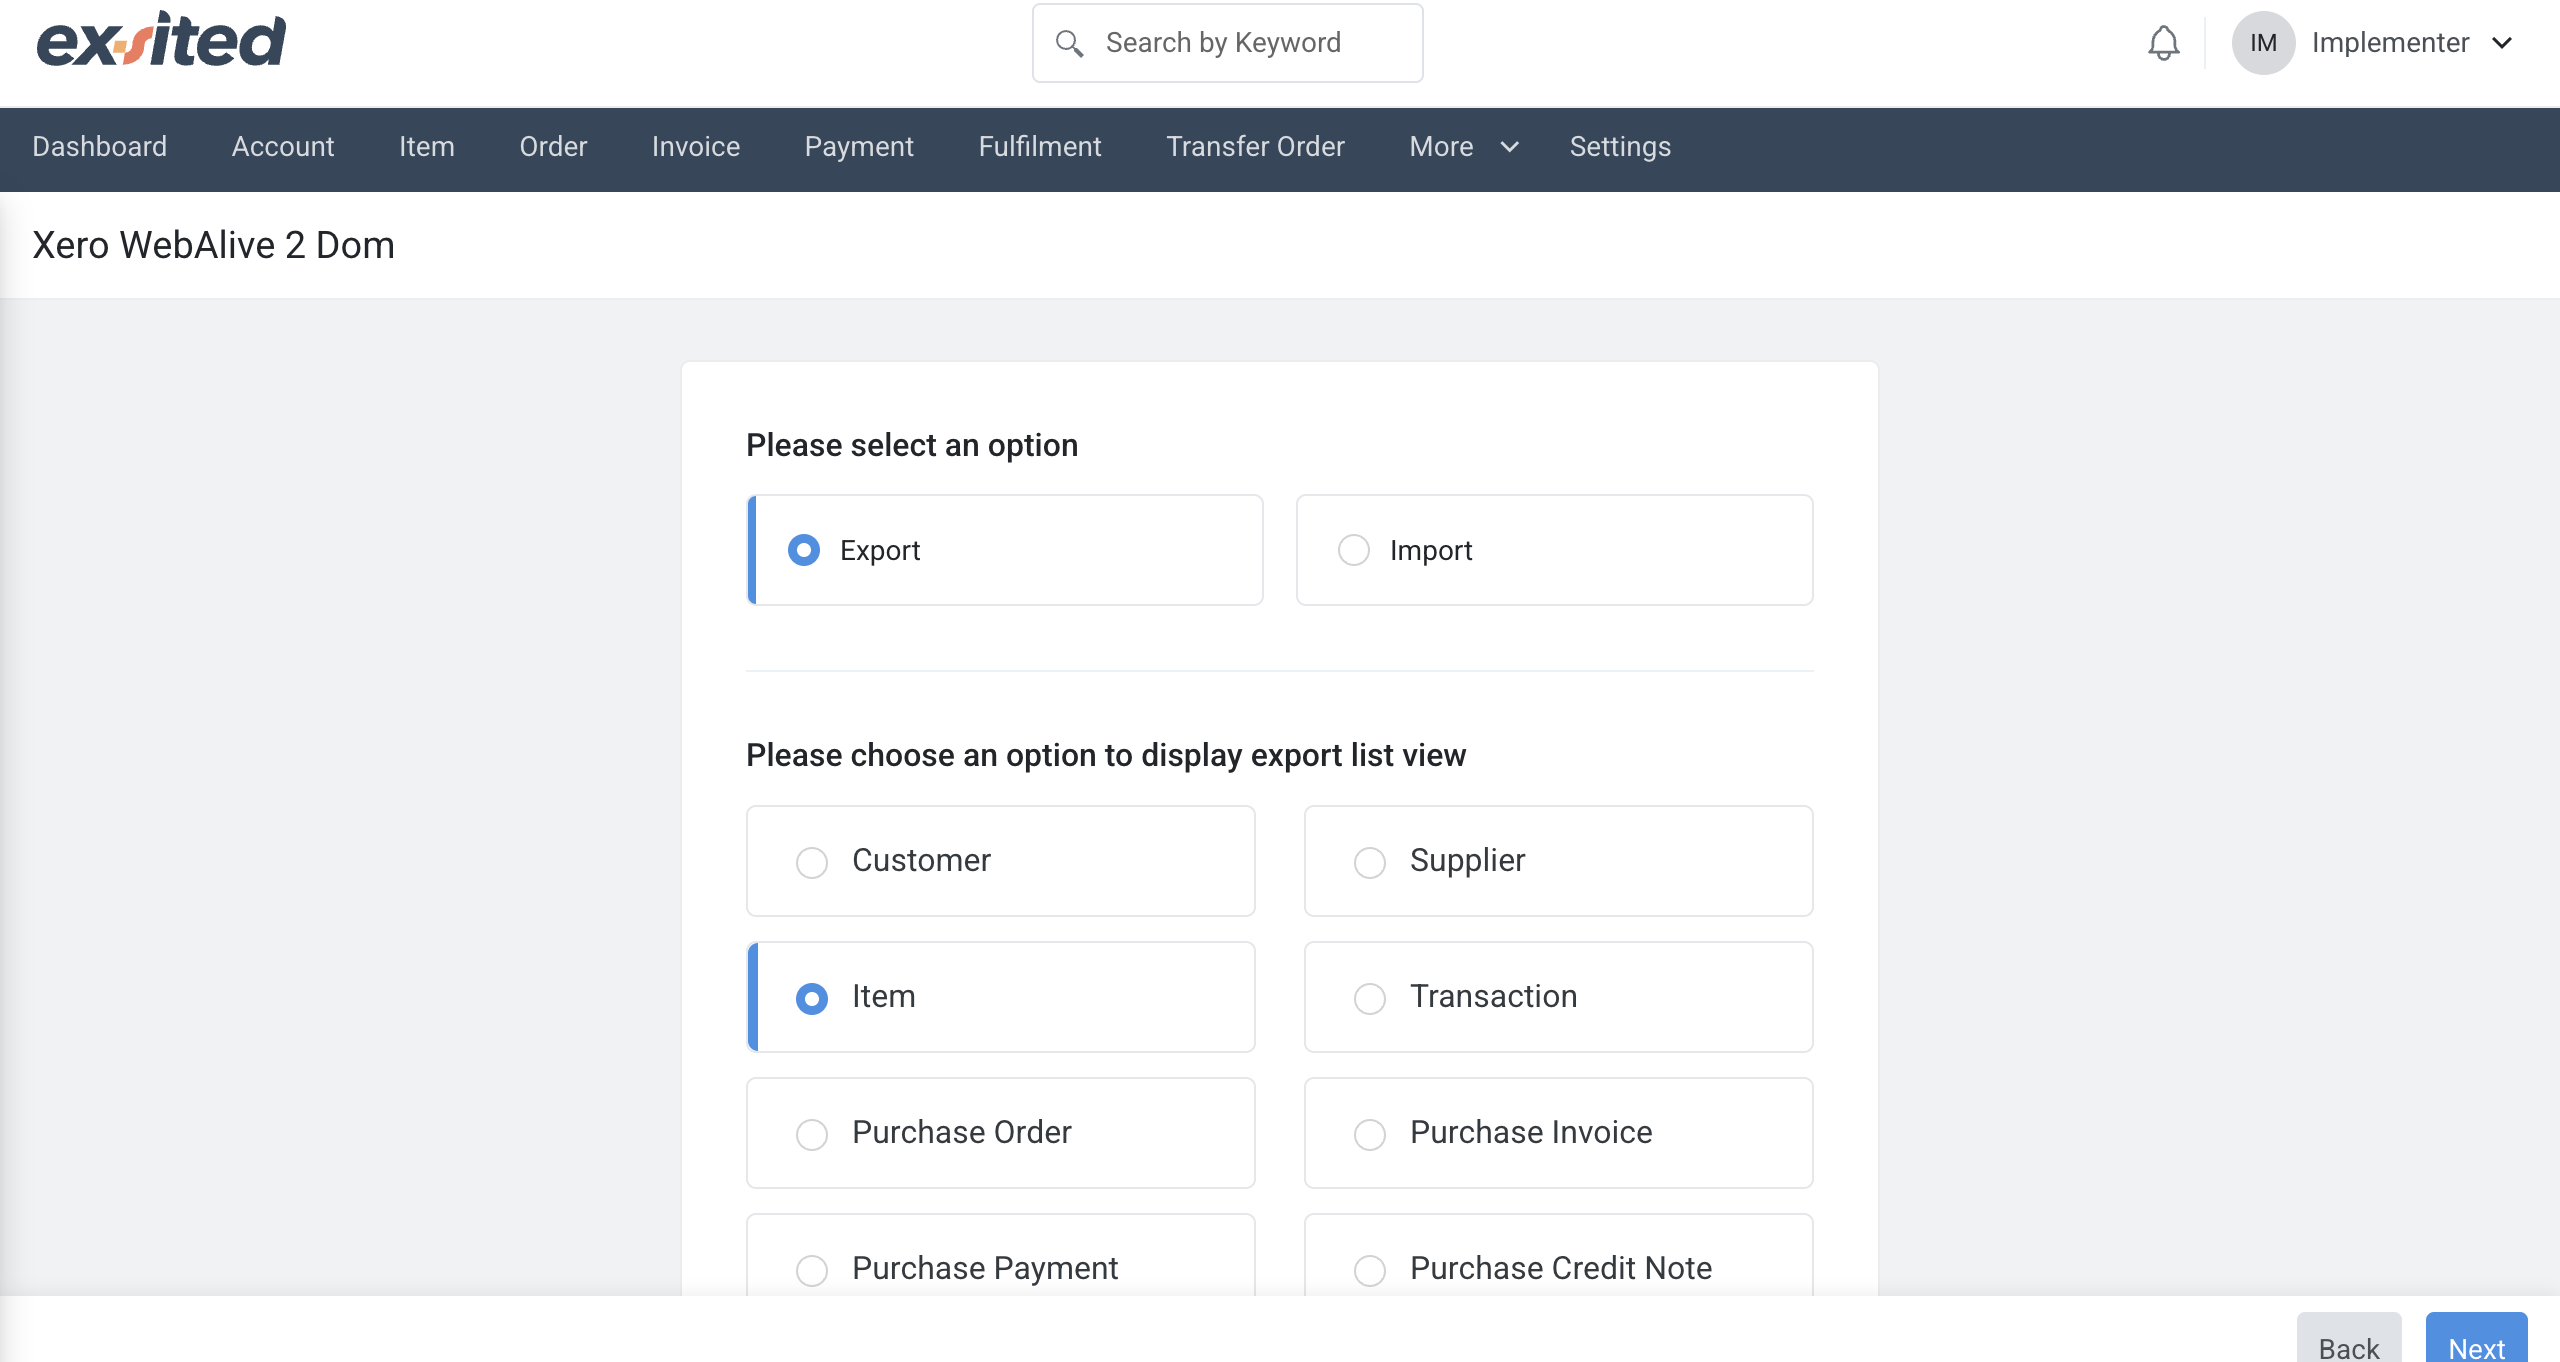
This screen allows users to choose between importing or exporting data between Exsited and Xero. Based on the selected option, users can then specify the type of records to sync, such as items, invoices, or contacts.
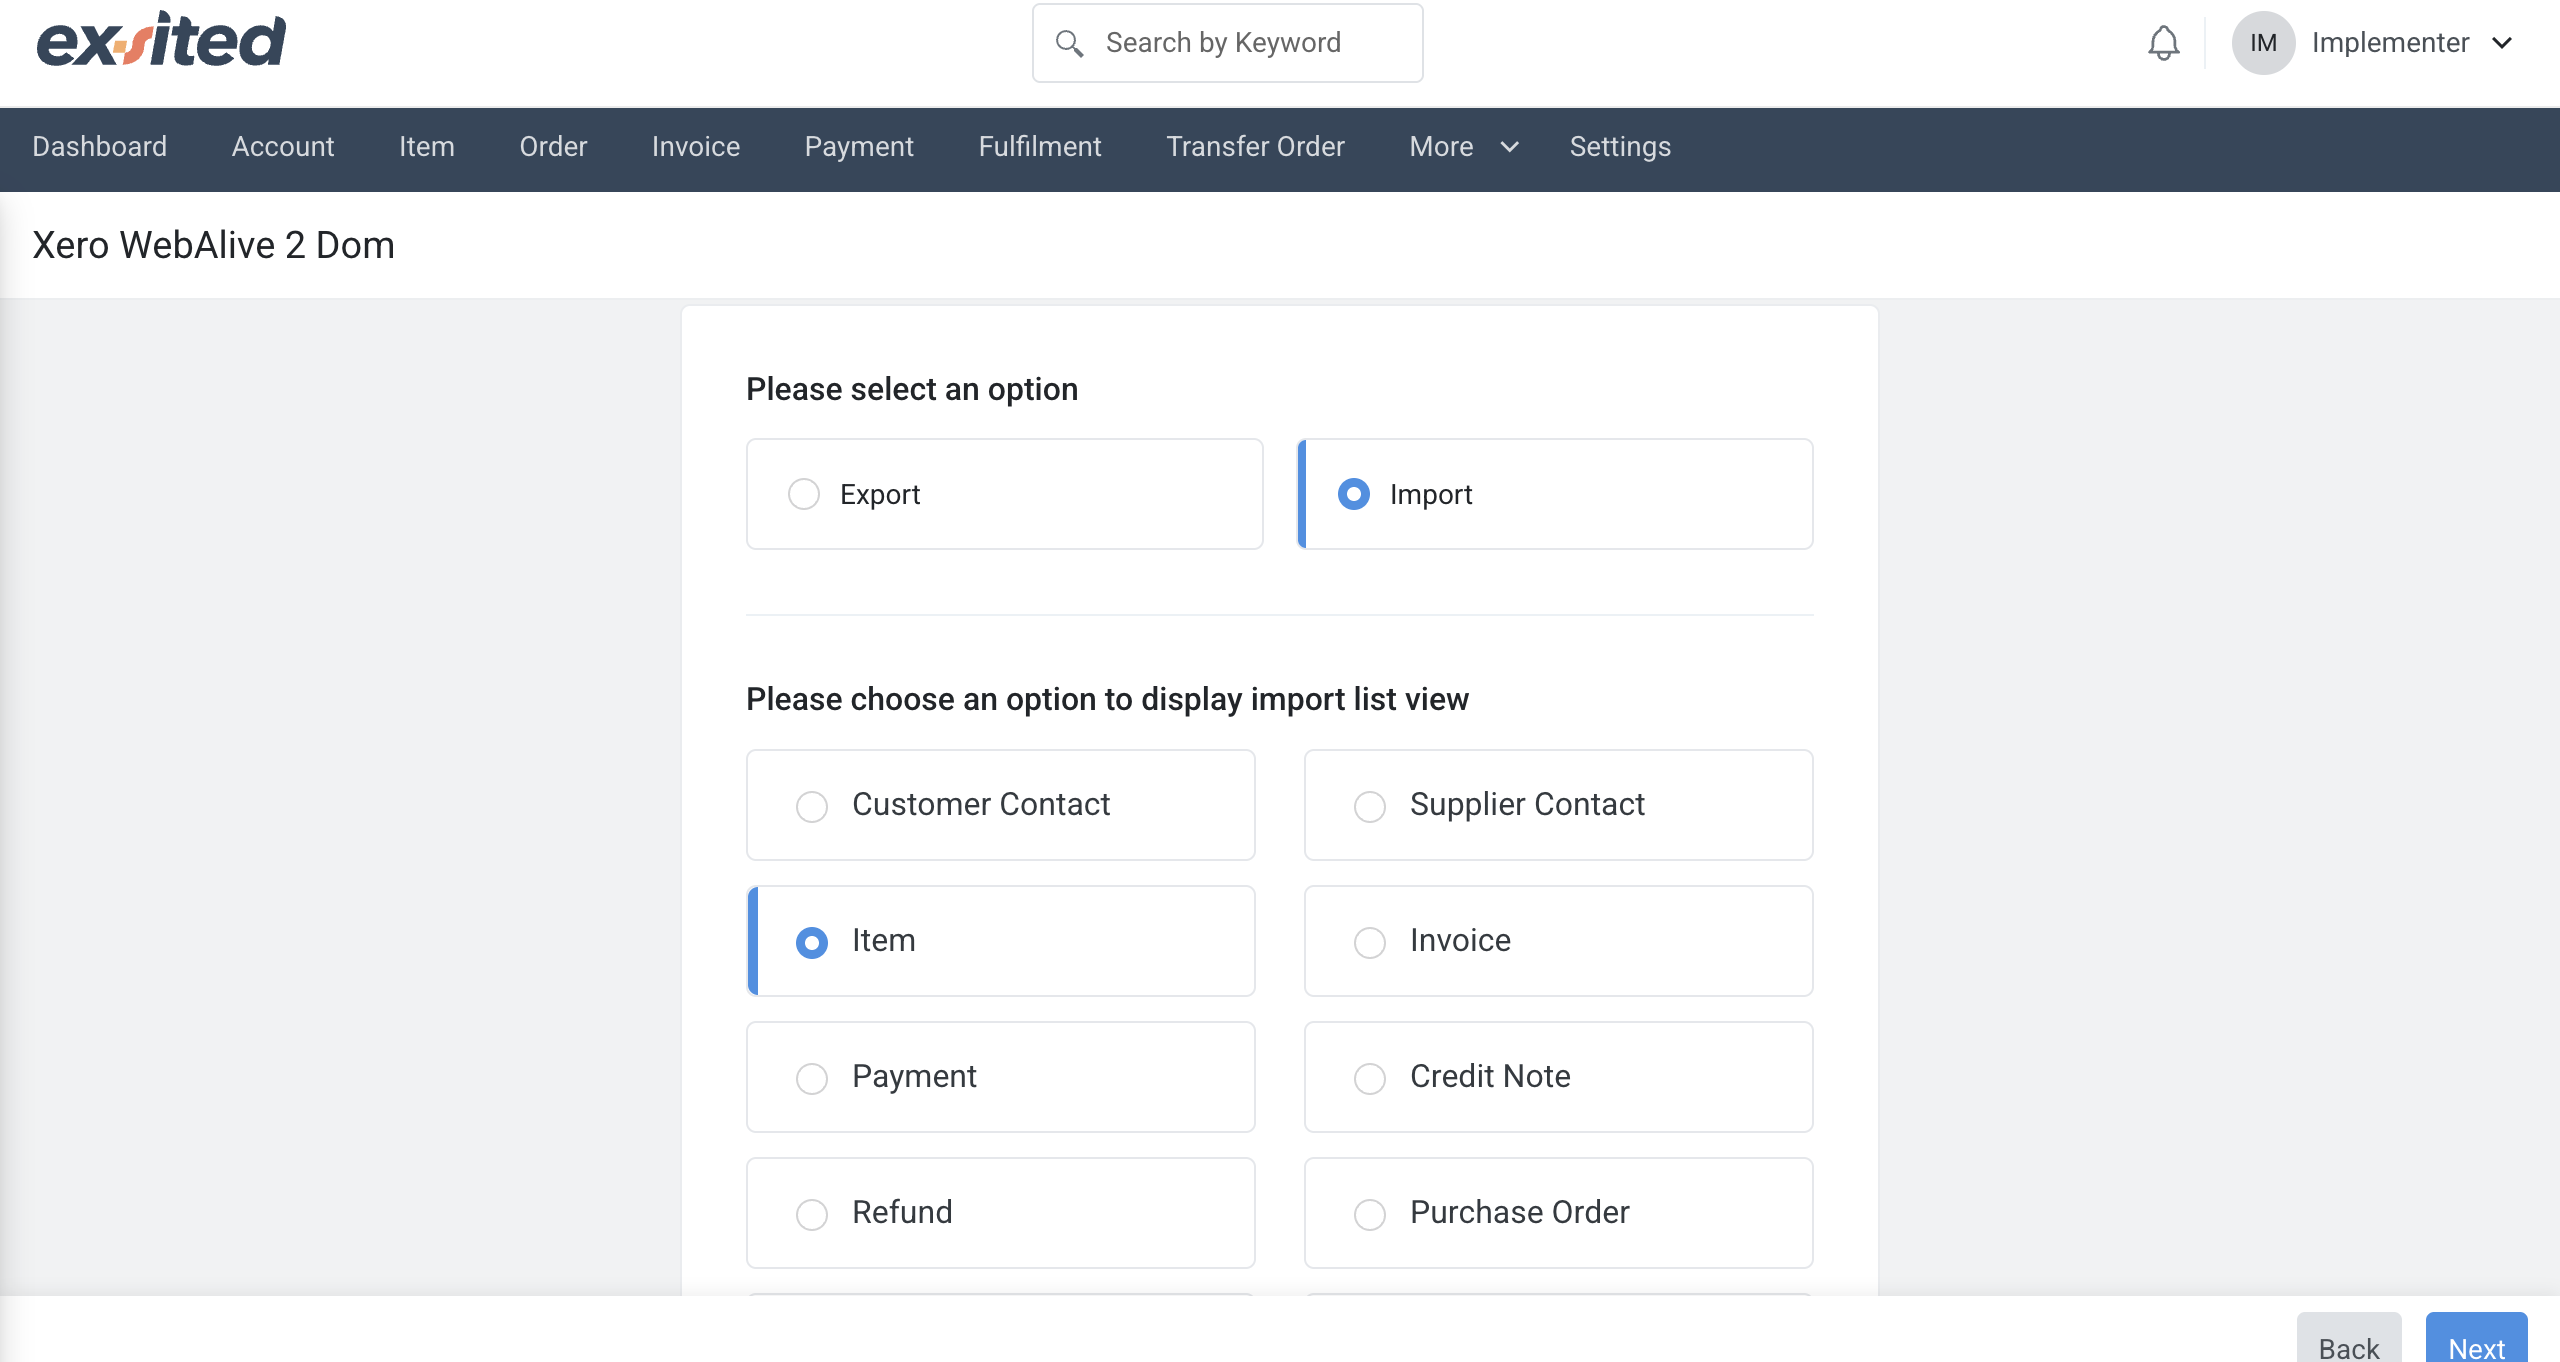
- Selecting 'New' imports only items that have not yet been imported into Exsited.
- Choose the item type to import: New or other oprtions.
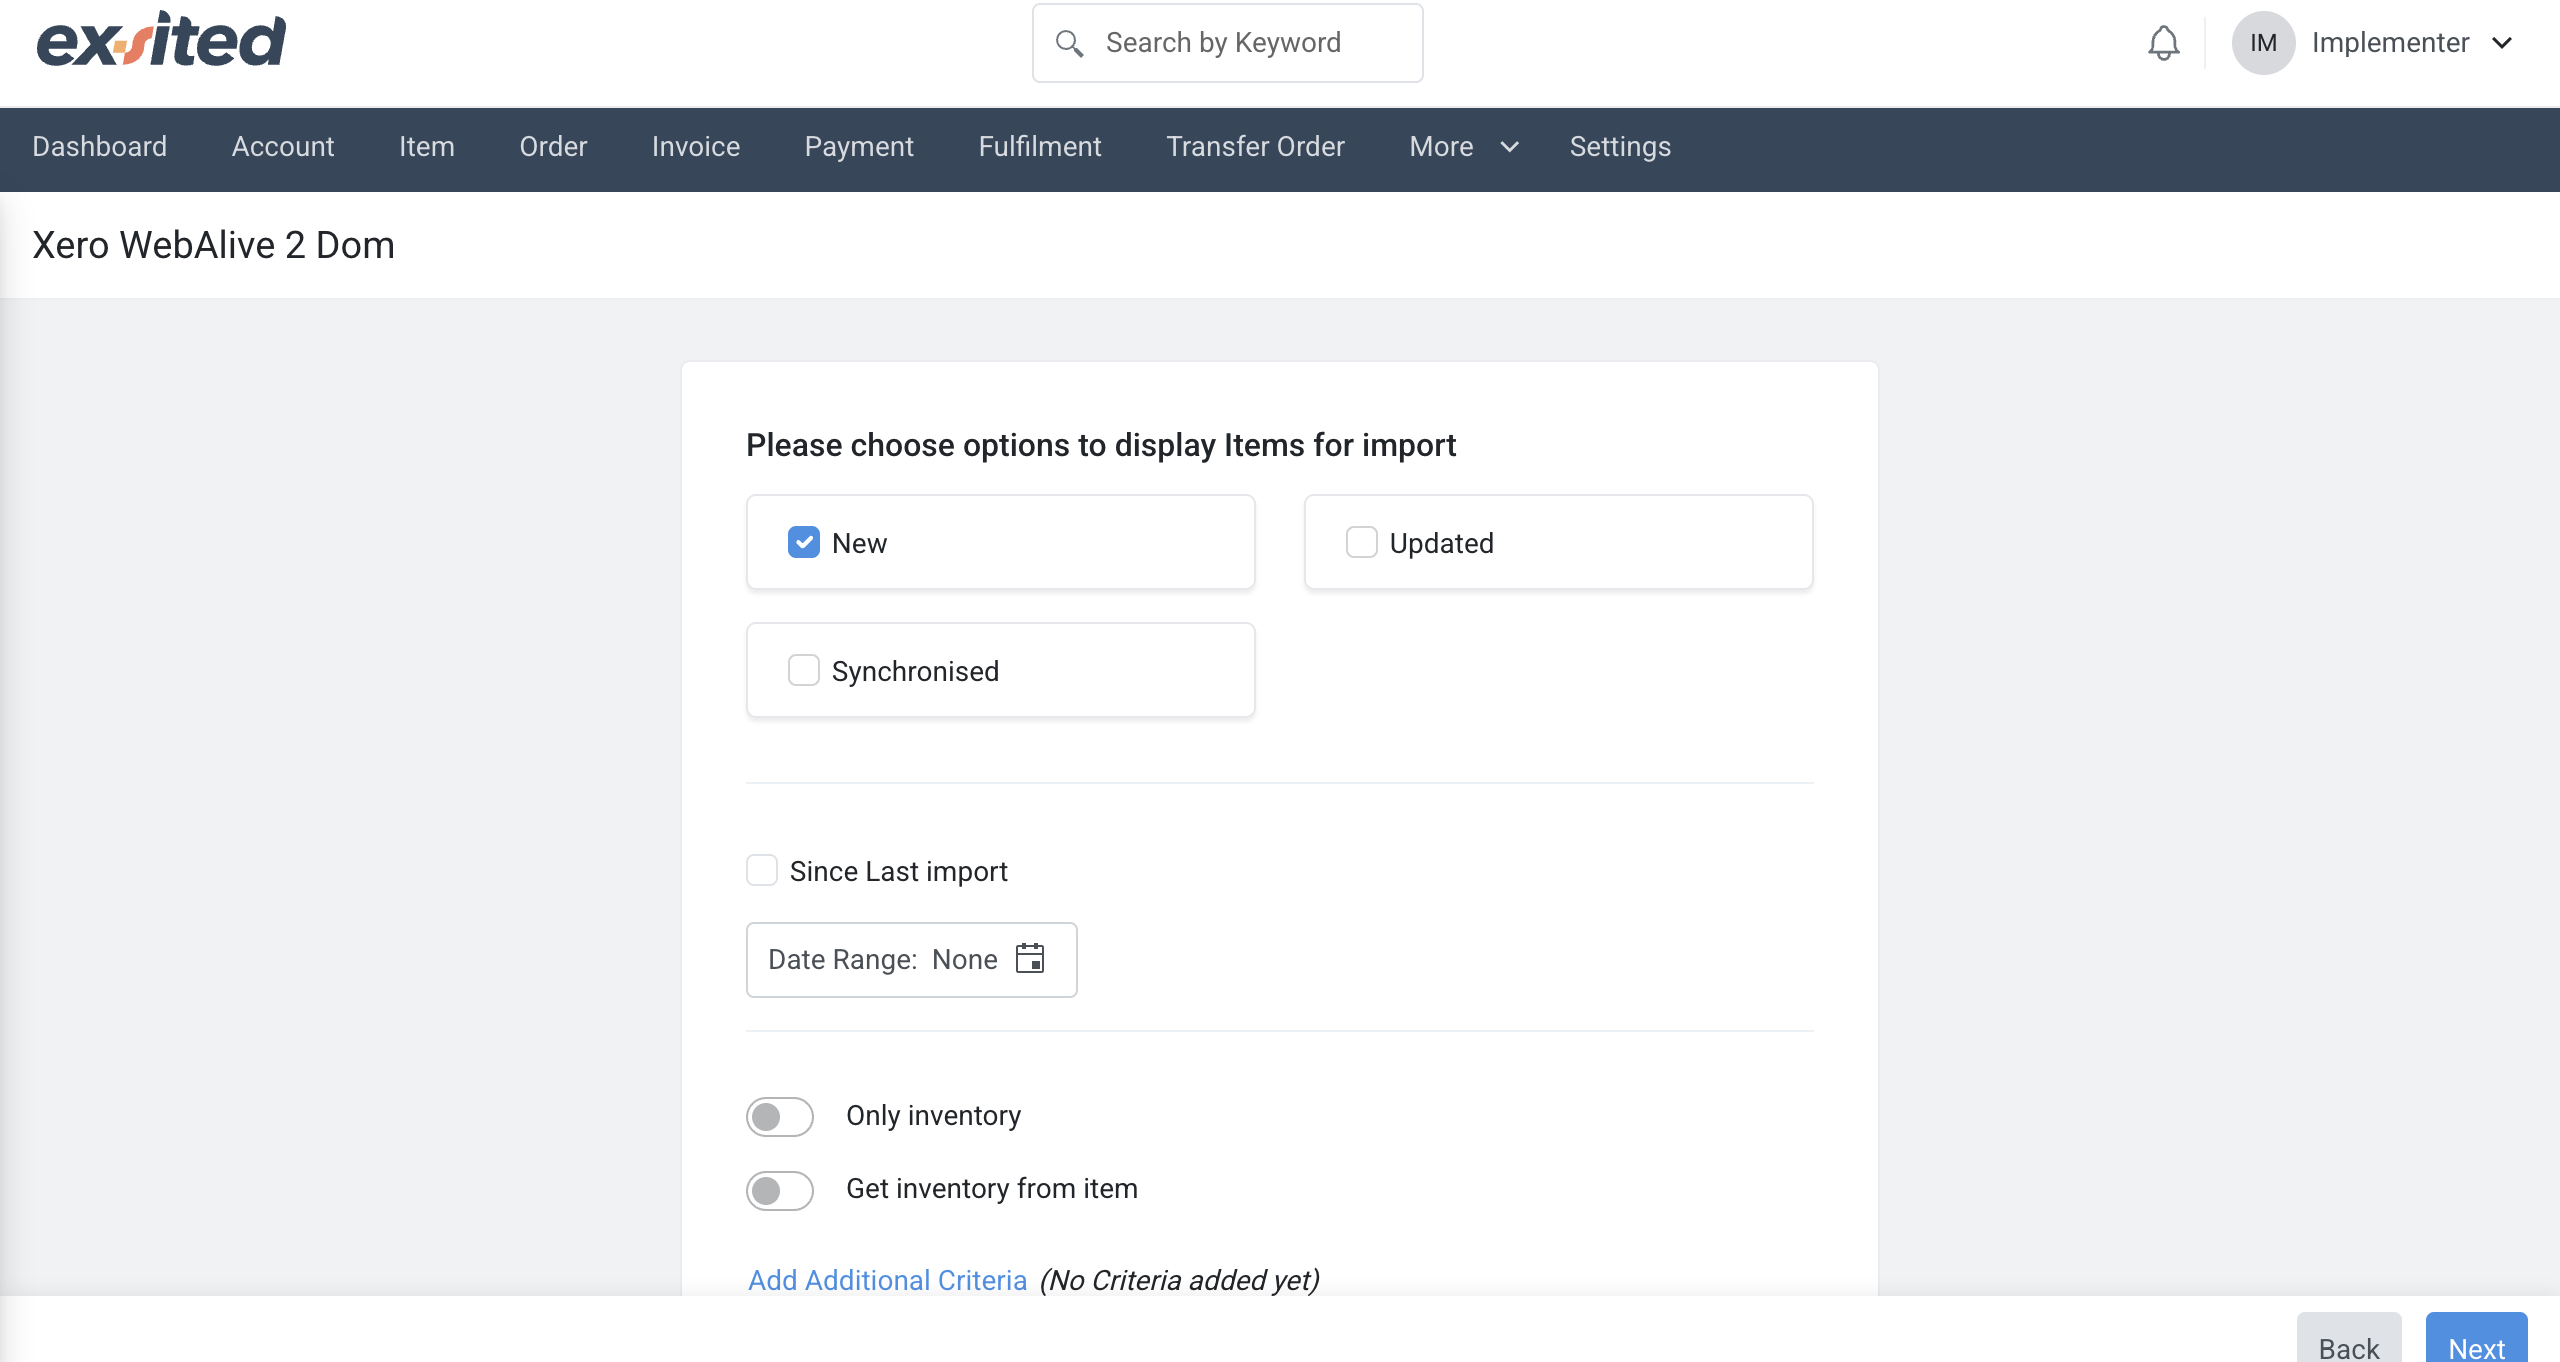
During item import, users can filter data by status (New, Updated, Synchronised) and choose to import only inventory items. The system then displays a list of items retrieved from Xero, including item codes, names, prices, and revenue accounts, for review before synchronisation.
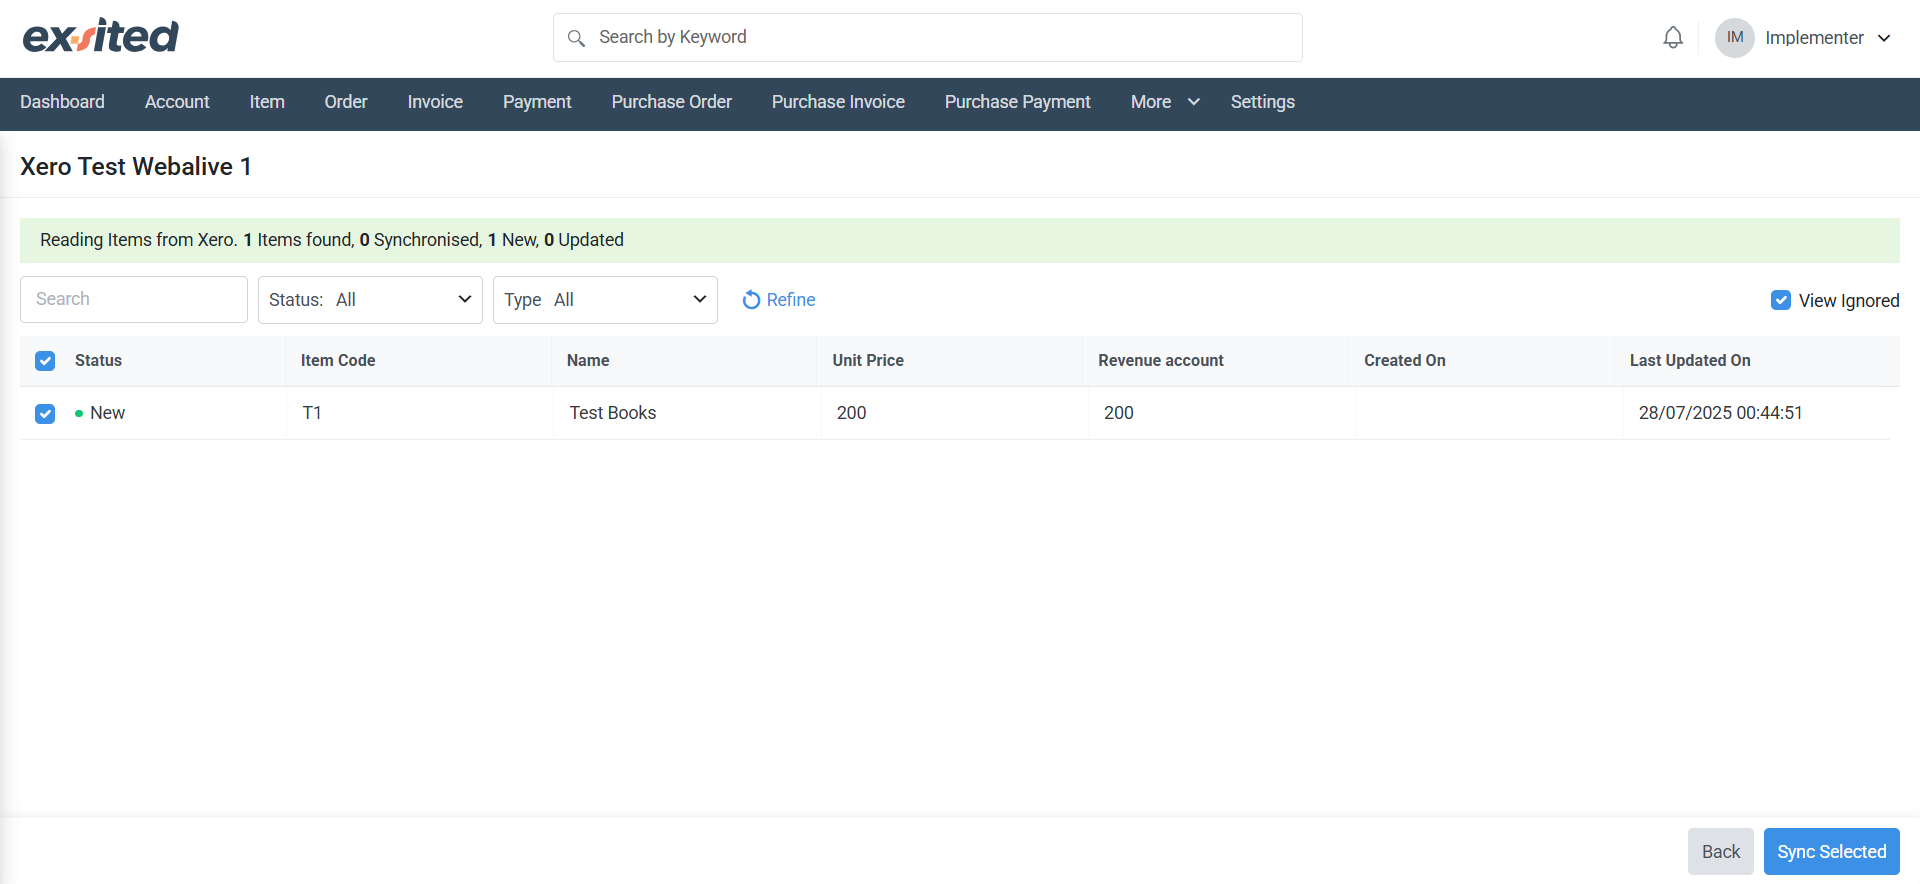
- Click Synchronise to begin the import.
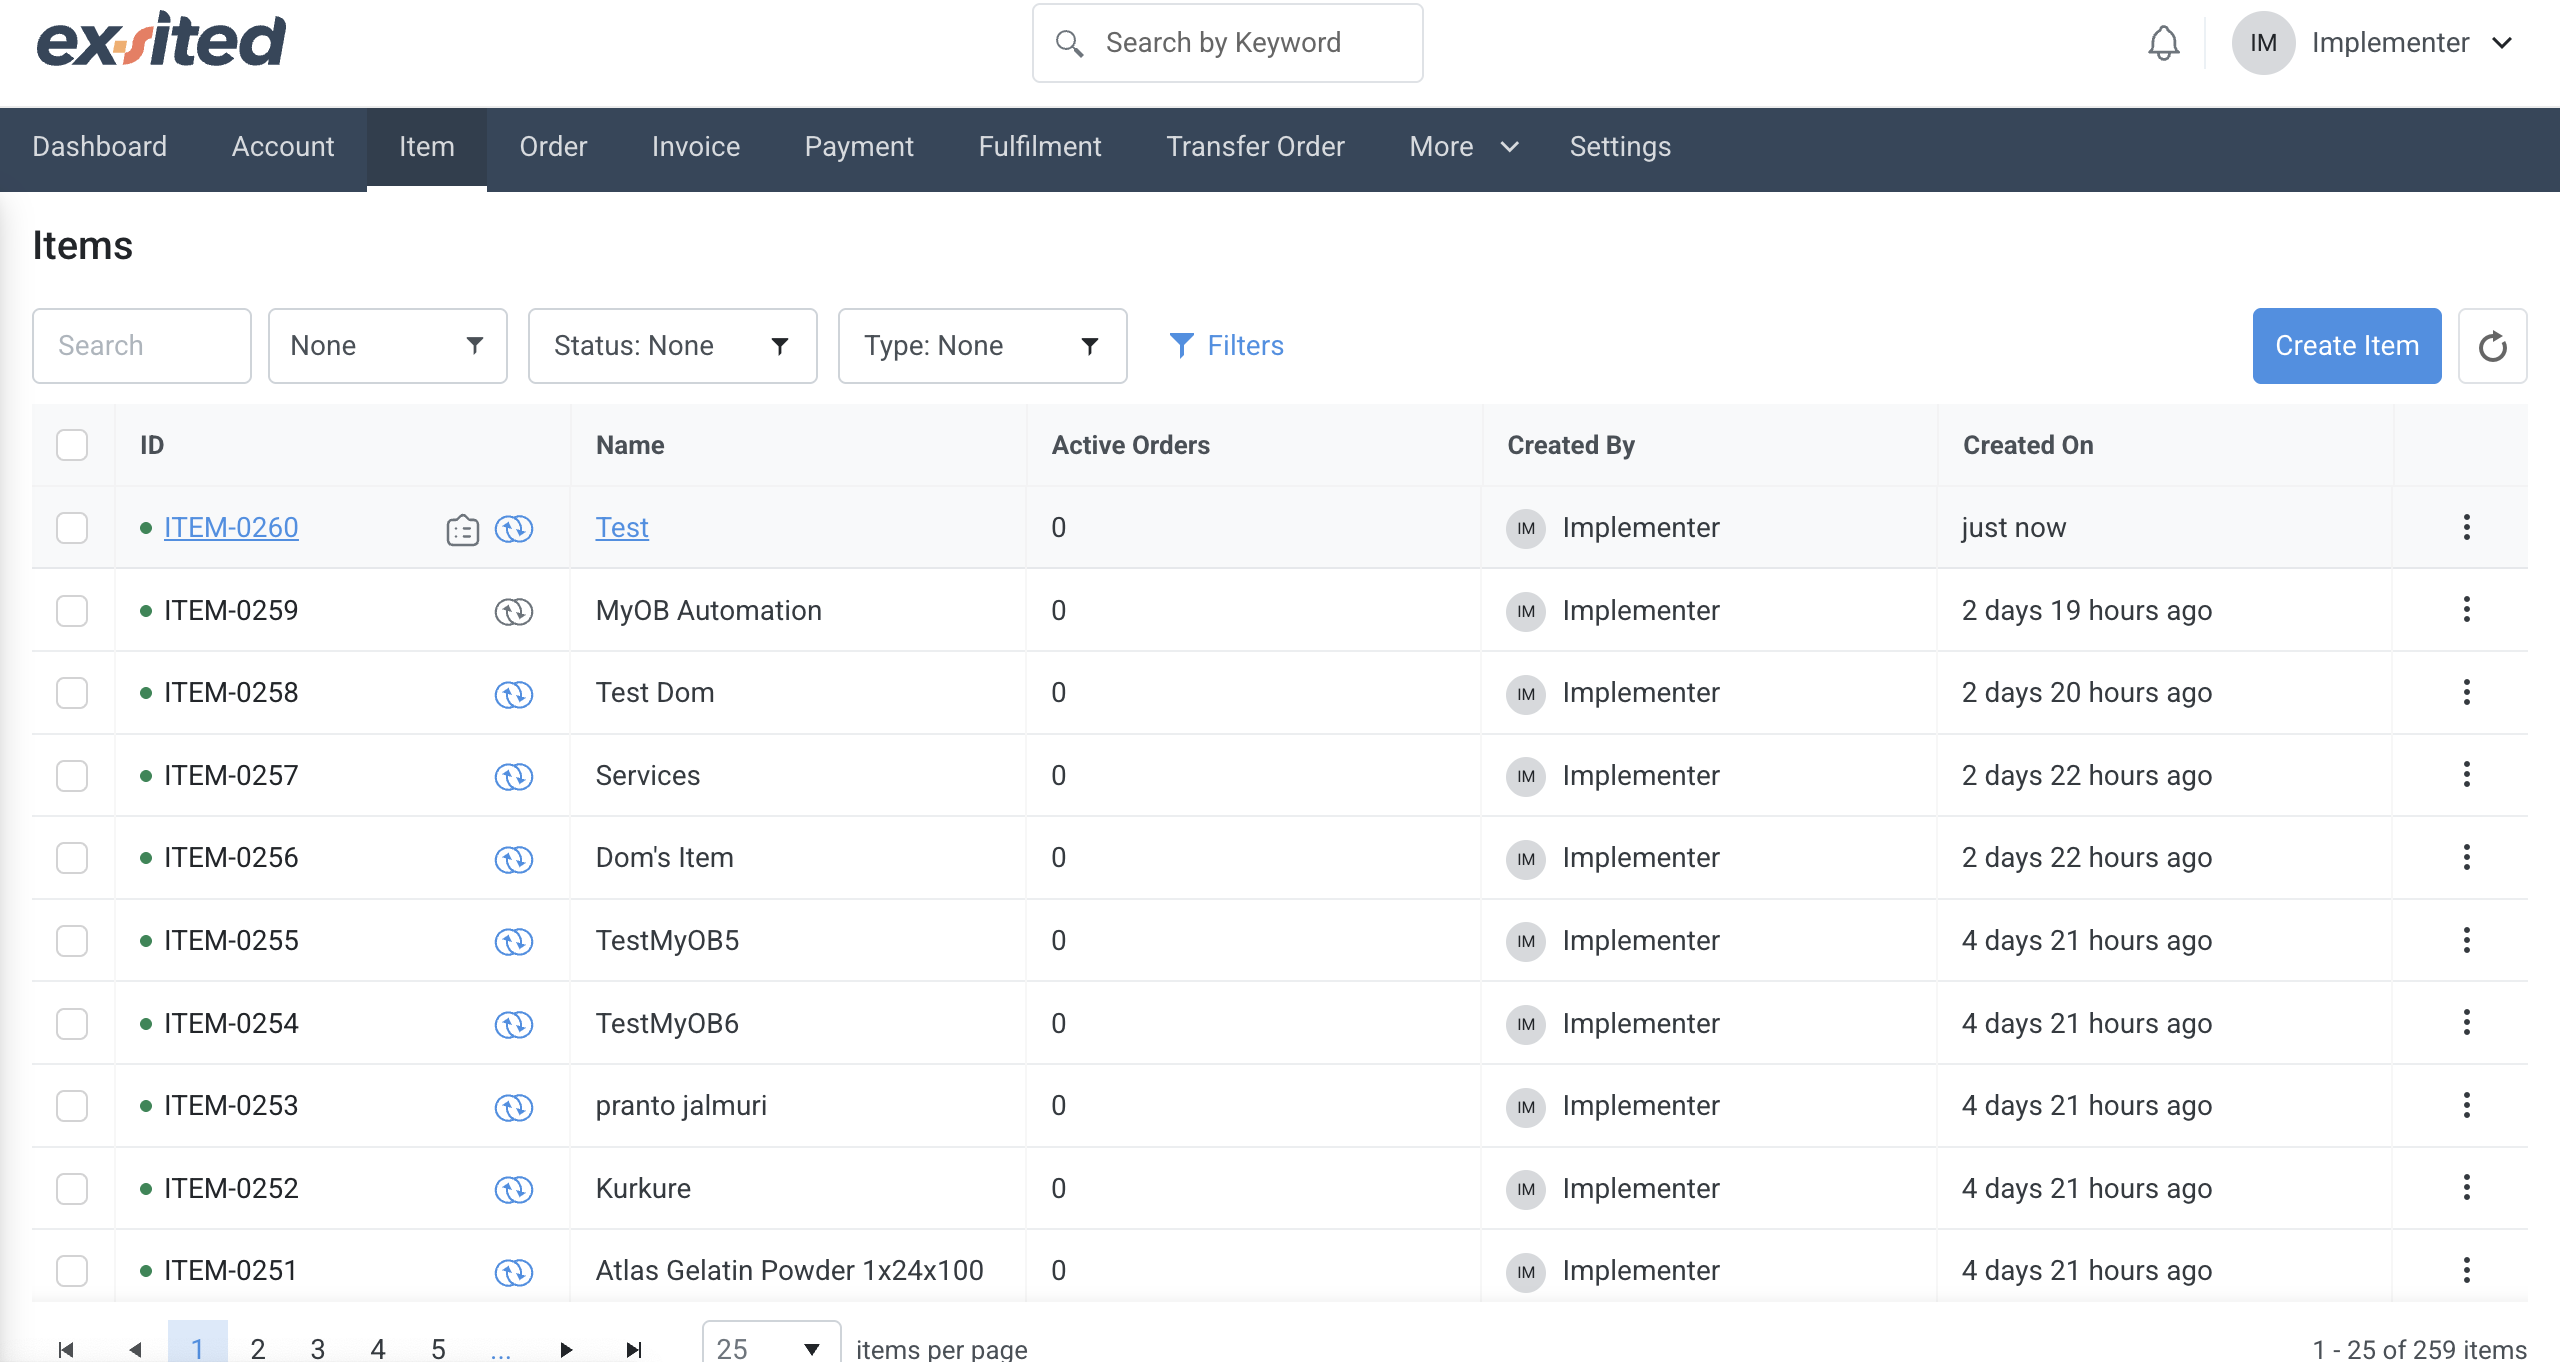
- After import, validate the items under Item List in Exsited.
After completing the import from Xero, all synced items appear in the Exsited item list with their respective codes, names, and timestamps. This view helps users verify successful imports and track item creation history by user and time.
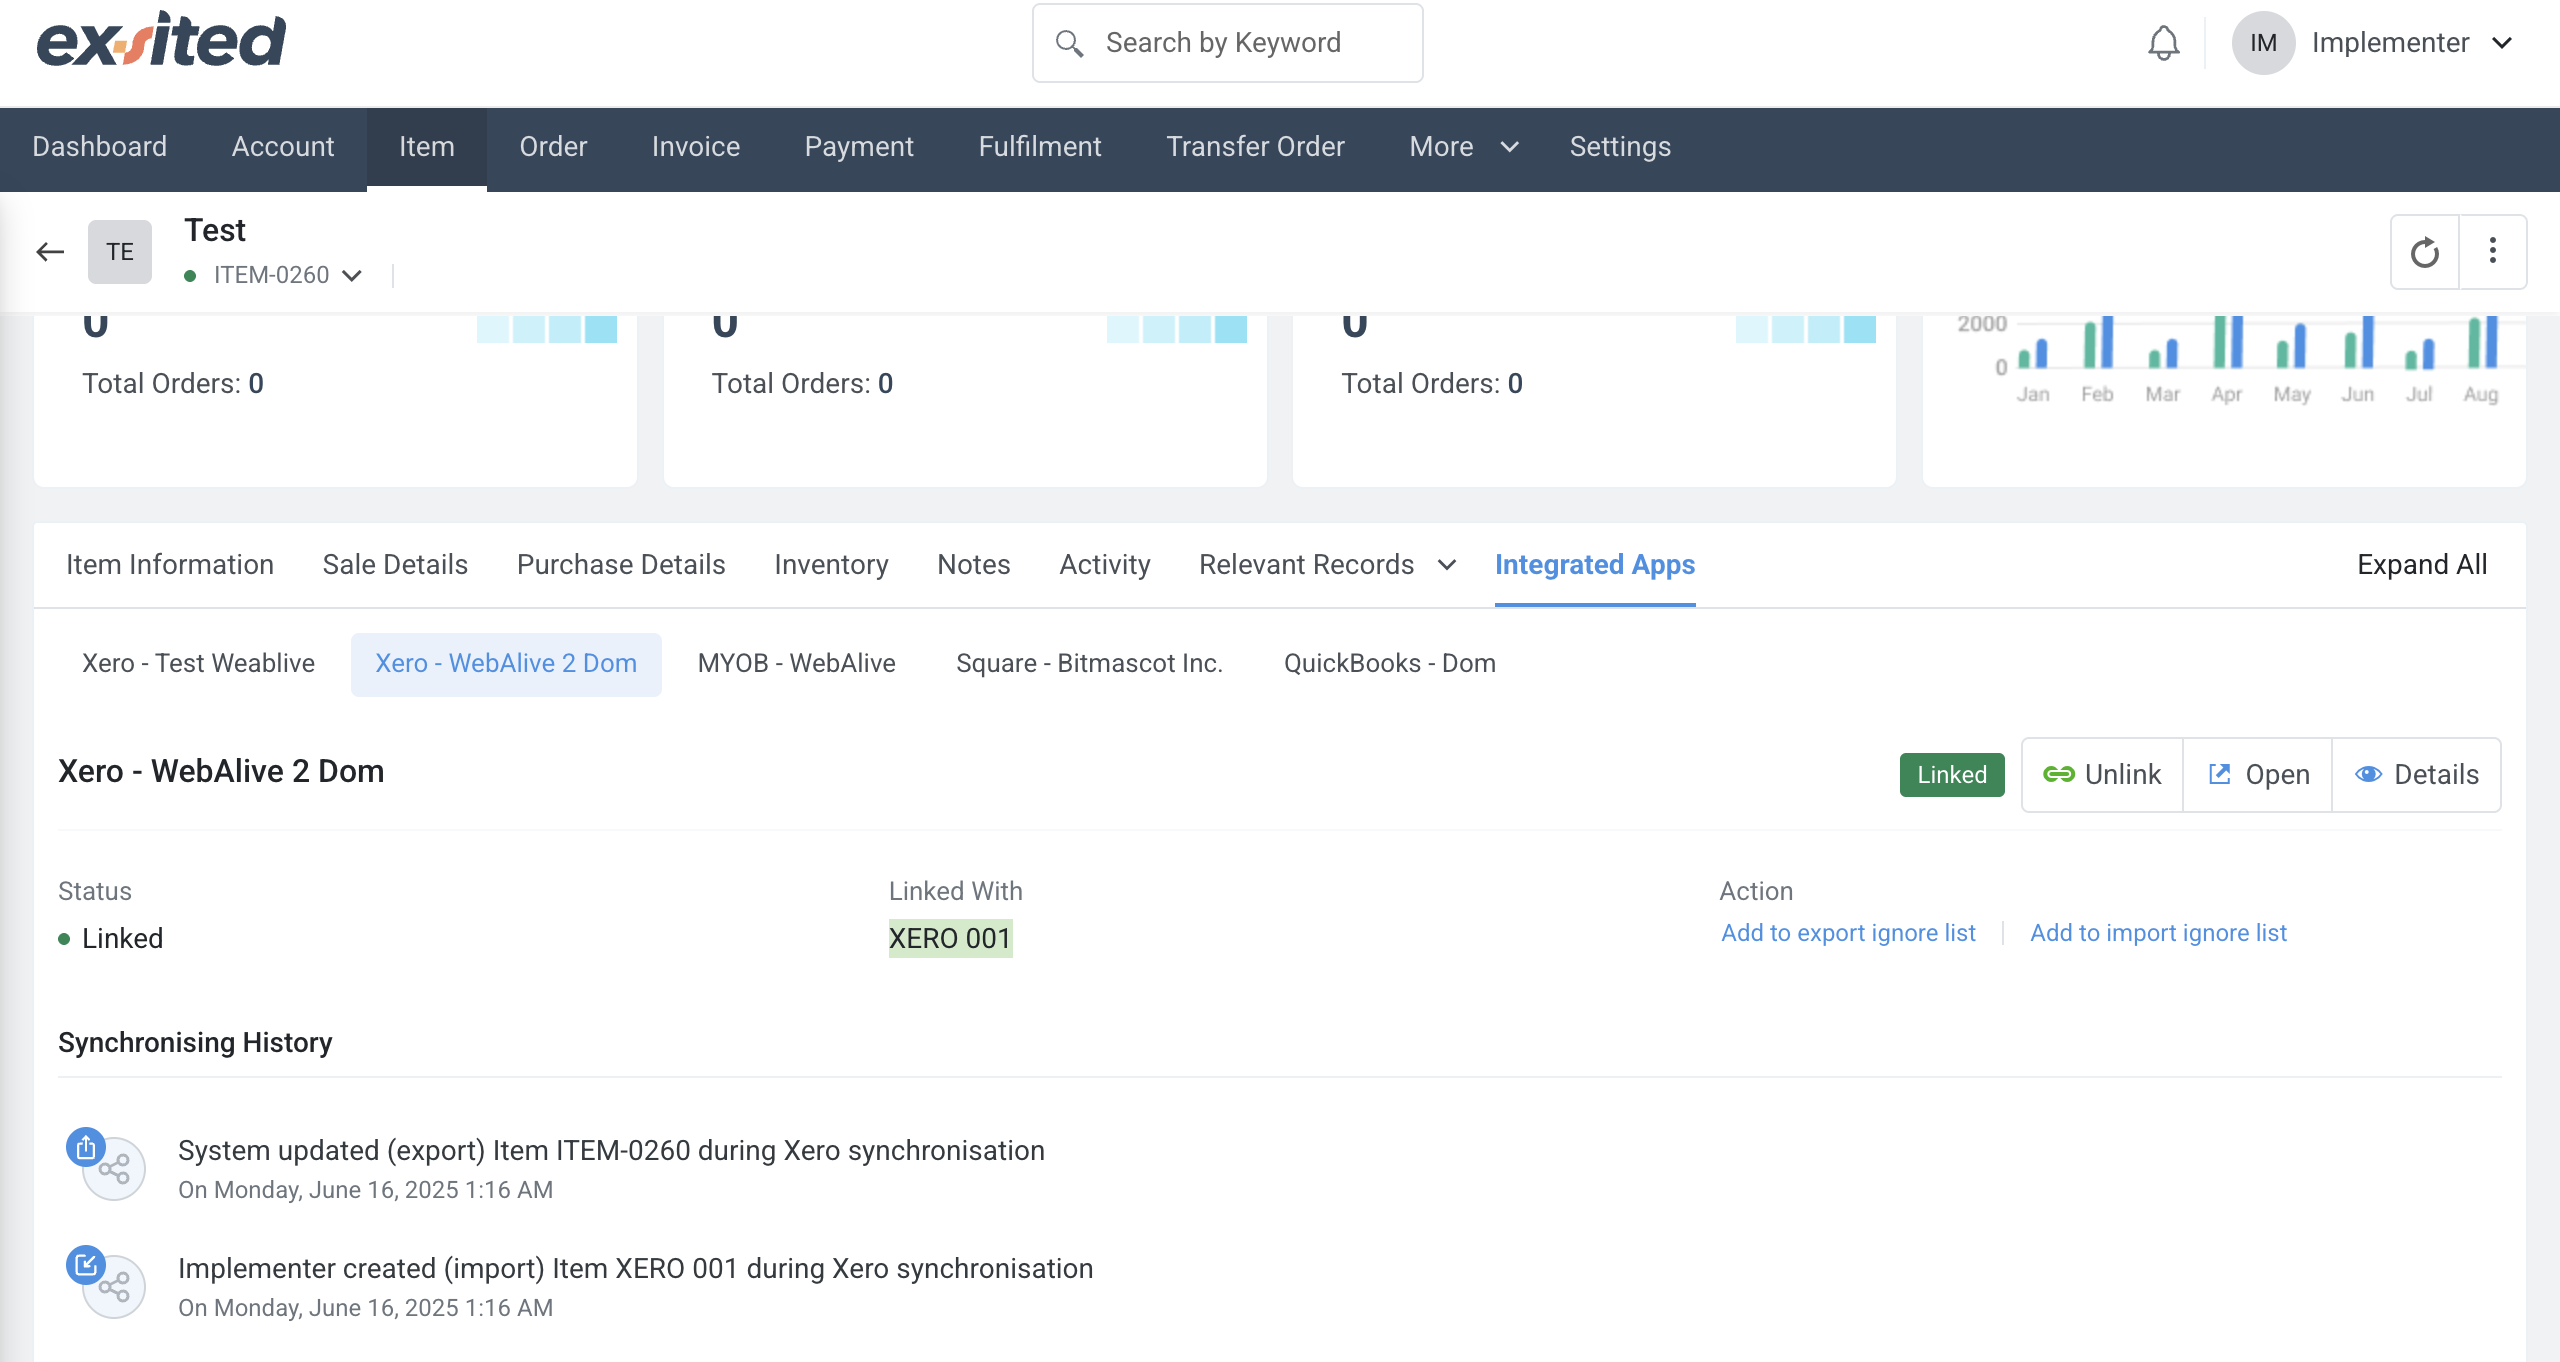
In the Item > Integrated Apps section, you will see the linked status. If you want to unlink an item, simply click on 'Unlink' to disconnect it.
Once an item is successfully linked between Exsited and Xero, users can view synchronisation history and manage the link status. If needed, users also have the option to manually unlink the item for correction or reconfiguration.
Export Items from Exsited to Xero
Navigation: More > Xero > Export Items
- Choose the items in Exsited to be exported.
- Select New for first-time exports.
- Click Export to push data into Xero.
- These items come from Exsited.
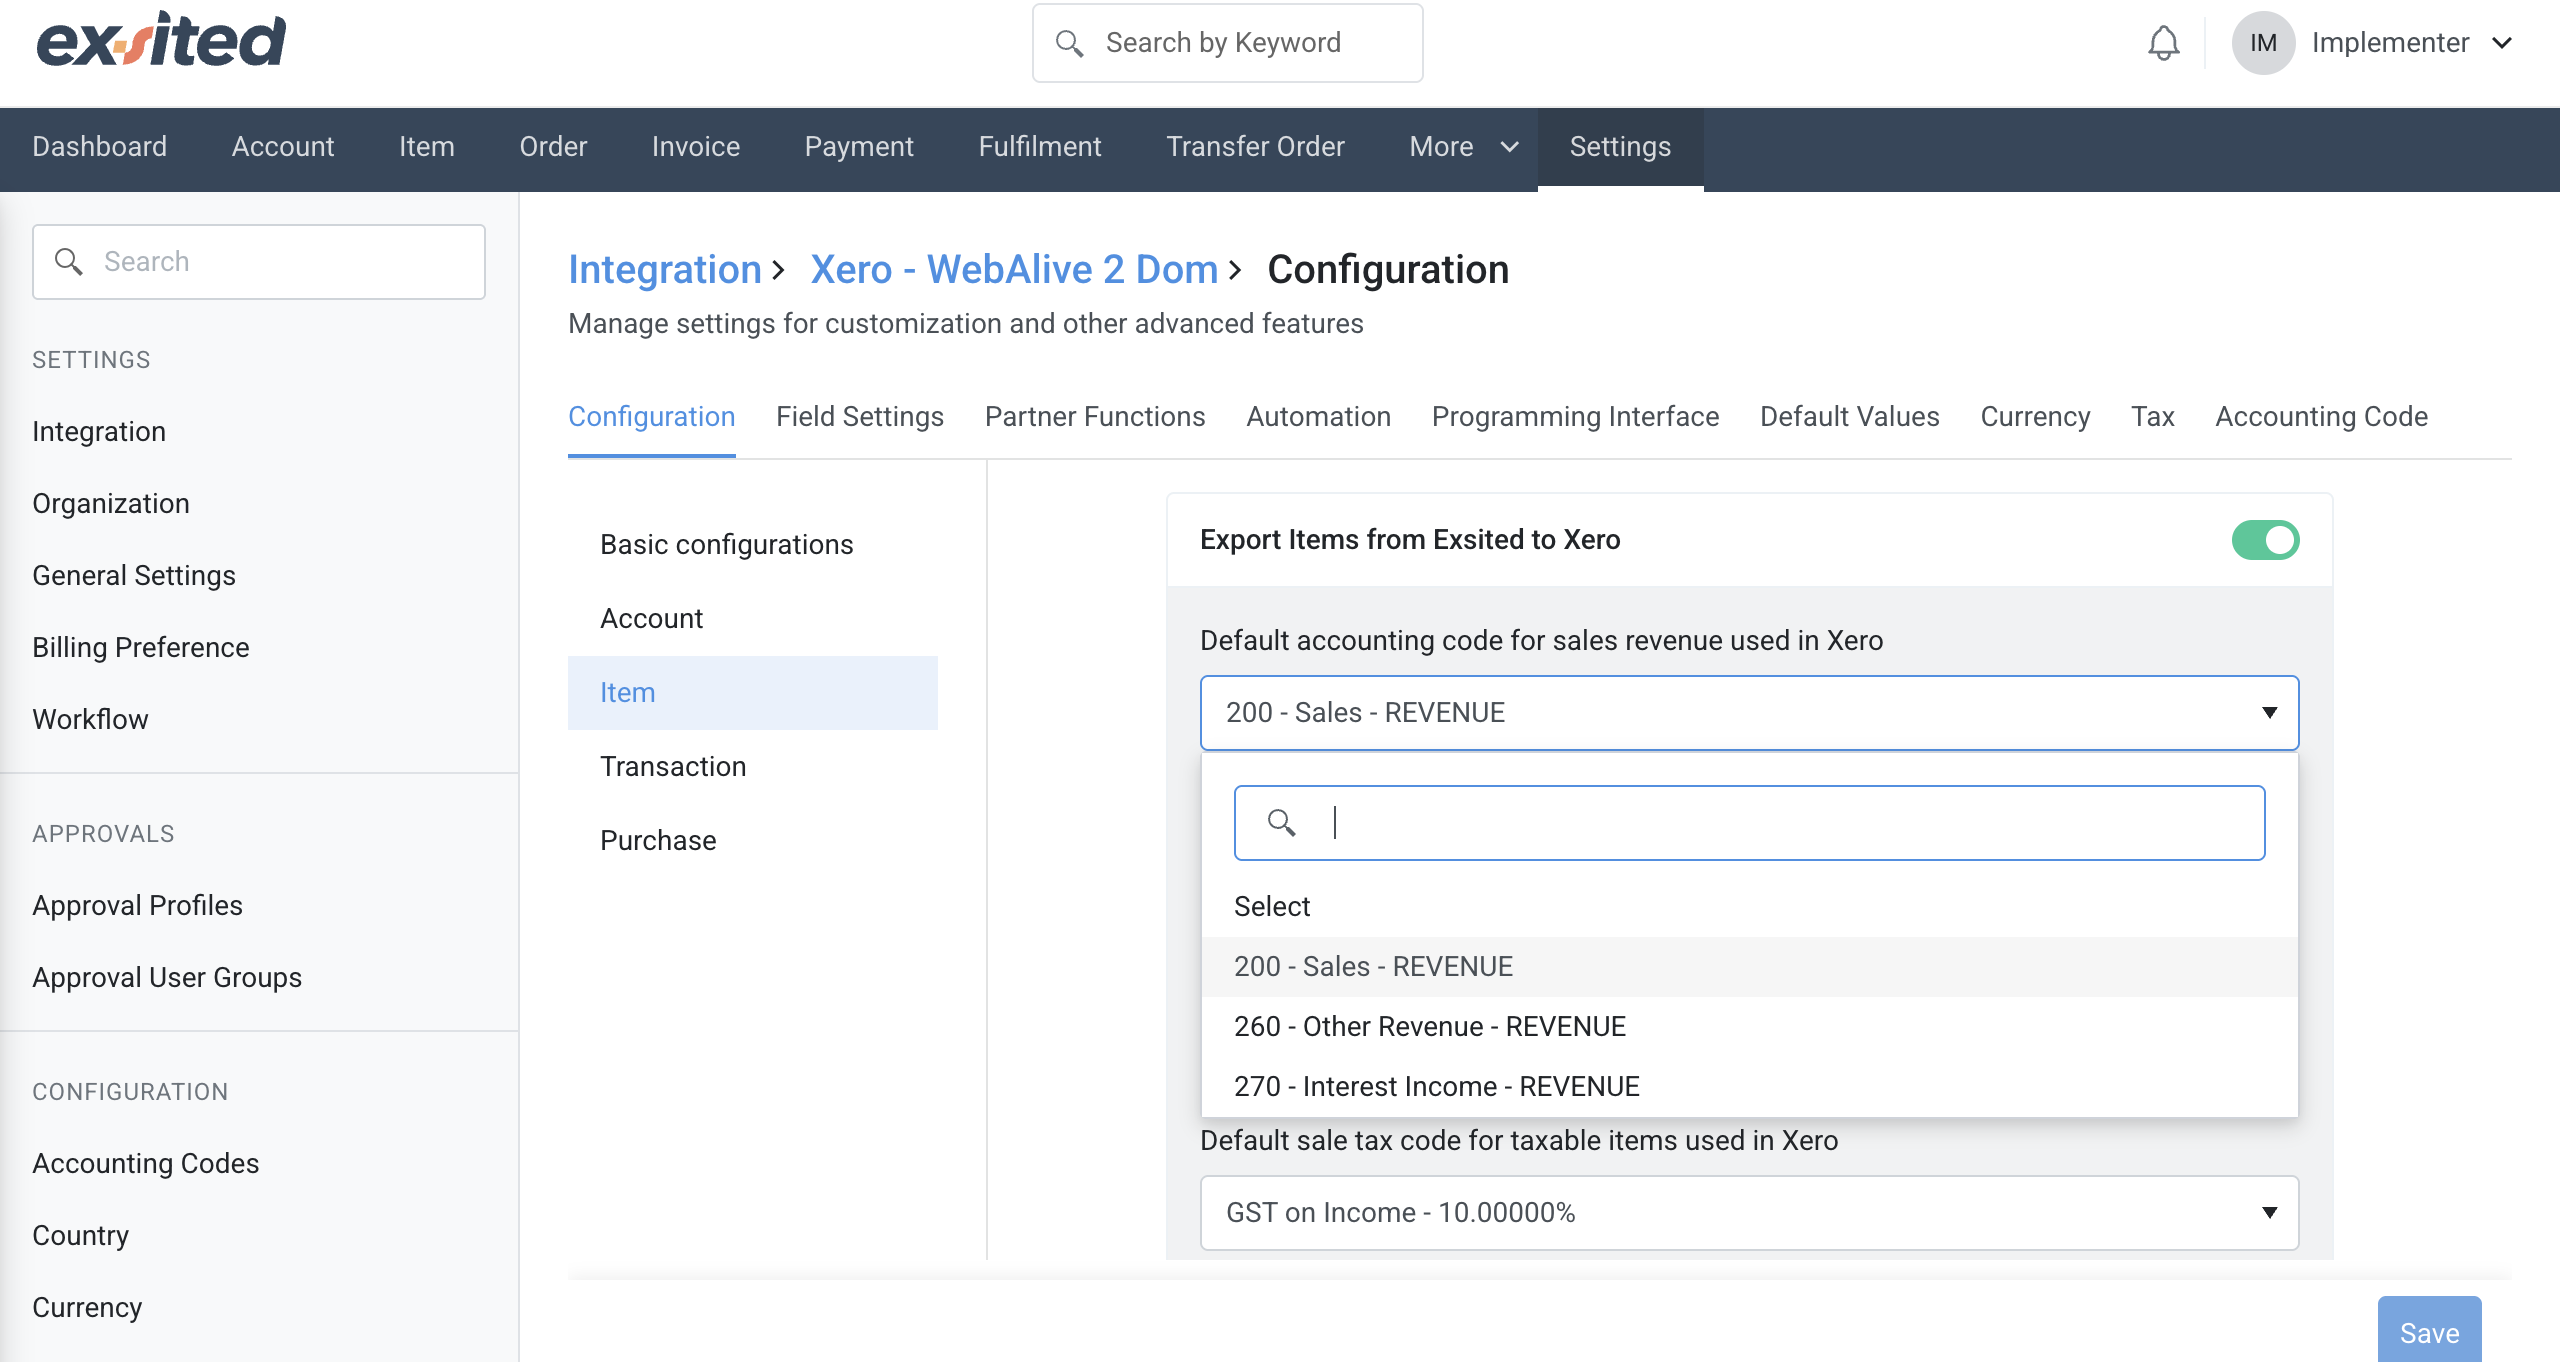
During export configuration in Exsited, users must select the appropriate sales revenue account from Xero to ensure transactions are recorded in the correct ledger. This step is essential for maintaining financial accuracy in exported item and invoice data.
Important Note: When creating or exporting a transaction from Exsited, make sure the item and warehouse used in that transaction already exist in Xero. If not, you must first export those records from Exsited. Transactions referencing non-existent items or warehouses will fail to synchronise.
In the export configuration for items, users must select the appropriate sales revenue account from Xero to map Exsited exports. This mapping ensures that item sales are recorded in the correct general ledger account during synchronisation.
- Choose the Xero organisation
- Click “New”
- Select items to export
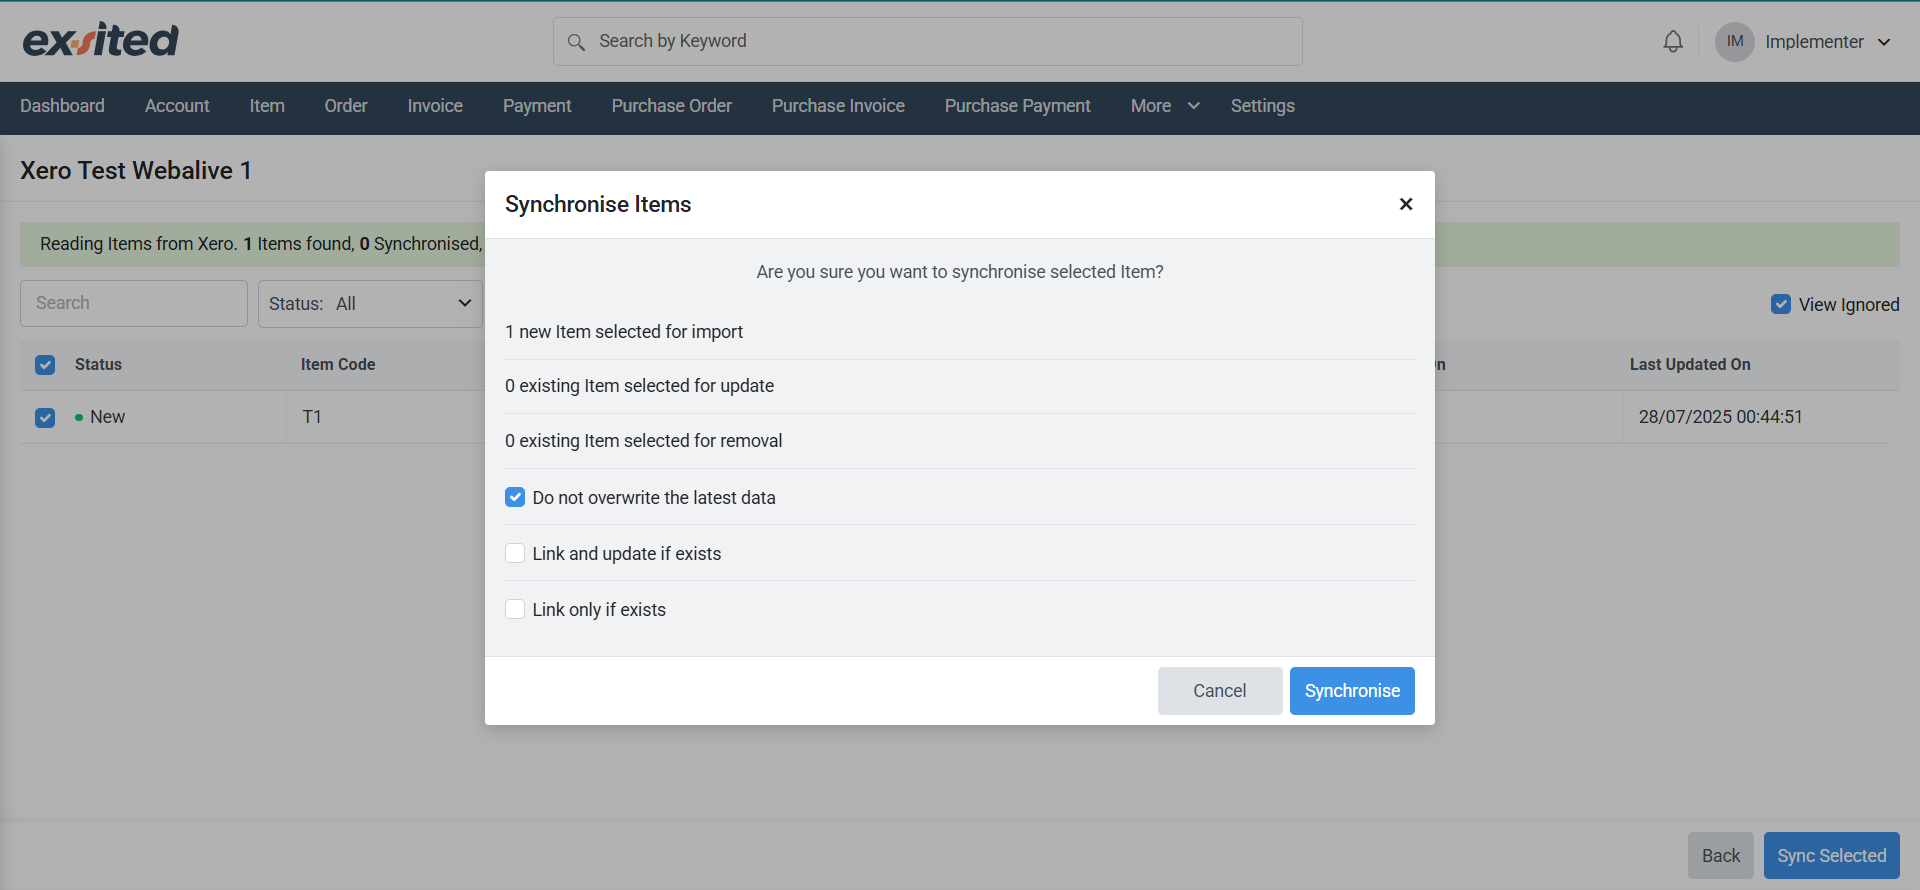
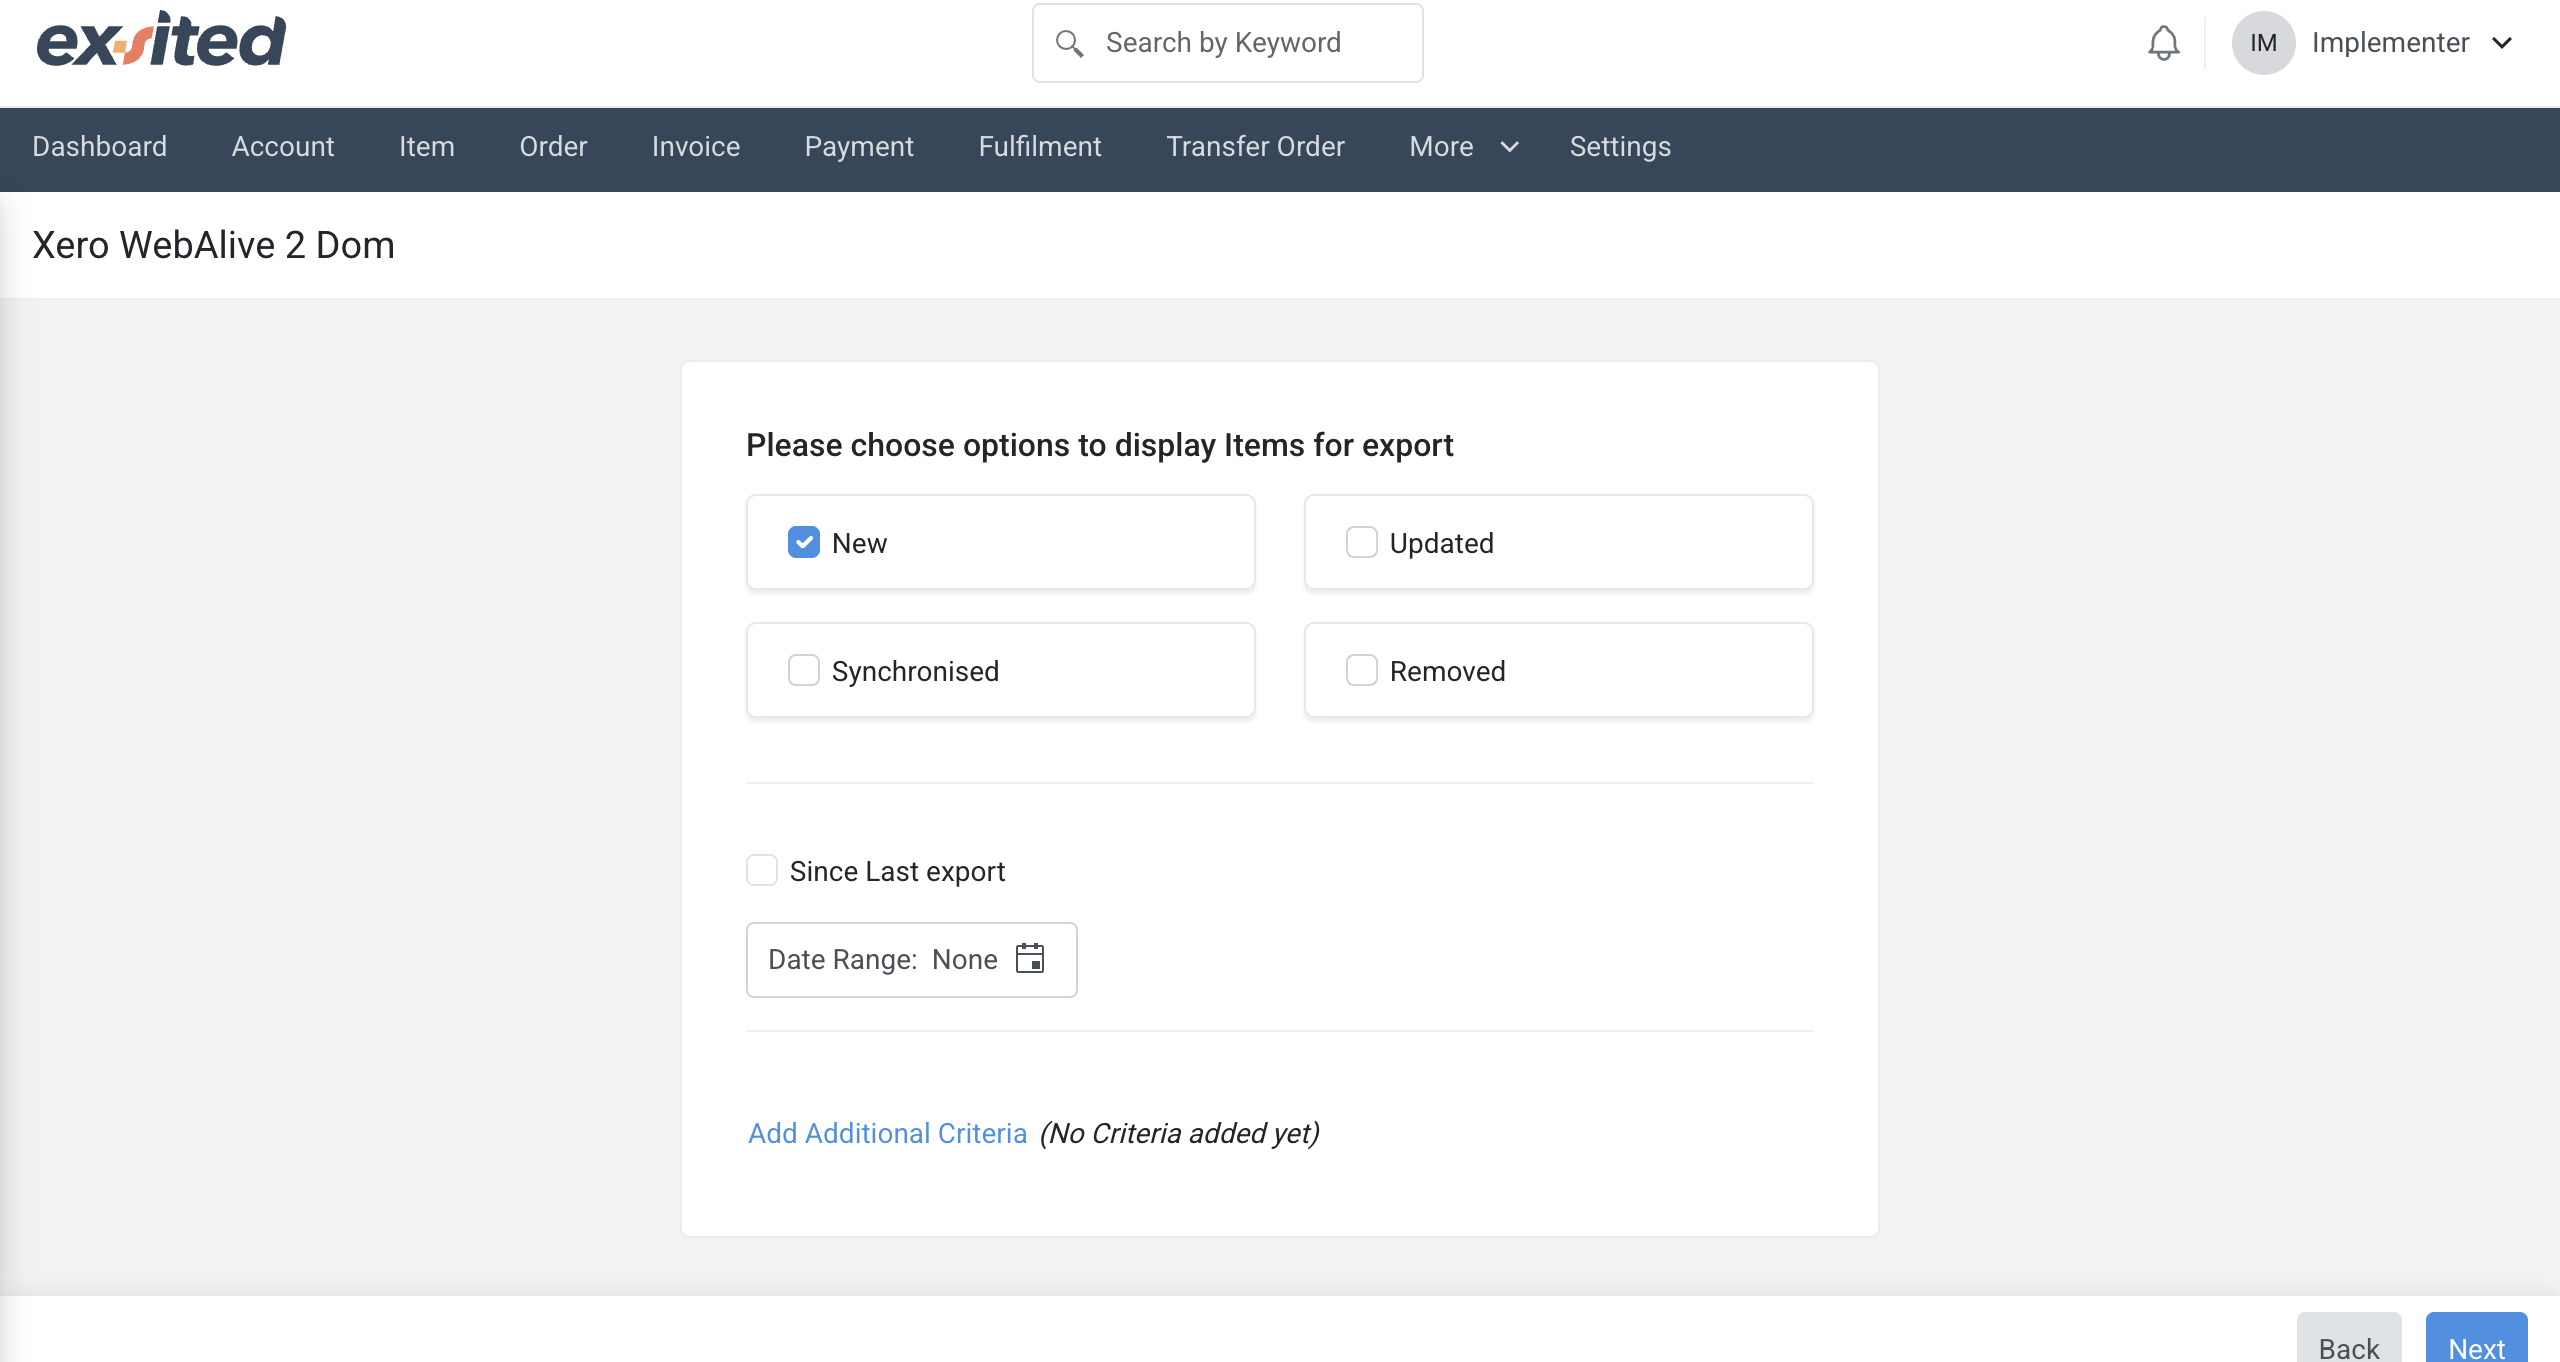
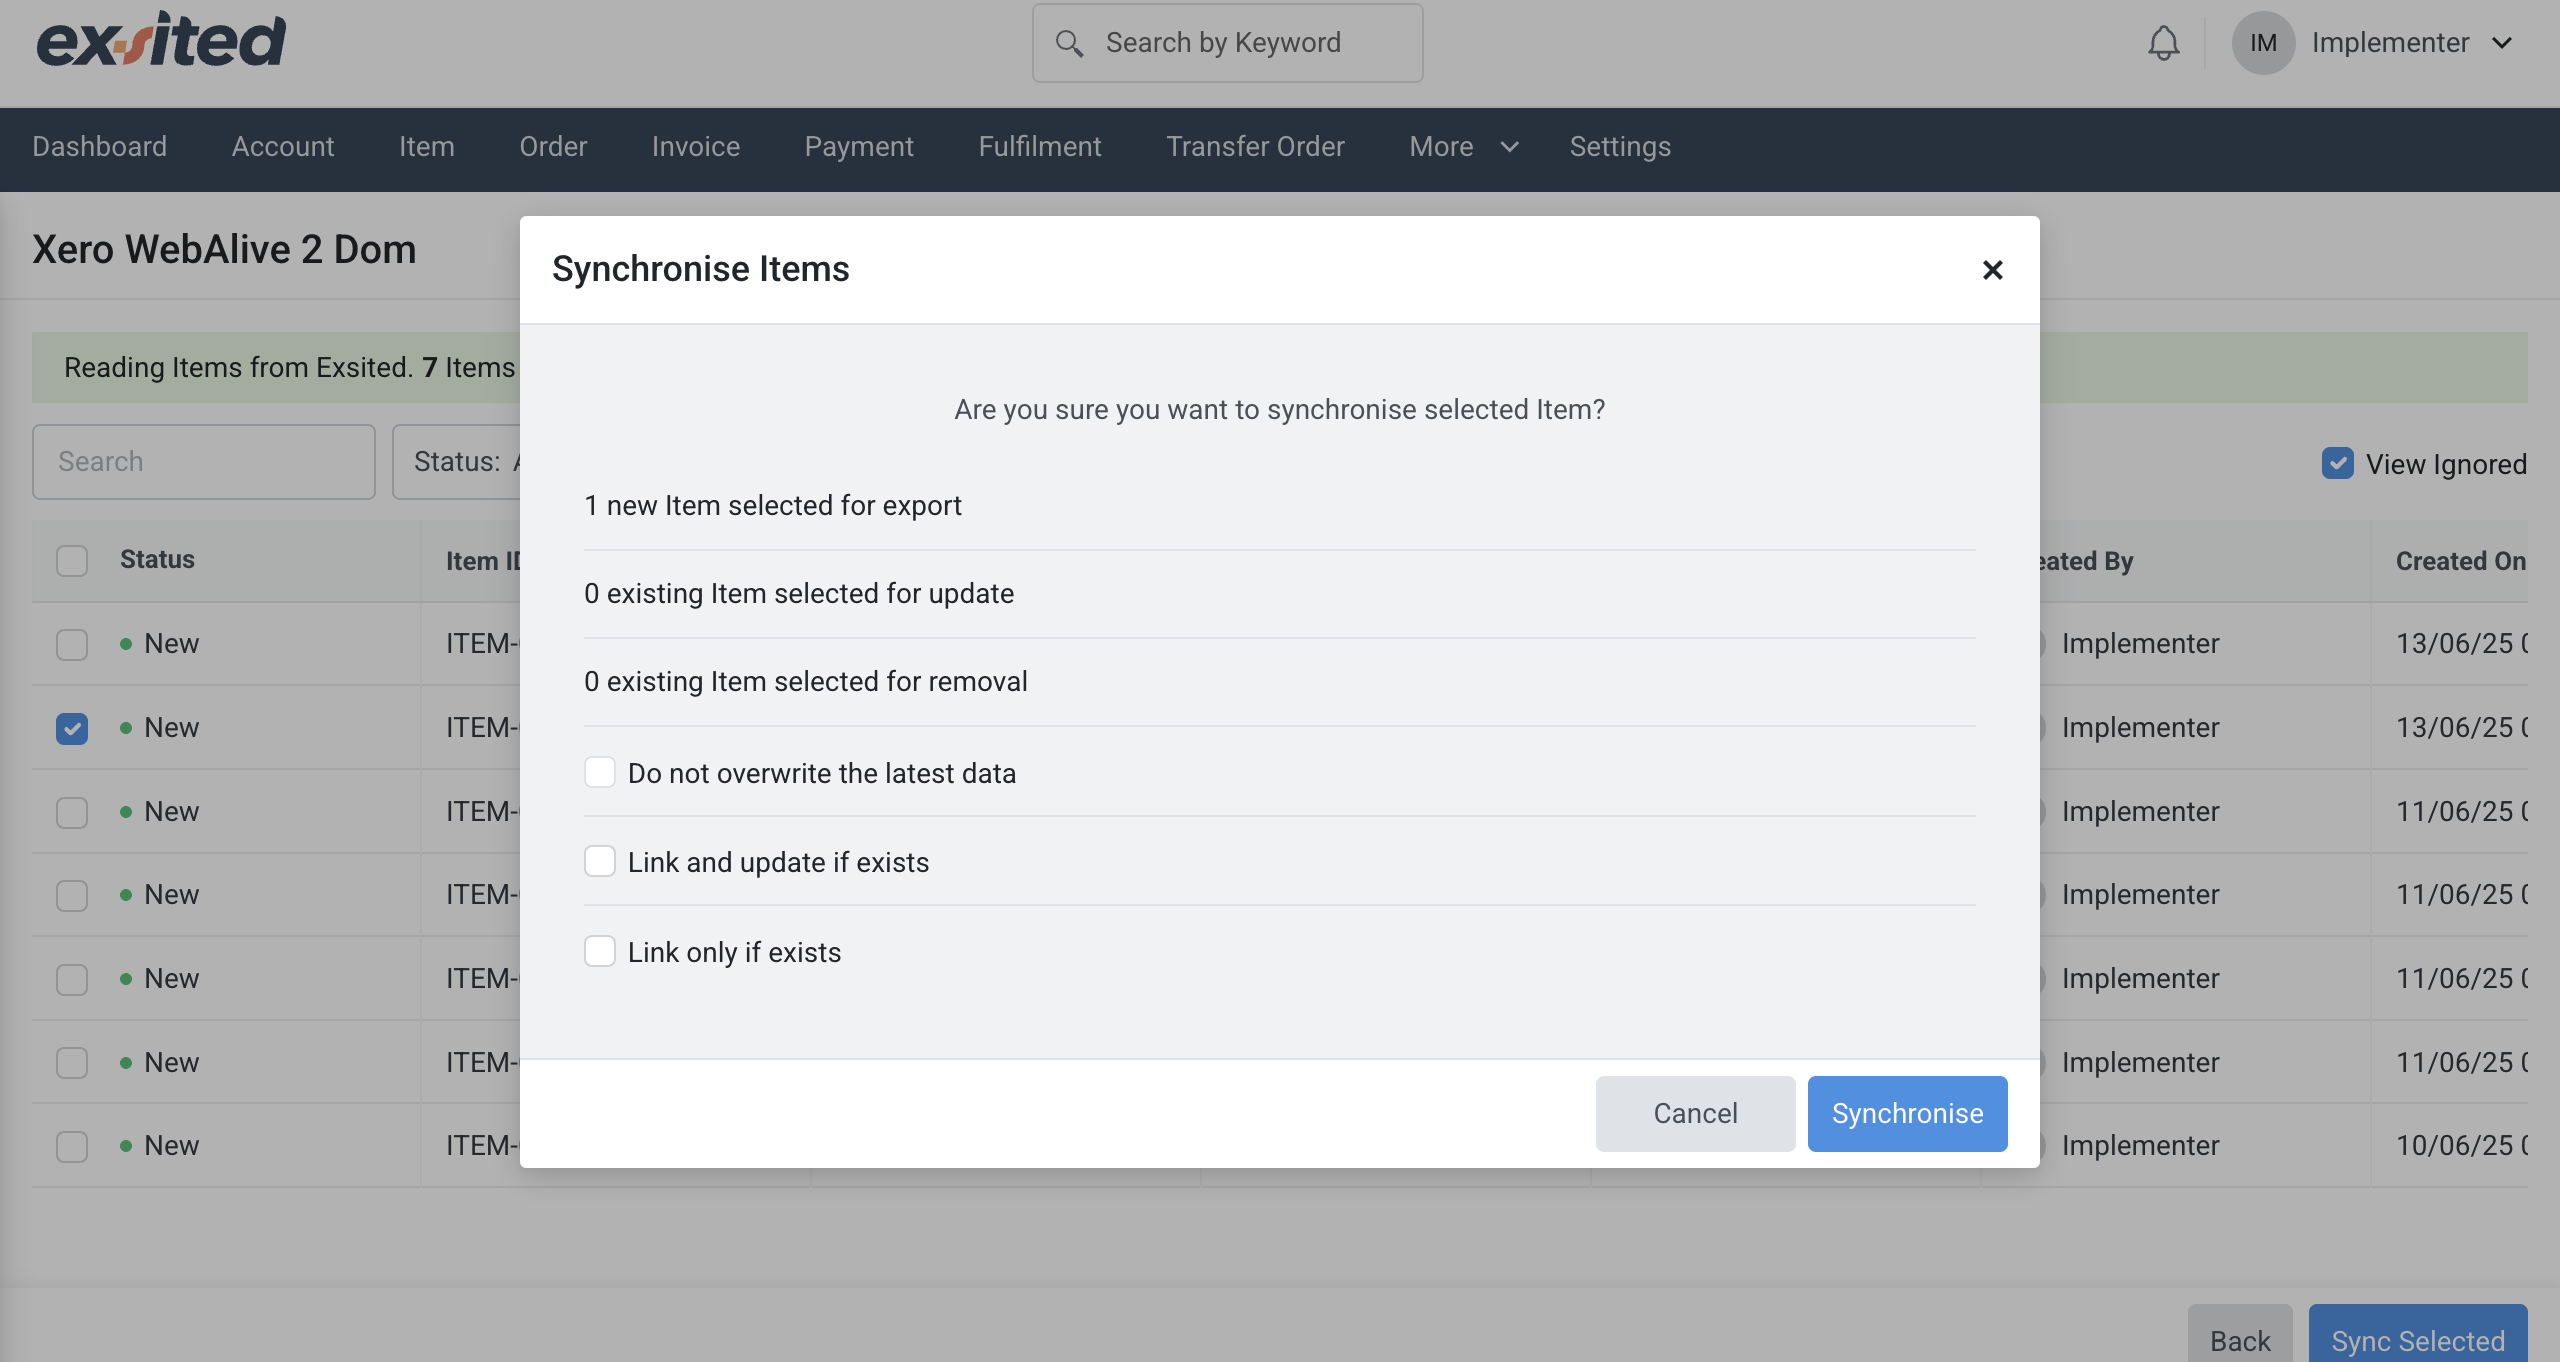
Before exporting items from Exsited to Xero, users can filter records by status, such as New, Updated, or Removed, and optionally define a date range. These options help ensure only relevant items are included in the export batch.
The synchronisation confirmation screen in Exsited provides detailed options before syncing items to Xero, including whether to link, update, or skip existing records. This step helps ensure that data integrity is maintained during the export process.
Before enabling automation, manually export or import items/accounts to ensure the integration works as expected.
Process Automation
Navigation: Exsited > Setting > Xero > Configuration > Partner Function
Import Automation
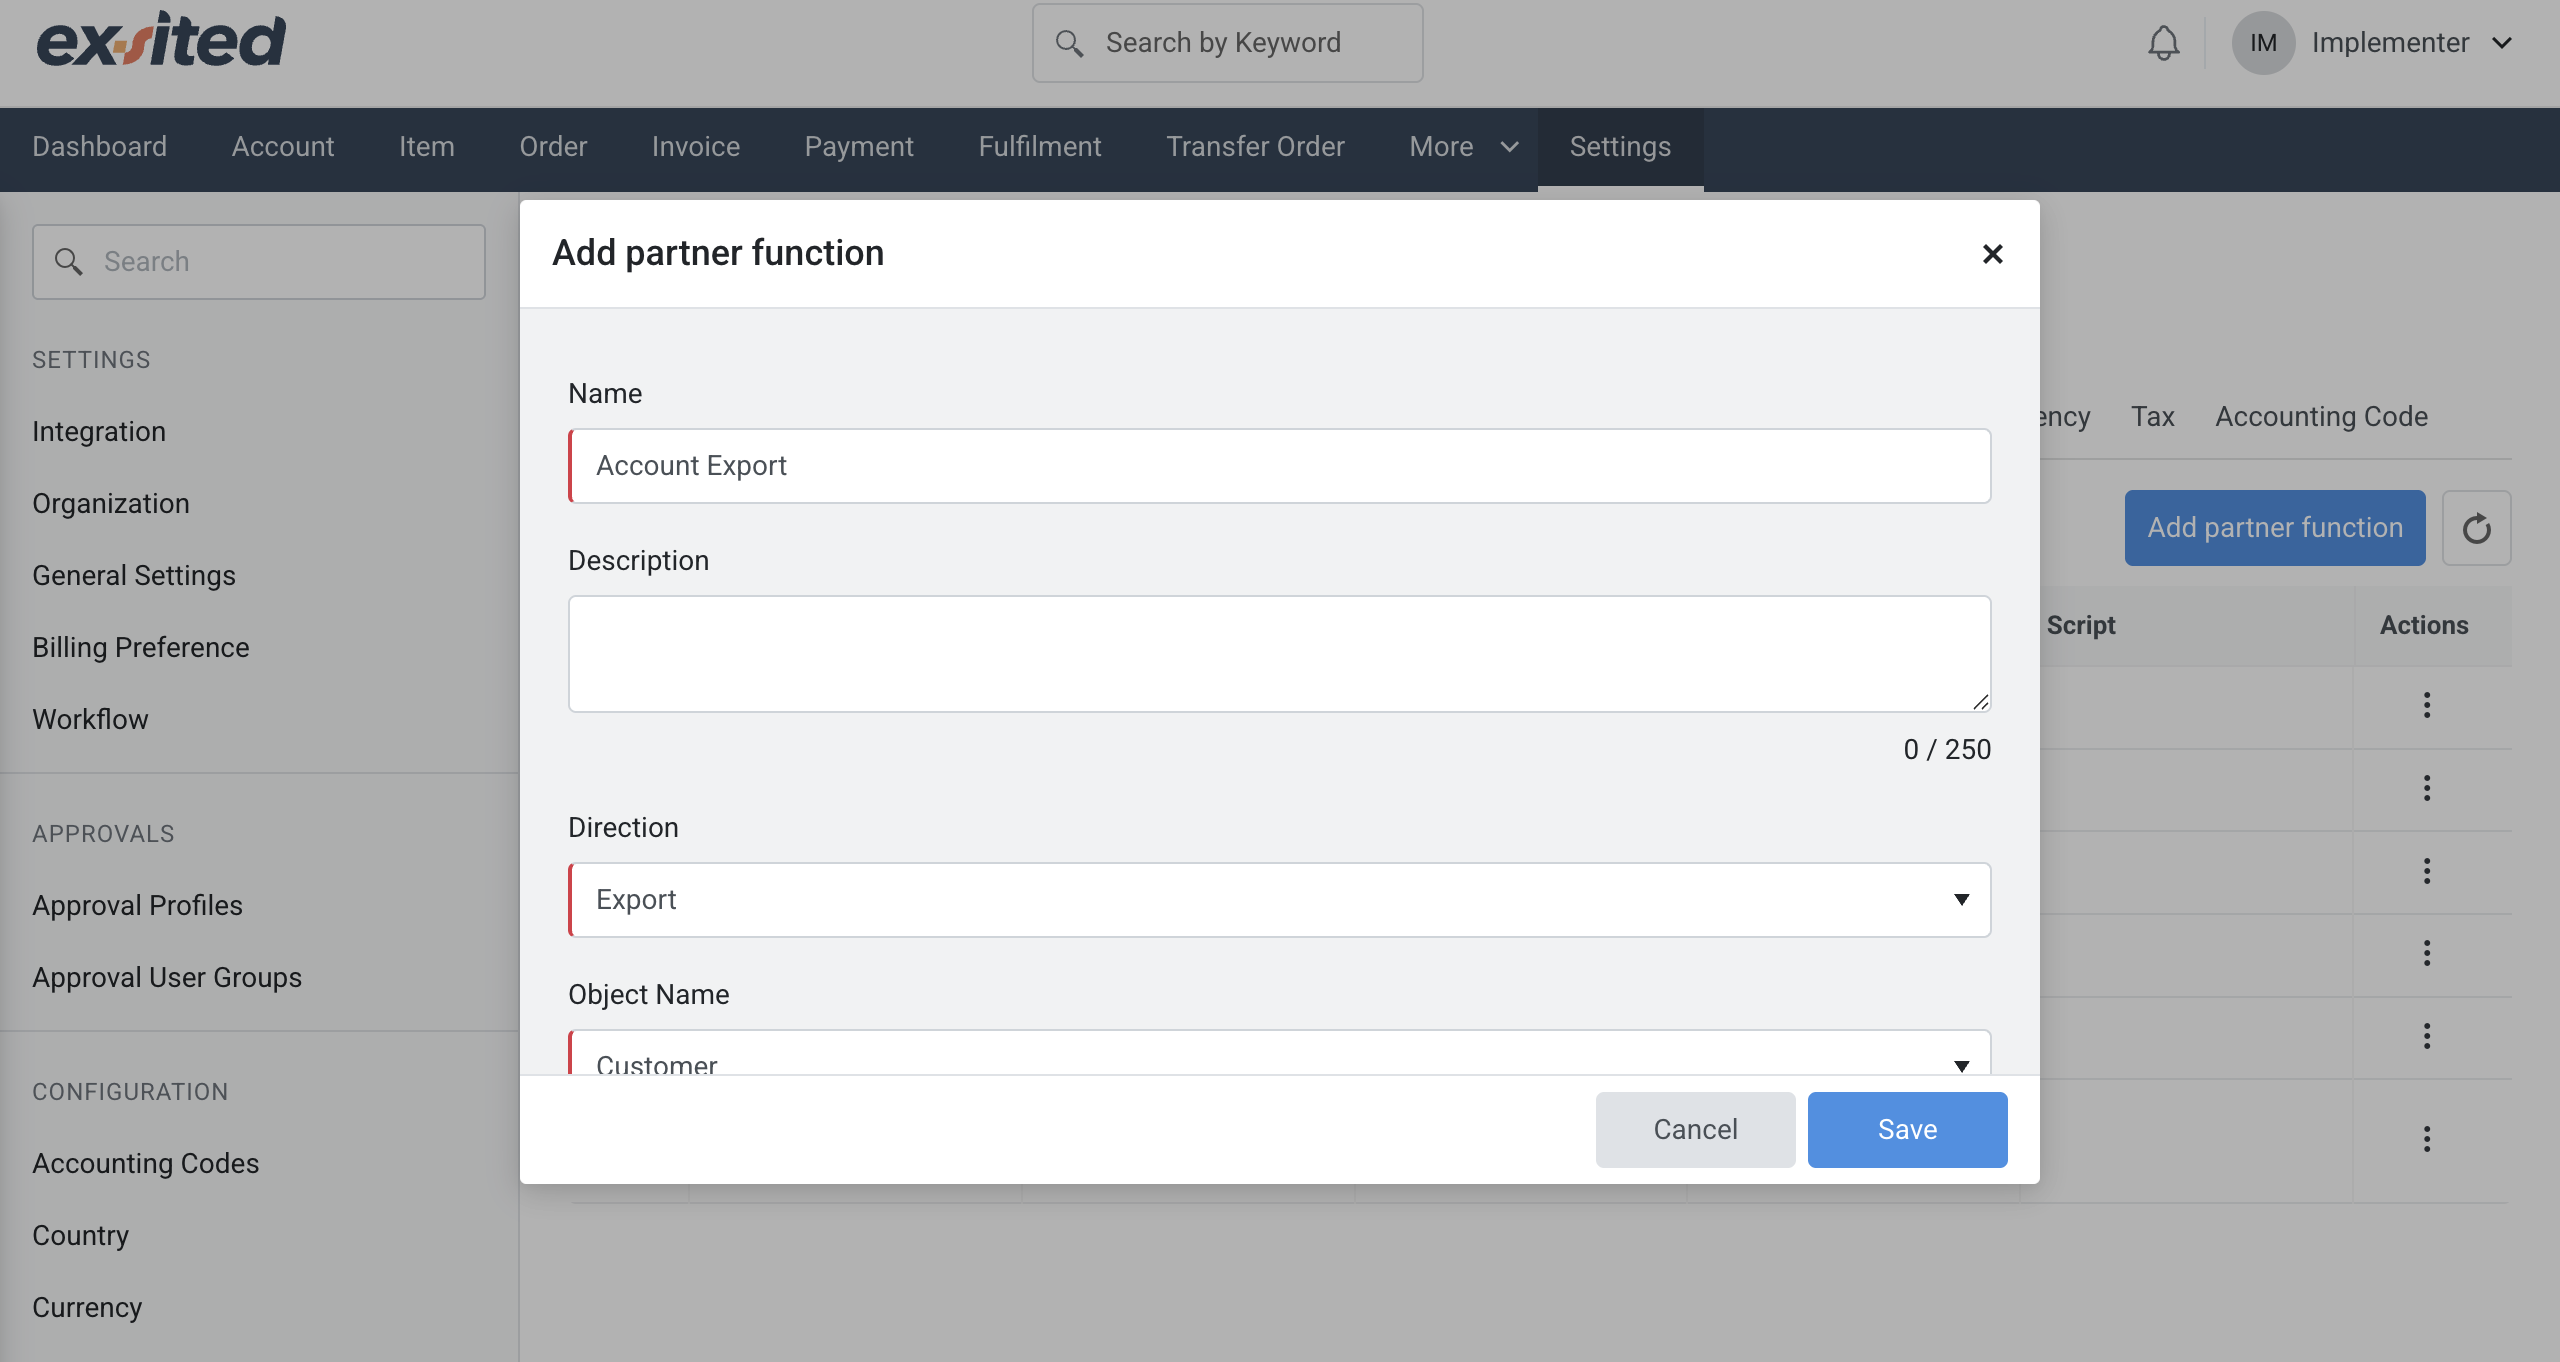
To automate the import process between Exsited and Xero, you must first create a Partner Function. This function serves as the foundational link between the two systems, defining how data (such as items, accounts, or transactions) is imported from Xero into Exsited.
The "Add Partner Function" form allows users to define integration logic by specifying the direction (import/export), object type (e.g., Customer), and event trigger. This setup is essential for automating data flows between Exsited and external systems like Xero.

Once a partner function is created, go to Exsited > Setting > Xero > Configuration > Automation
Automation Types in Exsited
- General Information:
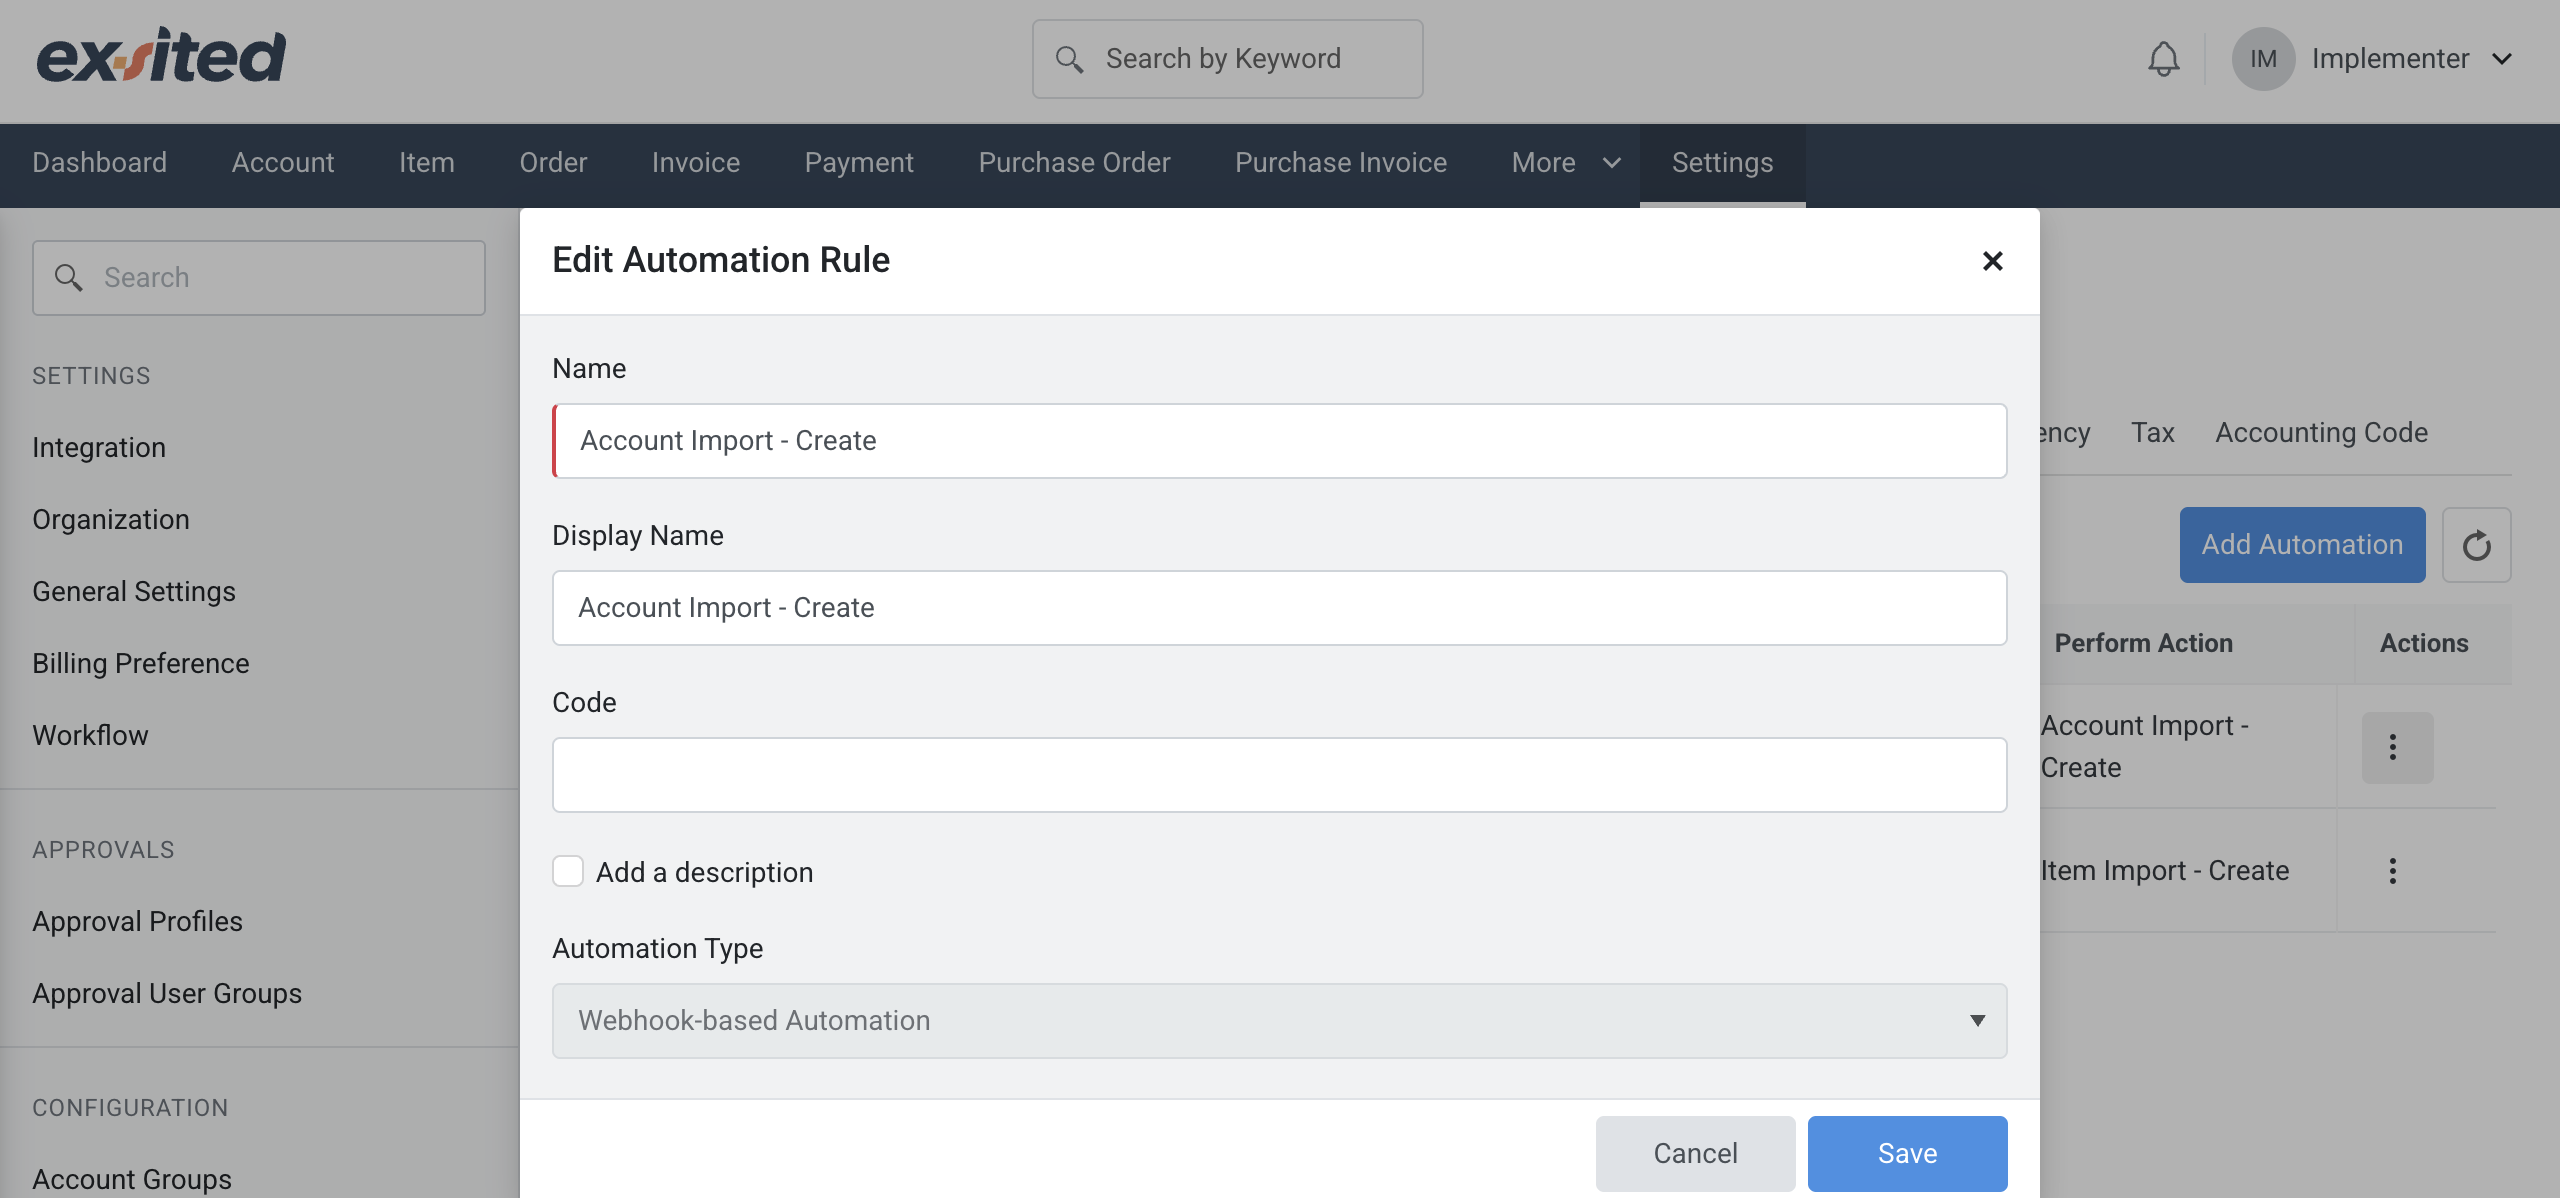
- Name:
Account Import - Create - Display Name:
Account Import - Create - Code: Add a unique identifier (e.g.,
account_import_create_xero) - Leave Description unchecked unless needed
- In the Automation Type settings within Exsited, there are two available options for automating data imports from Xero:
- Time-Based Automation
- Webhook-Based Automation
- This method enables real-time automatic data import as soon as a trigger event occurs in Xero (e.g., new invoice created, item updated).
- It is ideal for ensuring that data in Exsited is always up to date with the latest changes from Xero.
- Name:
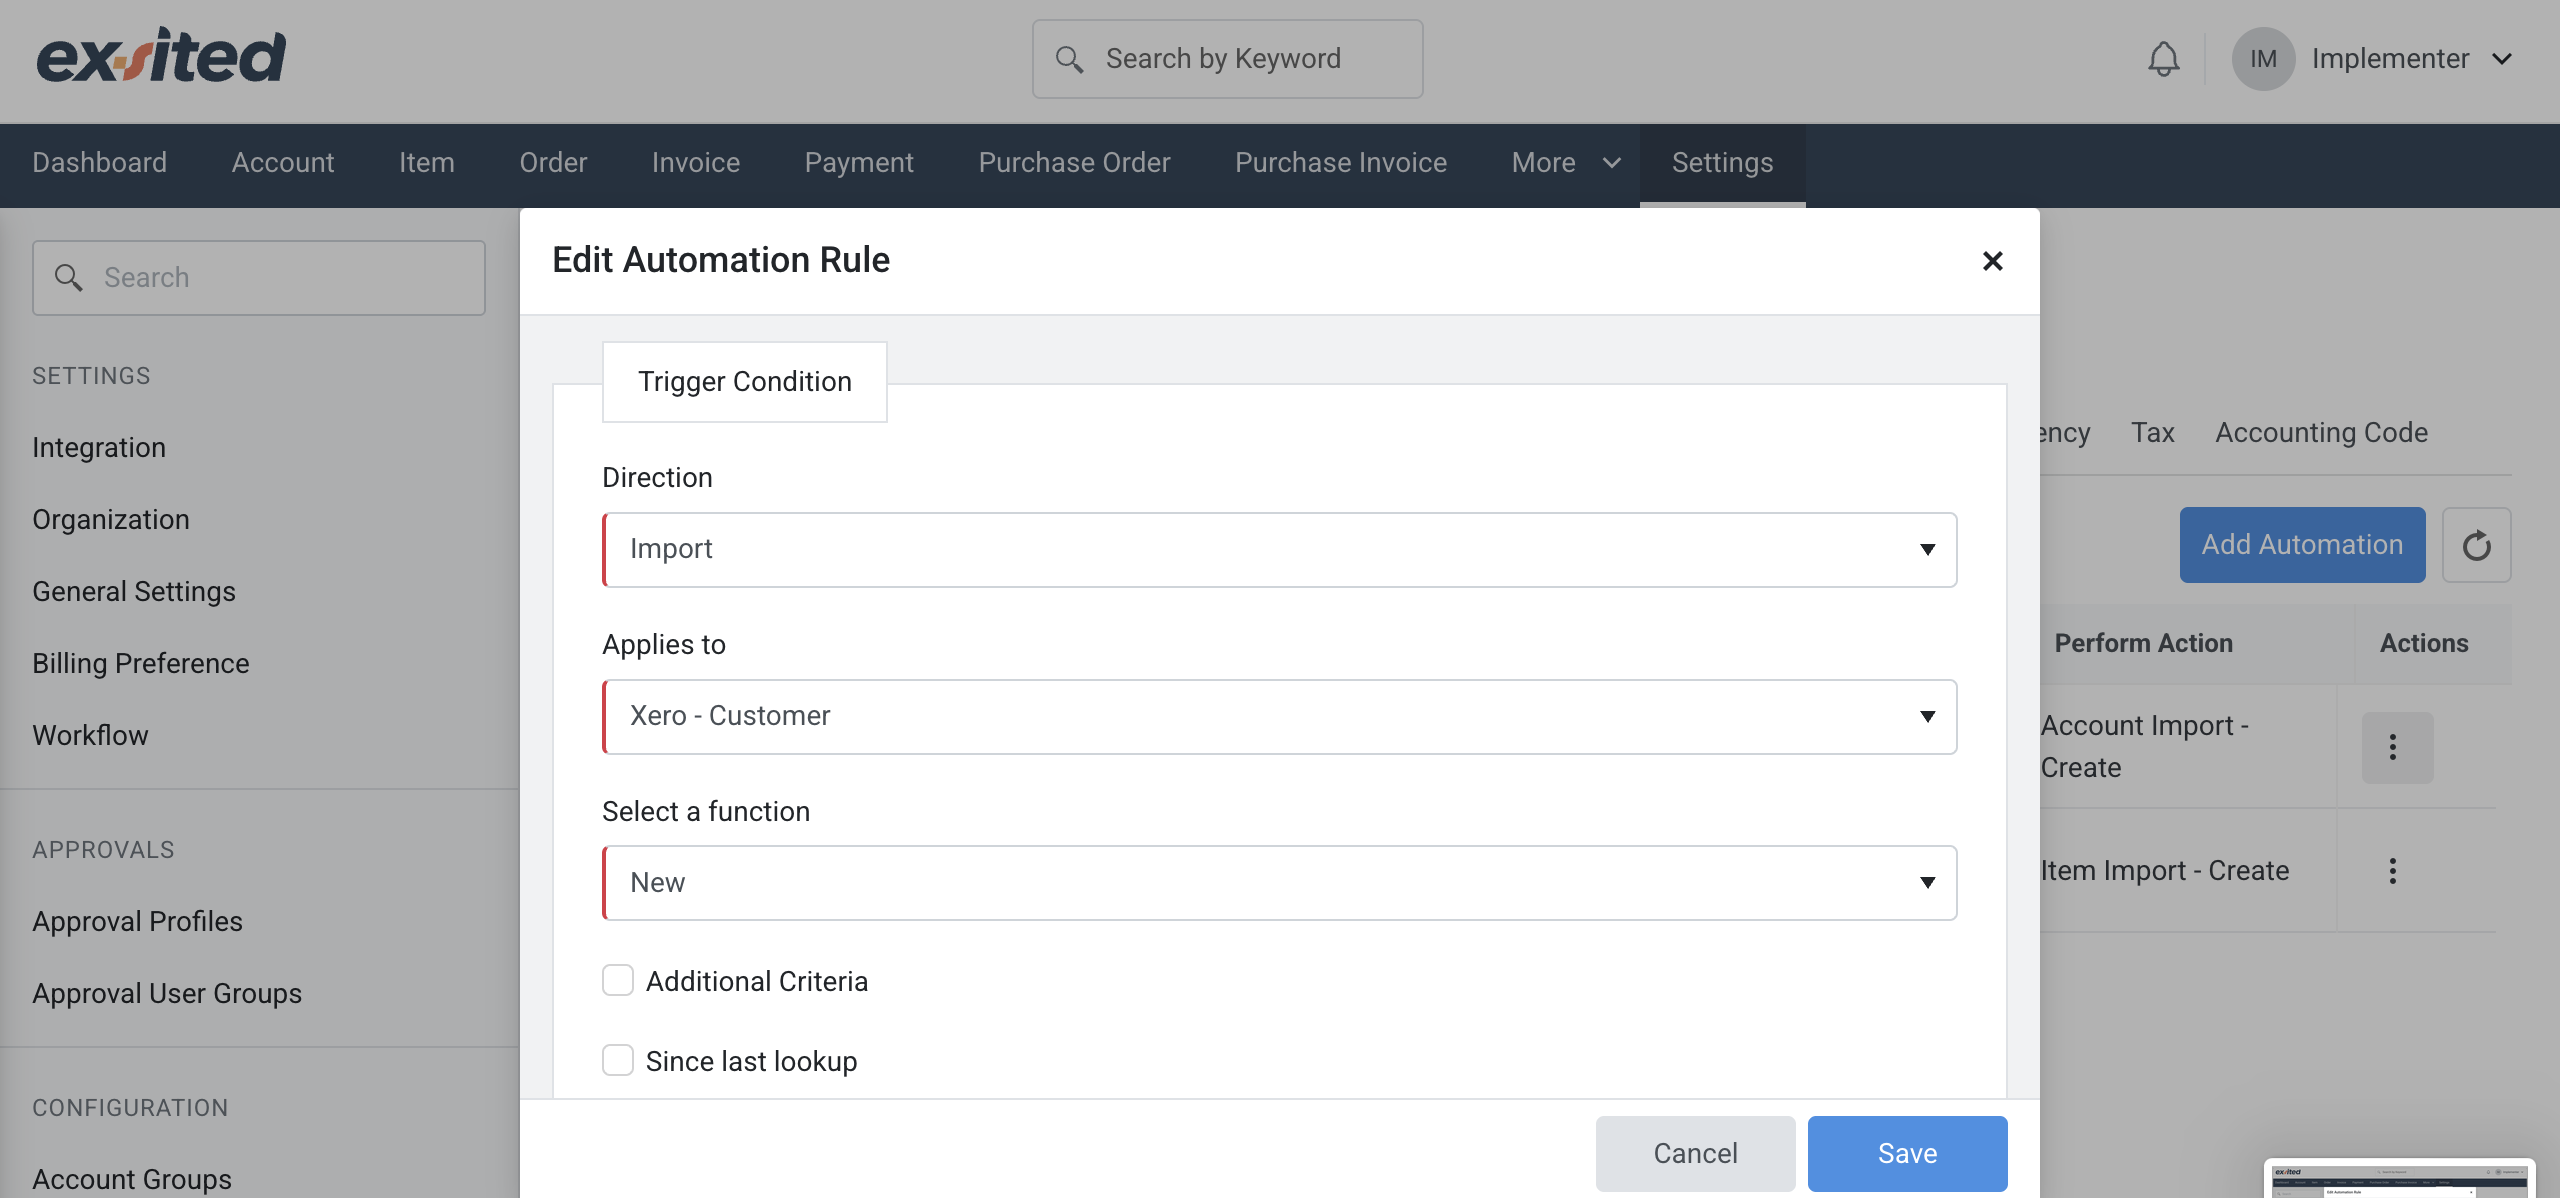
- Trigger Condition Tab:
- Direction:
Import - Applies to:
Xero - Customer - Select a Function:
New - You may tick
Since last lookupif you only want new customers since the last sync.
- Direction:
- Perform Action Tab:
- Perform Action:
Account Import - Create - Tick/untick "Do not overwrite the latest data" based on your requirement
- Set Ignore after failed attempts to 1 (or more if you want retries)
- Optionally, select another automation to trigger afterwards
- Perform Action:
- Click Save.

Export Automation
The “Edit Partner Function” window lets users configure or update existing integration rules, such as exporting customer records when a “Create” event is triggered. This helps maintain precise control over automated data exchanges between Exsited and connected platforms.
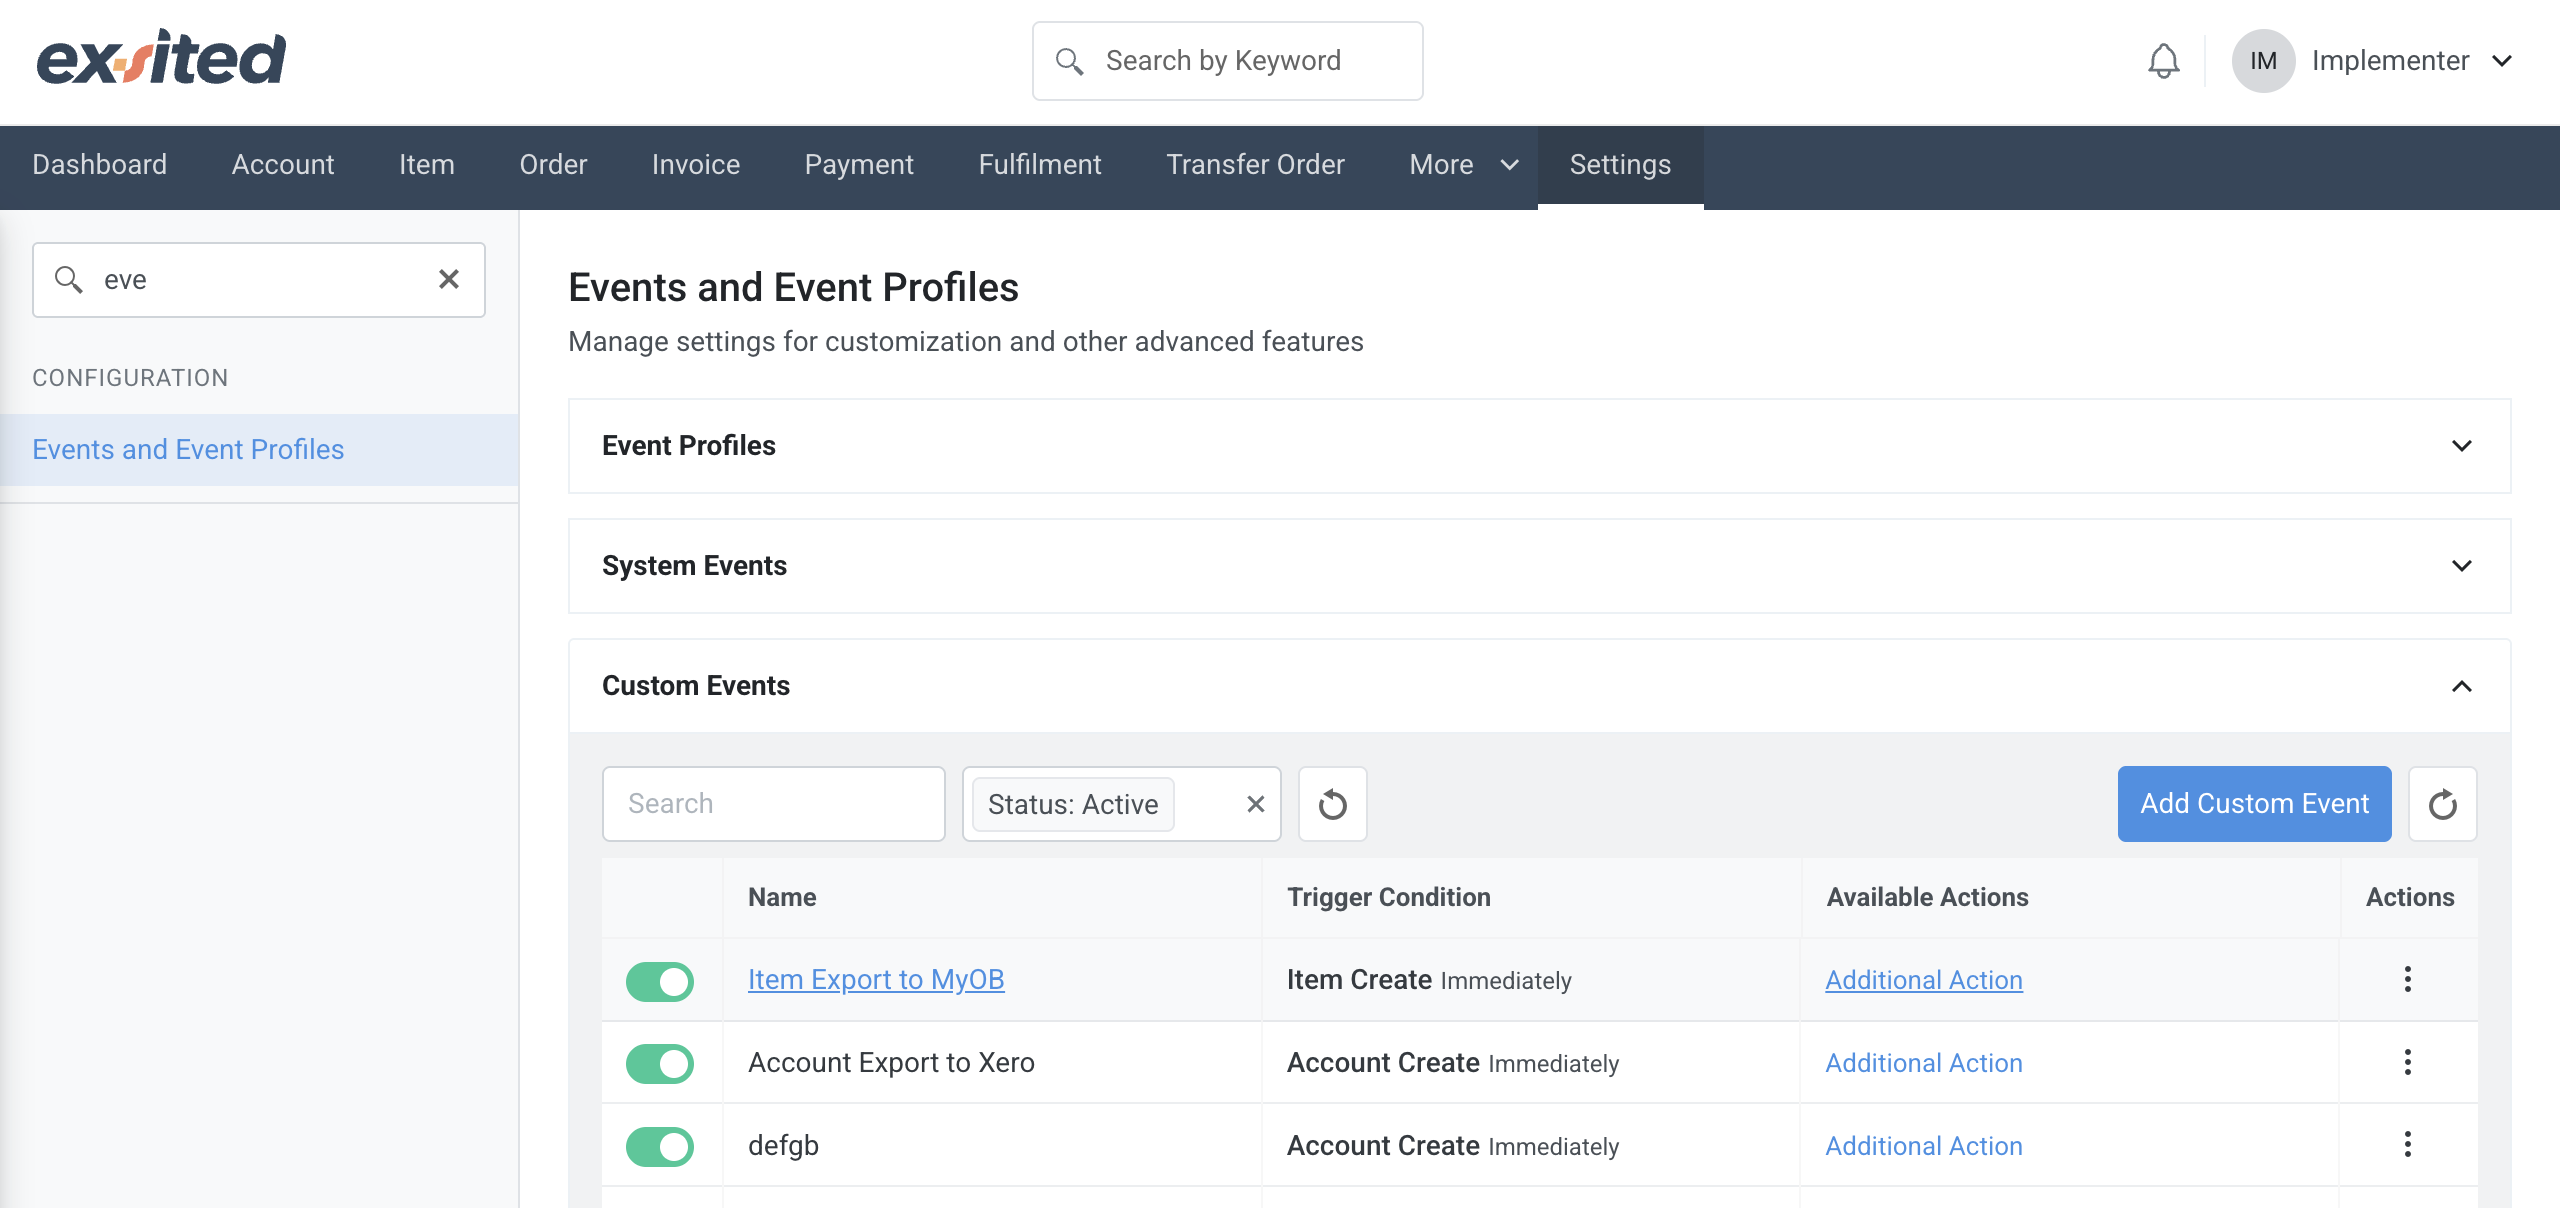
Navigation: Settings > Event and Event Profile > Custom Events
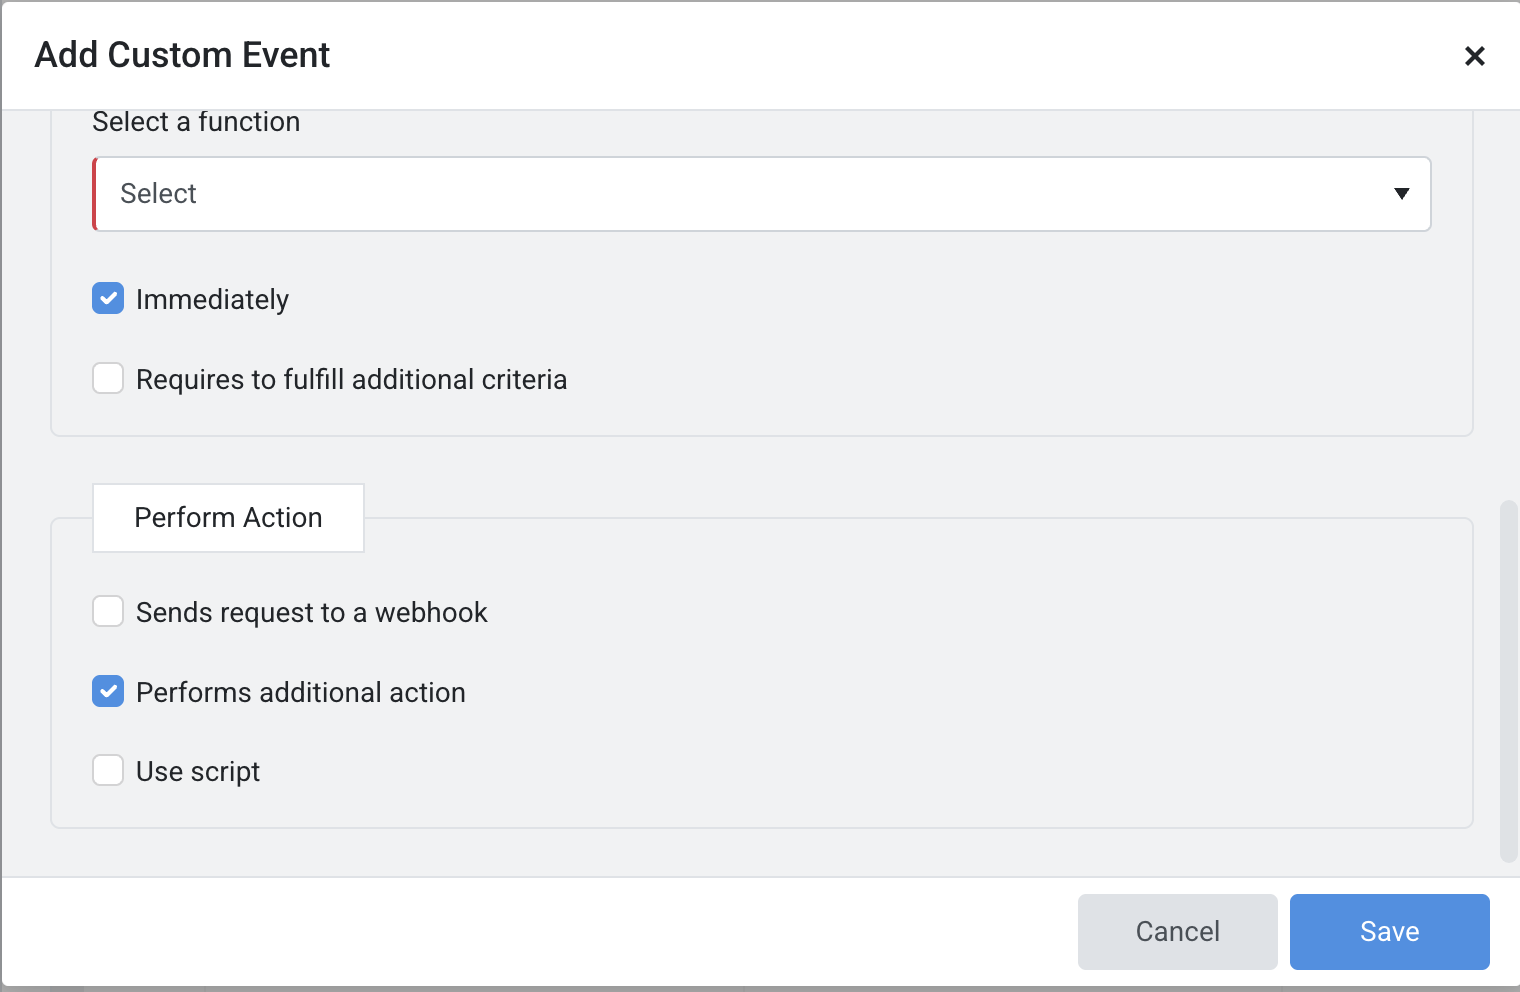
The "Add Custom Event" feature in Exsited enables users to define automation triggers, such as account creation, with flexible execution timing and actions. Users can choose to send webhook requests, run scripts, or perform additional actions based on defined criteria.
Enable the Custom Event for the Export Process
To automate the export process from Exsited to Xero, you need to enable a custom event. This event acts as a trigger that initiates the export of data (such as items, accounts, or transactions) whenever a specific action occurs in Exsited.
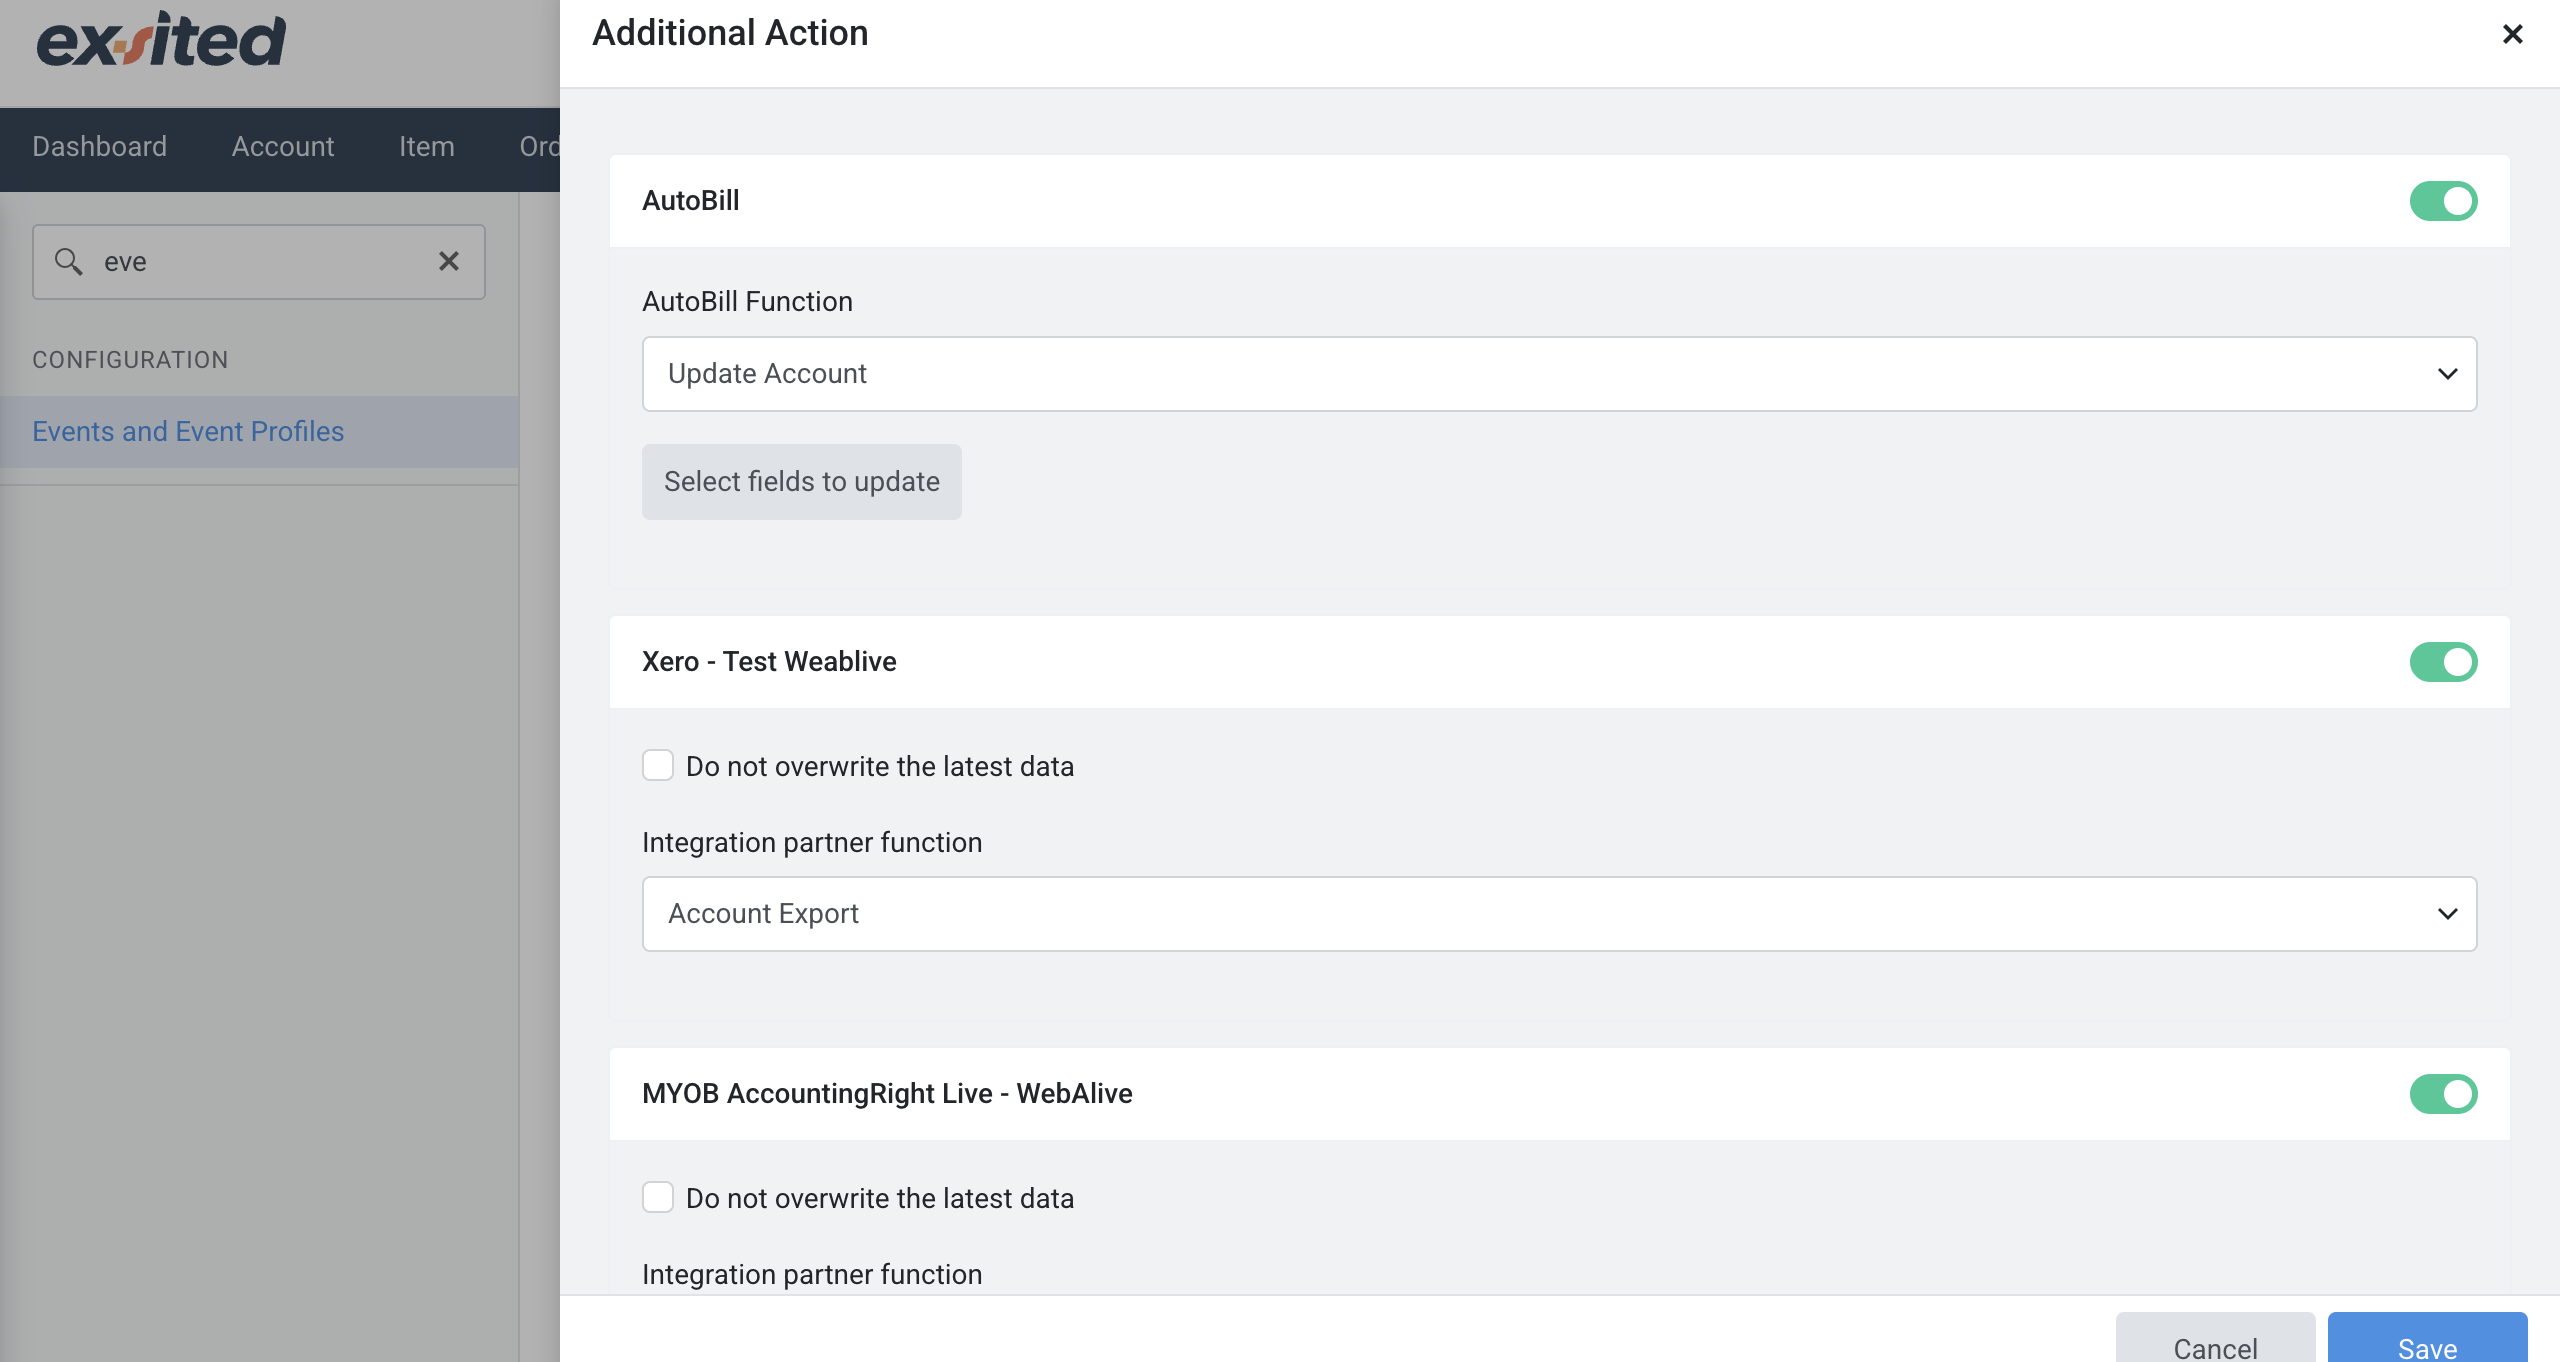
Navigation: Custom Event > Additional Action
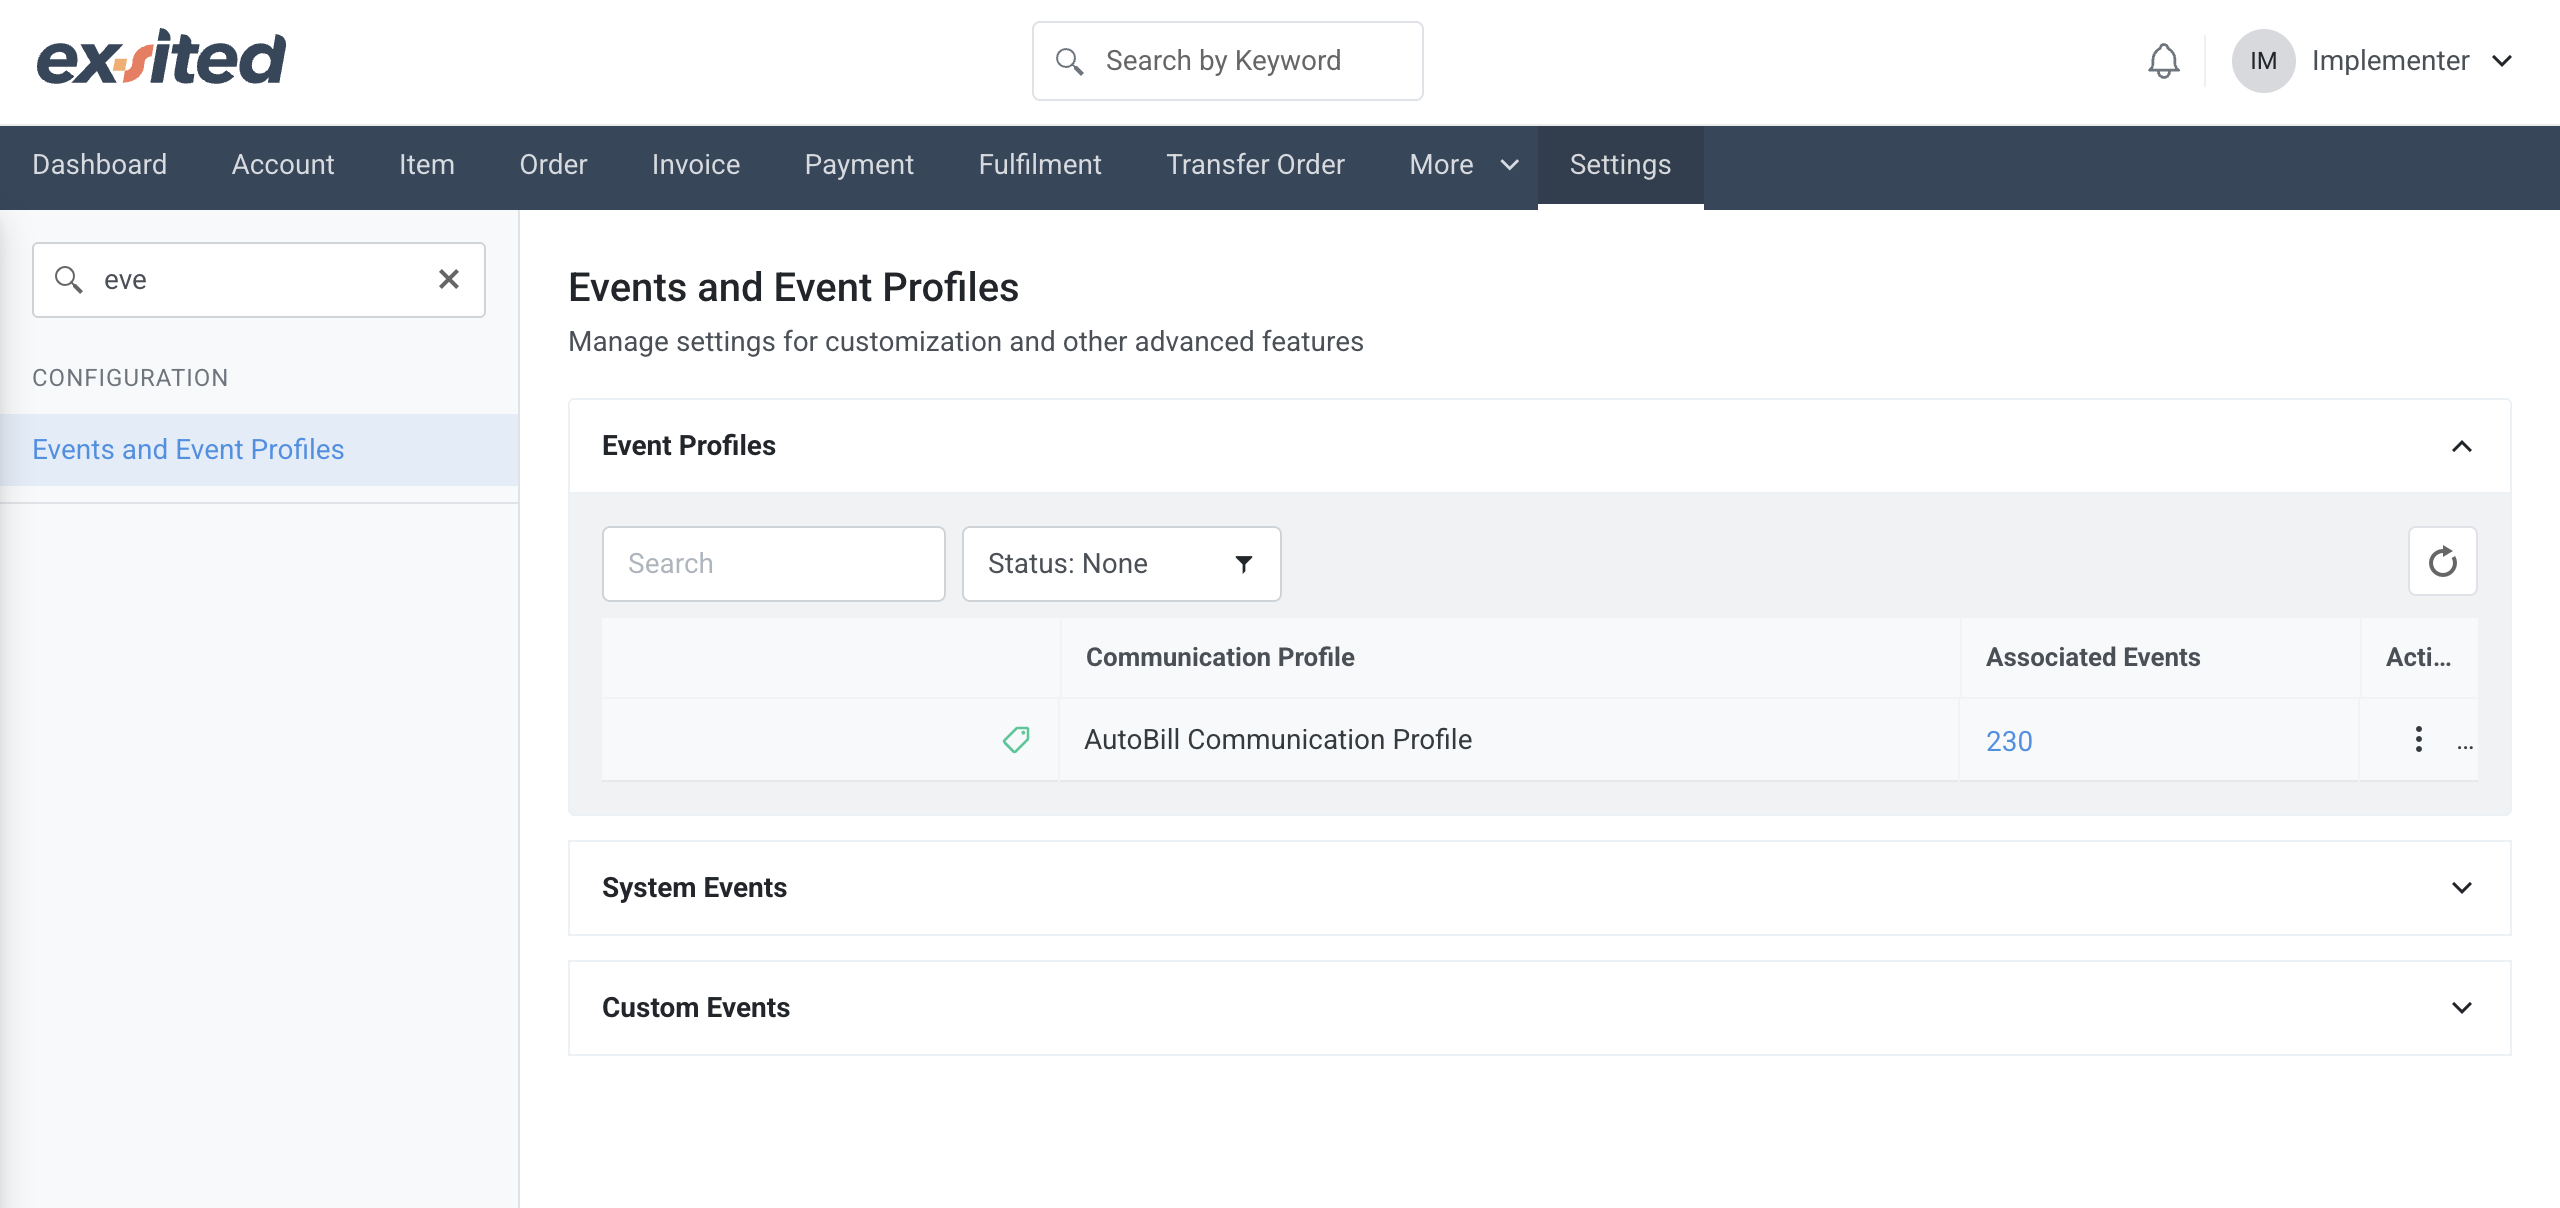
This screen allows users to manage the association of custom and system events with a specific event profile in Exsited. Events such as invoice reminders or exports to Xero can be toggled on or off to control automation behaviour.
Go to the Event and Event Profile > then click Associated Events > Enable the Custom Event

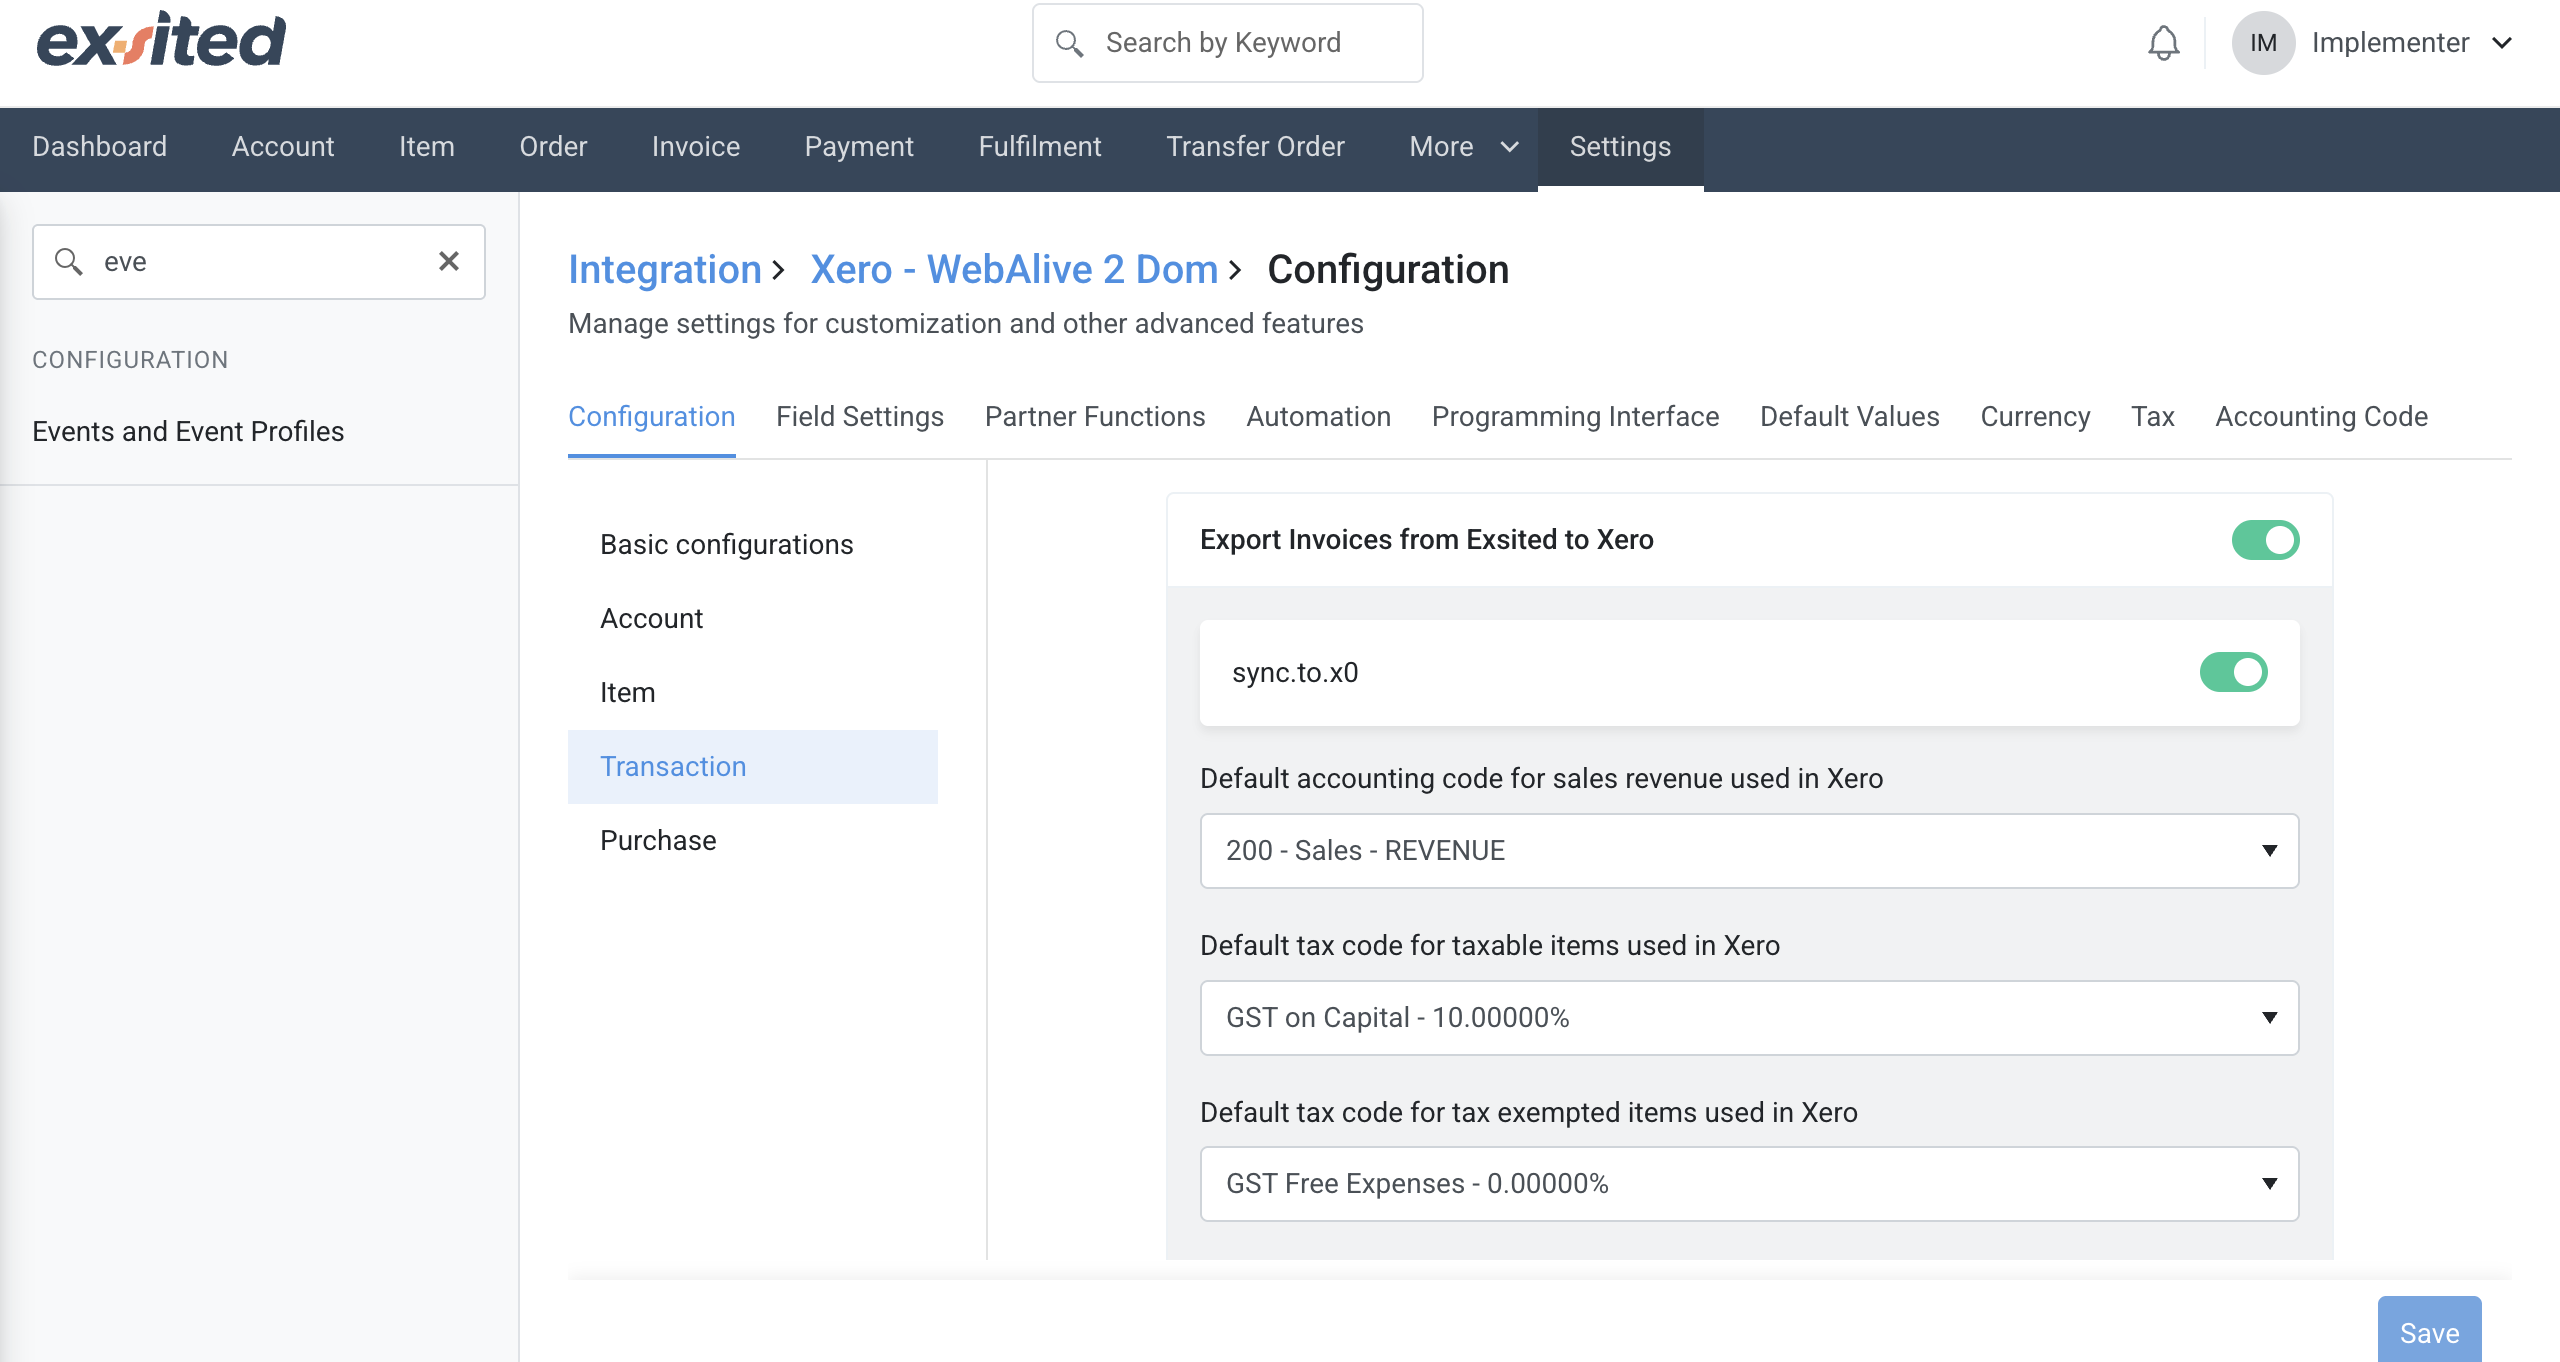
Transaction Configuration
Navigation: Setting > Integration > Xero (Organisation) > Configuration
The transaction configuration screen in Exsited allows users to define default Xero account codes and tax rates for invoice exports. It also supports mapping Exsited tax codes to Xero tax rules to ensure accurate compliance during financial transactions.
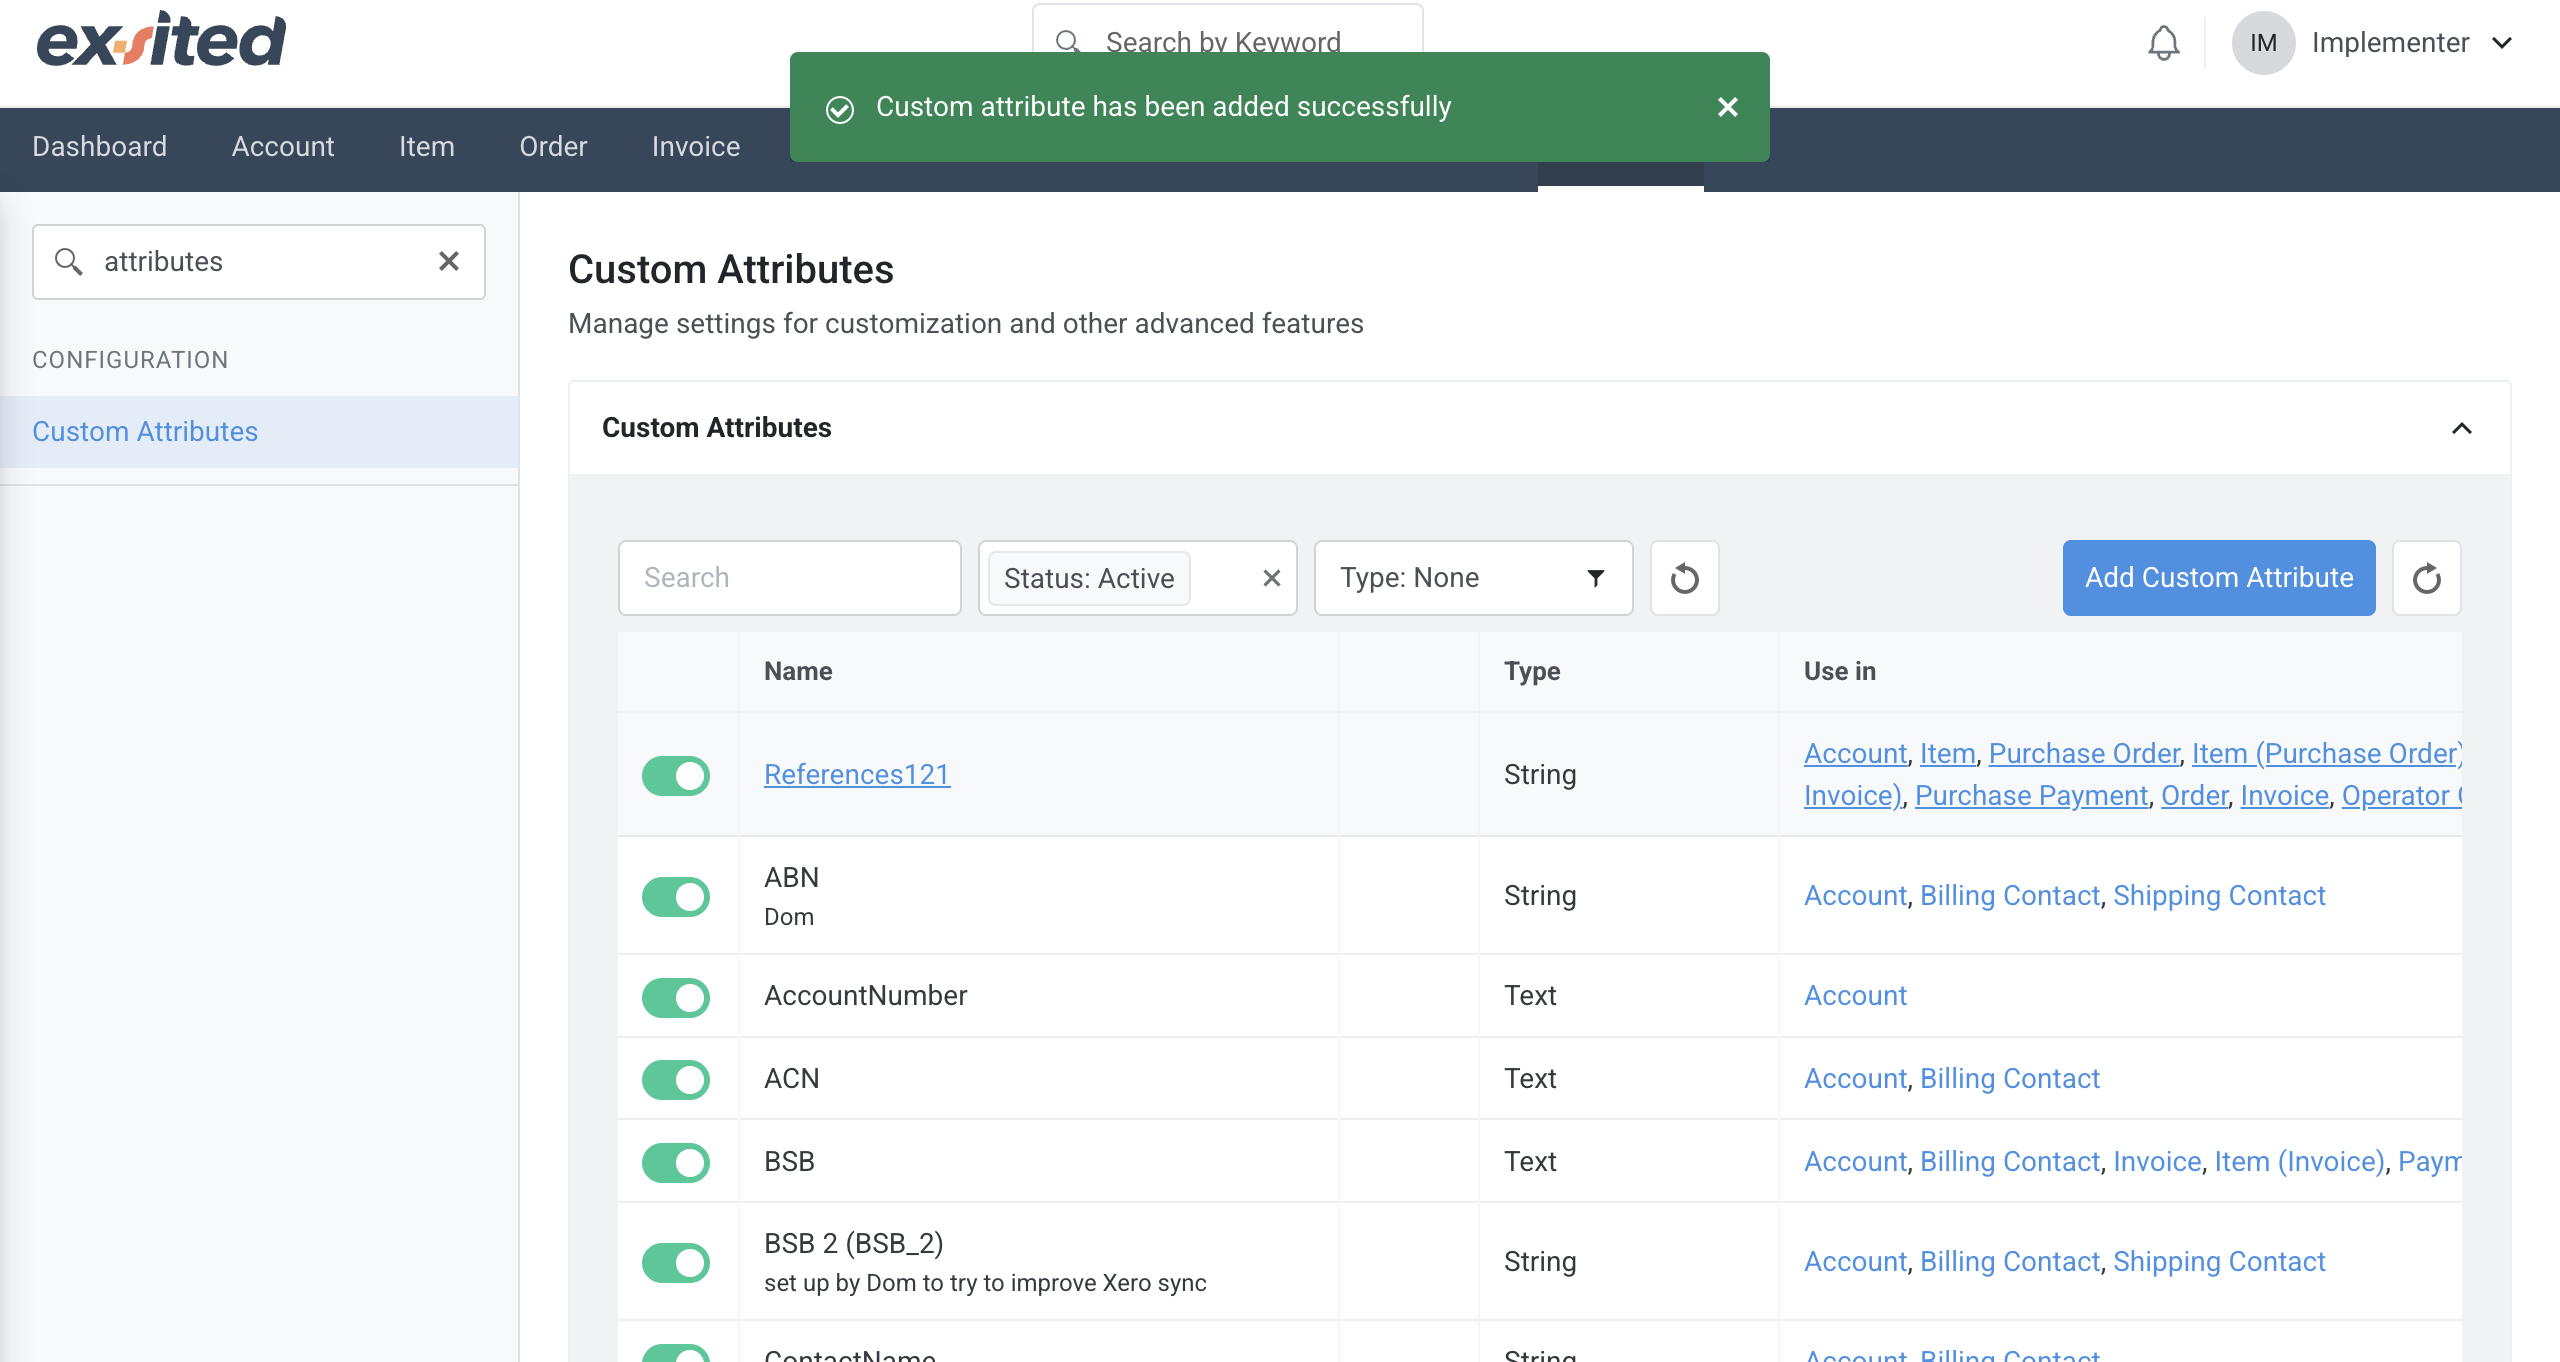
The Custom Attributes section in Exsited enables users to define additional fields, like references, to be used across modules such as invoices, payments, and credit notes. These attributes help align Exsited records with Xero’s data requirements for successful integration.
Navigation: Settings > Configuration > Custom Attributes
To ensure accurate data mapping between Exsited and Xero, it's important to define customer reference fields. In Exsited, this is done by creating Customer Attributes.
Xero uses customer references (such as contact names or unique IDs) to identify and manage customers. However, Exsited does not have these references by default. To align both systems, you need to manually create custom customer attributes in Exsited that match the reference format used in Xero.
This allows for:
- Proper linking of customer records during import/export
- Error-free syncing of customer-related data (e.g., invoices, sales orders)
- Improved integration accuracy and traceability
By setting up custom attributes in Exsited that mirror Xero’s customer references, you establish a consistent and reliable mapping between the two platforms.
To support the export process in Exsited, custom attributes such as "Reference" should be added and mapped to Xero fields. This ensures that essential identifiers are included during invoice, payment, and credit note exports for accurate data synchronisation.
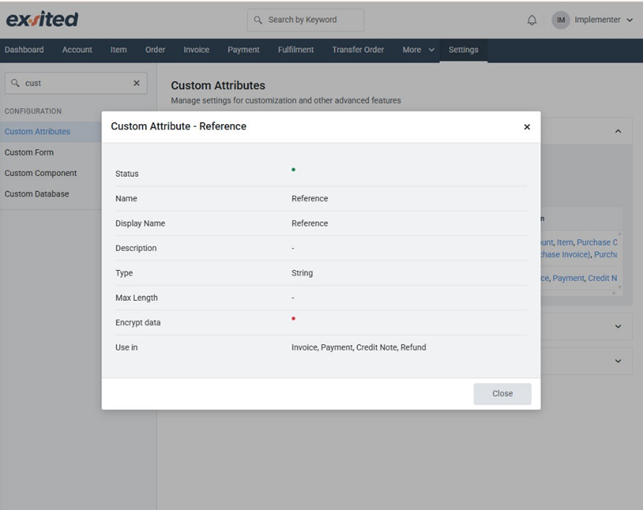
This mapping ensures that data fields such as customer names, item codes, invoice numbers, and tax details match correctly across both systems.
Once the field mapping is completed, you will be able to successfully export and import transactions, including invoices, between Exsited and Xero.
These integration processes can then be automated by using the Partner Function and Automation settings, allowing for seamless and real-time data synchronisation without manual effort.